Virtual Network Peering VNet, in this article, I will explain how to configure virtual network peering within the same Azure region. We can connect VNets to each other with virtual network peering. These vnet to vnet peering can be in the same region or across regions (Global VNet peering).
Virtual network peering – (Connecting virtual networks within the same Azure region)
Global virtual network peering – (Connecting virtual networks different Azure regions)
Virtual network peering within same networks
Creating two virtual networks
Deploy a virtual machine (VM) into each vnet
Connect two VNet with a virtual network peering
Communicate between VMs
Create virtual networks
Create the first vnet
Log in to the Azure Portal
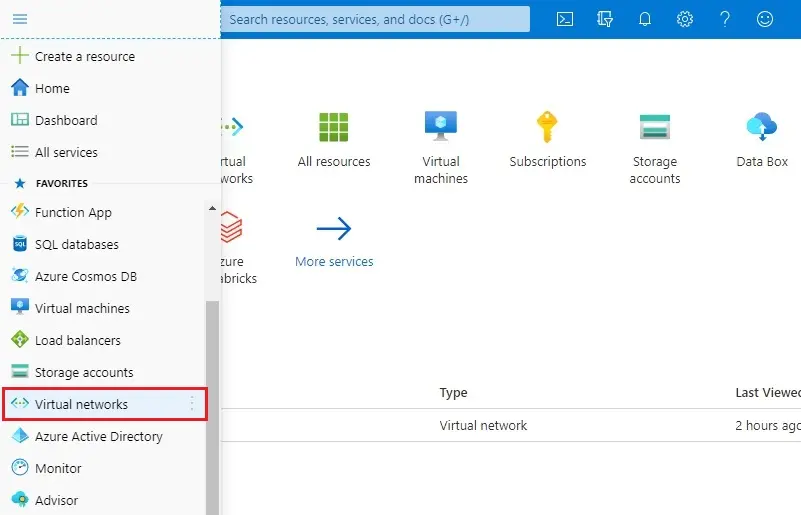
1- On the Azure portal, select Azure menu bar and select Virtual Network.
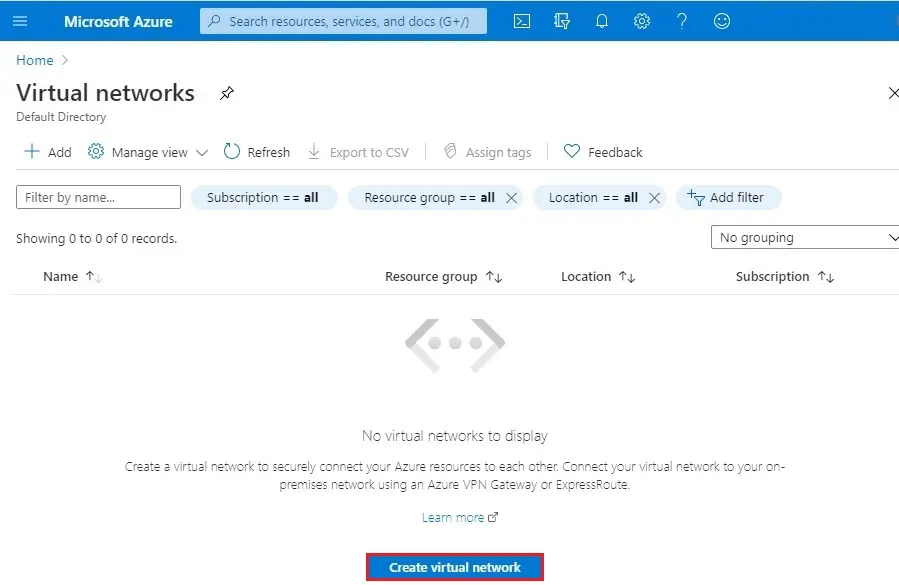
2- Click on create virtual network.
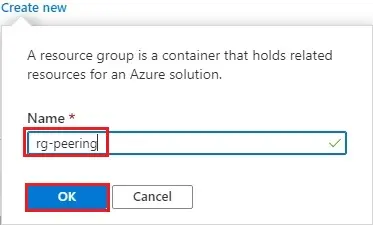
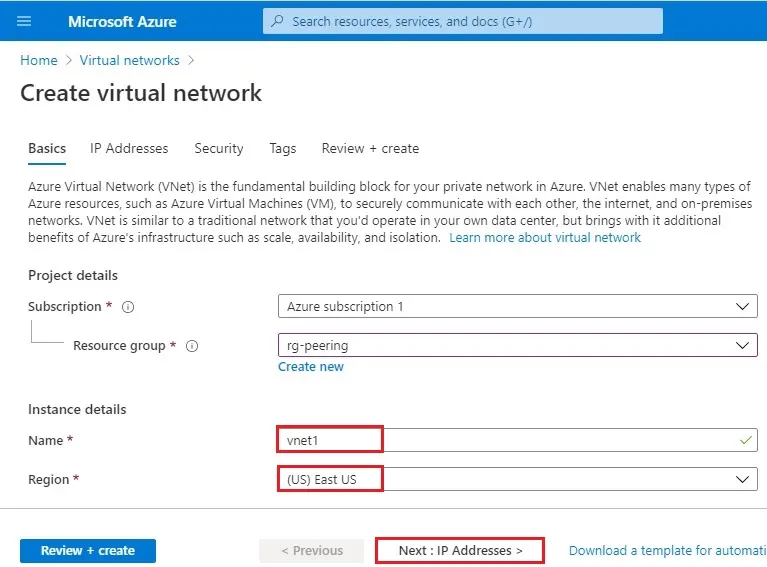
3- Choose your subscriptions, to create a resource group click on create new.
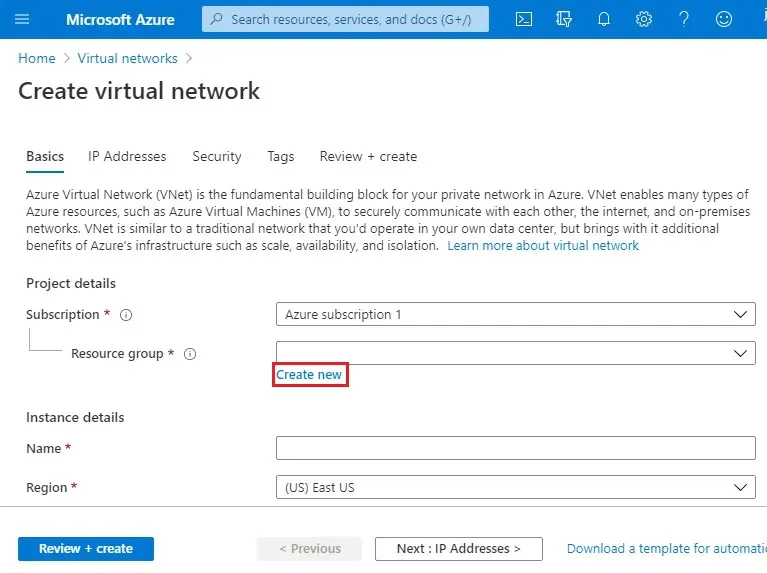
4- Type a recourse group name (rg-peering)
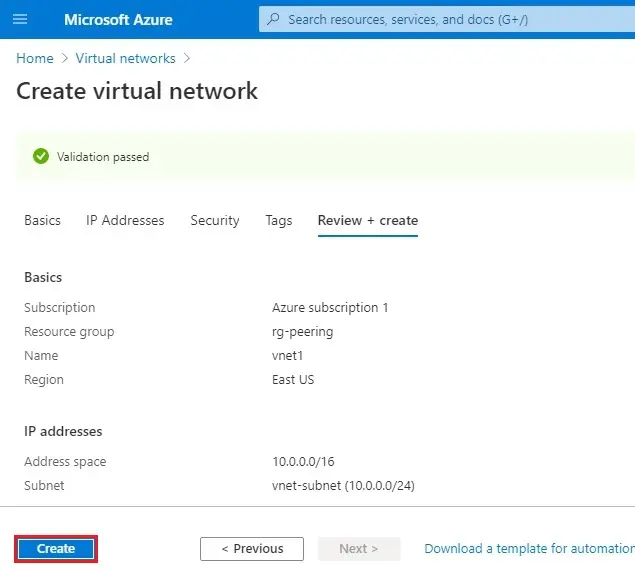
5- Instance details type a virtual network name (vnet1) select regions and the click Next : IP Address >.
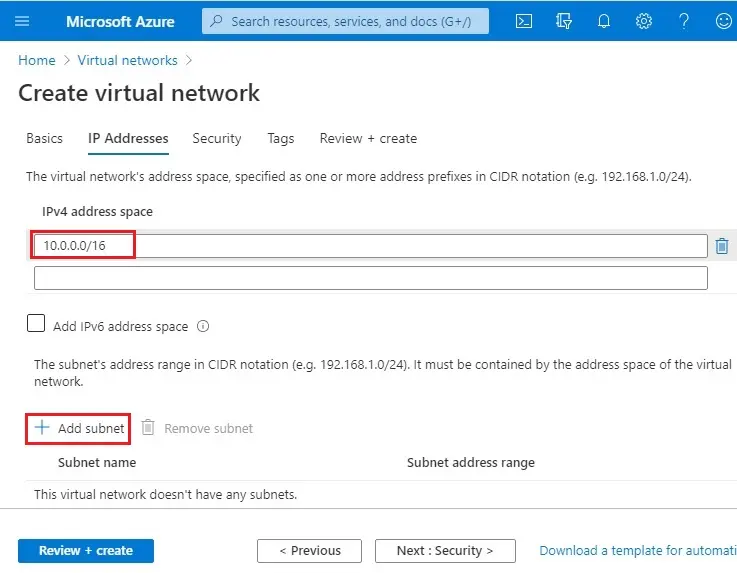
6- IP Addresses tab, enter 10.0.0.0/16 for the IPv4 Address Space field. Click the + Add subnet button below.
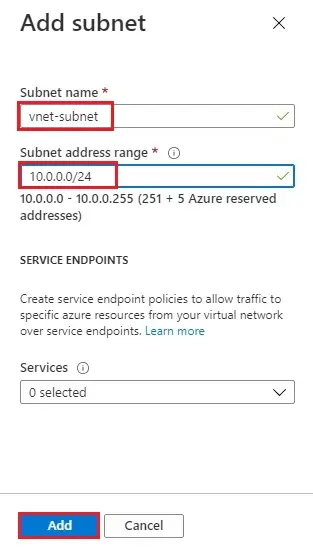
7- Add subnet wizard; enter a Subnet Name (vnet-subnet) and type 10.0.0.0/24 for Subnet Address range and then click ok.
8- Click Next : Security >

9- Choose DDos Protection (Basic) Firewall (disable) and Select Review + Create.

10- Select Create.
To create 2nd virtual network follow the above steps from 2 to 10 again with the following changes.
| Setting | Value |
| Resources Group | rg-peeering |
| Name | vnet2 |
| Region | (US) East US |
| IPv4 address space | 192.168.0.0/16 |
| Subnet name | vnet-subnet |
| Subnet address range | 192.168.0.0/24 |
| Security | DDos Protection Basic, Firewall disable |
| Create |
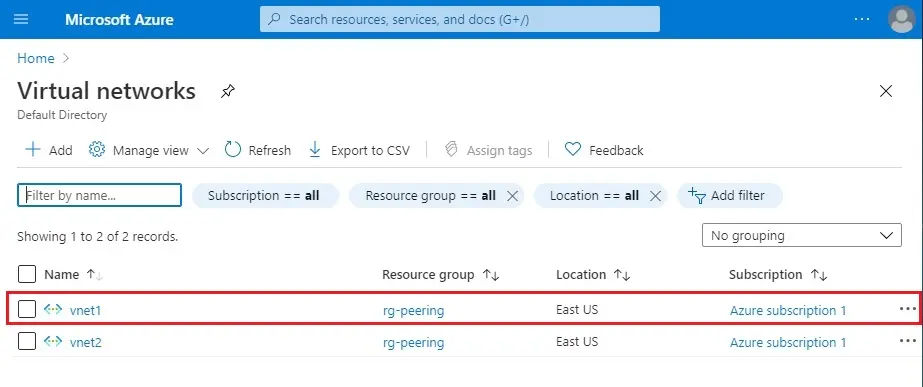
Now you can see both VNet created

Create Virtual Machines in Azure Portal
Create VMs in each virtual network so that we can test communicate between them.
First VM
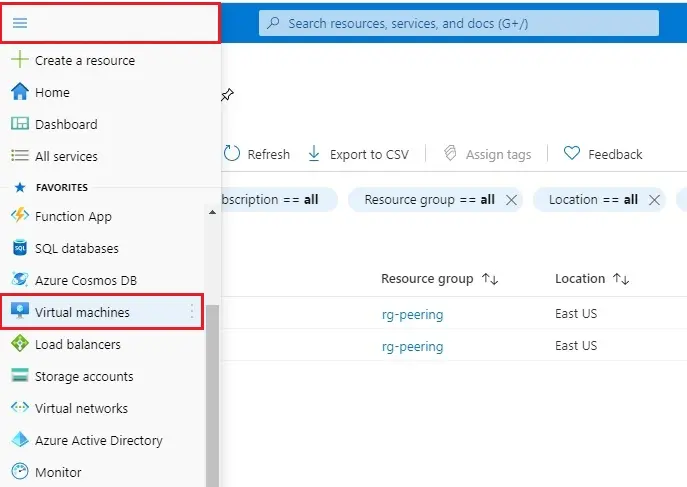
1- On the Azure portal menu tab, then select Virtual machines.
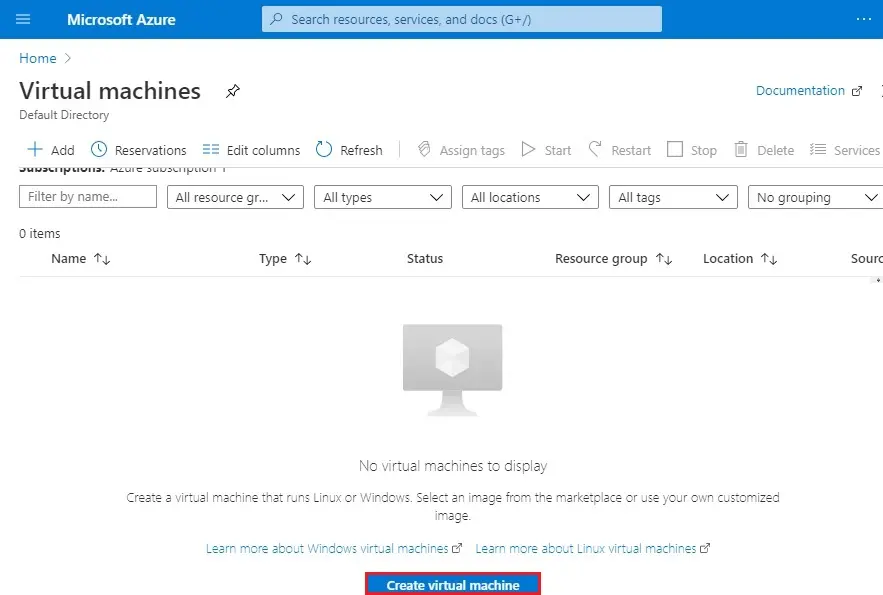
2- Select Create virtual machine.
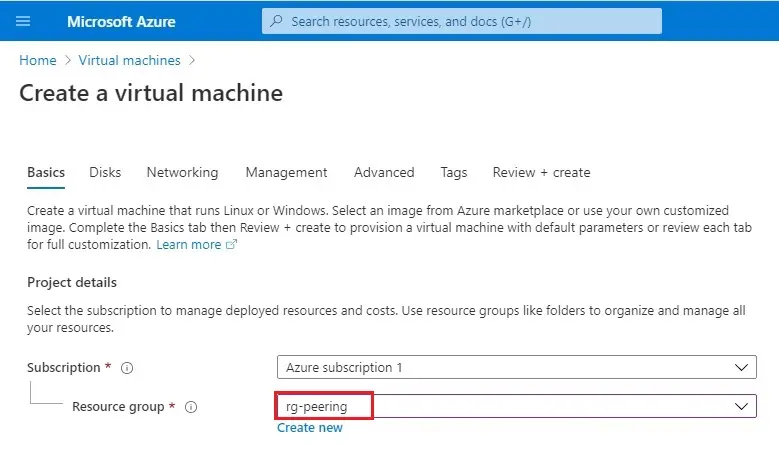
3- Resource group select existing (rg-peering).
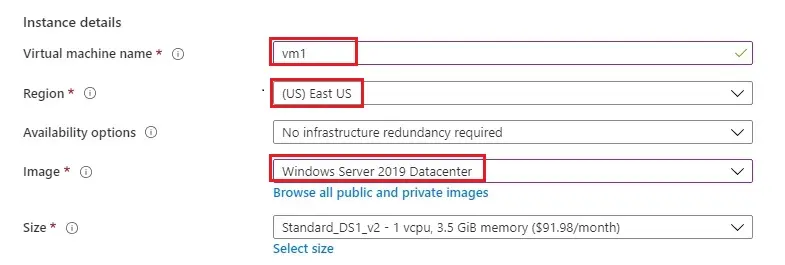
4- Instance details, enter a virtual machine name (vm1), Region (East US), and then choose Image Windows Server 2019 Datacenter. You can choose a different operating system, but the remaining steps assume you selected Windows Server 2019 Datacenter.
5- Administrator account, enter a username (jamil), Password. Public inbound ports choose to allow selected ports. Select inbound ports (HTTP RDP) and then click Next : Disks >
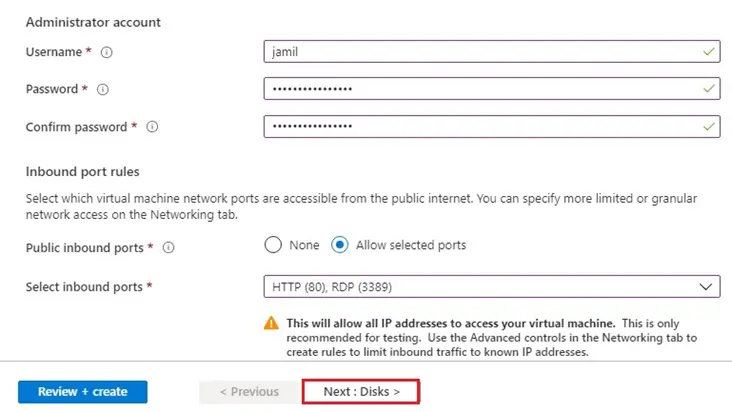
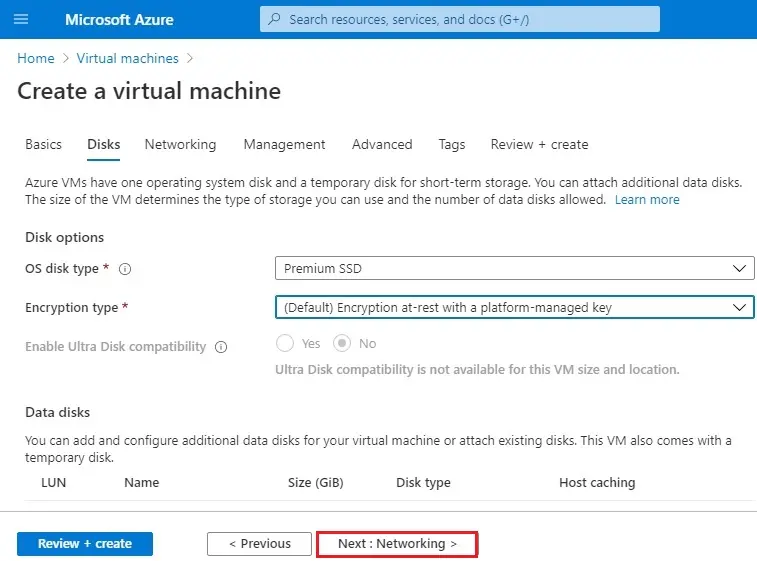
6- Click Next : Networking >
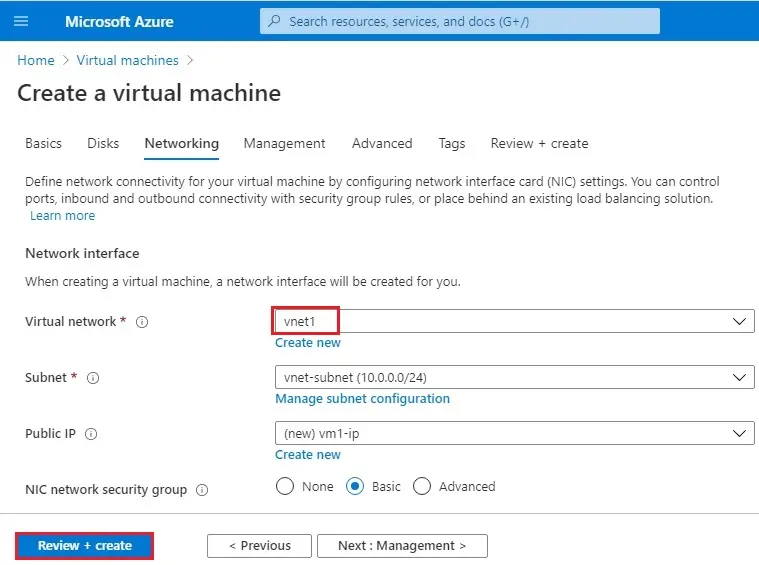
7- Under the Networking tab, network interface select virtual network (vnet1) and then select the Review + Create button.
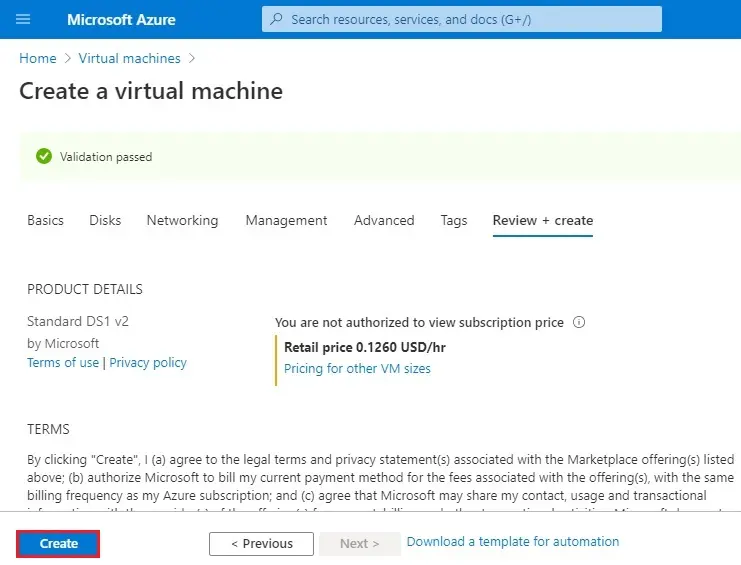
8- Click Create.
Create the second VM
Complete steps 2-8 again, with the following changes
| Name | Value |
| Resource group | rg-peering |
| virtual machine name | vm2 |
| region | (US) East US |
| Image | Windows Server 2019 Datacenter |
| Administrator account | username password |
| Public inbound port | allow selected ports |
| Select inbound ports | HTTP, RDP |
| virtual network | vnet2 |
| Create |
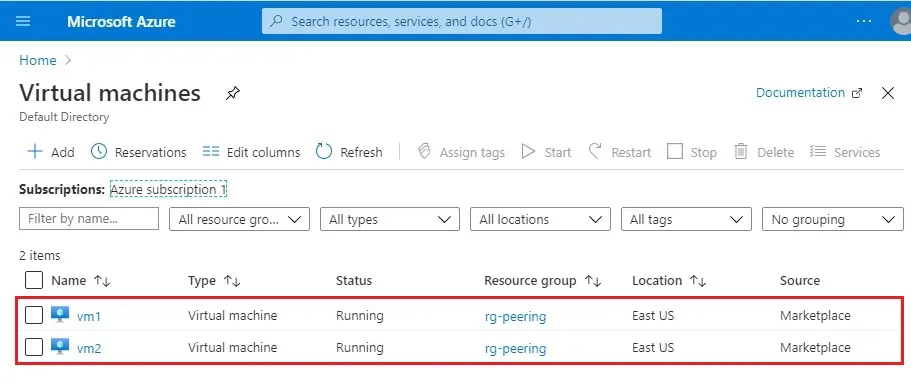
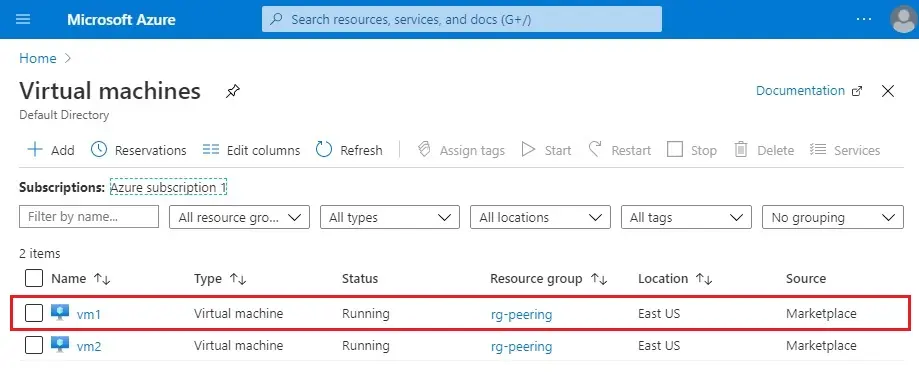
The VMs take a few minutes to create. Now the both VMs successfully created.
Peering Virtual Networks
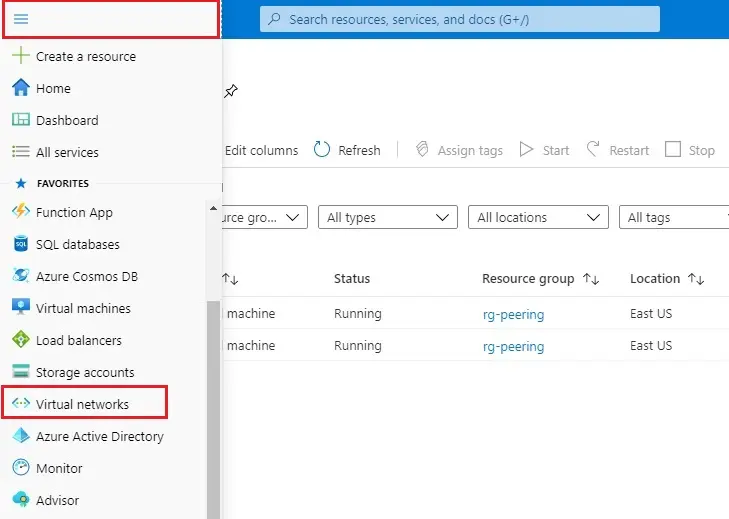
1- Select Azure menu bat and then select Virtual networks.
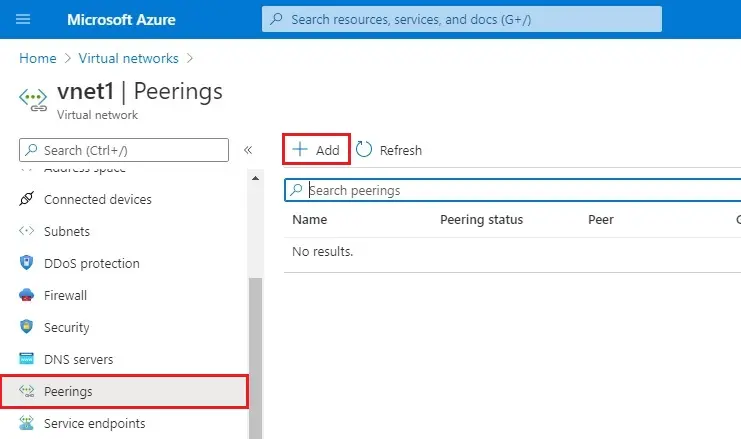
2- Click on vnet1
3- Under Settings Select Peerings, and then click + Add, as shown in the below picture.
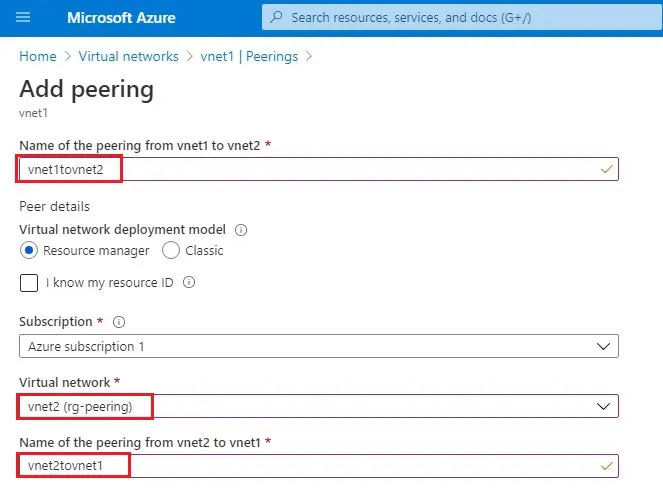
4- Add peering wizard, Type a name (vnet1tovnet2) under Name of the peering from vnet1 to vnet2.
Under Virtual network deployment mode choose Resource manager.
Select your subscriptions
Under virtual network select vnet2.
Under Name of the peering from vnet2 to vnet1, enter a name (vnet2tovnet1)
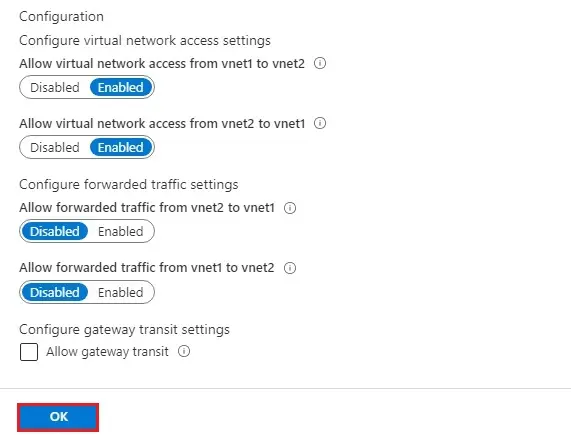
5- Configure virtual network access settings and then click ok.
6- Vnet1 peering status connected to vnet2
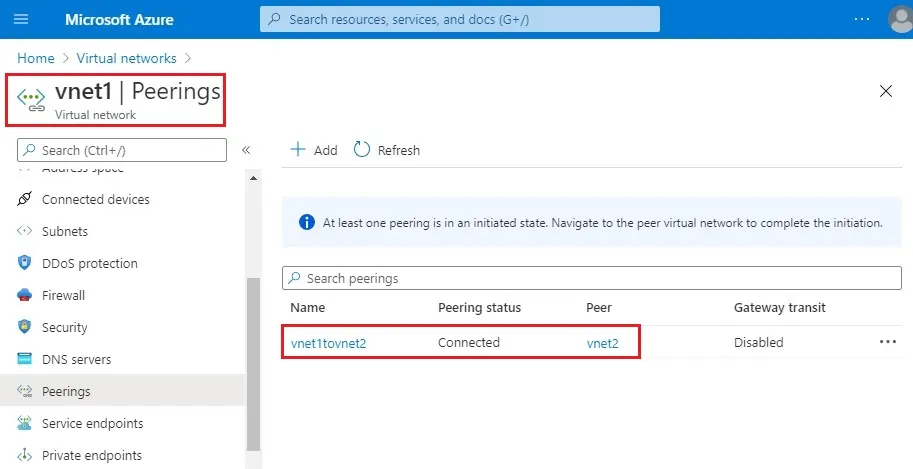
Vnet2 peering status connected to vnet1.
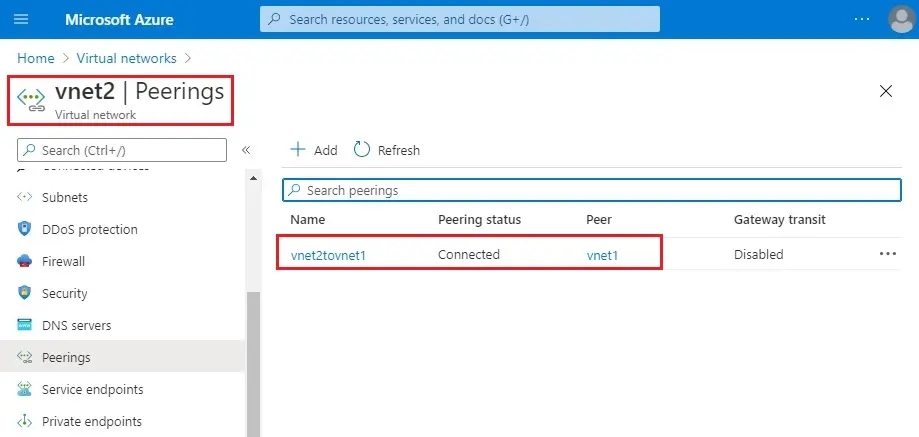
If you don’t see the status connected, click refresh.
Communicate between VMs
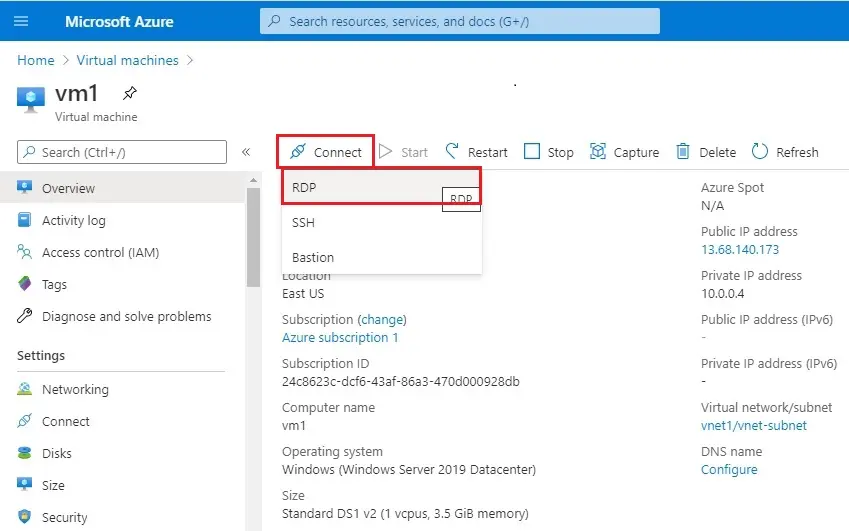
1- Select Azure menu bat, then select Virtual machine and then select vm1.
2- Select Connect button and the RDP.
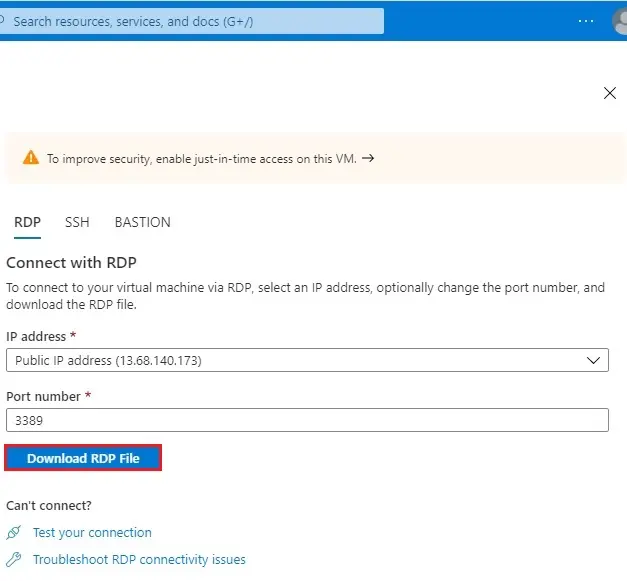
3- Click Download RDP file.
4- To connect to the VM, open the downloaded RDP file and click Connect.

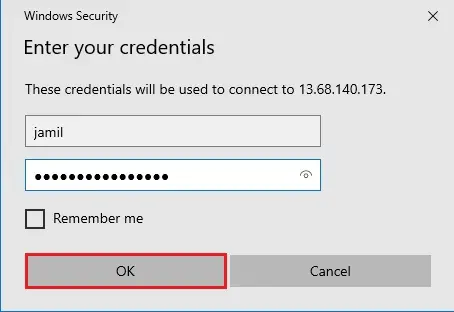
5- Enter the user name and password you specified when creating the VM and then select OK.
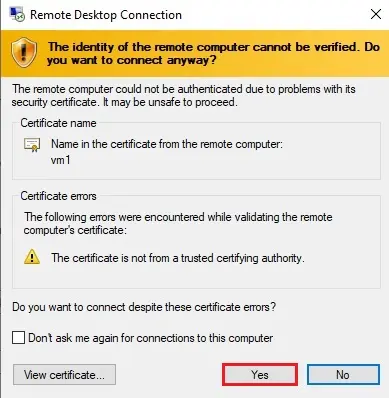
6- Select Yes.
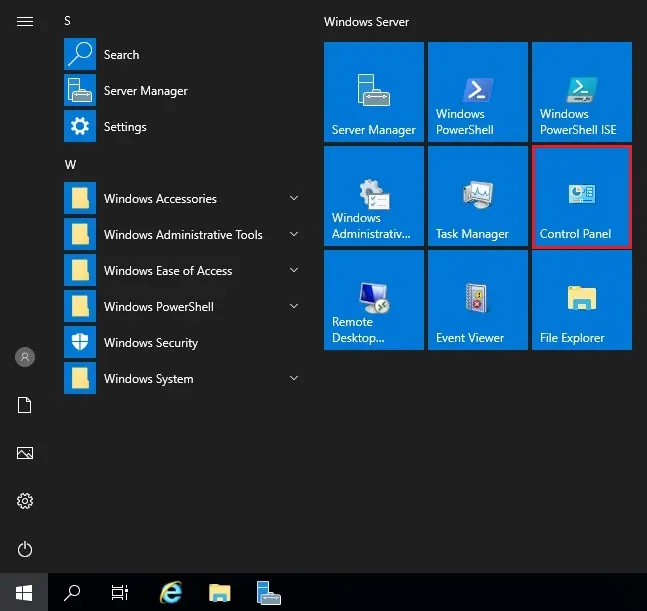
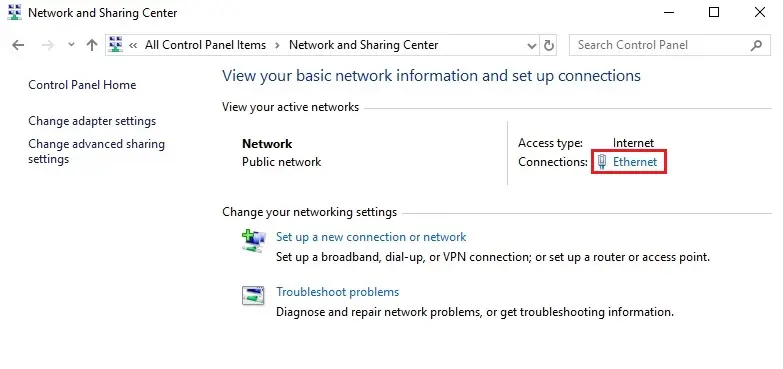
7- Click Windows button and click Control panel.
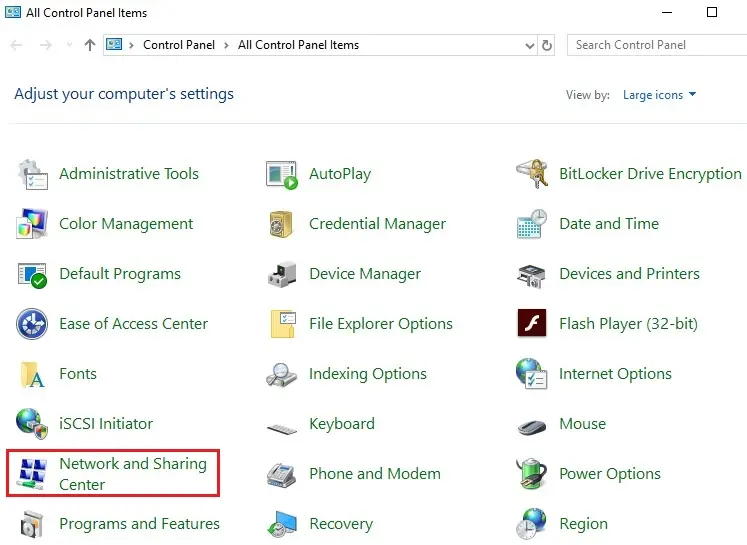
8- Select network and sharing center
9- Select Ethernet
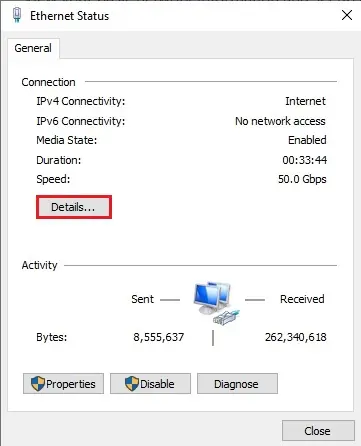
10- Select Details
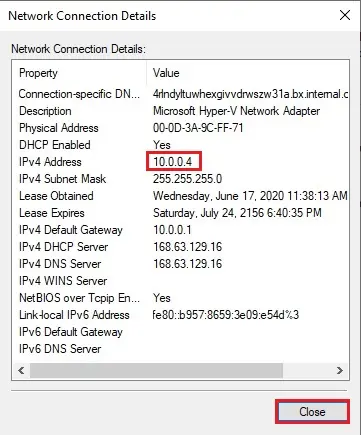
11- Now you can see vm1 private IP Address.
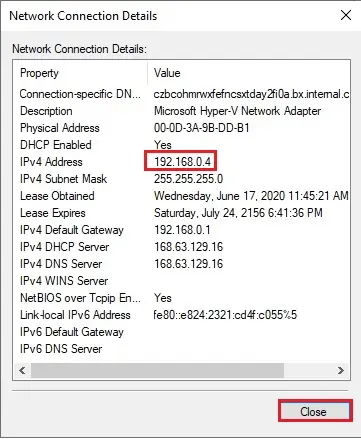
12- Vm2 IP Address.
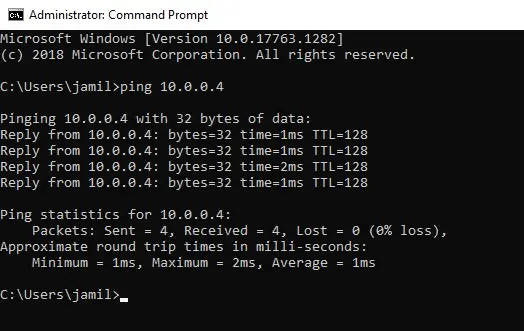
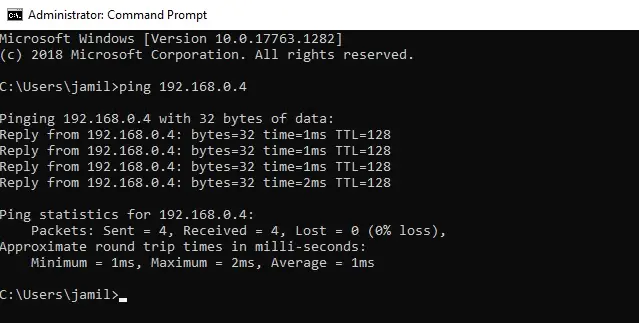
We can use the ping command to communicate with the vm2 VM from the vm1 VM. Ping command uses the Internet Control Message Protocol (ICMP), which is disabled through the Windows Firewall, by default.
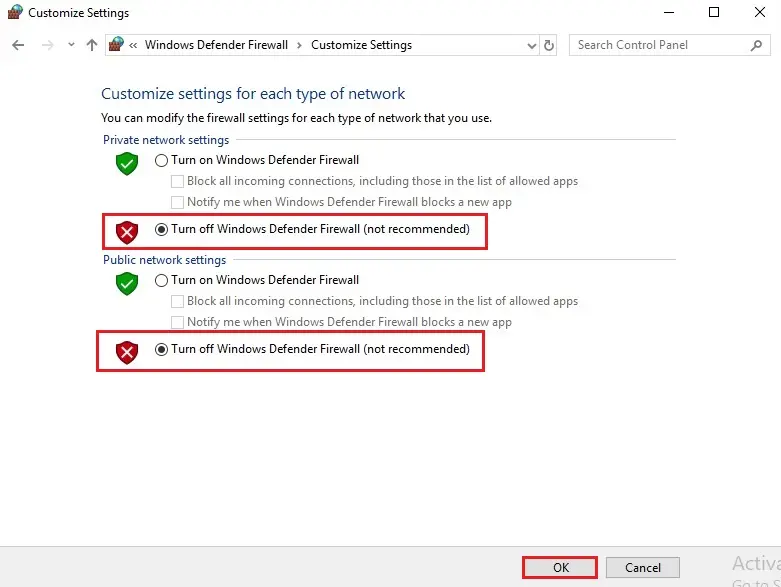
Disable Windows defender firewall follow the below steps.
1- Under network and sharing center click on Windows defender firewall.

2- Select Windows defender firewall on or off.

3- Turn off private network, public network settings and then click OK.
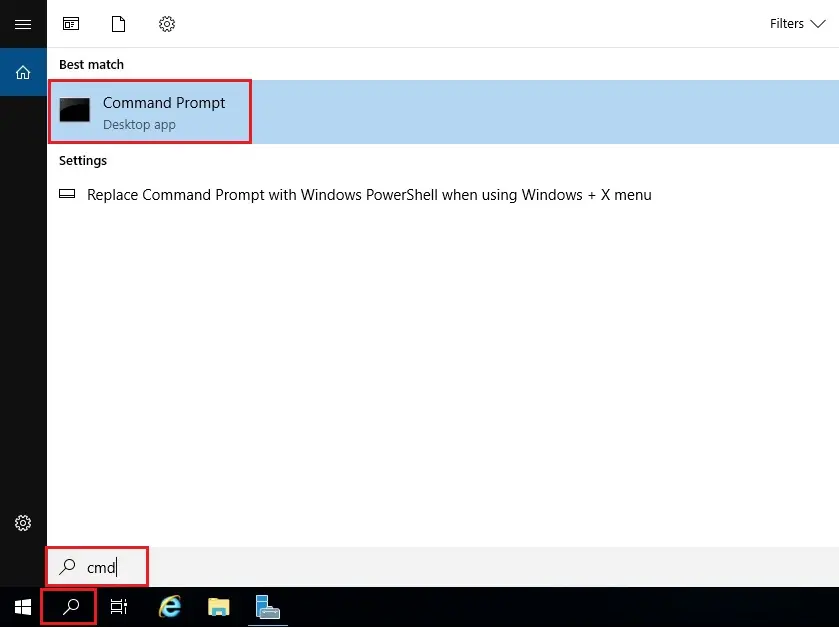
4- Open command prompt to ping VMs
5- IP Address vm2 (192.168.0.4) pinging from vm1
6- IP Address vm1 (10.0.0.4) pinging from vm2