Create a virtual network (VNET)
In this blog, I will explain how to create a virtual network (VNET) using the Microsoft Azure portal. A virtual network is the basic building block for your private network in Azure. It enables Azure resources, like VMs (Virtual Machines), to safely communicate with each other and with the internet.
Sign in to the Microsoft Azure Portal
Create a virtual network
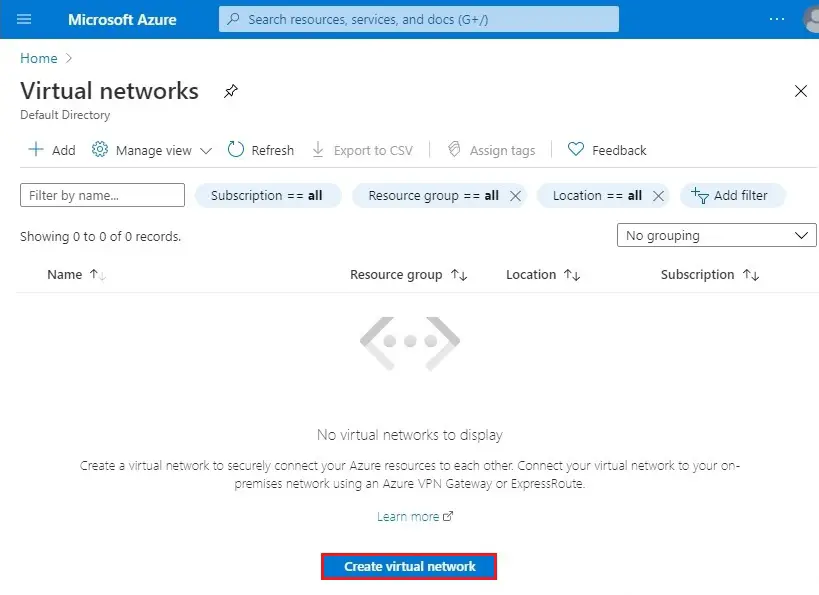
1- Type in the search bar (virtual networks) to find or from the Azure portal menu select virtual networks.

2- In the virtual network default directory click on create a virtual network.
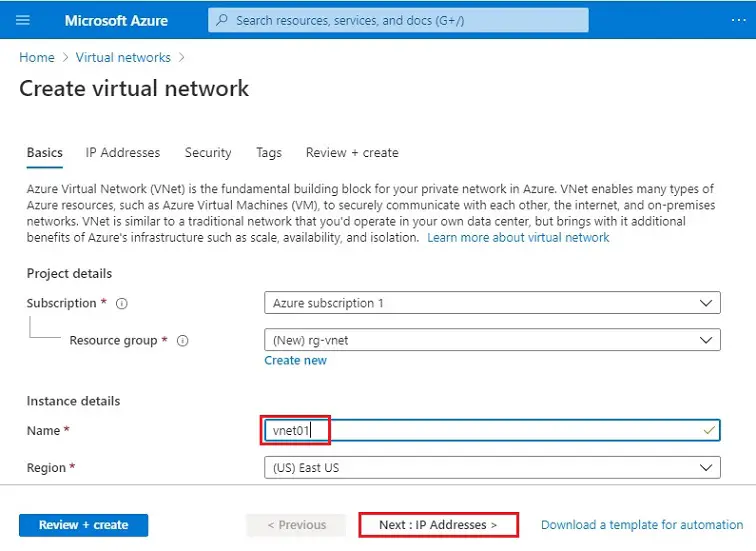
3- In the create virtual network wizard, select your subscription. Click on create new next to Resource group to create a new resource group.
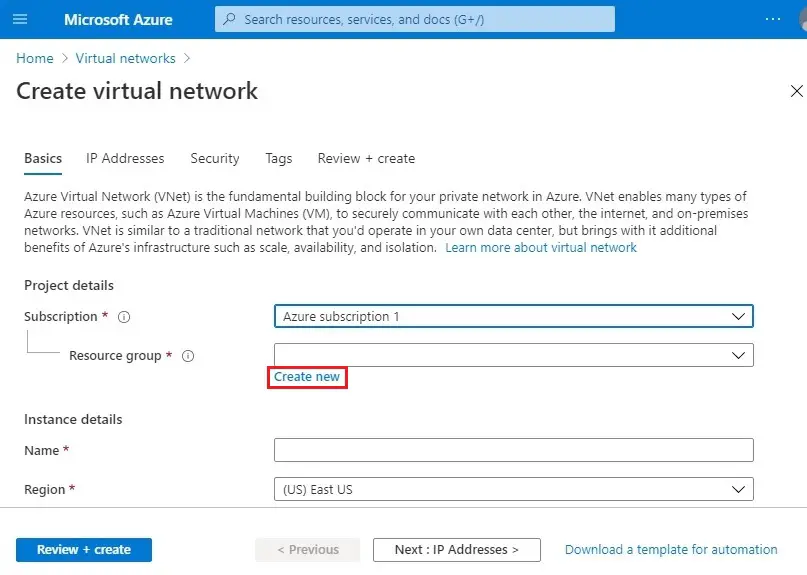
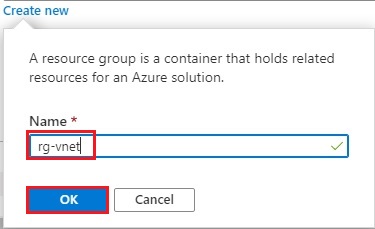
4- Type a resource group name (rg-vnet) and then click OK.
5- Under instant details enter the name of your virtual network (vnet01).
Then select a location to use as the basis for your virtual network. Choose a location that is close to your location to increase performance. Select Next: IP Addresses >
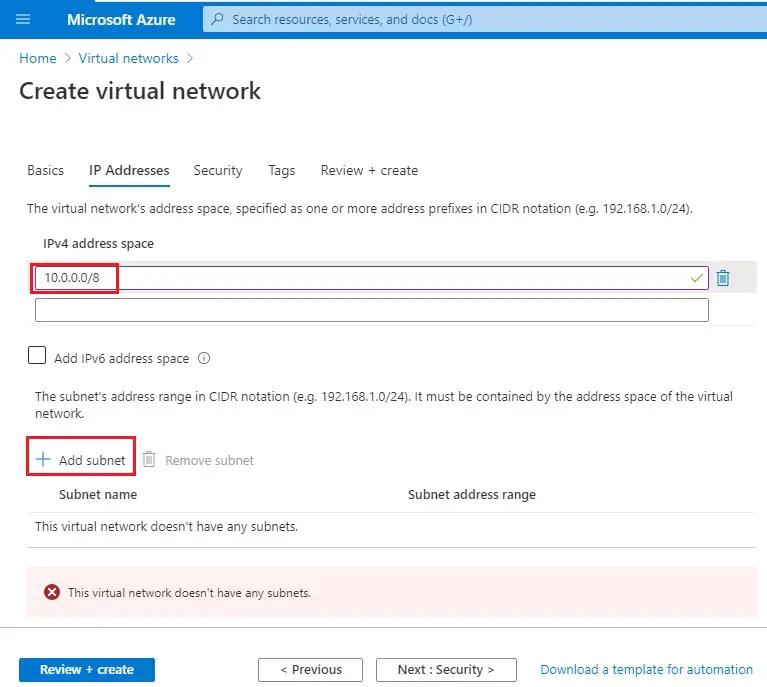
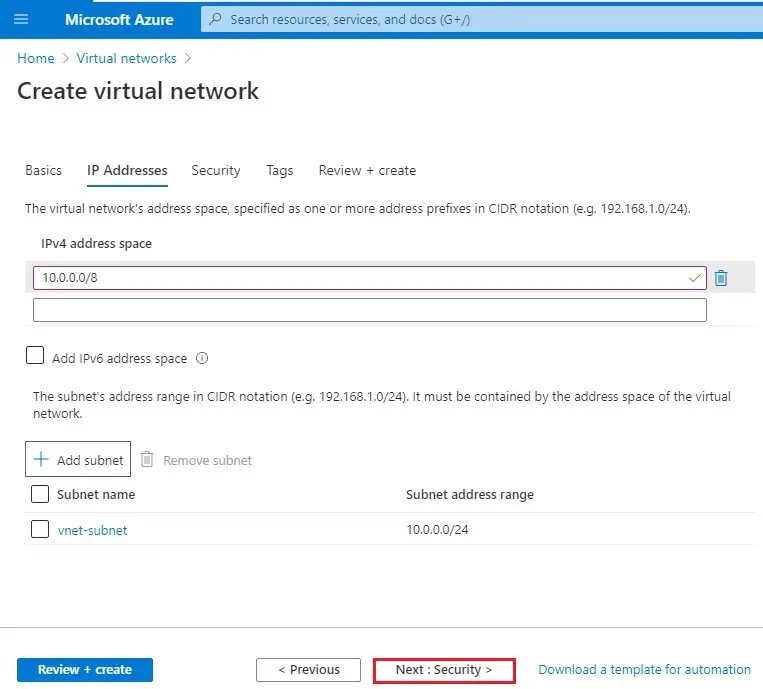
6- Provide an address space IPv4 address space, I am selecting 10.1.0.0/8, but if you prefer to use a different address feels free. Click + Add subnet
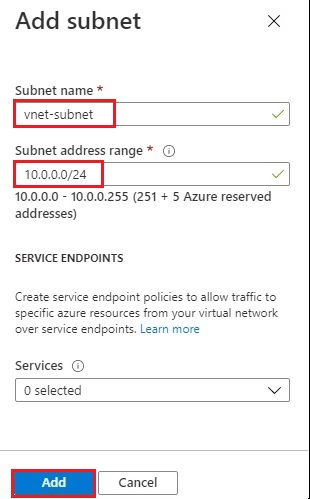
7- Add subnet wizard, and then enter a subnet name (vnet-subnet) and type 10.1.0.0/24 for the Subnet address range.
To create a service endpoint policy to allow traffic then select a service under services.
8- Click Next : Security >
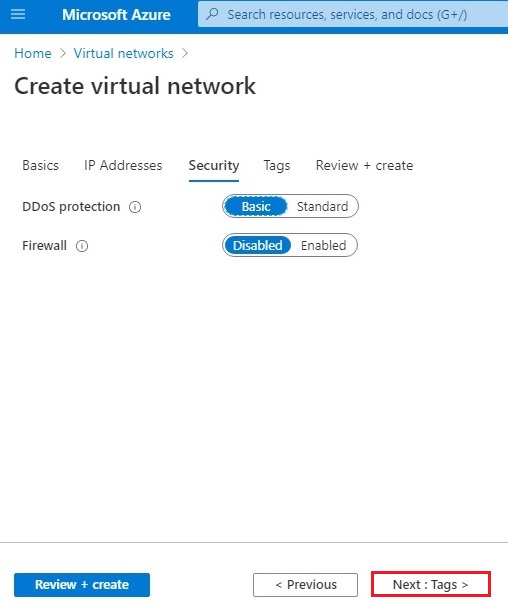
9- Select DDos protection, Firewall and then Next : Tag >
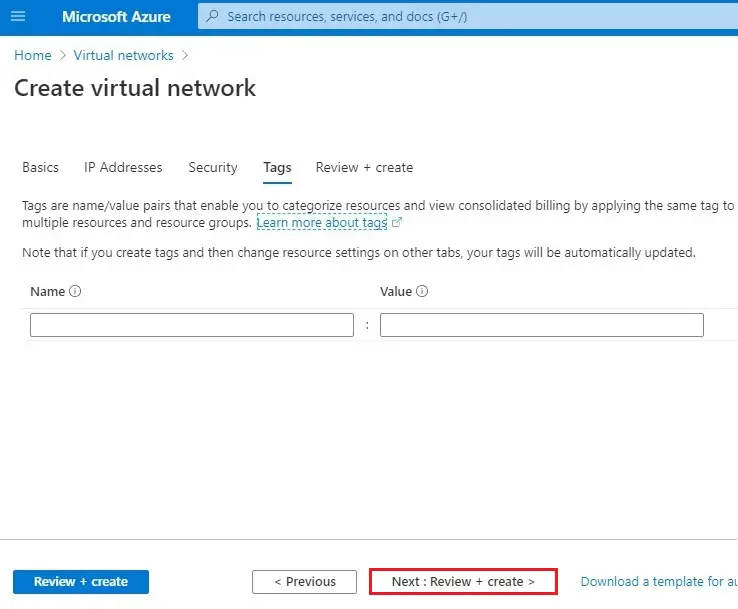
10- Create virtual network tag click Next : Review + Create >
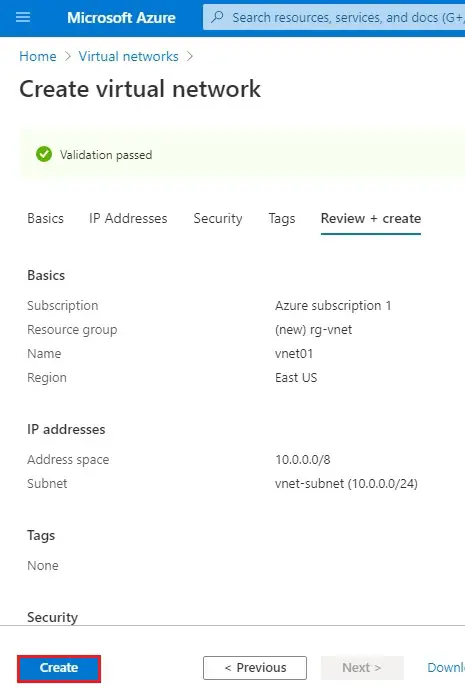
11- Virtual network validation passed and then selects Create.
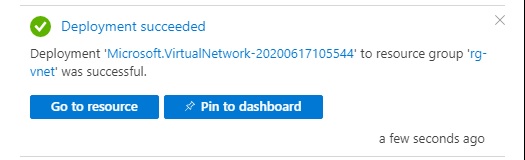
12- Virtual network deployment succeeded.
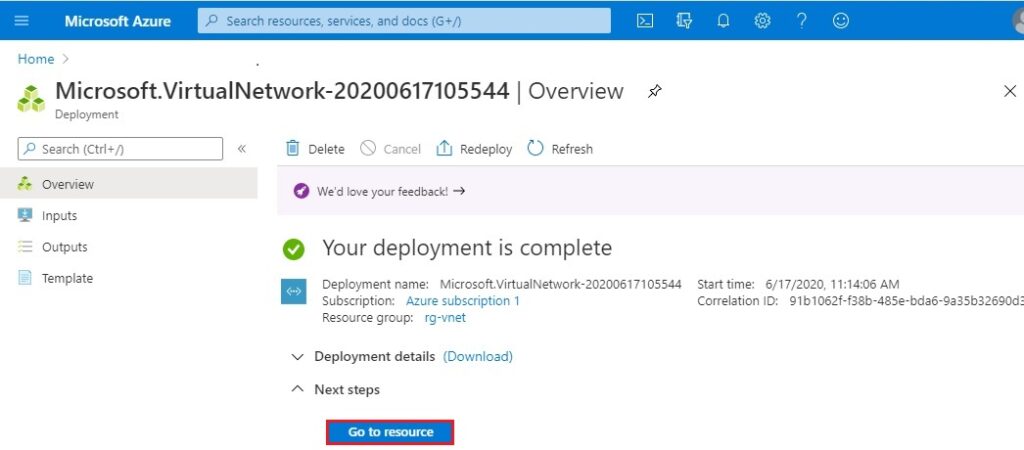
13- Your deployment is complete select go to resource.
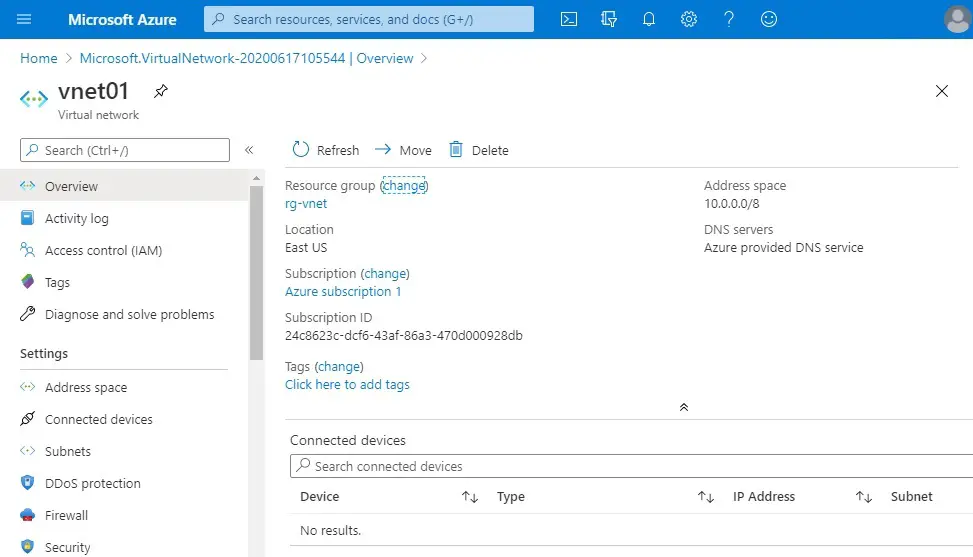
14- Virtual network overview.