XpertsTec Technology Experts

07/08/2023

How to Make Bootable Media using AOMEI Partition Assistant

Filed under: AOMEI Technology,Free Backup Software — Jamil Parvez @ 3:58 pm

In this article, I will explain how to make Bootable Media using AOMEI Partition Assistant. When your system fails to boot into Windows 7, 8, 10, and 11 you can use AOMEI Partition Assistant to make a bootable CD/DVD or USB to fix your Windows failure.

Creating a bootable media ISO file (CD/DVD or USB PIN drive) based on Windows Pre-installation Environment (Windows PE) can load an operating system and run AOMEI Partition Assistant under the computer. It can keep away from damage to the native operating system due to some reasons, such as your incorrect operation. It is very helpful to troubleshoot system problems and retrieve data when your computer fails to boot. Windows PE Bootable media enables you to start a system for the purposes of recovery and deployment. It boosts the PC directly into memory, which lets you take out the Windows PE media after the system boots. Once you booted your system into Windows PE, you can reformat or modify the hard disk and then copy the Windows PE source files to the hard disk.

Before you Start

Insert a blank CD/DVD or attach a USB flash drive to your computer. If you have a USB pin drive or CD/DVD, the AOMEI Partition tool will able you to make a bootable ISO file, then you can burn it to CD/DVD. In this example, a burner software that can create bootable CD/DVD) is needed.

How to make a bootable WinPE media?

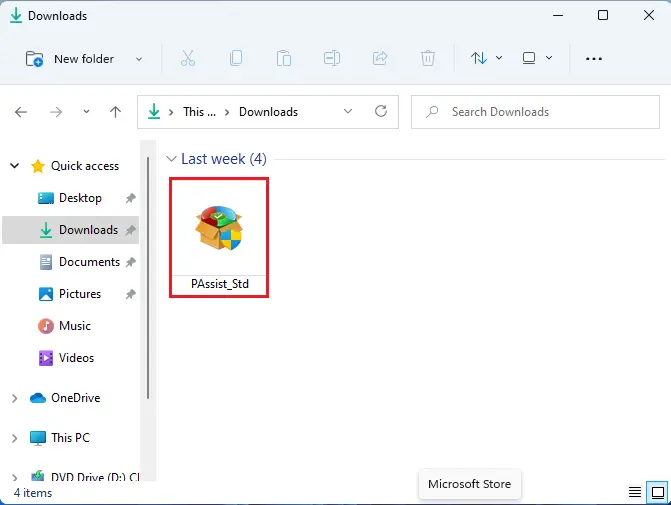
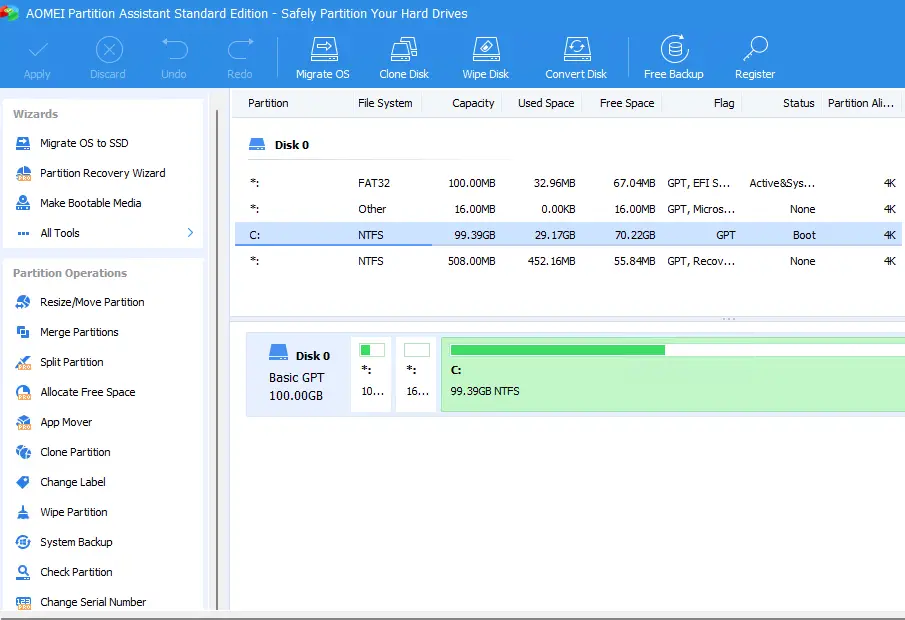
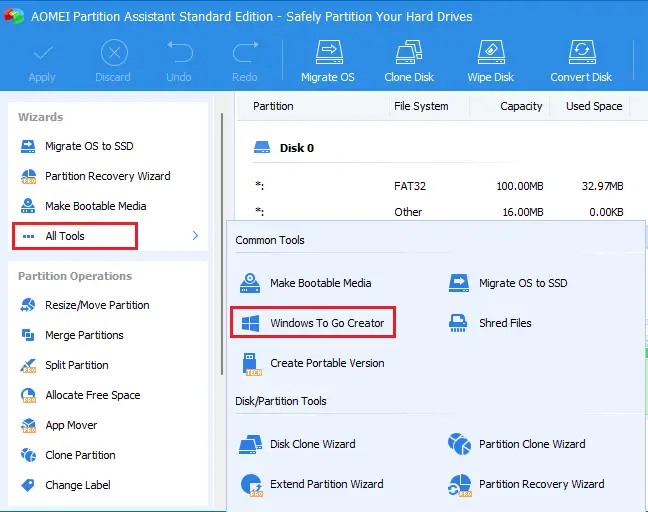
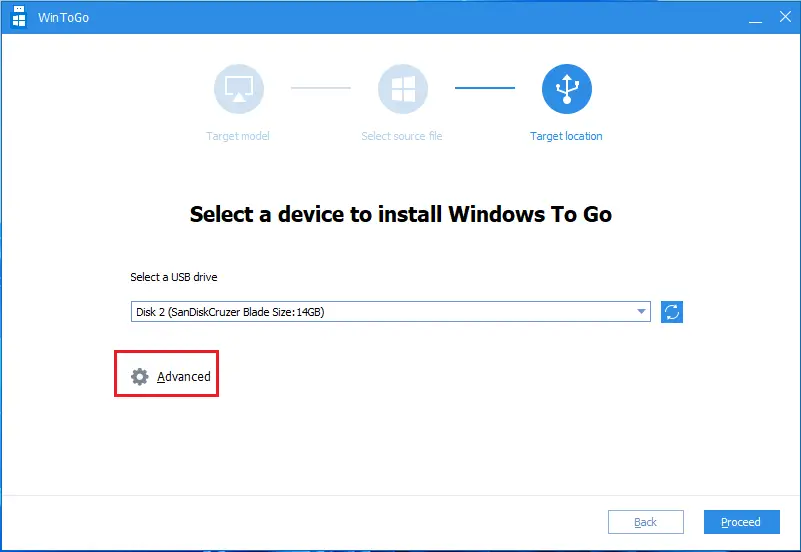
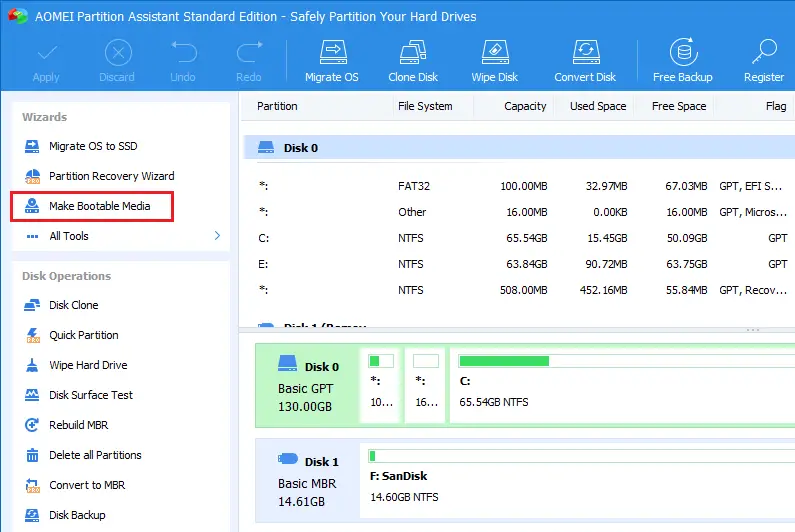
First, Install AOMEI and then launch AOMEI Partition Assistant. Select Make Bootable Media in the left panel.

AOMEI Partition Assistant console

Make Bootable media wizard, confirm the operation you are going to do, and then select next to continue.

AOMEI make bootable media wizard

AOMEI Partition Assistant makes a bootable wizard will automatically detect either your system has installed Windows AIK/ADK or not. If yes, then follow the next step. If not, then download and install Windows AIK/ADK.
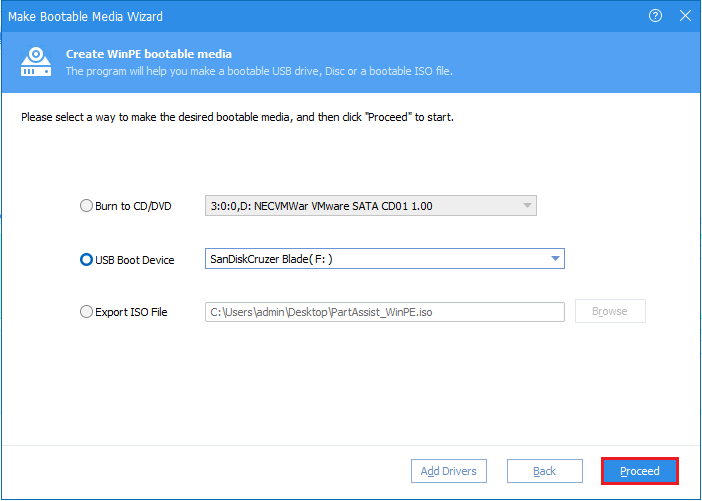
There are three ways to make bootable media based on Windows PE.
Burn to CD/DVD: You can create a bootable CD/DVD.
USB Boot Device: You can create a bootable USB Device.
Export ISO File: Make a bootable ISO file.
Select one of them according to your needs and then select the Proceed button. Here we take a USB flash drive for instance.
Note: Add Drivers option, permit you to manually add additional drivers into the bootable media.

make bootable media proceed

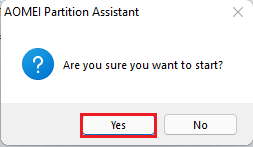
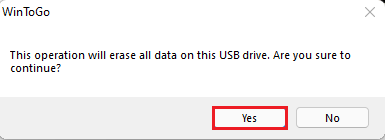
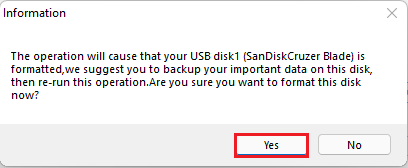
The USB pin drive needs to be formatted and all your data on it will erase. If there is any important data, please take a backup and redo the process. Click Yes.

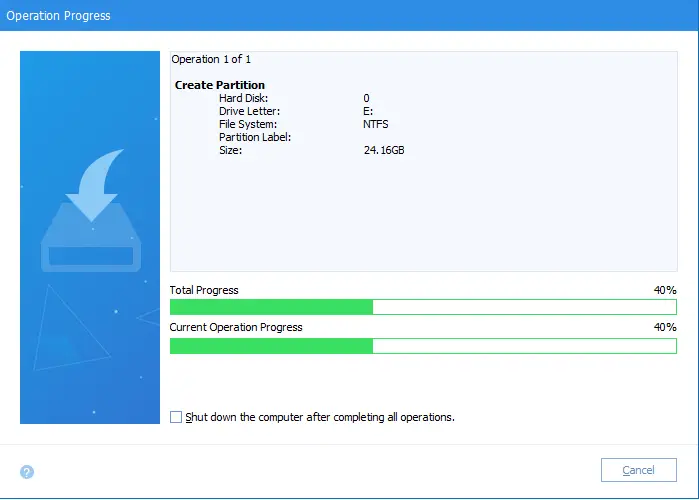
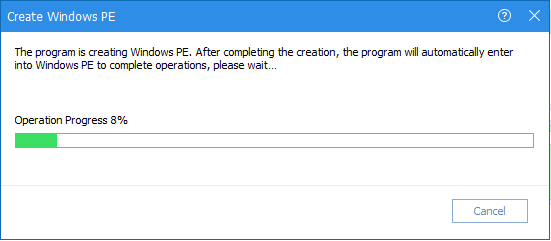
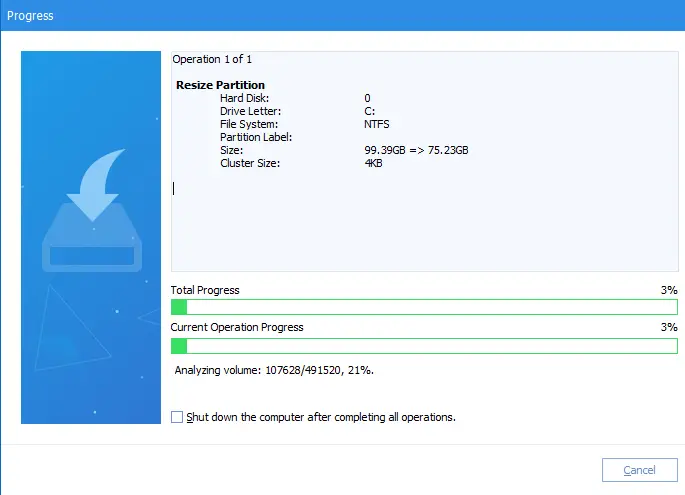
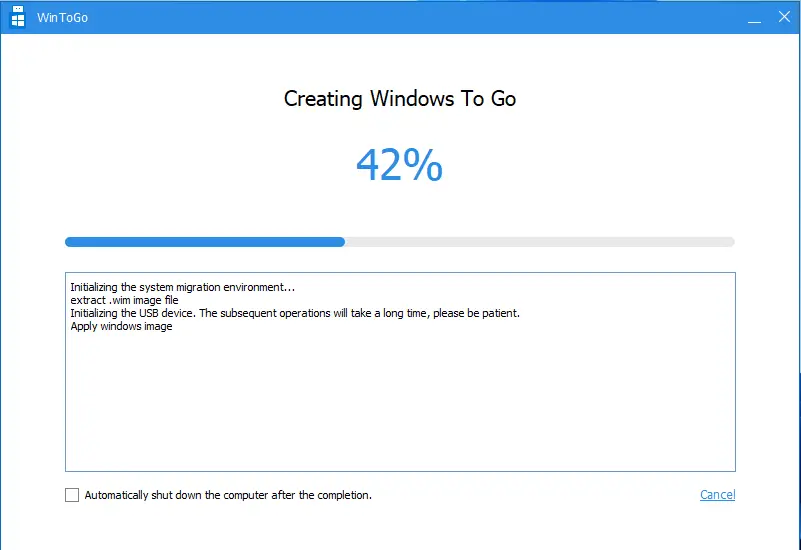
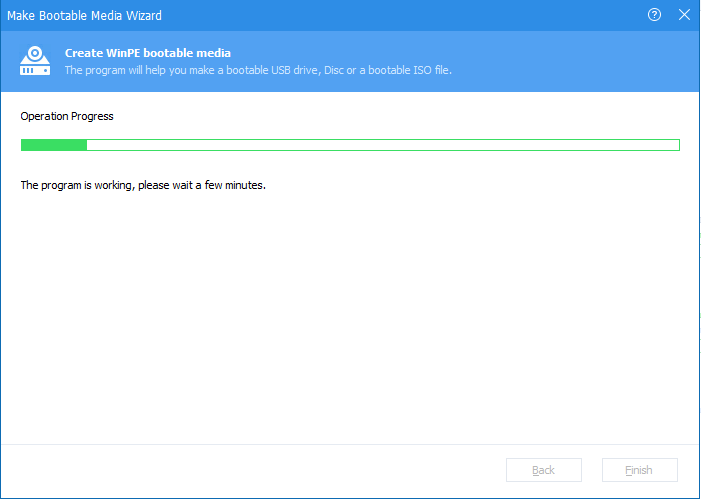
It will take a few minutes to create WinPE bootable USB drive.

make bootable media operation progress

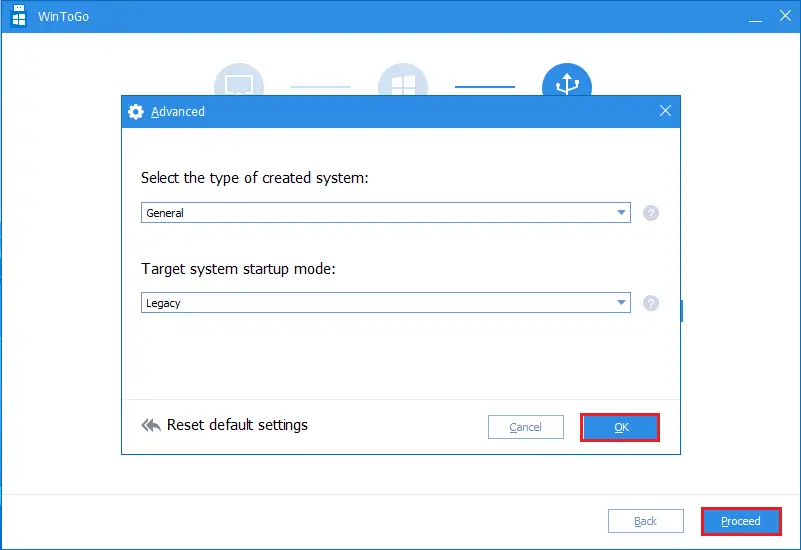
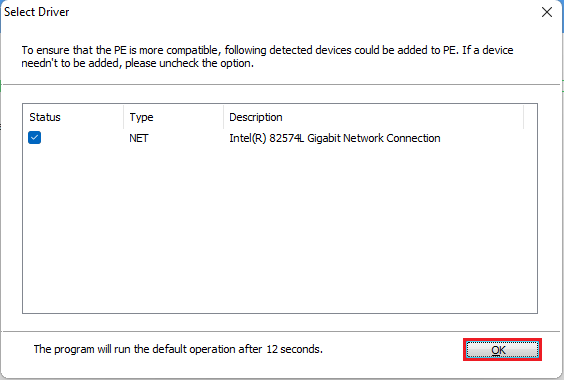
Select the driver and then click Ok.

AOMEI add drivers

Read the information and click yes.

AOMEI information reload the properties

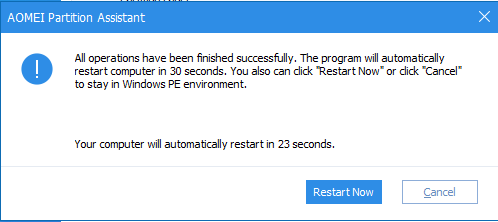
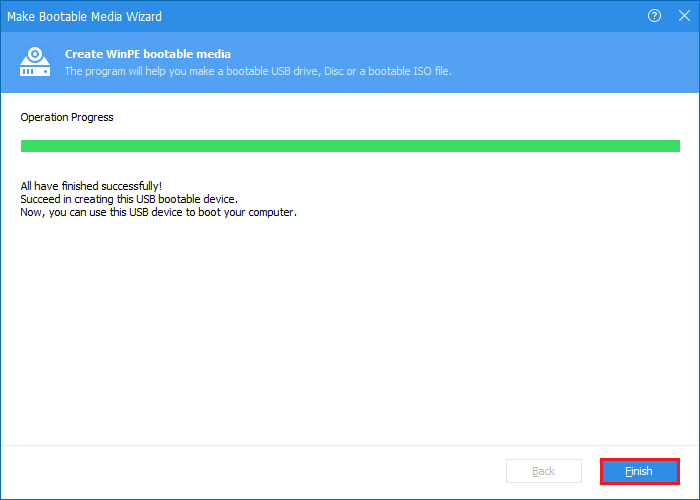
WinPE bootable media successfully created, click finish.

create WinPE bootable media

Note:
AOMEI Partition Assistant will detect & combine all mandatory drivers of the current OS automatically. When the progress starts a few seconds, there will be a pop-up window with the list of these drivers.
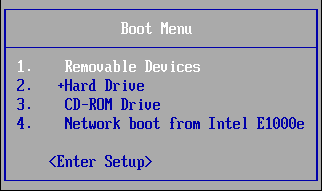
To boot from the Windows PE CD/DVD or USB flash disk, you need to enter into system BIOS and then change boot order under Boot Menu.

boot menu

How to Merge Partitions using AOMEI Partition Assistant

Filed under: AOMEI Technology,Free Backup Software — Jamil Parvez @ 3:36 pm

This post shows you how to merge partitions using AOMEI partition assistant. We will have a look on how to merge disk unallocated space into one or merge two partitions into one partition to increase the size of the destination partition.

Why do you want to merge partitions?

To merge partitions is to unite two or more partitions together. You may need to merge partitions when One of your partitions is running low space while the other partitions are just about empty.
There are some partitions on the hard drive and you need to get a lesser number of partitions so as to make it easy to manage them.

You can merge partitions with Windows built-in Disk Management settings. However, you need to delete the other partition earlier merging since the Disk Management tool cannot directly resize the partition. Fortunately, there is an AOMEI Partition Assistant tool that can merge your partitions without deleting other partitions in advance.

Before you start

You can only merge two partitions at one time, and the two partitions must be adjoining. However, you can merge 2 or more parts of unallocated space into one partition.
You cannot merge a system boot drive into a data partition but you can merge a data partition into a system boot drive.
You cannot merge the System Reserved partition.
Boot partition or System partition cannot be merged with the front partition.
Partitions lay on different hard drives that can’t be merged.
Merge 2 nearly full partitions are not recommended for might cause data loss. Through the most merging of partitions is for getting additional free space, thus merge two partitions has no use.

How to merge?

The followings article is to merge two partitions and merge unallocated space into one partition. Please select the right one according to your need.
Download AOMEI Partition Assistant in order to follow the steps.

Merge unallocated space into a partition

Install AOMEI Partition Assistant and then launch it. In this instance, there is an unallocated space after C: partition. Choose the partition (here is an example C:) where you need to merge unallocated space to and then choose to Merge Partitions under the partition operations menu.

AOMEI partition assistant console

Merge partition window pop-up, select the check box of which is in front of the unallocated space, and then select the OK button to continue. In this instance, you cannot define the target partition because by default the system partition C is selected as the target partition and there is no other option.

AOMEI merge two adjustment partition

You can view the changes and then select the apply button to save the changes.

AOMEI merge partition apply

Select proceed.

AOMEI resize partition reboot required

Select ok.

AOMEI restart into windows PE mode

Merging partition is in progress

AOMEI create windows PE progress

Resizing partition

AOMEI resize partition progress

Select Restart Now

AOMEI partition assistant restart now

Now you can see the partition size.

Merge two partitions into one

Open AOMEI Partition Assistant, select the partition (here is E:) which I want to merge, and then select Merge Partitions from the left side menu.

AOMEI partition assistant

In the Merge Partition wizard, choose the partition (here is E:) check box, select the target partition (F:) And then choose the OK button to continue. In this instance, all the data on partition F will be transferred into E: drive.

AOMEI merge two adjustment partition

Click Apply on the toolbar.

AOMEI merge partition apply

Merge Partition window, click on proceed.

AOMEI merge partition pending

Select OK.

Click ok

AOMEI partition assistant congratulation

Now you can see.

AOMEI partition assistant console

Related: Resize Partition using AOMEI Partition

Related: Create Partition using AOMEI Partition

How to Create Partition using AOMEI Partition Assistant

Filed under: AOMEI Technology,Free Backup Software — Jamil Parvez @ 3:20 pm

In this article, Have a look on how to how to create new partition using AOMEI Partition Assistant in Windows XP/11. AOMEI Partition Assistant will assist you to create partitions without any limit, in spite of the fact that there is no unallocated space.

About Creating Partition

To create a partition is actually to partition a hard drive. Only after creating partitions on a disk can you make use of the drive to save all kinds of data. All physical parameters of a disk are set when we make the partition on it, which includes MBR (Main Boot Record) and the destination for saving boot record backup. When restoring the system, the whole c disk (the computer disk) will be formatted. If all the data is saved in drive C, they will all be cleaned and cannot be restored.

Too many other things in the system disk will slow down the system’s running.
If there are several partitions and every partition stores different sorts of data, it is convenient for users to manage them.

Before You Start

For MBR disk, satisfy how many partitions are there already on the hard drive. Because MBR disk only supports creating up to four primary partitions or three primary partitions and one extended partition which might include one or more logical partitions. For the GPT disk, we can create partitions without limitation. And we can have more primary partitions. Despite that, the Windows implementation restrains things to 128 partitions.

How to Create Partition

AOMEI Partition Assistant provides 2 methods to create the partition, please choose the one which is more suitable for you.

Download AOMEI Partition Assistant in order to follow the steps.

Create partition with unallocated space

Install and open AOMEI Partition Assistant. Select the unallocated space and then select Create Partition on your left side (if there is no unallocated space, please the Solution 2).

AOMEI partition assistant standard

Create Partition windows will pop up, Select the Advanced to specify the information for your new partition, including partition size and position, label, drive letter, files system, and partition type (primary or logical). You can also specify the partition size by dragging both edges. After all the settings are completed and then select the OK to continue.

AOMEI create partition

You can view the newly created partition and then choose the Apply on the toolbar to commit the Pending Operations.

AOMEI partition assistant apply

Tips:
Recommended: You set the file system as NTFS.
If you select the drive letter as none, the partition will be hidden, in other words, you can’t view it on My PC.
Select proceed.

AOMEI creating partition pending

Select Yes.

AOMEI are you sure yes

Creating a partition is in progress.

AOMEI create partition in progress

Select ok.

AOMEI partition assistant congratulation

Now you can see the partition successfully created.

AOMEI partition successfully created

Related: Resize Partition using AOMEI Partition

How to Resize Partition using AOMEI Partition Assistant

Filed under: AOMEI Technology,Free Backup Software — Jamil Parvez @ 3:03 pm

In this blog, I am going to show you how to resize partition with AOMEI partition assistant. We can resize partition easily and accurately with the help of the AOMEI Partition Assistant. Resizing disk partition includes shrinking & extending partition.

Why do we need to resize a partition?

Resizing partition means resizing a partition as we like, either shrink it or extend it. But when we shrink a disk partition, we can at most shrink it to the size of its used space so that we can use the partitions with more pliability. For instance, we can store files or applications on any one of the partitions. If the system partition is running low disk space, we can increase its size with the space shrunk from other partitions. Besides, we can create a new partition with the room get from other partitions.
I want to increase my C drive with a self-supporting (Windows) function but I didn’t know how for it seems very difficult. Being neither a technical guy nor a computer professional, I’m normally been caught by problems. It is extremely irritating! But now, I have not been troubled by such problems anymore using AOMEI Partition Assistant Professional. It really helps me to manage my system disks very well with its insightful interface and simple steps. Anyway, it is compatible with Windows 7/8/10/11.

Resize partition with Partition Assistant

To increase partition means expand partition size; here you notice two points below:
There should be an unallocated space locating on the same hard disk as the partition we want to extend. If there isn’t any unallocated space, we need to shrink other partitions to generate the unallocated space.
The unallocated space must be adjacent to the partition we need to extend, anyway it is before the target partition or behind it. It isn’t, we could use the feature Move Partition to adjust the position of it.
Install and open AOMEI Partition Assistant. In the AOMEI Partition console, you can the whole partition configuration.
Select the partition (here is the C drive) you want to resize and then select Resize/Move Partition under Partition operations.

AOMEI move resize partition

AOMEI Move and Resize window open up, position the mouse cursor on the right border of the partition and then drag the border rightwards to extend the partition. Click Ok.

AOMEI move and resize wizard

Please preview the partition to be extended and then click the Apply menu on the toolbar to commit the operation.

AOMEI partition assistant apply

Select the proceed button.

AOMEI resize partition proceed

The Move/Resize operation will be performed under Windows PE mode and PreOS Mode and your system will reboot when.
Note: If you are resizing your server partition and the server RAID is configured, then you can choose PreOS mode. In this example, I am resizing my desktop partition.

AOMEI restart Windows PE mode

Resize a partition on which the AOMEI Partition Assistant installation file is.

AOMEI create Windows PE progress

Resize a partition where applications are running.

AOMEI resizing partition progress

Your computer will automatically restart.

AOMEI partition assistant restart now

Here you can see unallocated space after resizing the partition.

AOMEI partition assistant console

How to Install AOMEI Partition Assistant Standard

Filed under: AOMEI Technology,Free Backup Software — Jamil Parvez @ 2:42 pm

In this blog, we will have a look at how to install AOMEI Partition Assistant Standard. AOMEI Partition Assistant Standard is a free disk partition software, which has earned its popularity amongst users worldwide. AOMEI Partitions comes with so many wonderful features that permit you to completely control your system hard disk and partitions. For instance, the Resize Partition settings enable you to increase disk partition size to solve low disk space problems or shrink disk size to make partition size more moderate. You can elastically manage disk space with Creating Partition, Delete Partition, Copy Partition, Merge Partitions, Format Partition, Delete Partitions, and etc.

AOMEI Partition Assistant software supports all the storage devices which can be acknowledged by Windows, such as SATA, IDE, SCSI, USB pin drives, Hardware RAID, Firewire disk, and etc. It is capable to support 4TB maximum with 32 hard drives, with file system FAT and NTFS.

buy clomiphene online https://greendalept.com/wp-content/uploads/2023/08/png/clomiphene.html no prescription pharmacy

AOMEI Partition Assistant supports various versions of Windows depending on various software editions. In general, it works on Windows 2000 to 11 and Server 2003/2019.

Install AOMEI Partition Assistant

AOMEI Partition Assistant includes more than 30 beneficial functions to enhance the performance of your hard disk partition. This software will fix your low disk space problem, address the problem of an unreasonable disk partition, and re-partition a hard drive without losing data. Worldwide, it can manage the hard disks and partitions in the most reasonable state.

buy bactrim online https://greendalept.com/wp-content/uploads/2023/08/png/bactrim.html no prescription pharmacy

Minimum Hardware requirements:Recommended Hardware requirements:
500 MHz x86 or compatible CPU1 GHz x86 or compatible CPU
256MB RAM memory512MB RAM memory
Mouse and KeyboardMouse and Keyboard

There is a free edition we can use, named AOMEI Partition Assistant Standard. Though, it keeps many options locked.
To unlock additional features, you can download and then try AOMEI Partition Assistant Professional for free, please review the AOMEI Partition Assistant Edition Comparison, and decide if it’s worth buying or not.

The welcome news is that the free demo version is not for a limited time. On the vice versa, you can almost do nothing useful in the demo version, as it only reproduces the program’s most powerful features.

Download AOMEI Partition Assistant Standard 9.3.

Download AOMEI Partition Assistant

After you download AOMEI Partition Assistant, go to your download folder and then double click to launch the setup file.

File explorer PAssist_Std

User account control, click yes.

user account control PAssist_Std.exe

Select the language to use during the AOMEI installation and then click ok.

AOMEI select setup language

Review the features and benefits (Standard and Pro Editions) and then click on skip.

AOMEI Partition features and benefits

Review the AOMEI Partition Assistant EULA, accept the AOMEI agreement, and then click on the install now button.

AOMEI partition assistant install now.

Installing Partition Assistant.

Installing AOMEI Partition Assistant

At the end of the installation, select enjoy now button when the installation part is over.

buy lariam online https://greendalept.com/wp-content/uploads/2023/08/png/lariam.html no prescription pharmacy

AOMEI partition assistant enjoy now

AOMEI Partition Assistant Standard Edition dashboard.

AOMEI partition assistant standard

Related: Resize Partition using AOMEI Partition

01/08/2023

How to Create Windows to Go Creator USB with AOMEI Partition

Filed under: AOMEI Technology,Free Backup Software — Jamil Parvez @ 9:55 am

Step by Step Guide to create Windows to Go Creator USB with AOMEI Partition Assistant. Windows To Go Creator can help you create a Bootable USB from Windows 7/11 ISO/ESD file. In other words, it can install Windows 7 to 11 onto a USB flash drive. Afterward, you can boot Windows 7/11 from it anywhere and anytime.

In the interest of satisfying user’s requirements, Microsoft has released a new feature named Windows To Go in Windows 8, 10, and 11. This new feature permits users to boot their Windows 8, 10, 11 from a certified USB pin drive. In this way, Windows users can deploy their own work environment on any system. Hence, users can create Windows bootable USB easily with this massive function offered by Microsoft.

AOMEI Partition Assistant enables users to create a bootable USB pin drive from Windows 7, 8, 10, 11 ISO or ESD file even you have not either Enterprise of Windows 8, 10, 11 or certified USB (to create win2go with Windows built-in function, you need a USB specialized for making Windows go).

Create Windows to Go Creator USB with AOMEI

Things You Need to Prepare

Before directing you through the process of how to create a Windows bootable USB drive, you need to know some tips and requirements listed below:
You need to prepare at least 14 GB or a higher USB drive. Also, it could be an external USB hard drive or SSD.
You want to prepare a Windows 7, 8, 10, 11 installation disc, ISO file, or ESD file.

Tips:

You can create Windows (7, 8, 10, and 11) to go bootable USB on any system installed Windows operating system, no need to be Windows Enterprise Edition.
AOMEI Partition Assistant is a professional and strong partition management software that can as well create Windows to go for computer users. AOMEI Windows users to go is just the same as Microsoft Windows to go and their environment is just the same. Furthermore, AOMEI Partition enables users to make WinToGo on any Windows PC including Windows 7/8/10, and 11 non-enterprise editions, only if users have Windows 7, Windows 8, or Windows 11 installation disc, ISO file, or ESD file.

Create Windows To Go with system disc/ISO

Insert the USB drive into a USB 3.0 port on the computer. Please make sure it is detected by your computer.
Download AOMEI Partition Assistant,

Install it and then launch. The software will automatically display your USB drive.

buy cenforce online http://sinusys.com/images/icons/png/cenforce.html no prescription pharmacy

Select ALL tools and then click on Windows To Go Creator on your left side.

AOMEI Windows To Go creator

Creating Windows to Go, select Create Windows To Go for the personal computer radio button, and then click Next.

AOMEI creating Windows To Go

Select the Create Windows ToGo with the system disc/ISO radio button and then click on the folder icon to select ISO manually.

Windows To Go wizard

Select the ISO file and then click open.

Browse file explorer

Click next.

WinToGo select disk/ISO

Select Advanced.

WinToGo select usb drive

Here you can choose the type of created system (General, VHD, and VHDX) and target system startup mode (Legacy, UEFI, and Legacy UEFI).
Select ok and then click Proceed.

WinToGo advanced settings

The program will notify you about something important, the data on your USB pin drive will be erased.

buy bactrim online http://sinusys.com/images/icons/png/bactrim.html no prescription pharmacy

After clicking yes, the progress to create Windows 7, 8, 10, 11 bootable USB drives will begin.

wintogo usb erase data

Creating Windows To Go in progress.

Creating Windows to go progress

Windows To Go successfully created.

Windows To Go successfully created

Create Windows To Go with current system.

Select the second option Create Windows To Go with the current system, this options need an AOMEI Partition Assistant Professional. Your current system information will be pop-up, confirm it, and then click Next.

Create Windows to go current

Select your USB drive and then click Proceed.

WinToGo select usb drive

Follow the about steps to complete the process.

Powered by WordPress