
In this blog, I will explain how to restore PC using Veritas System Recovery. The Veritas System Recovery recovers any ware feature lets administrators restore a system disk of a supported Windows platform PC. We can restore the system even if it has dissimilar hardware than was found in the original PC from which the recovery point was made.
Restore any ware lets you make the requisite changes for the system to be able to start. Depending on the configuration, you might need to make additional changes for the computer to run accurately as it did previously.
Restore any ware lets you recover a recovery point onto new hardware. For example, Restore any ware is automatically used for you in the following below steps.
Restore PC using Veritas System Recovery
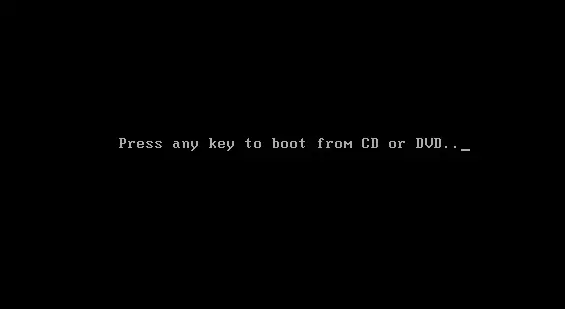
1- Boot your computer using veritas system recovery bootable media
Press any key to boot from
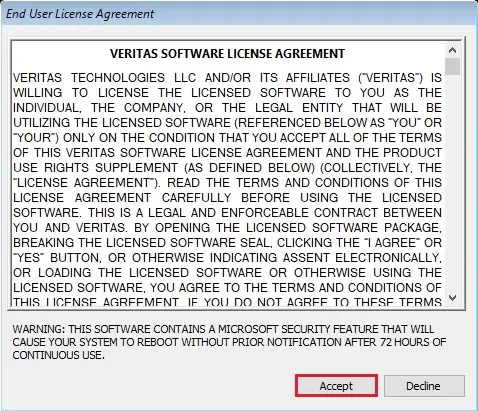
2- Accept the Veritas license agreement and then click next.
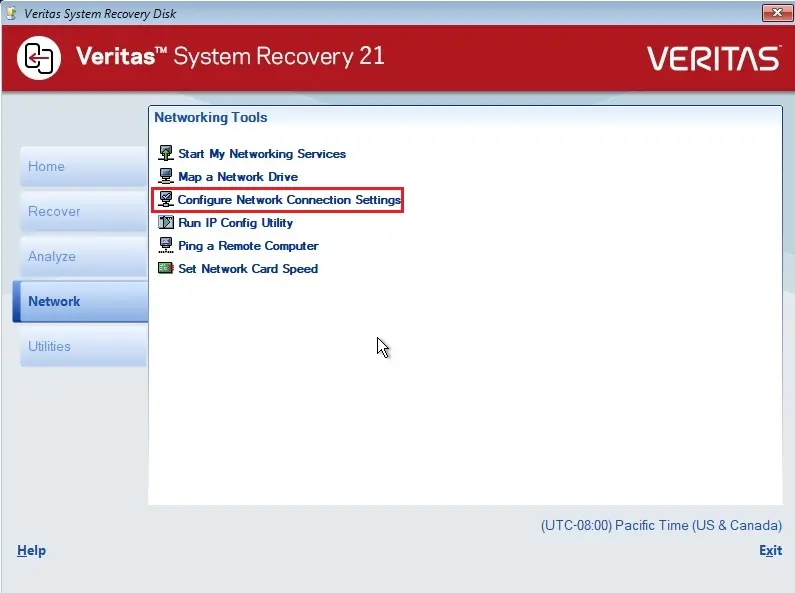
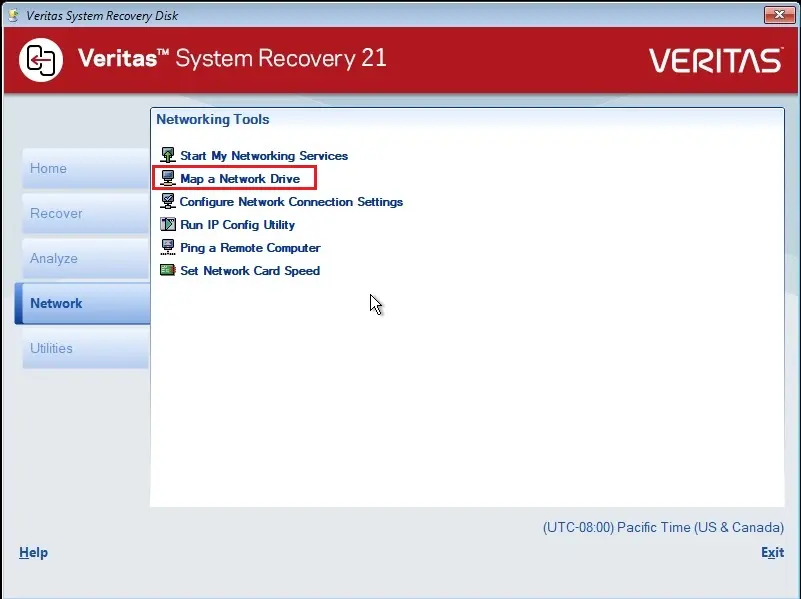
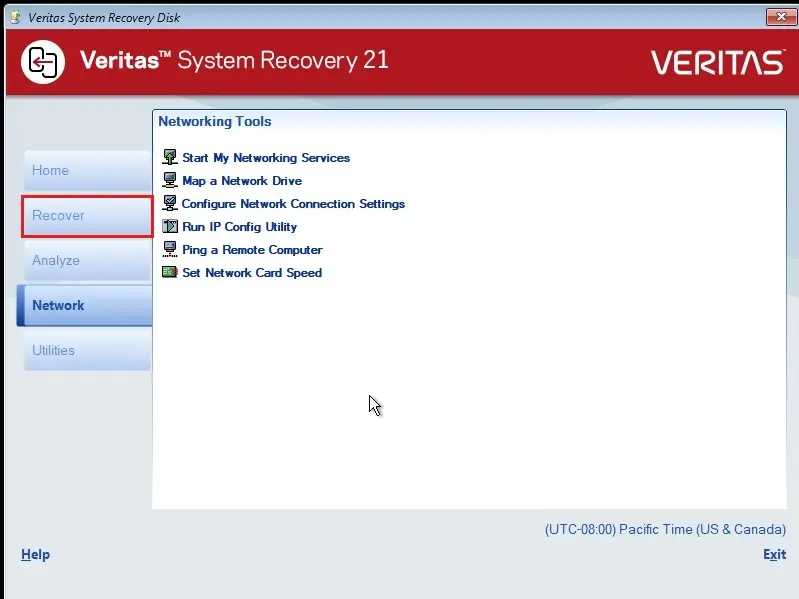
3- Here you will get a recovery disk menu. Select network options.

4- Click on configure network connection settings.
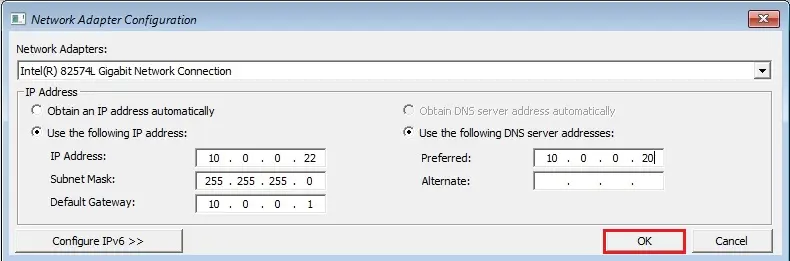
5- Select network adapter, and type your network IP address and then click ok.
6- Select Map a Network drive.
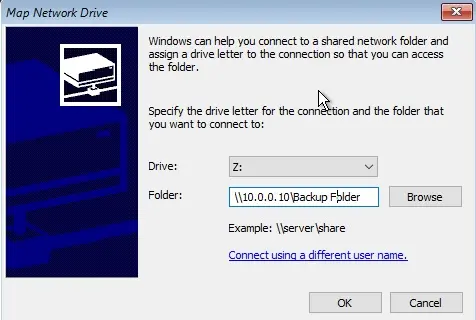
7- Type your network folder path where your backup saved, and then click on connect using a different user name.
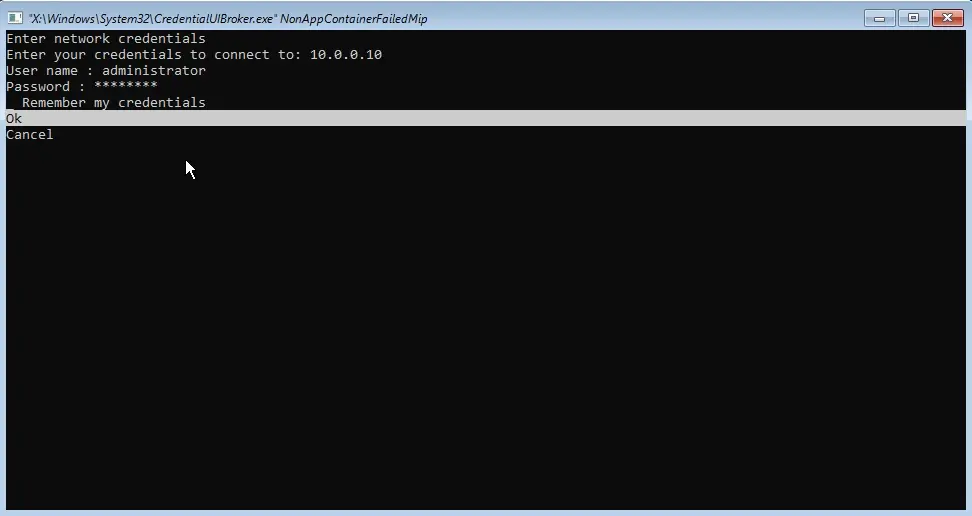
8- Type user credentials and then click ok.
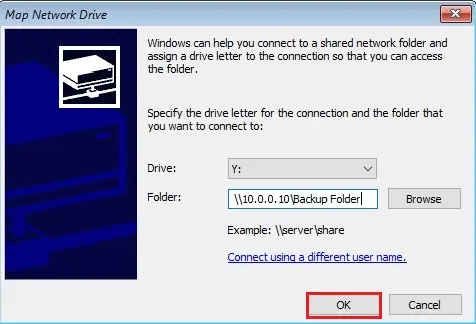
9- Click ok.
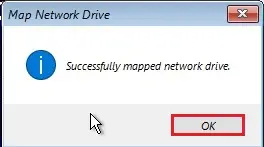
10- Click OK.
11- On the recovery disk menu, click on Recover.
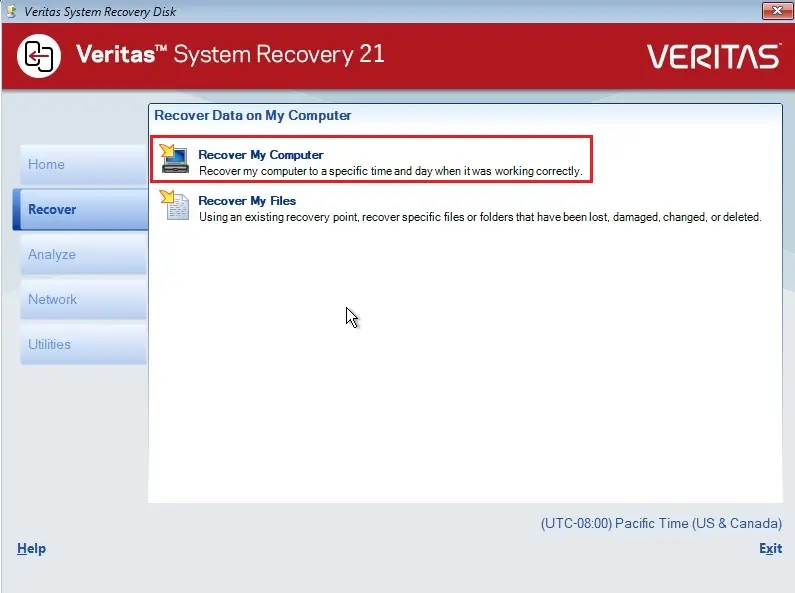
12- Click on Recover My Computer.
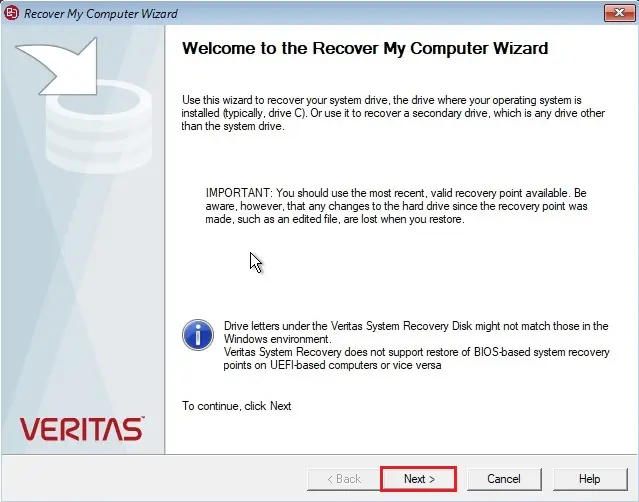
13- You will see Recover My Computer Wizard, and then click on Next.
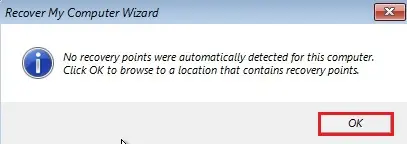
14- Click ok.
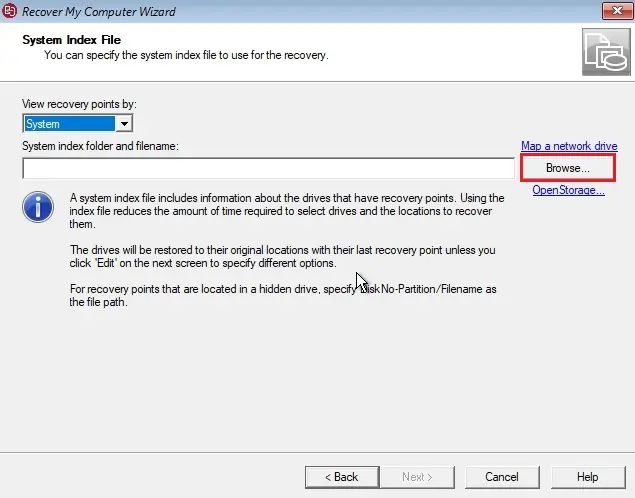
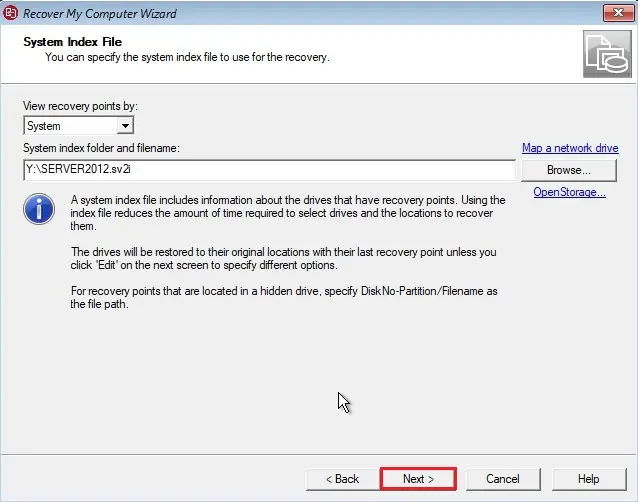
15- Select the Browse button and then go to the location where you have your backups.
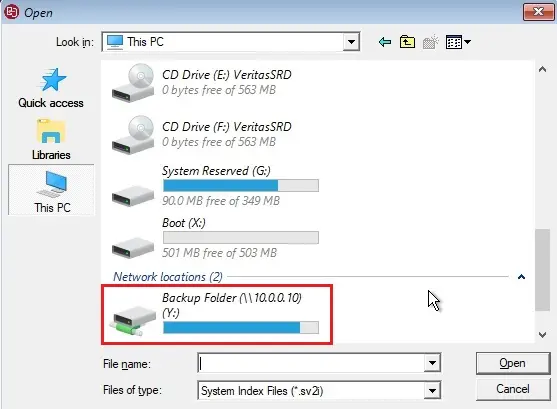
16- Select network locations, open shared folder.
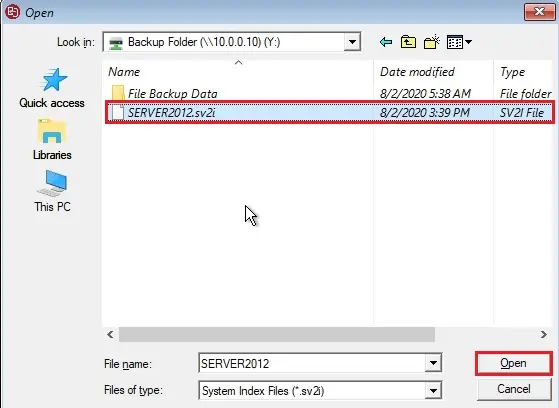
17- Select Vertas backup and then click open.
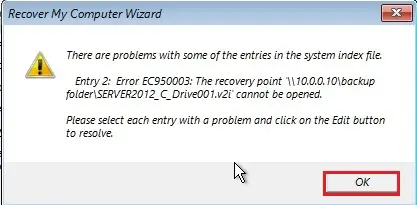
18- Click next.
19- Click Yes to write disk partition structures.
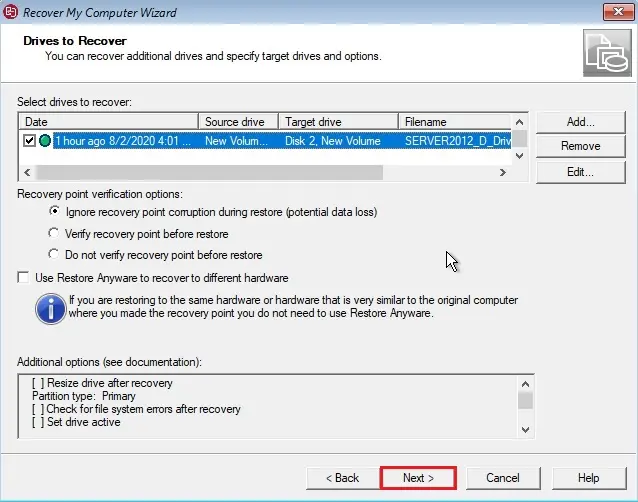
20- Verify the drives to recover. Insure the checkboxes are checked and then you have this green mark on. When you are recovering to the same machine, you do not fiddle nearby with any other settings in this page.
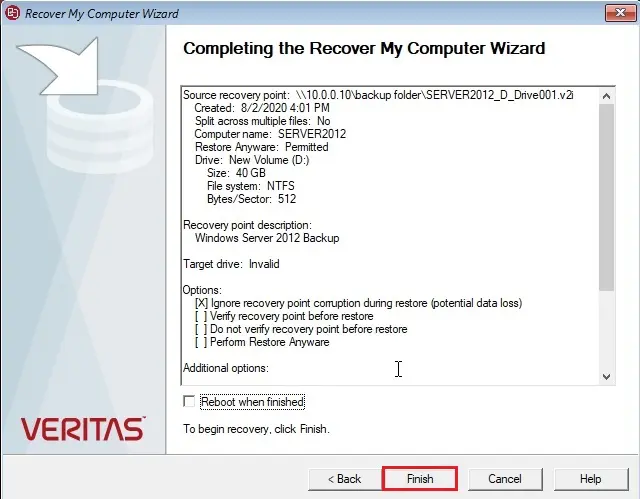
21- Leave the Reboot when finished checkbox unchecked. Click on Finish to perform restore.
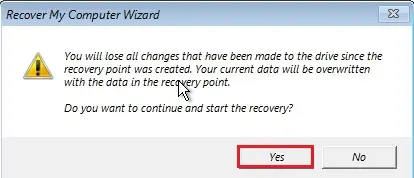
22- Click yes and continue.
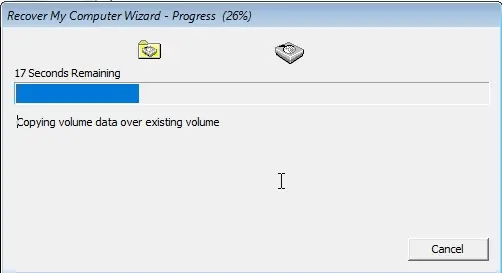
23- Restore Progress.
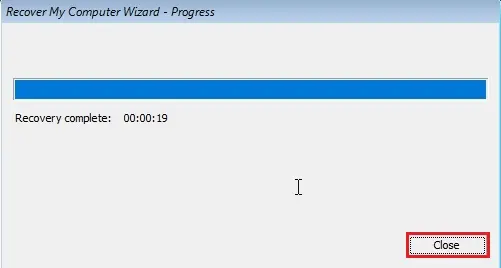
24- Recovery Complete. Click on Close.
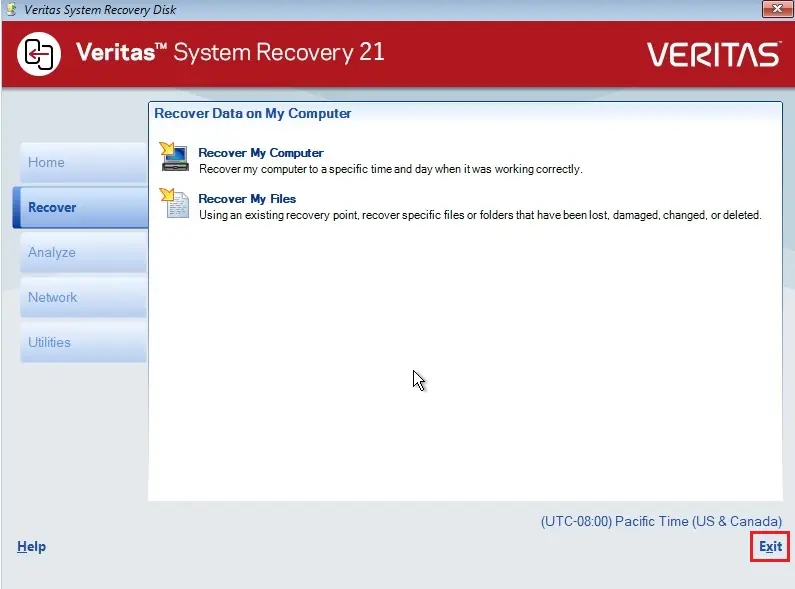
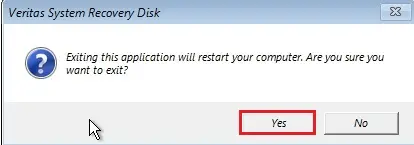
25- Click on Exit on the recovery disk menu.
26- Click Yes to restart the computer.
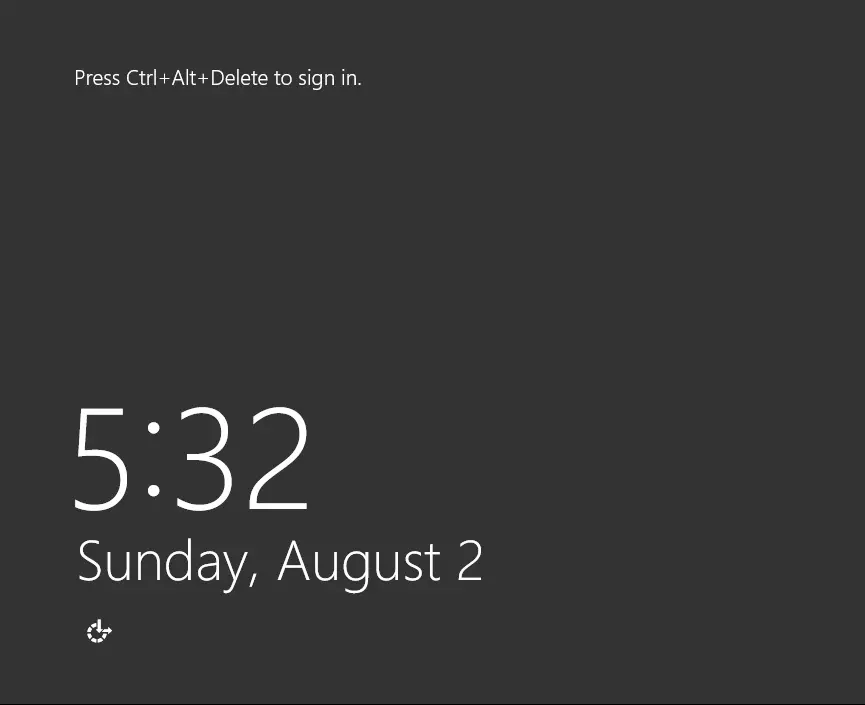
27- Reboot your system, it successfully got into Windows.
For more details please visit Veritas