In this article, we will show you how to find PC’s model number on Windows 11 and if you plan to upgrade your PC. You wish to get the model number on your computer for some purpose. Do you know how to check the computer model number on your device if you’re running Windows 11? This post has different easy methods.
Identifying your PC’s model number in Windows 11 might help you solve hardware problems and ensure compatibility with accessories and devices.
The manufacturer of a product assigns the model number, a name or code specific to that product and identifies its features. On the other hand, the model name is a label that is easy for customers to understand and is used for branding and marketing.
For example, the model’s name, HP Elite, doesn’t provide specific information about the product other than that it is a workstation under the Elite line. However, the model number, HP EliteDesk 8300, reveals more of the device’s technical specifications and differentiates it from other products in the EliteDesk line.
Find PC’s Model Number via the System Information
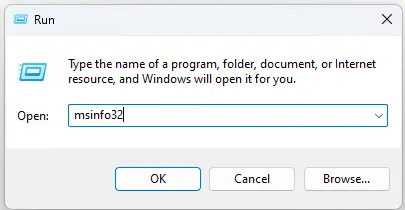
Open the run box by pressing the Windows + R key, typing msinfo32, and hitting enter, or press the Windows + S key to open the Windows search type “System Information” and open it.
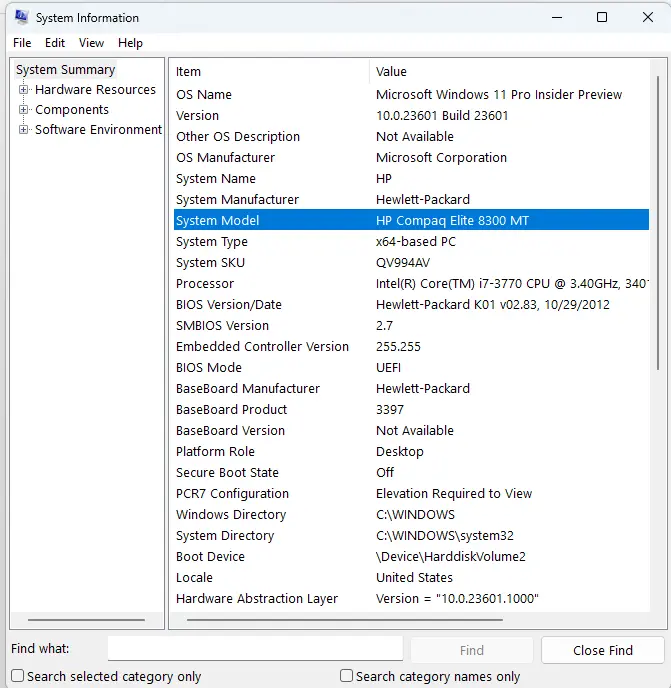
You will find computer model number next to “System Model” and the system manufacturer above it.
Find PC’s Model Number via Settings
Note: You can also get computer model number on the computer’s case or in the user guide. Here are some steps you may take to find it on your computer. Also, the model number is not the same as the serial number; a longer alphabetic code is used to identify each product unit.
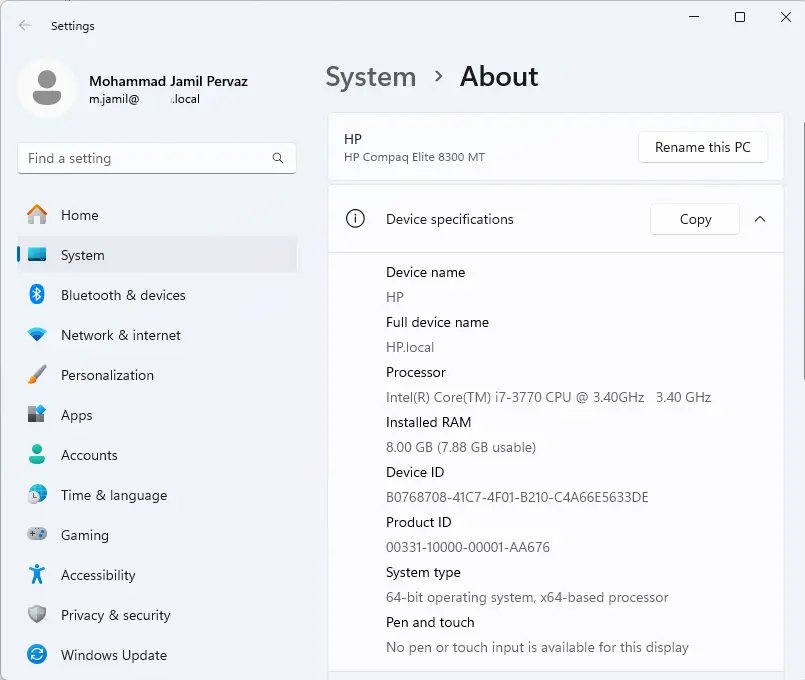
Go to the Settings app, select System, and then About.
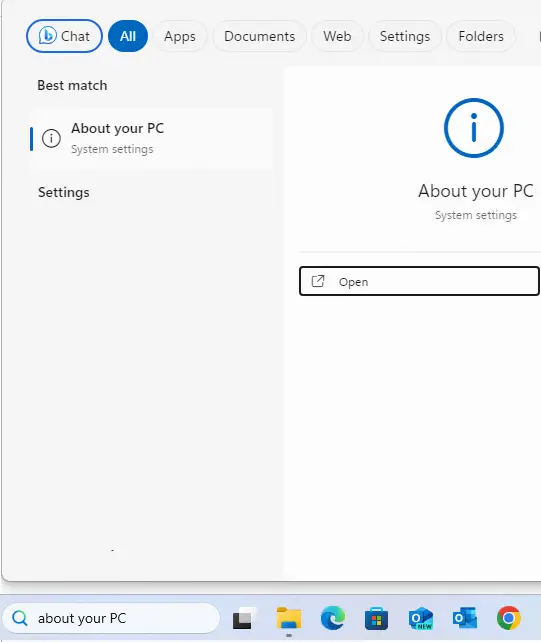
Or search about your PC and open it.
At the top, “Device specifications,” you will find your device’s manufacturer and model number.
Find Out the PC Model Number via the DirectX Diagnostic Tool
Please follow the steps below to know your PC’s model number using the DirectX Diagnostic Tool.
Open the Run dialog box by pressing the Windows + R keyboard shortcut.
Once the dialog box opens, type “dxdiag” and click OK.
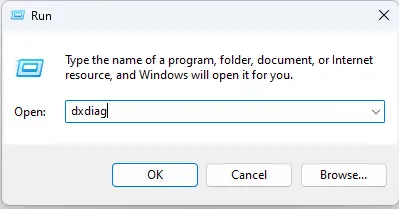
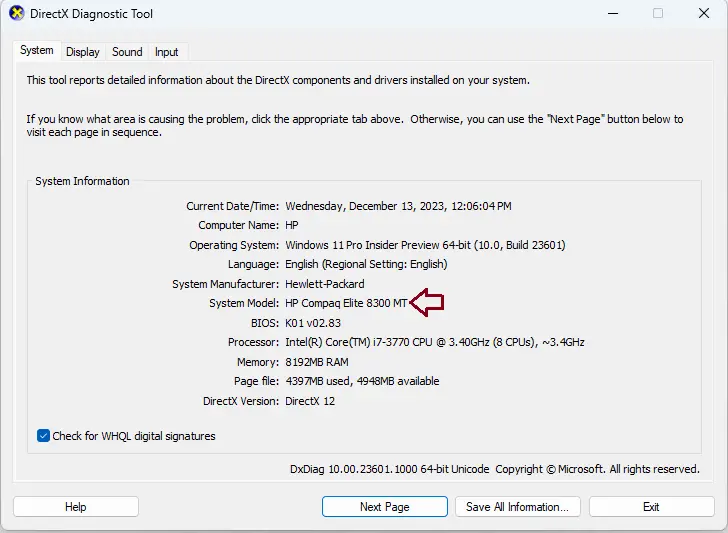
The DirectX Diagnostic App will open, displaying different tabs. Just click on the “System” tab.
Under the “System Information” section, you can find the “System Model”, which will give you the name of the model of your device.
Following these instructions will allow you to quickly find the model’s name of your computer using the DirectX Diagnostic Tool.
Find Your Computer Model Number via the Command Prompt
Using the Command Prompt is another way to find your computer’s model number.
Click the Windows search icon and search for cmd.
Right-click on the Command Prompt app from the search result and choose Run as administrator. This will run Command Prompt with administrator rights.
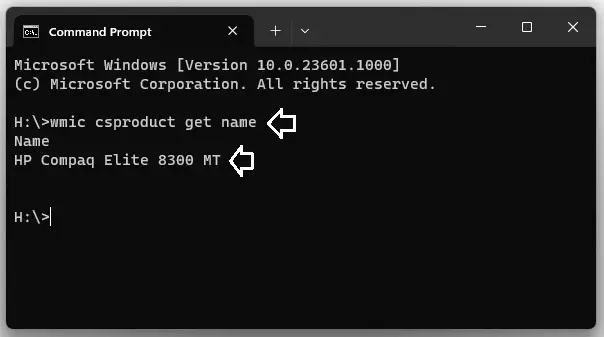
Copy this command, “wmic csproduct get name, identifyingnumber” and paste it to the Command Prompt and hit Enter.
The cmdlet will display your computer model number.
Find Your Computer Model Number via PowerShell Command
Find Your Computer Model Number via PowerShell CommandOn Windows 11; advanced users can now use Windows PowerShell to check the PC model number.
Click on the Windows search icon and search for PowerShell.
Right-click on the PowerShell app from the search result and choose Run as administrator. This will run the PowerShell app as an administrator.
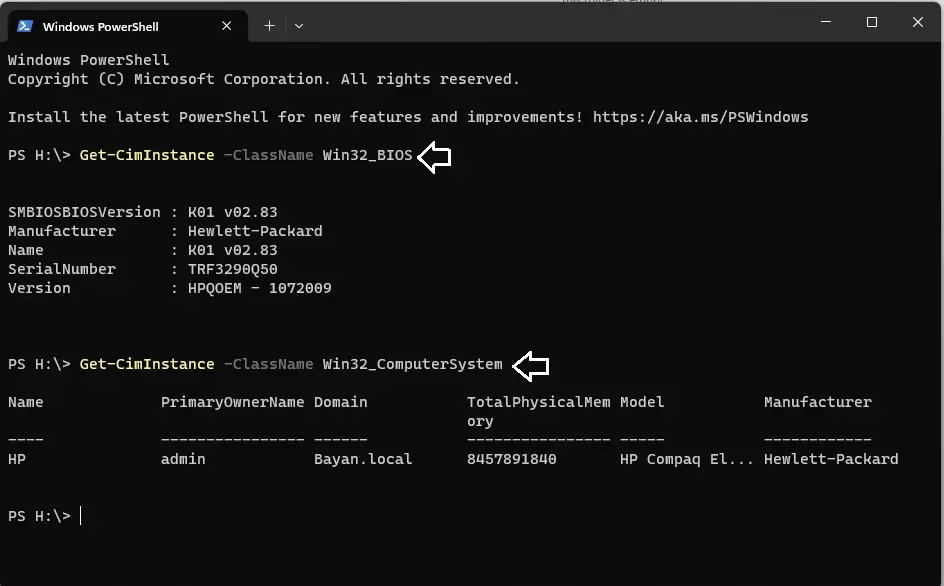
Copy this command, “Get-CimInstance -ClassName Win32_bios” and paste it to PowerShell, then hit enter.
Your computer model number can be found in the Model section.
Finally, getting your laptop or computer model and serial number on Windows 11 can be useful in various situations, such as upgrading components, troubleshooting problems, and maintaining an accurate inventory. System Information, Windows PowerShell, Command Prompt, and other utilities in Windows 11 make it simple to find this information. You can quickly note down your computer or laptop’s model and serial numbers, regardless of brand, such as HP, IBM, Dell, Lenovo, Acer, or others.


