

It is very pretty simple to change computer name in Windows 11 (default computer name). You can change the PC name throughout the Windows 11 Settings tab. You can also use Command Prompt (CMD) or PowerShell or to change the name of your Windows 11 system. Here are the steps to change your computer name on Windows 11.
Change Computer Name via Windows Settings
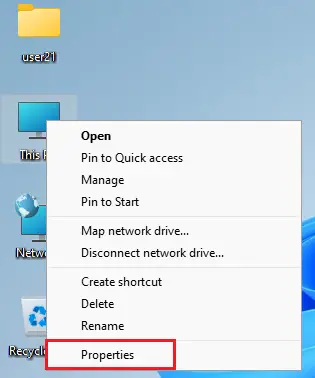
To change the computer name, right-click on This PC and then select properties.
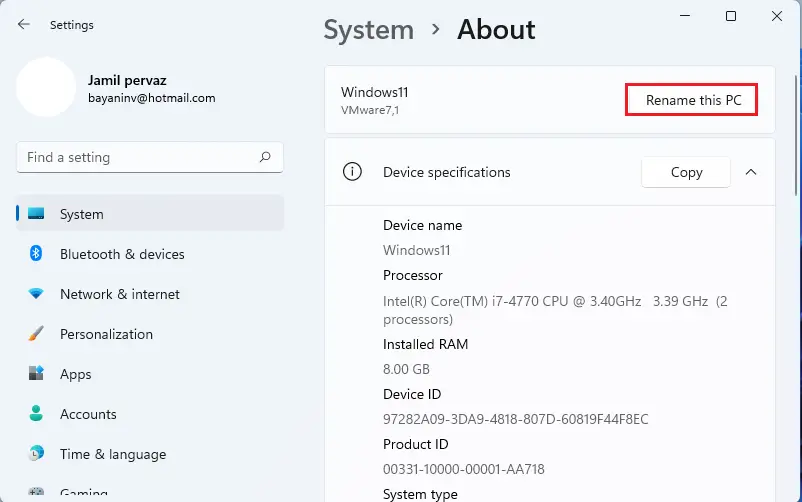
Select rename this PC.
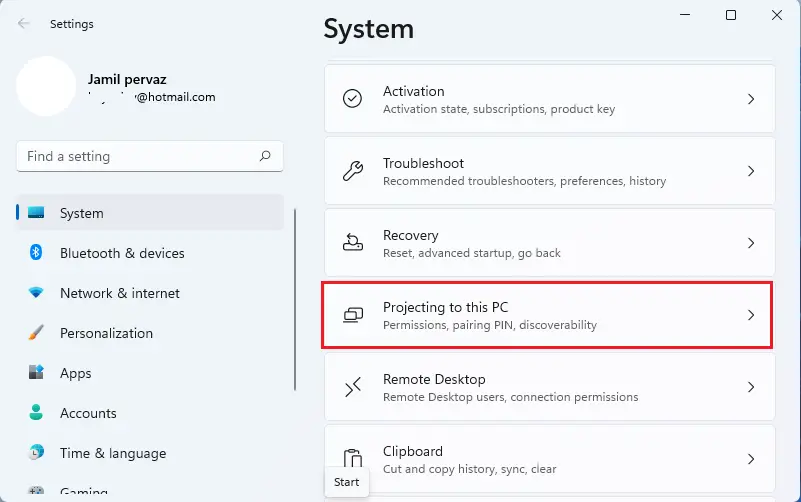
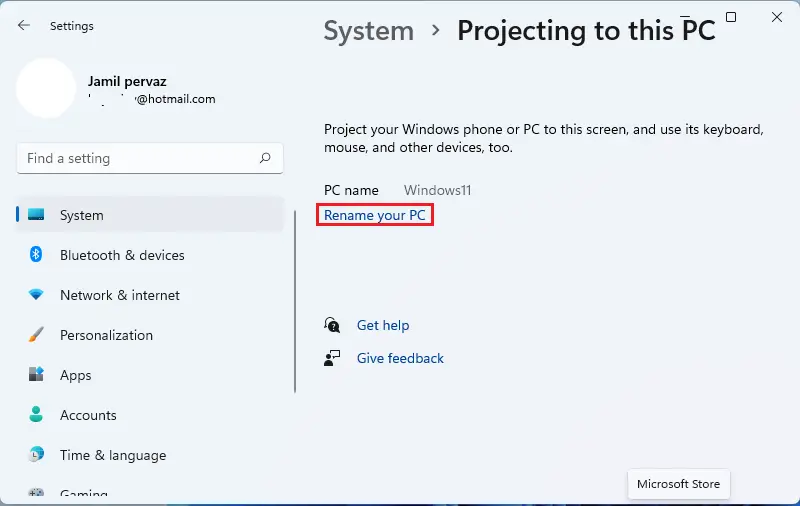
Or you can open the Windows settings app and then select projecting this PC.
Select rename your PC.
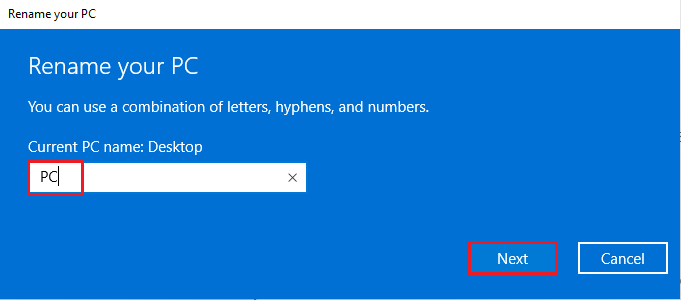
Enter a new computer name under the current PC name and then click Next.
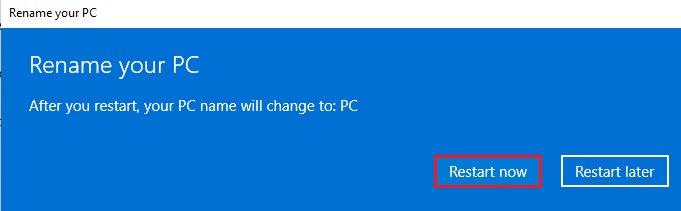
Select the Restart now button.
Change Computer Name using System Properties
We can also have the option to change our computer name from the properties.
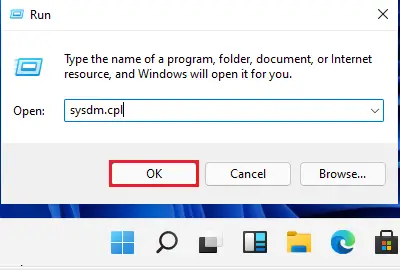
To change the computer name, hold the WINDOWS+R key to launch the run command, type sysdm.cpl, and then click ok.
The System Properties will open by default, Select the Change button.
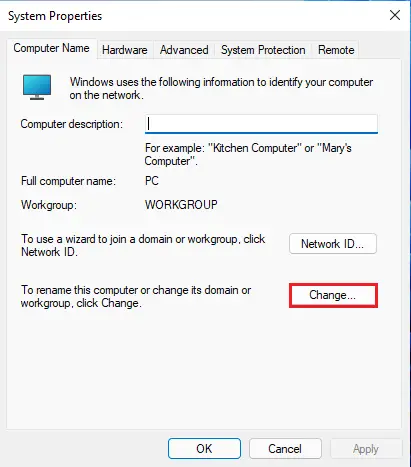
Under computer name/domain changes, type a new computer name and then select ok.
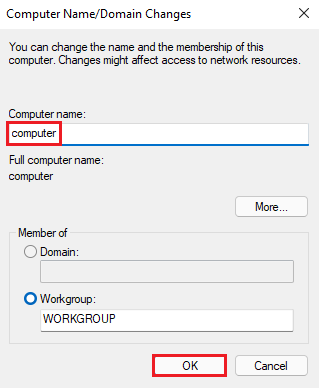
Click on ok.
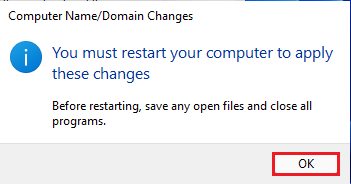
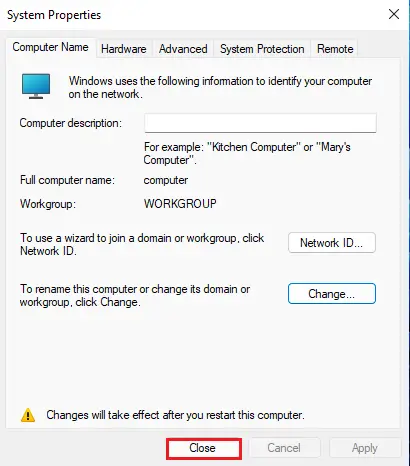
Click close.
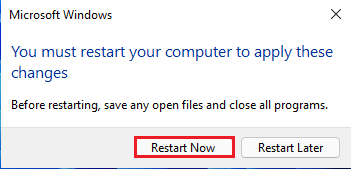
Make sure that you have saved files before restart.
Select Restart Now.
Change Computer Name using Command Prompt
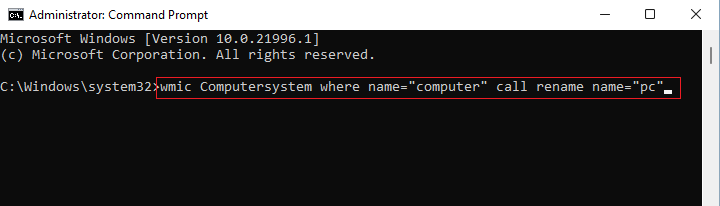
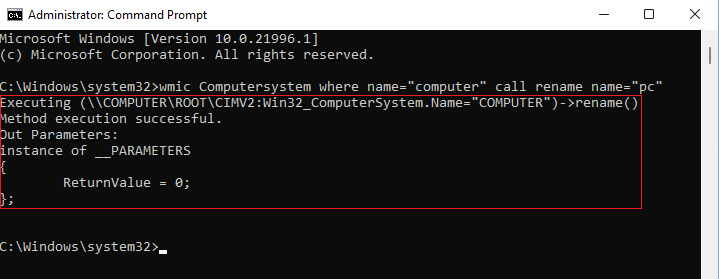
To rename your computer, run the command prompt as an administrator.
wmic computersystem where name=”Present Name” call rename name=”New Name”
In the command prompt window, switch the present Name with the current name and then New Name with the new name you wish, and then press enter.
Now close the Terminal and then restart the computer for the changes to reflect.
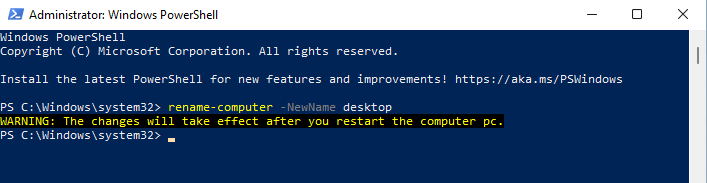
Change Computer Name via PowerShell Command
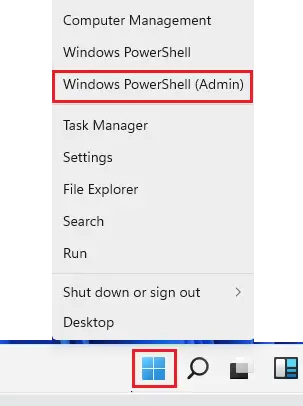
You can also change the system name with the Powershell command. Right-click on Windows 11 start button and then select Windows PowerShell (Admin).
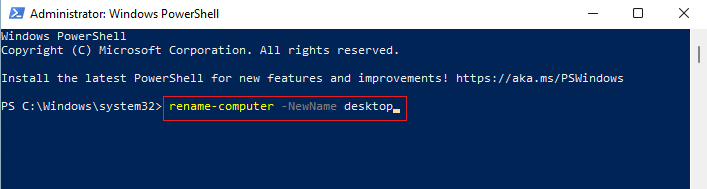
Enter the below PC rename command in the PowerShell window.
Rename-Computer -NewName “New Name”
Change ‘New Name’ with the new name for your PC, and then hit enter.
Warning: Restart the computer for the changes to come into effect. Close the PowerShell window and restart the system.