In this guide, you will learn how to create an IAM Role AWS Amazon. We can create a role for a service using the AWS Management Console. Because certain services support further than one service role. We can learn how to assign the essential trust & permissions policies to the role so that the service can suppose the role on your behalf. The process that we can use to control the permissions for the role can vary, according to on how the service determines the use cases, and whether or not you create a service linked role.
Create an IAM Role AWS
1- In the AWS Management Console select IAM.
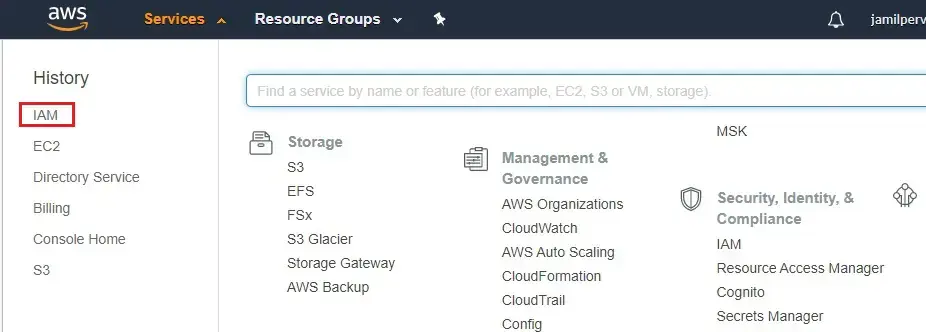
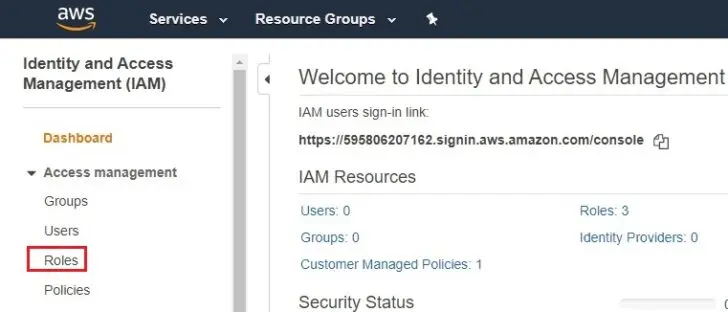
2- Select Roles under Access management.
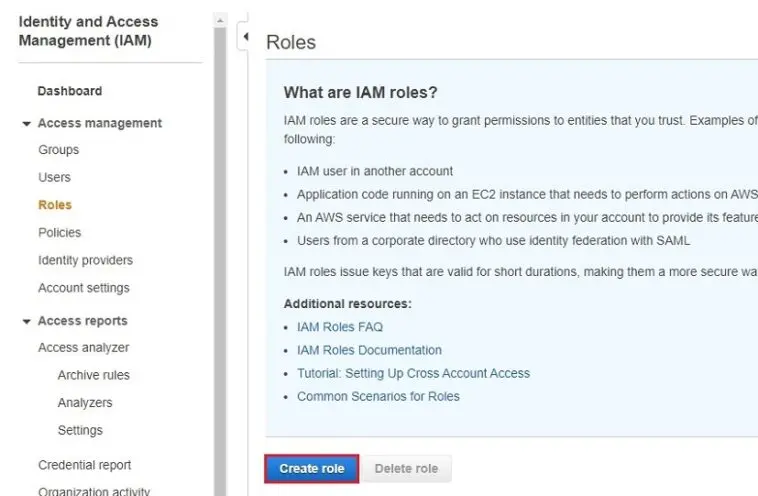
3- Select Create role.
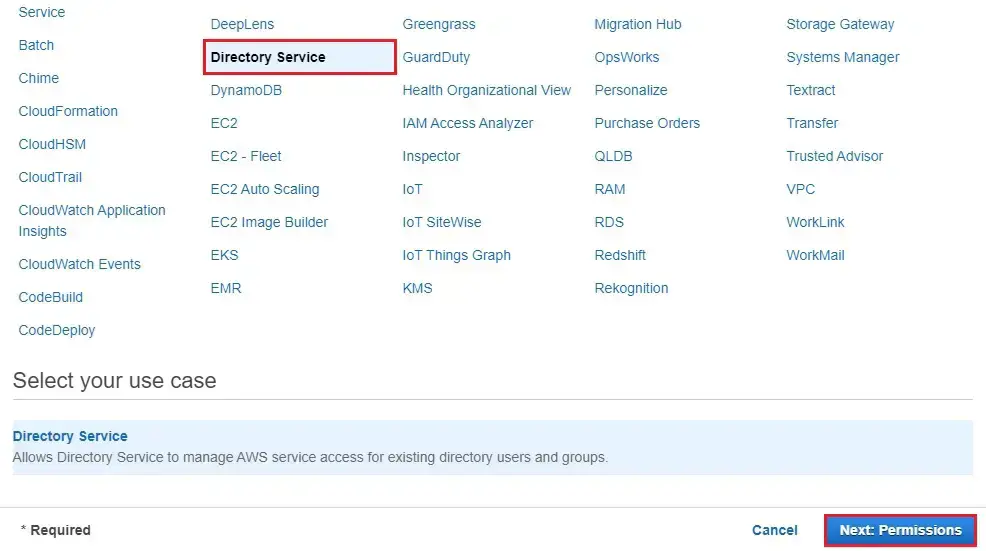
4- Select directory service and then click Next: Permissions.
5- Type EC2FULL, select (AmazonEC2FullAccess) and click Next: Tags.
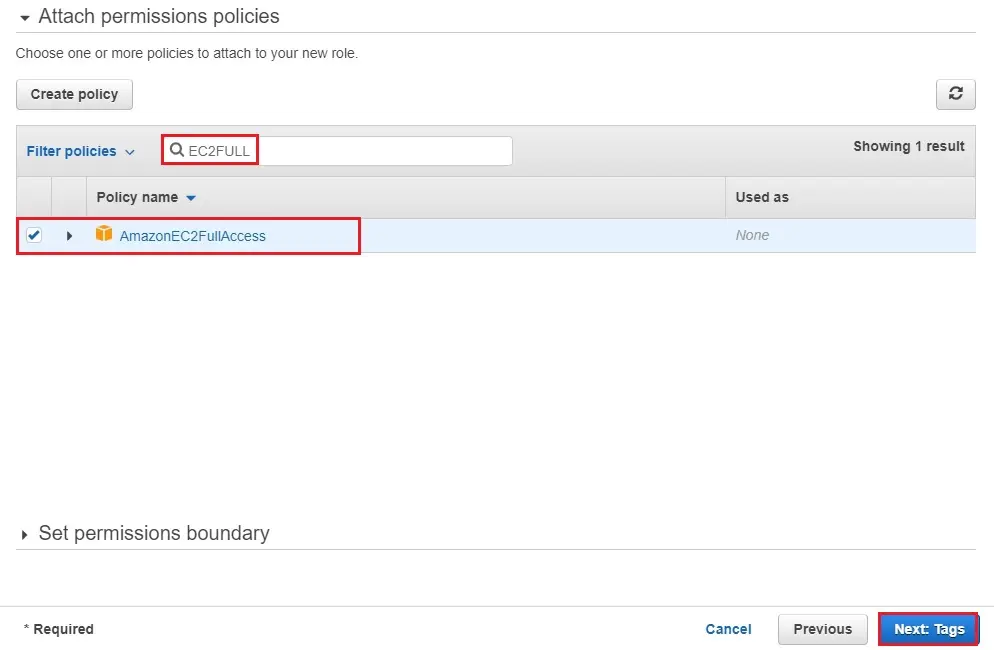
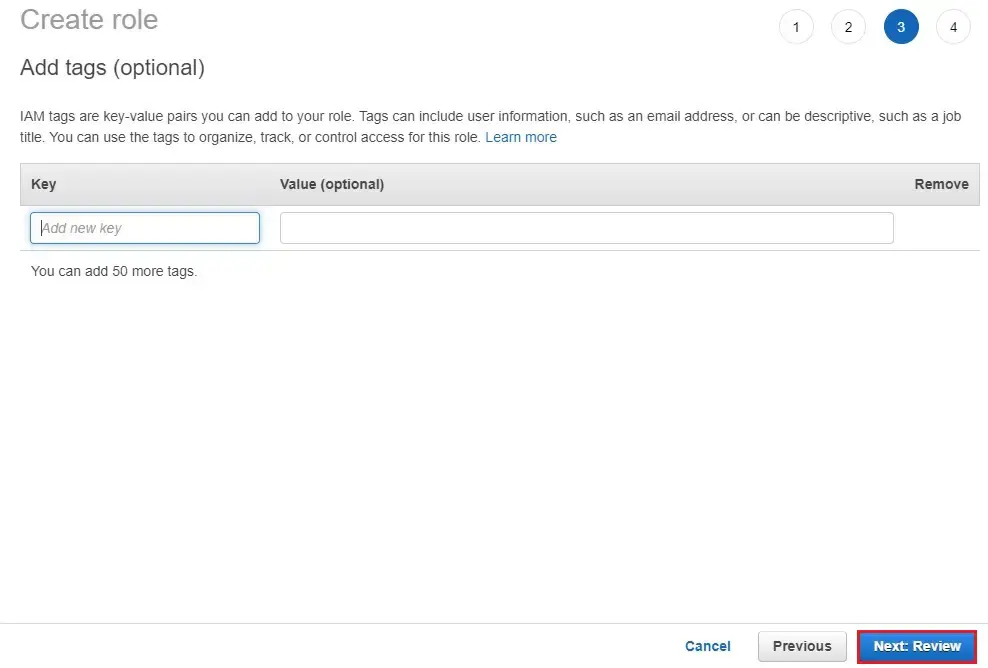
6- Add a tag if you need or click Next: Review.
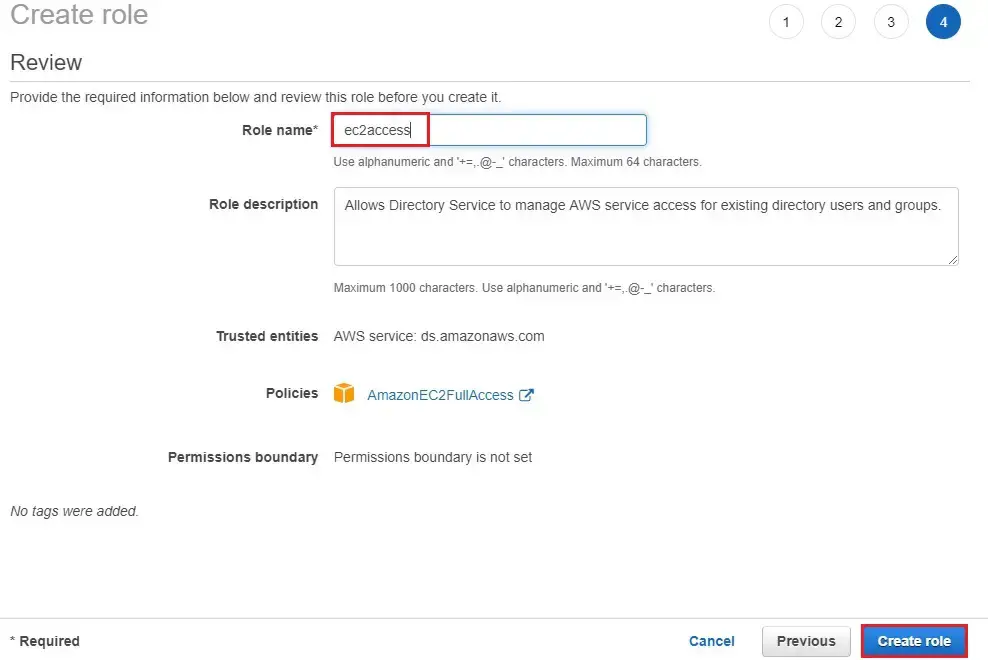
7- Type a role name (ec2access) and then click create role.
8- 1 Role has been successfully created, click on create role for another role.
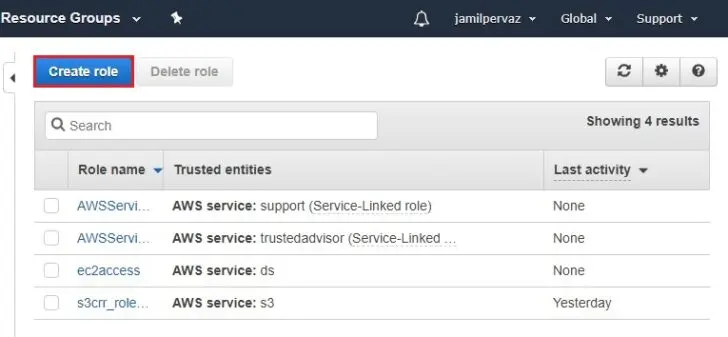
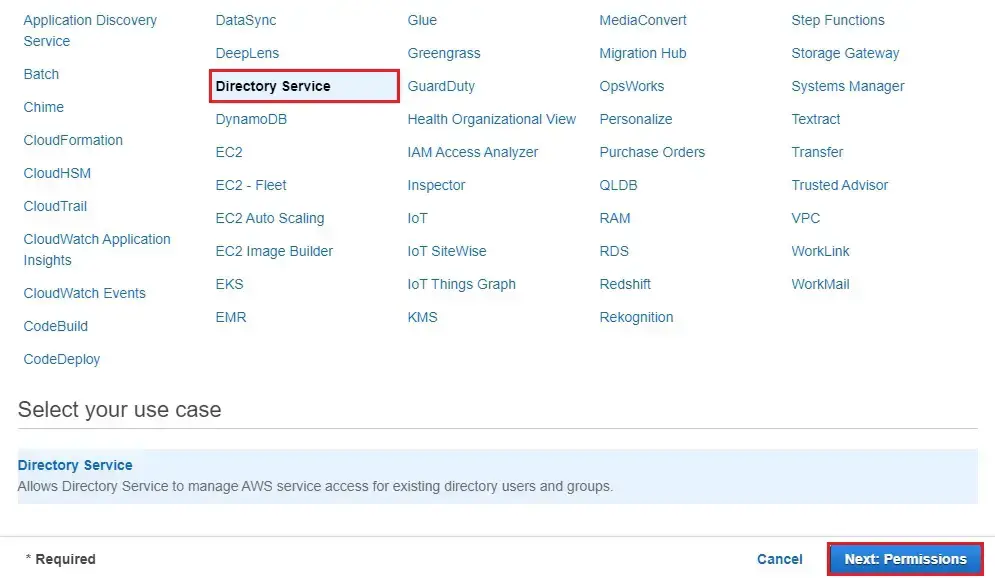
9- Select Directory service and then click Next: Permissions.
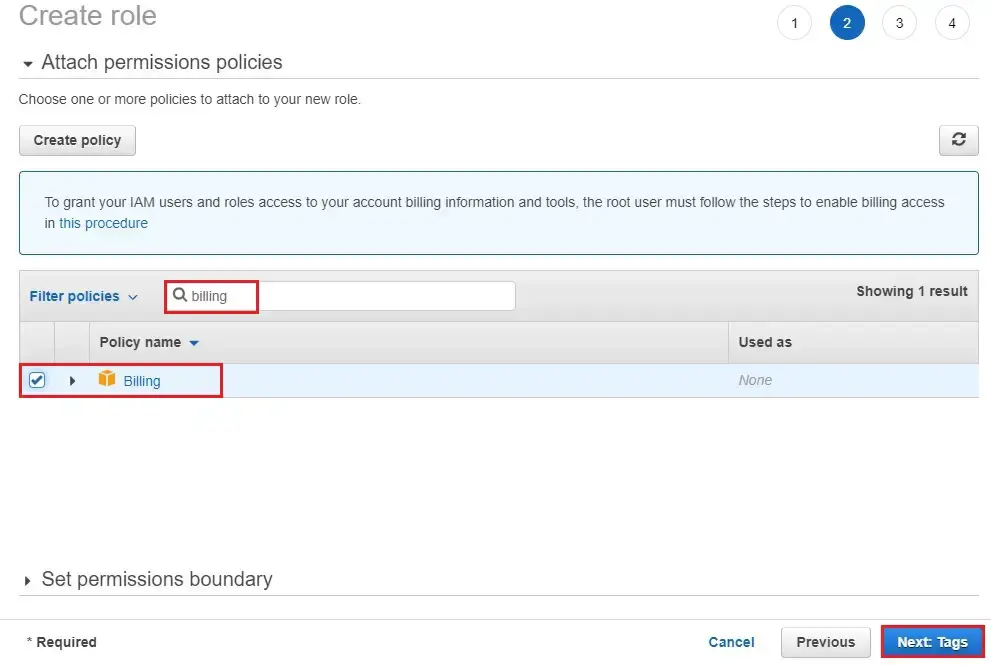
10- Type billing in search bar, select Billing and then click Next: Tags.
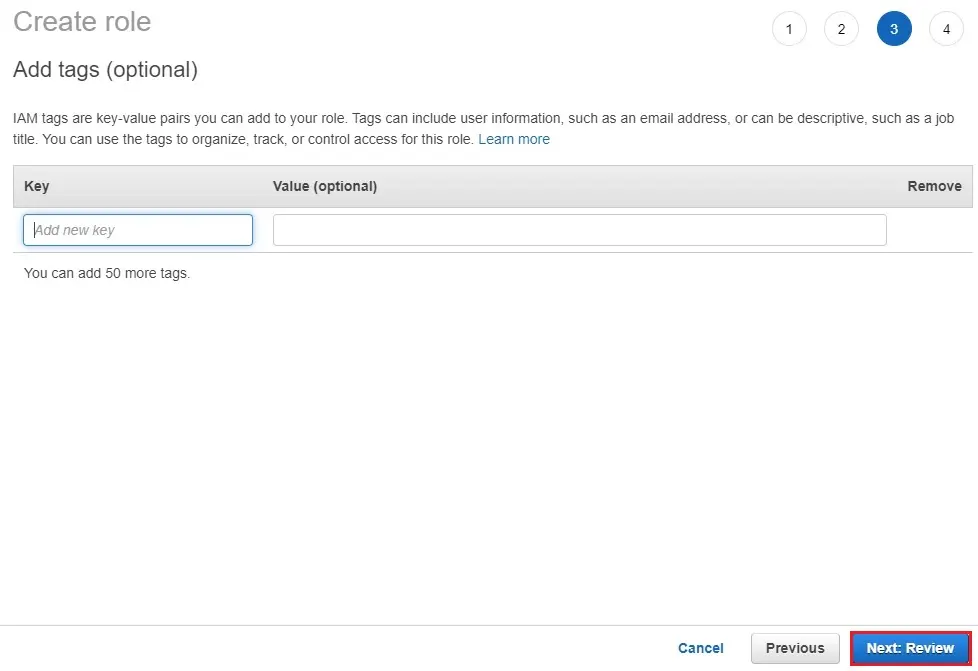
11- Click Next: Review.
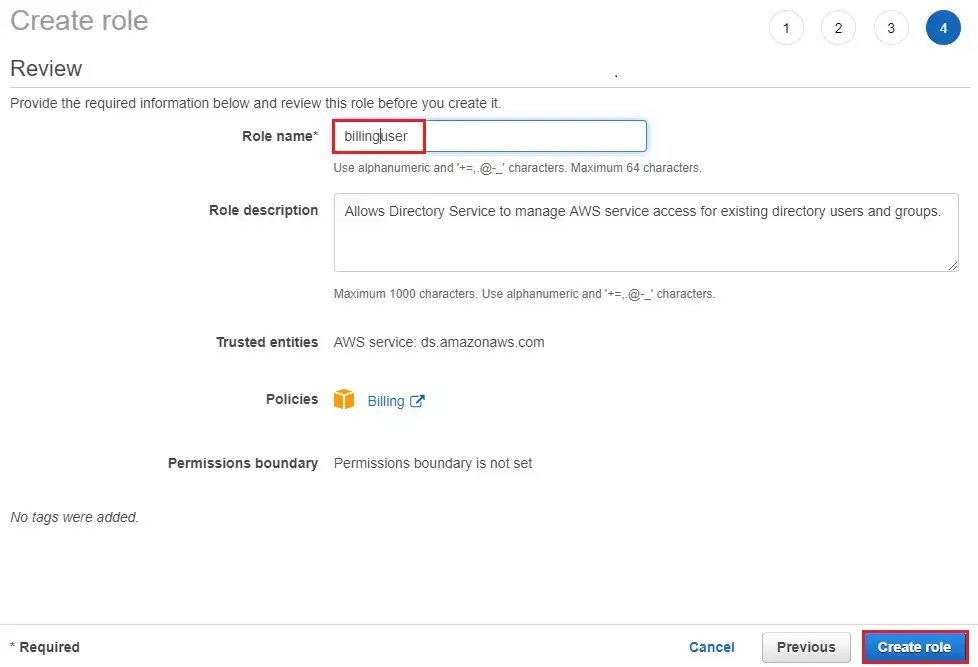
12- Type a role name (billinguser) and then click create role.
For more details visit AWS


