In this article, I will show you how to configure directory services in AWS. AWS Directory Service improvement several ways to use Microsoft Active Directory (AD) with other AWS services. Directories stock information about groups, users, and devices, and administrators use them to handle access to information and resources. AWS Directory Service provides several directory choices for customers who need to use existing Microsoft AD or Lightweight Directory Access Protocol (LDAP) aware applications in the cloud. AWS also offers those equal options to developers who want a directory to manage devices, users, groups, and access.
Configure Directory Services in AWS
For more details please visit AWS
Create EC2 Instance in AWS
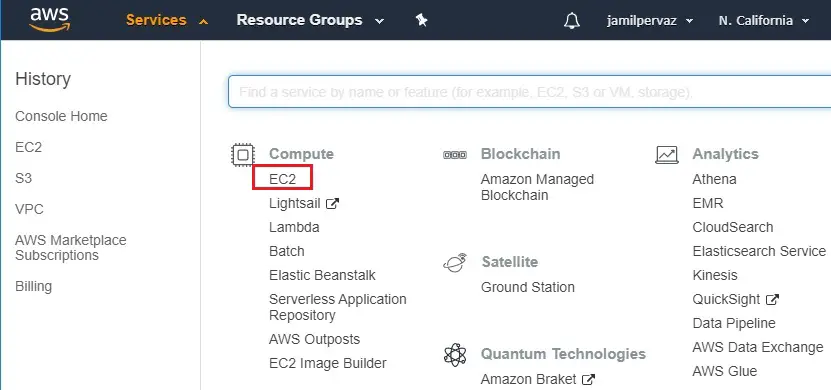
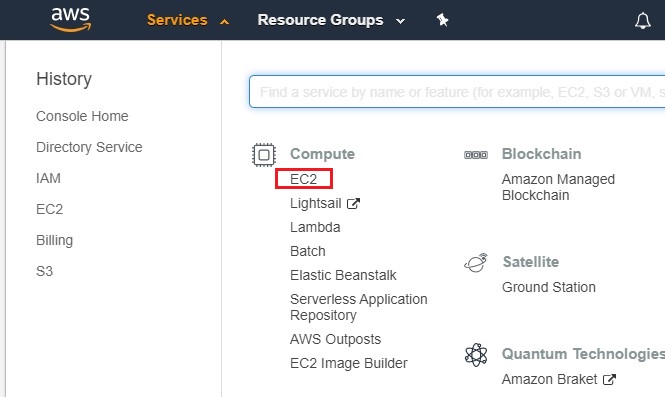
1- Log in to the AWS account and then go to the AWS Services tab at the top left corner. Click on EC2 under compute.
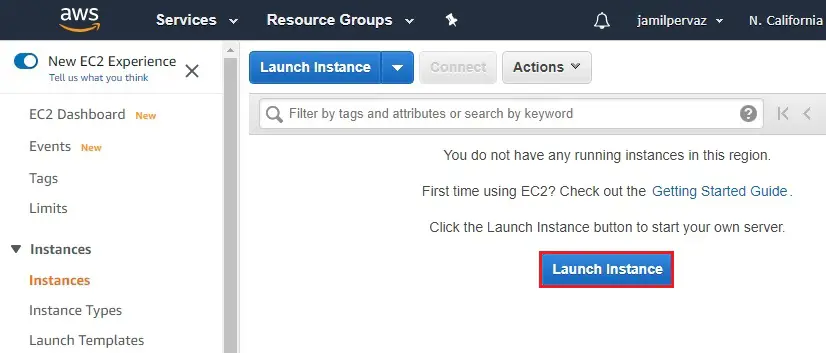
2- Choose instance on the left side and then select Launch Instance button.
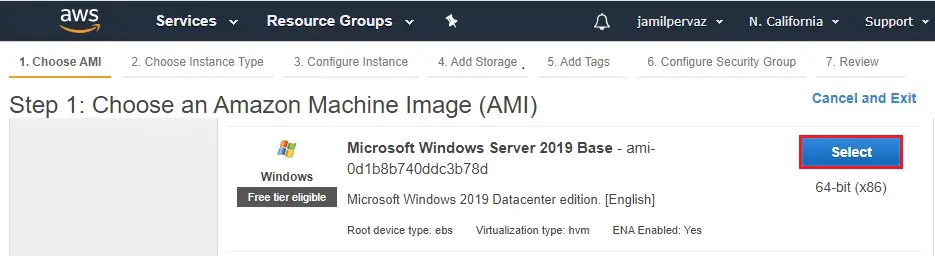
3- Choose the default Amazon (64 bit) AMI.
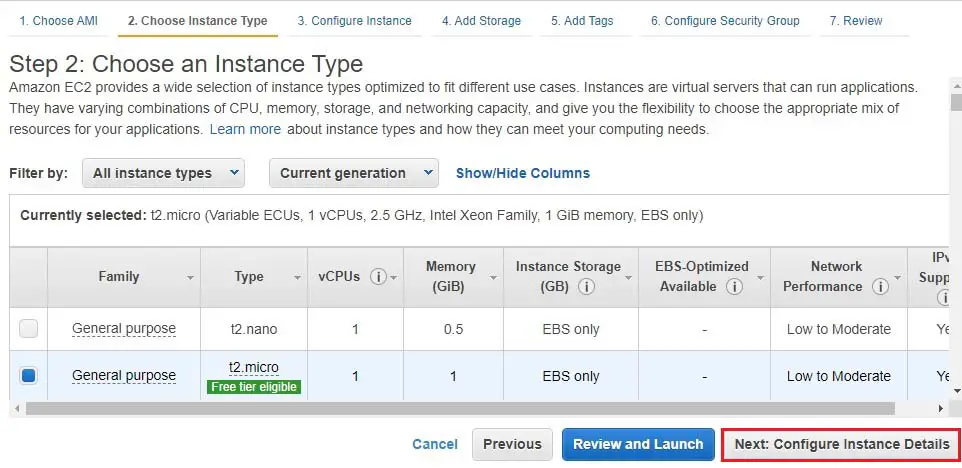
4- Choose the type of instance.
Click Next : Configure Instance details
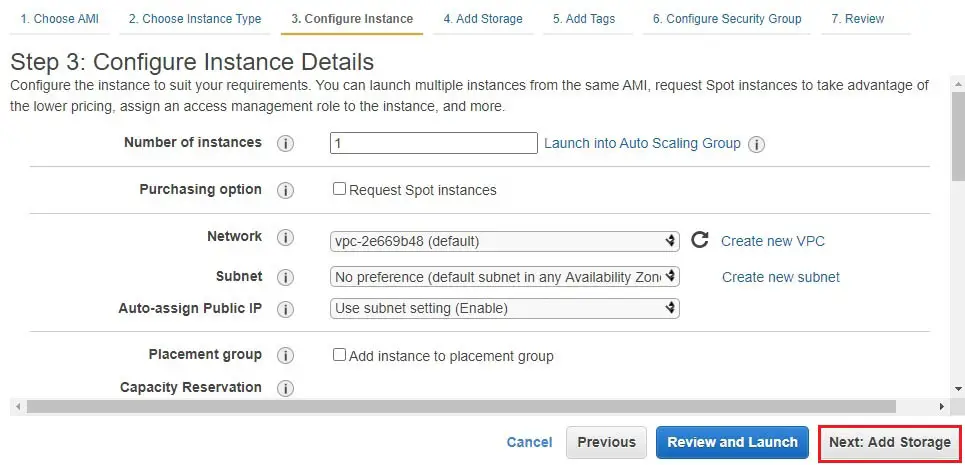
5- Instance Details
Type Number of instances – 1
Network – default.
Subnets – default.
Auto-assign Public IP – default
Click on Next : Add Storage.
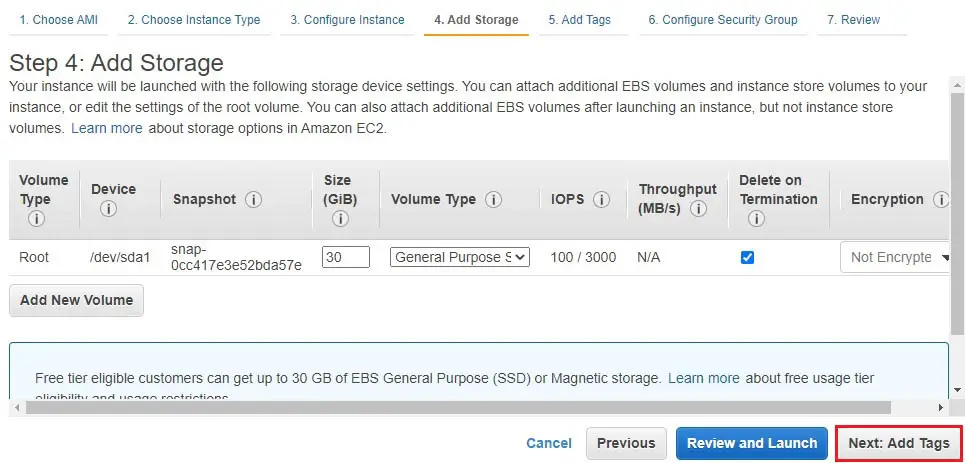
6- Volume size – default 30Gb.
Click Next : Add Tags.
Click on Next : Configure Security Groups
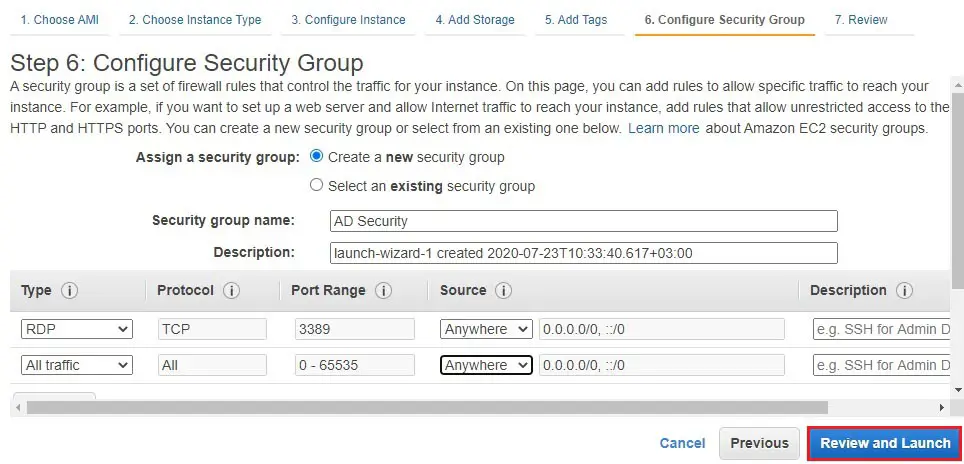
7- Configure Security Group.
Security group name – AD Security
Select Protocols – RDP, All traffic, Source type Anywhere
Click on Review and Launch
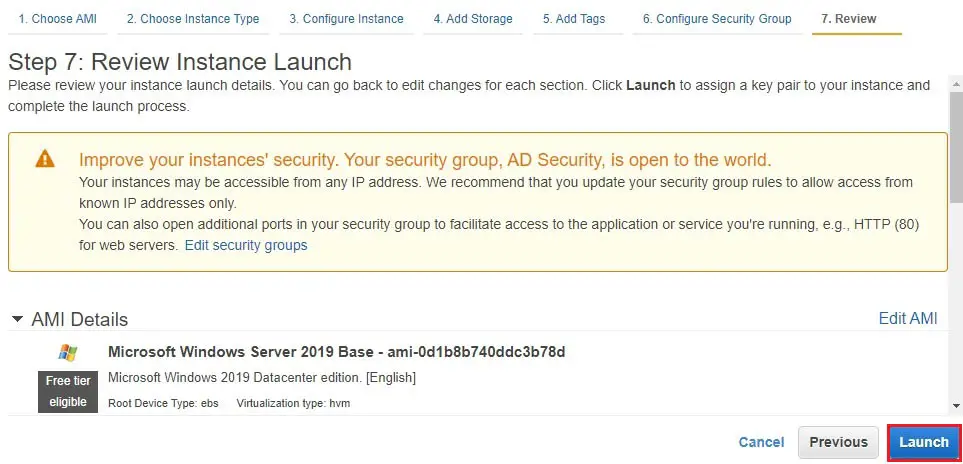
8- Click launch.
9- Select – Create a new key pair
Key pair name – active directory key
Choose download key pair and then save it in your secured folder
After downloading key pair click launch instance.

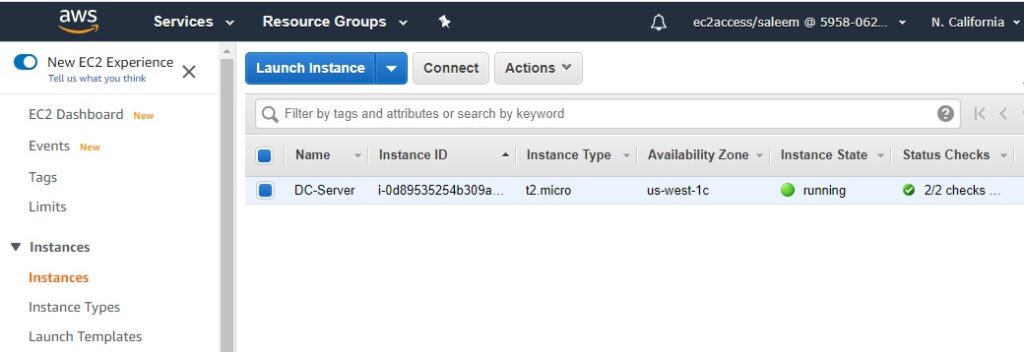
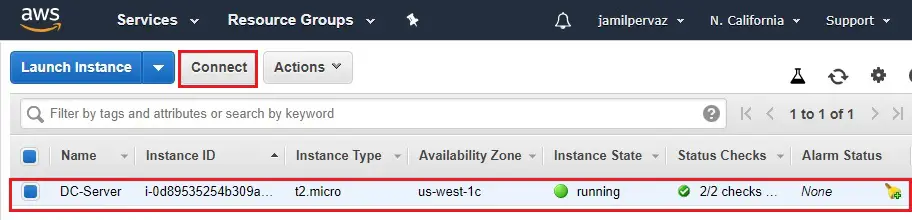
10- After instance is up and running, you can see its status as running
Select instance (DC-Server) and then click connect.
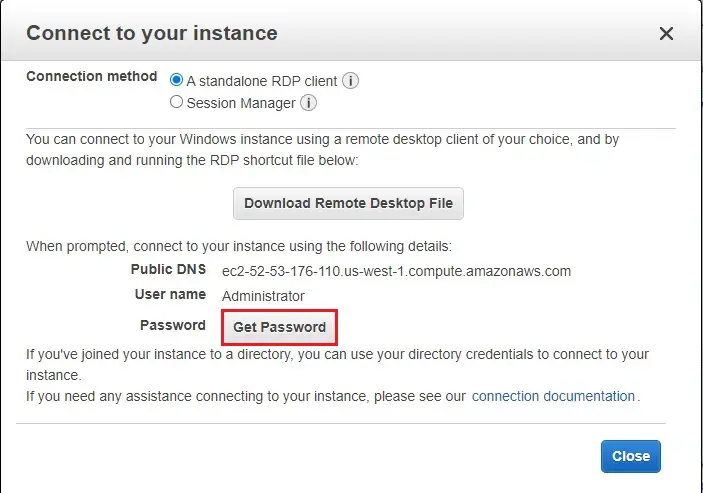
11- Click on get password.
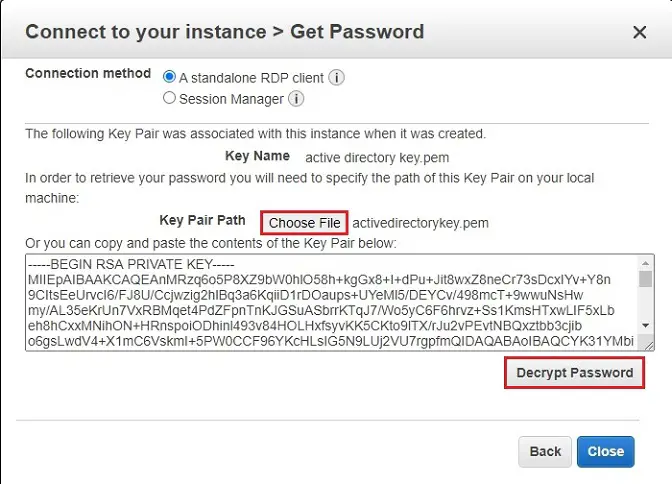
12- Click choose file button.
Select your key pair (active directory key) and then click ok.
Click Decrypt password.
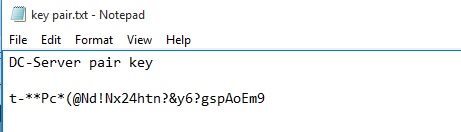
13- Copy password and then select download remote desktop file.
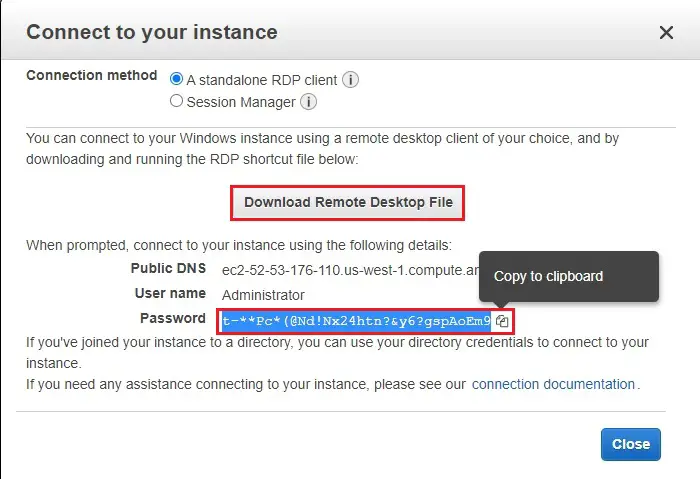
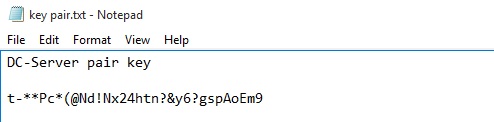
14- Open notepad and paste your password in notepad.
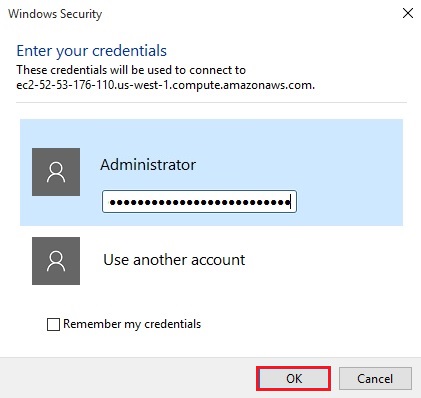
15- Open remote desktop key and then click connect.
Paste password and then click ok.
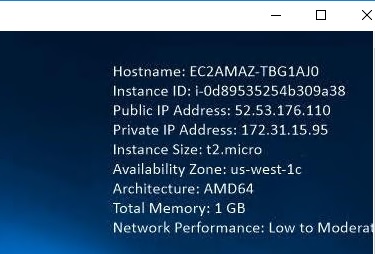
16- EC2 Instance (AD-Server desktop).
How to change administrator account password in EC2 Instance in AWS
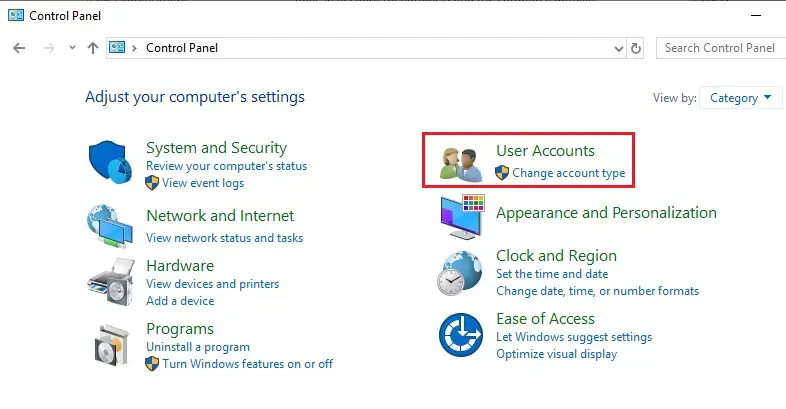
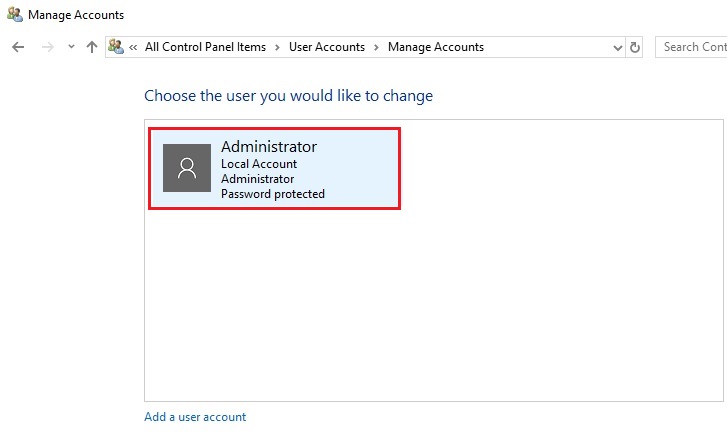
1- Open control panel and select User Accounts.
2- Select Administrator local account.
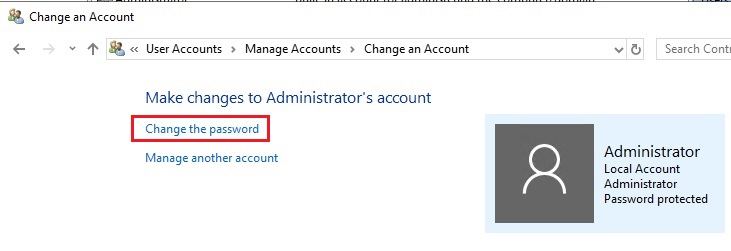
3- Click on change the password.
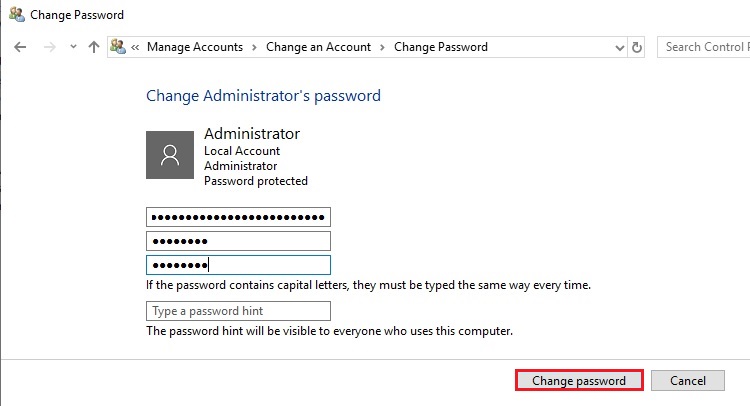
4- Copy your EC2 instance password then one we have saved in notepad.
5- Paste here, type new password, confirm password and click change password
Save new password in notepad.
How to change computer name in EC2 Instance in AWS
1- Open server manager, select local server and then computer name.

2- Click on change.

3- Type computer name and then click ok.
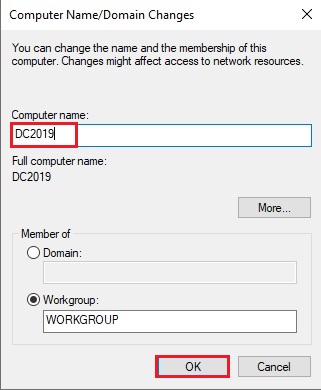
4- Click ok
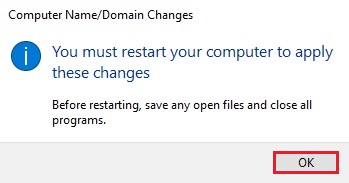
5- Select restart now.
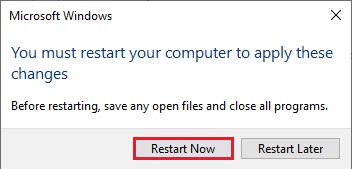
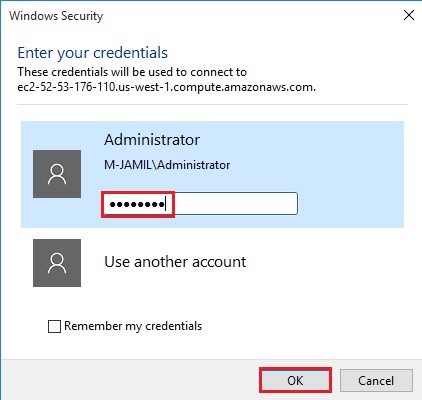
6- After restarting, connect EC2 instance (DC-Server) again and now you can use your new password to connect.
How to install Active Directory in AWS Instance
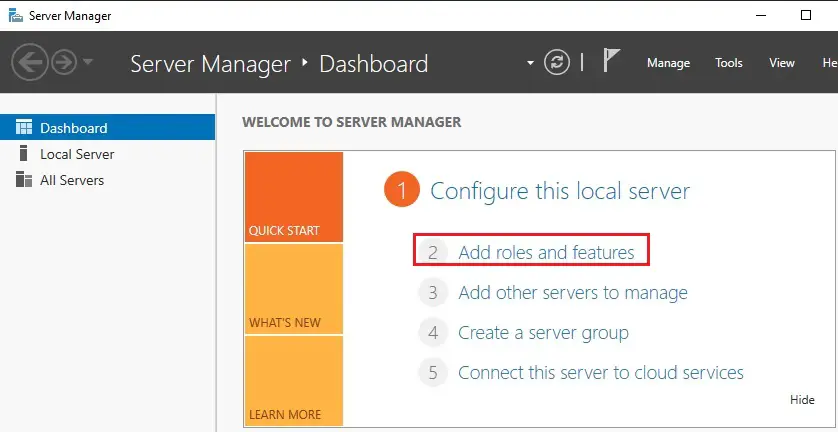
1- From Server Manager Dashboard, Select Manage and Select Add Roles and Features.
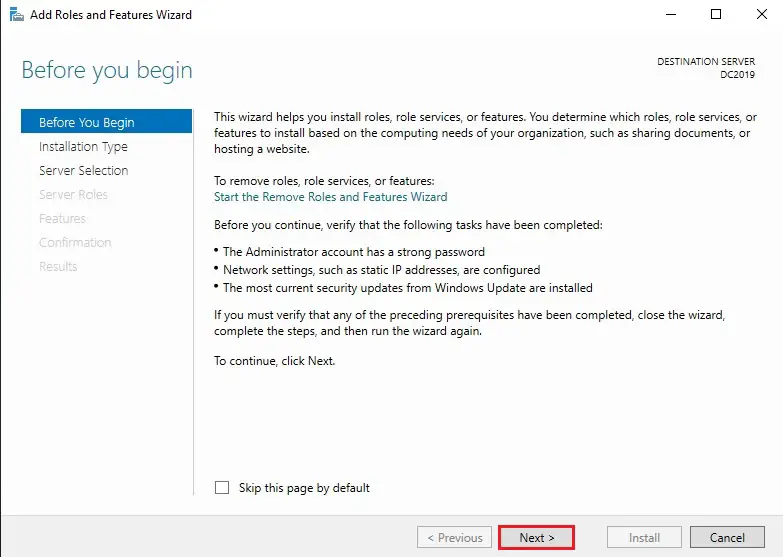
2- Click Next.
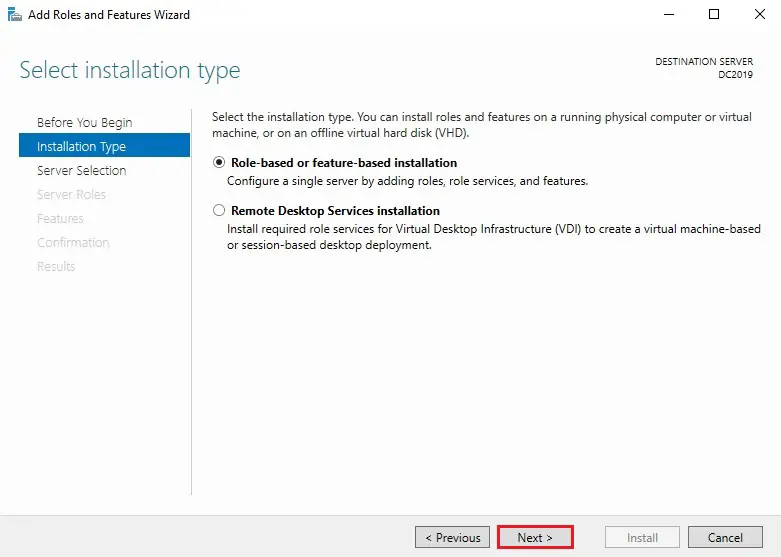
3- Select Role-based …….. installation and then Click Next.
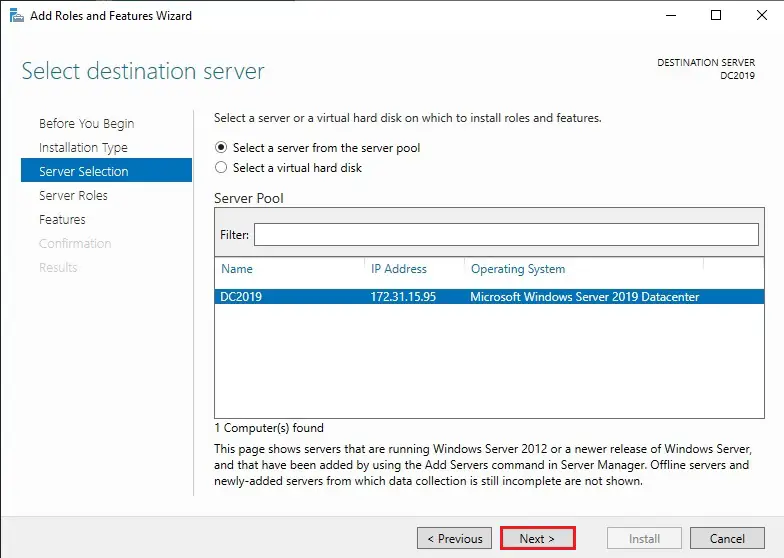
4- Select a server from the server pool on which you want to configure active directory and then Click Next.
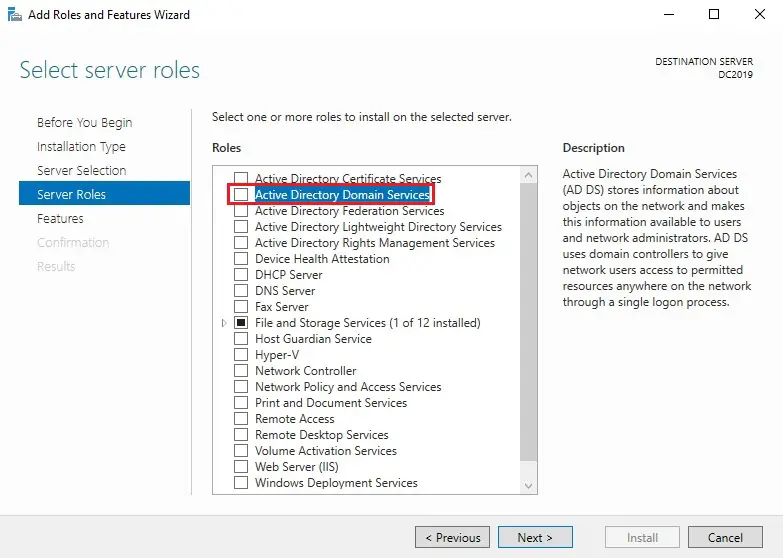
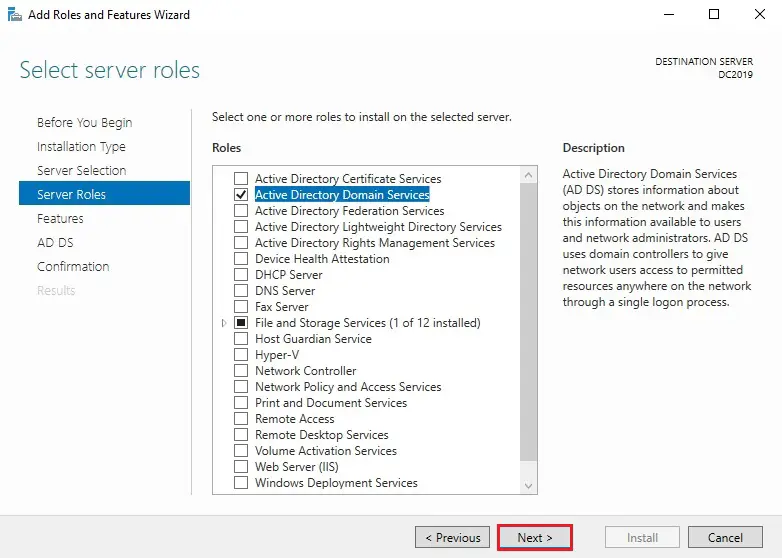
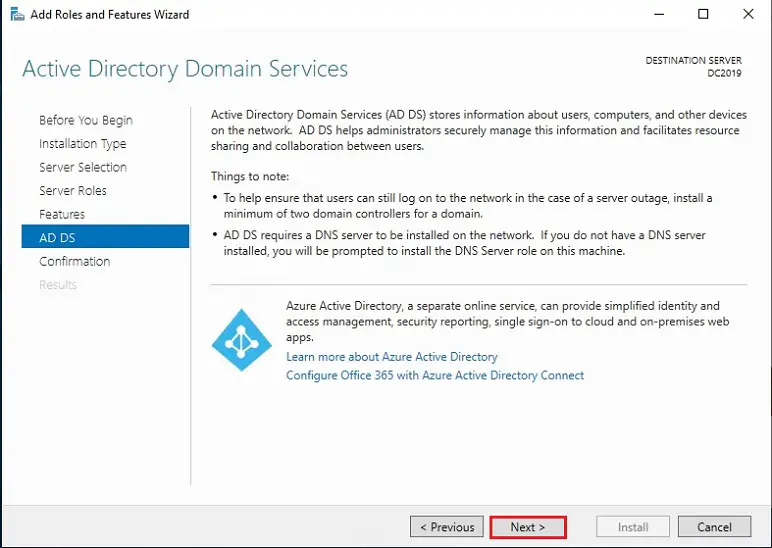
5- Select Active Directory Domain Services from server roles page.
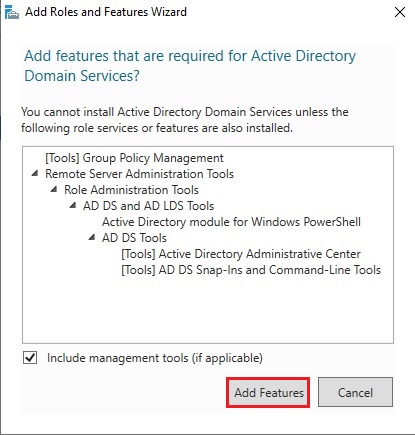
6- A Windows will popup showing additional required features, Click Add Features.
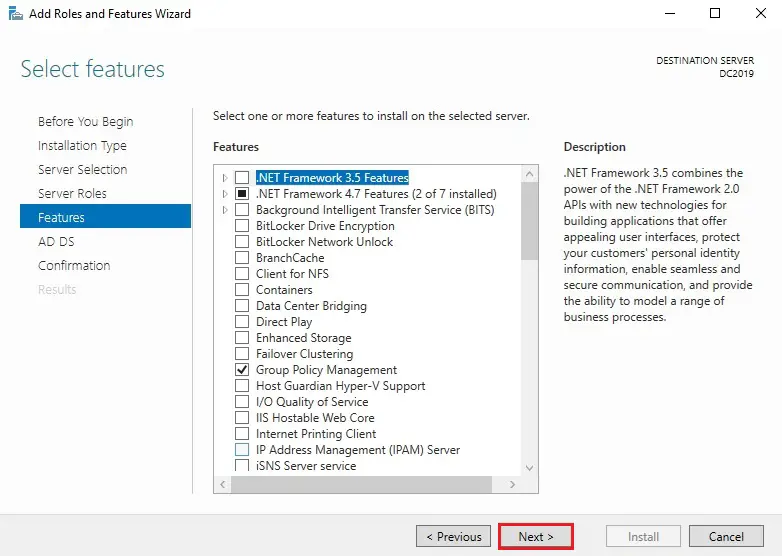
7- Click Next.
8- Click Next.
9- Click Next.
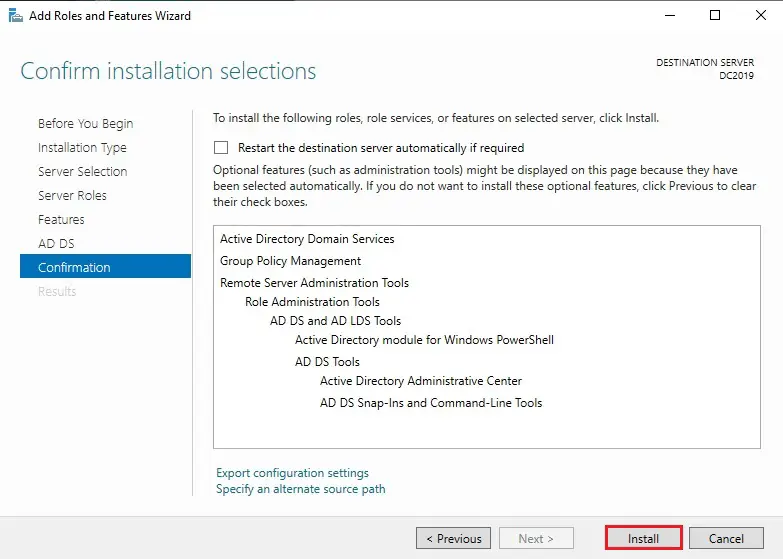
11- Review the installation and then Click Install.
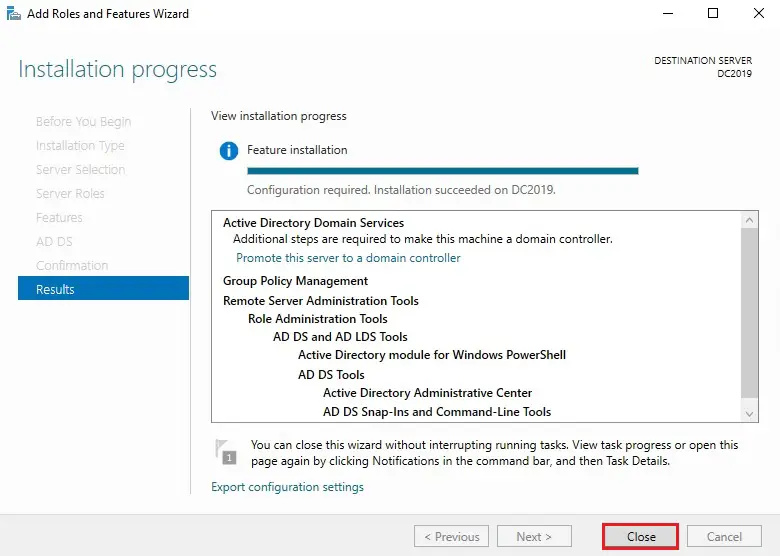
12- Installation completed, Click Close.
How to Configuring Active Directory.
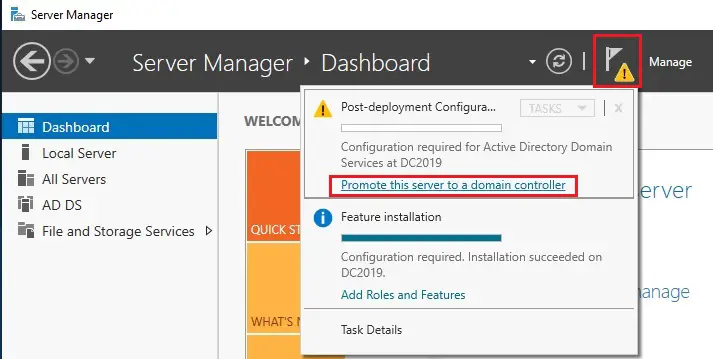
1- From Server Manager Click on Notifications, click Promote this server to a domain controller.
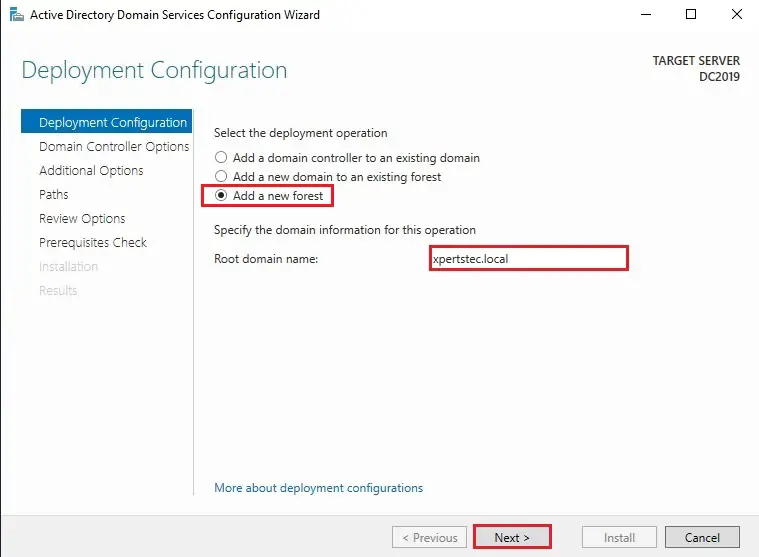
2- Under the deployment operation Select Add a new forest enters Root domain name (xpertstec.local) and then Click Next.
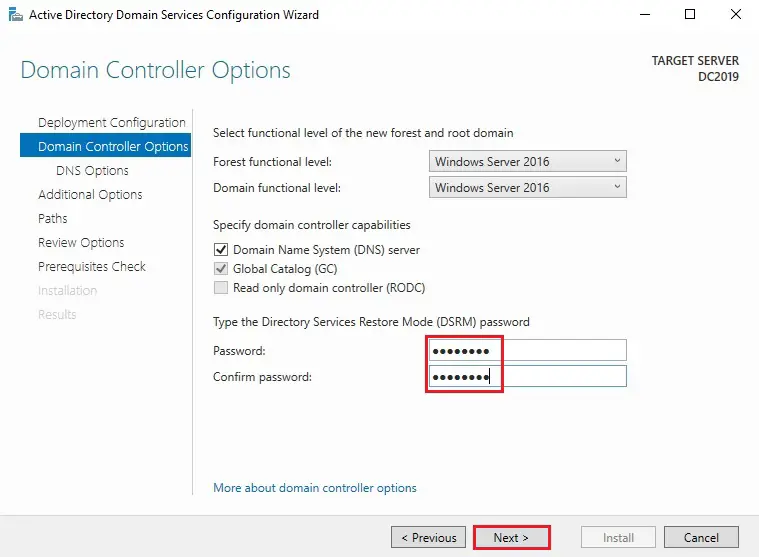
3- Keep Domain Name System (DNS) server and Global Catalog (GC) checked and then type the directory services restore mode (DSRM) password, Click Next.
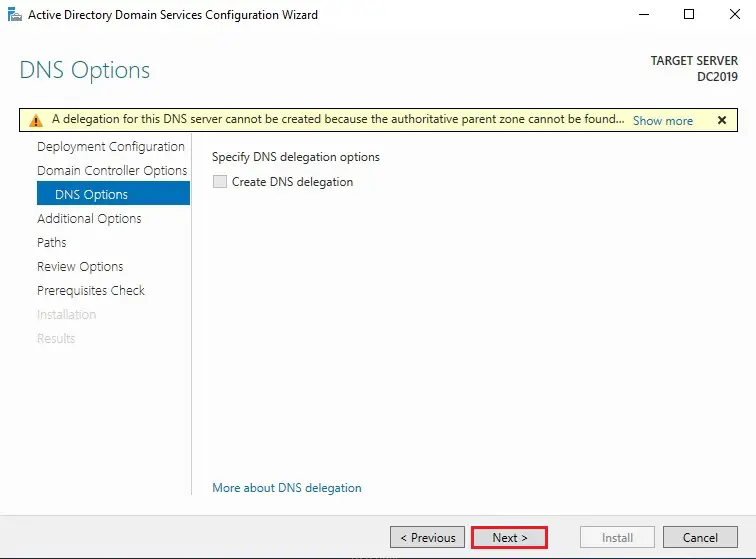
4- Ignore warnings “DNS options” window and Click Next.
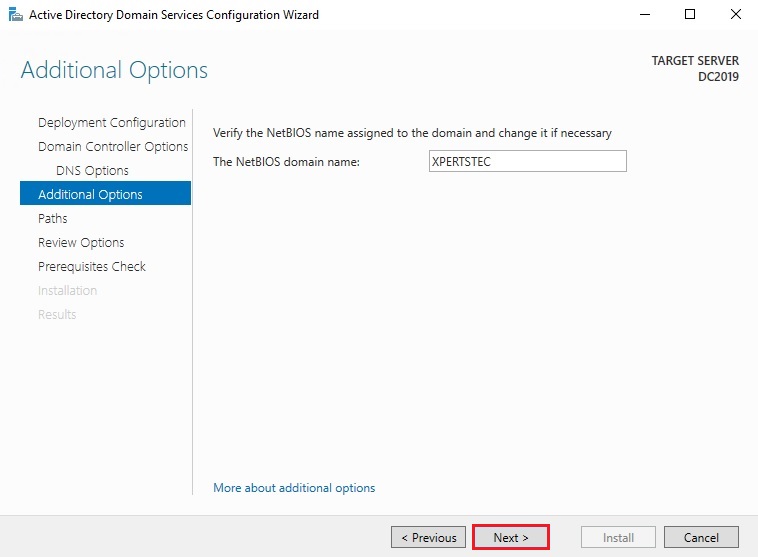
5- In additional options window, verify the NetBIOS domain name and Click Next.
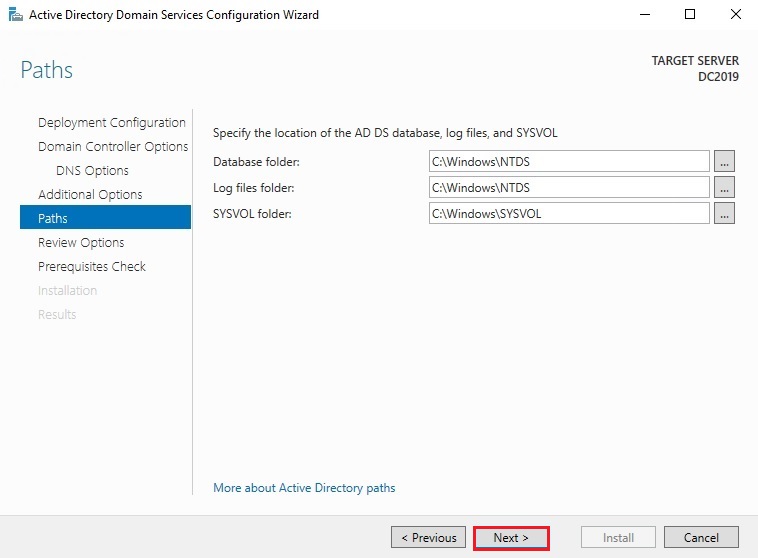
6- Specify the location of the AD DS database, log files, and SYSVOL folders and Click Next.
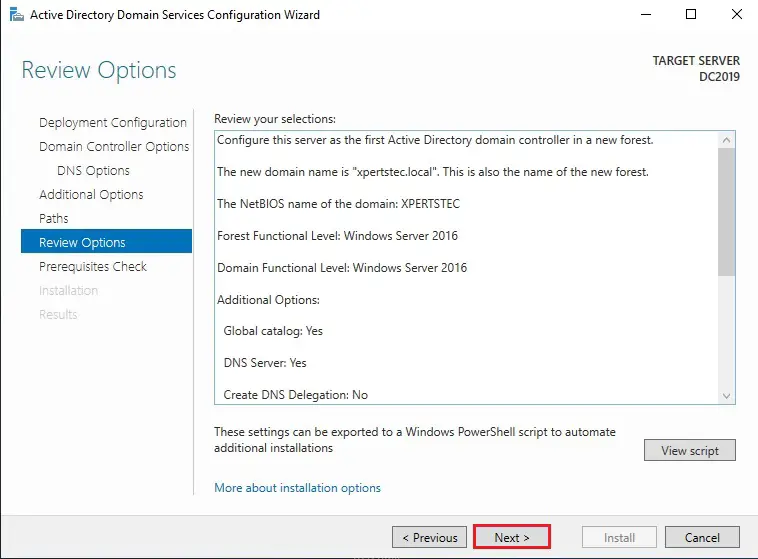
7- Review options window and then click Next.
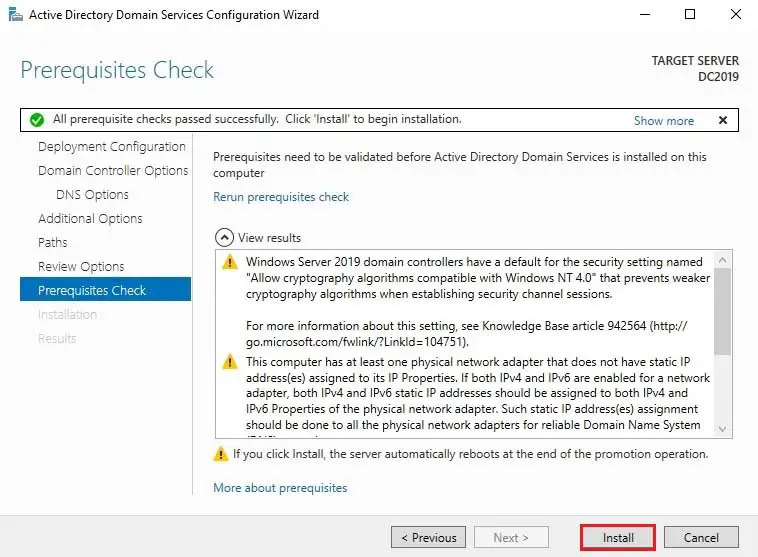
8- When all prerequisite have been successfully passed and Click Install.
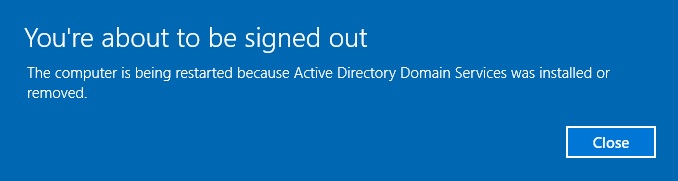
9- You will be prompted that your machine successfully configured as a domain controller and will be rebooted automatically.
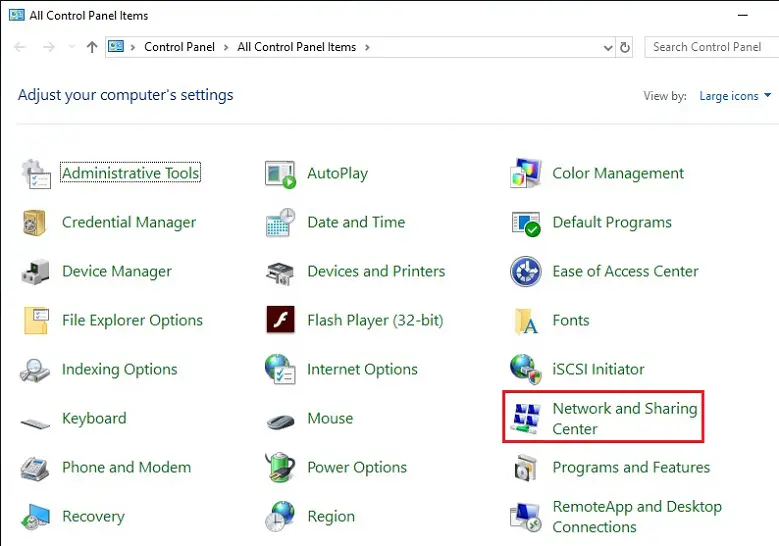
How to Change DNS IP in EC2 Instance in AWS
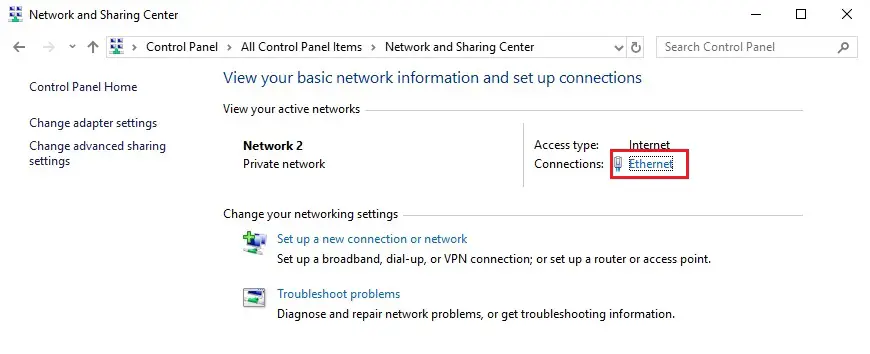
1- Launch control panel and then choose network and sharing center.
2- Click on Ethernet
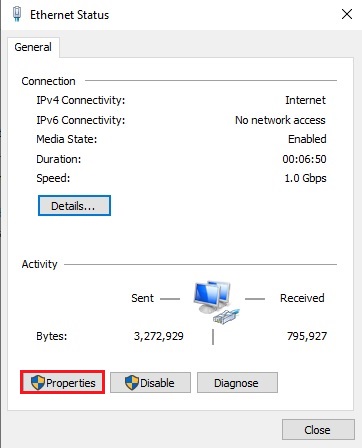
3- Select properties.
4- Choose internet protocol version 4 and then choose properties.
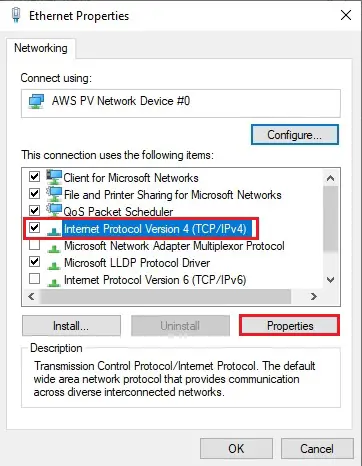
5- Type your EC2 Instance private IP Address under preferred DNS server and click ok twice.

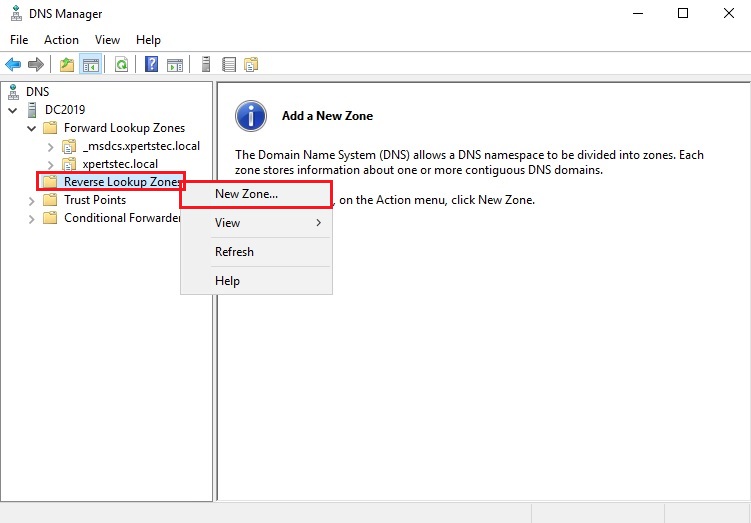
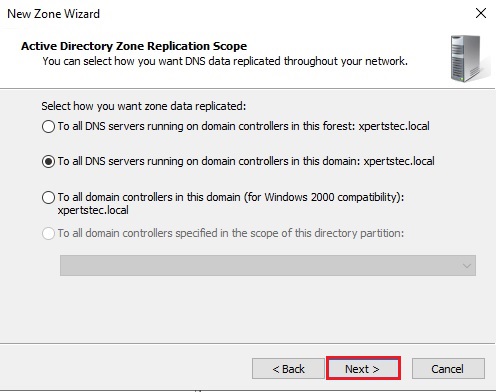
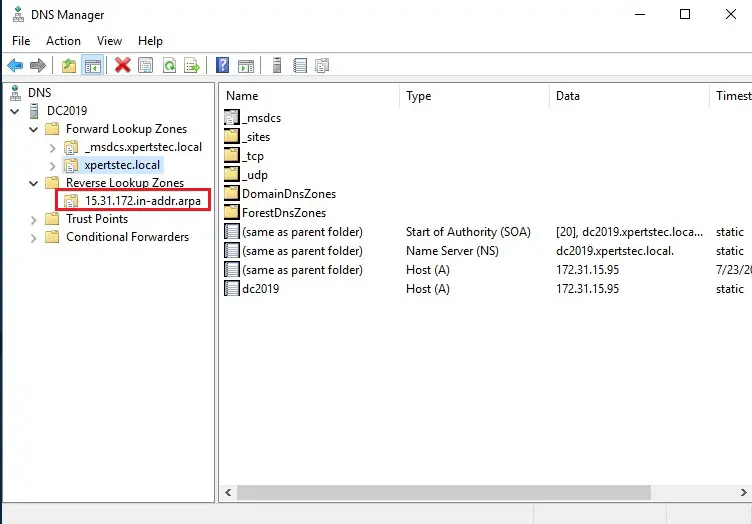
Add Reverse Lookup Zone in Windows Server 2019 NDS step by step
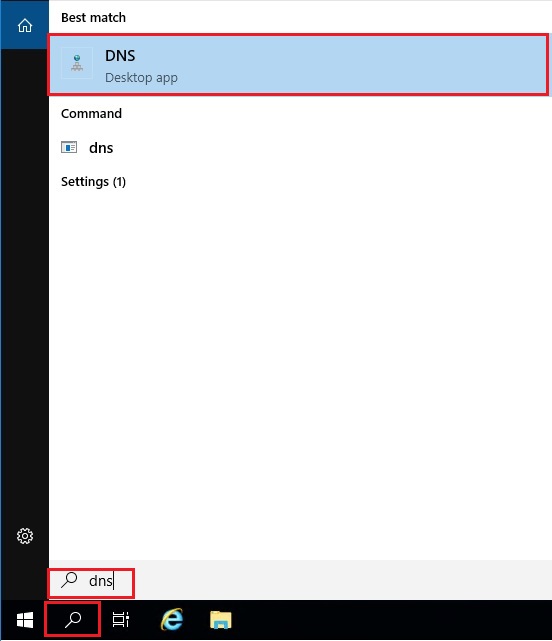
1- In window server search bar type DNS and select it.
2- Expand you DNS server (DC2019)
Right-click on reverse lookup zone option and then select New Zone.
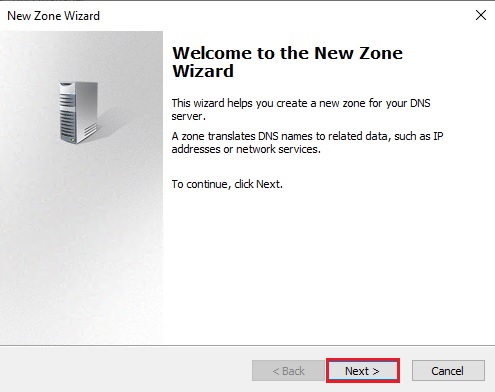
3- Click Next.
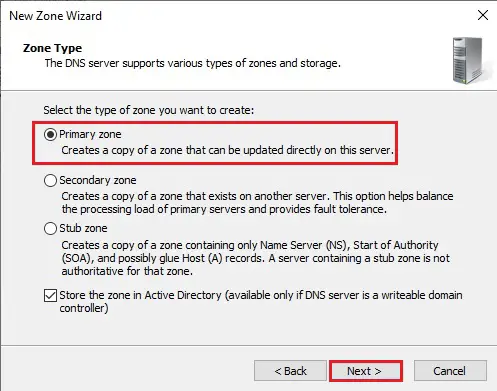
4- Select primary zone and click Next.
5- Click Next.
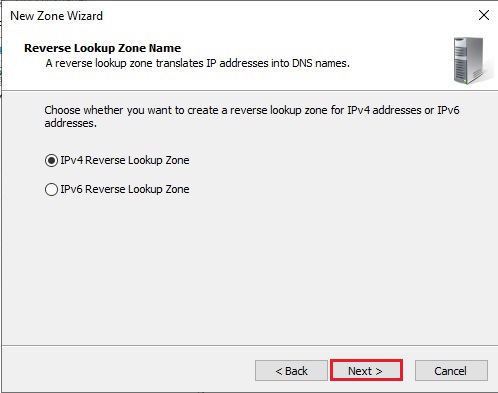
6- Select IPv4 Reverse Lookup Zone and click next.
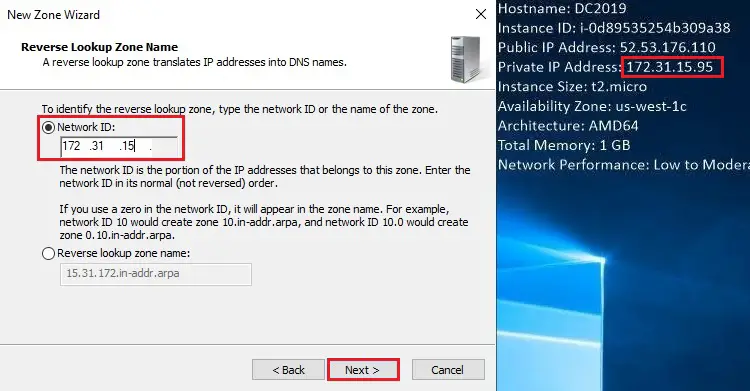
7- Enter Network ID
Here we need to enter our EC2 Instance private IP address and click next.
8- Click next
9- Click finish.

10- Reverse lookup zone successful created.
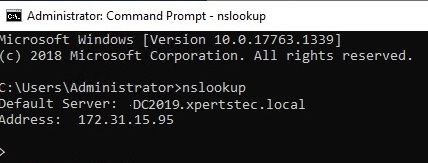
11- Open command prompt and then type nslookup.
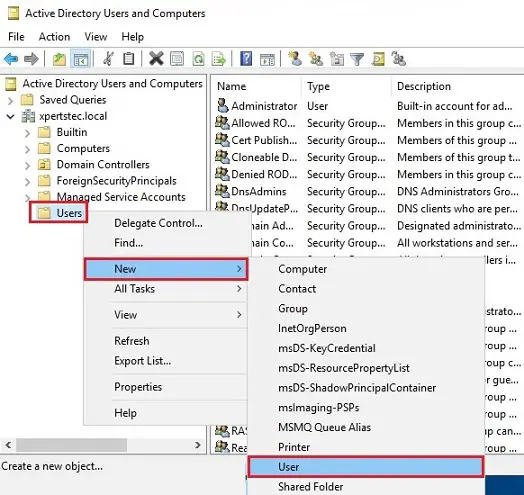
Creating new Users with Active Directory Users and Computer
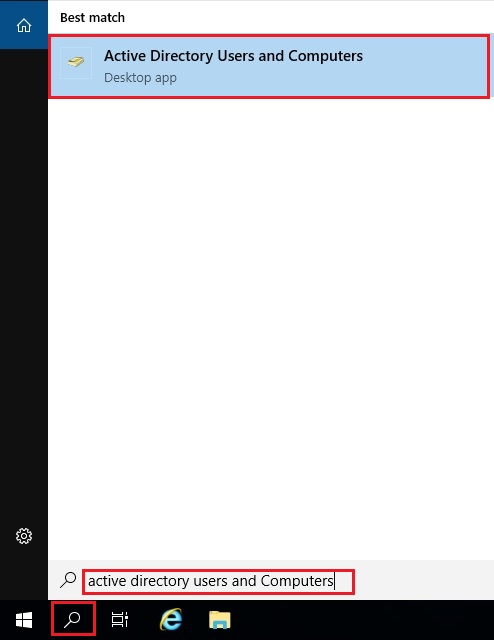
1- Launch Server Manager choose tools and then choose Active Directory Users and Computers.
Or type Active directory users and computers in search bar and then select it
2- Expand your domain
Right-click on Users, choose New, and then User from the menu.
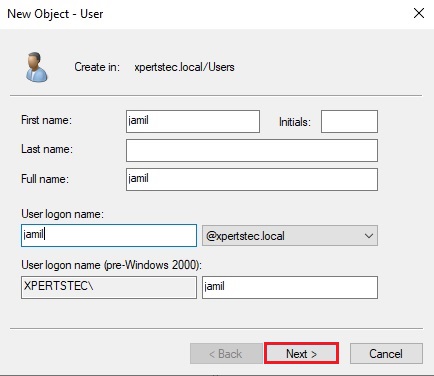
3- In the New Object – User dialog, type a First name, Last name, User logon name and then click Next.
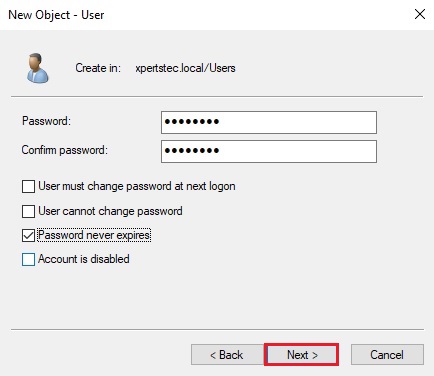
4- Type and confirm a password, then click Next.
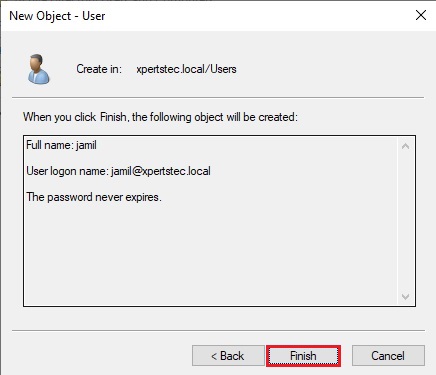
5- Click Finish.
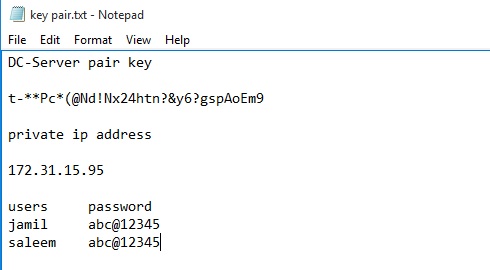
6- Please follow the above step from 2 to 6 to create a second user
And type user users name and password in notepad
How to Create Directory Services
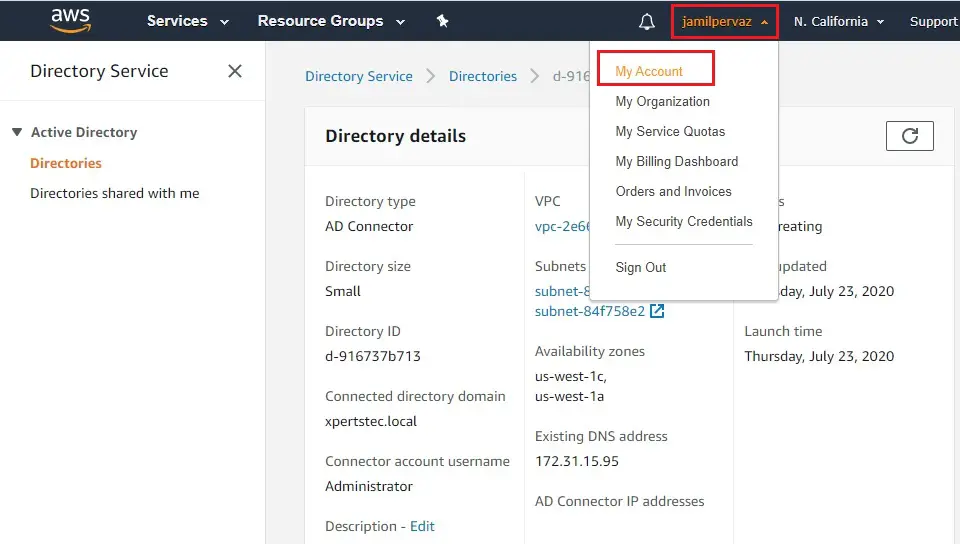
How to Allow AWS IAM users Access to Billing Dashboard
1- Select your account name and then select My Billing Dashboard
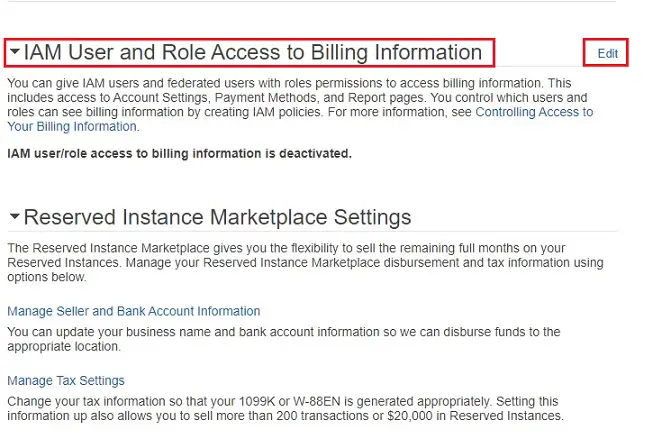
2- IAM user and allow Billing access to billing information click on Edit.
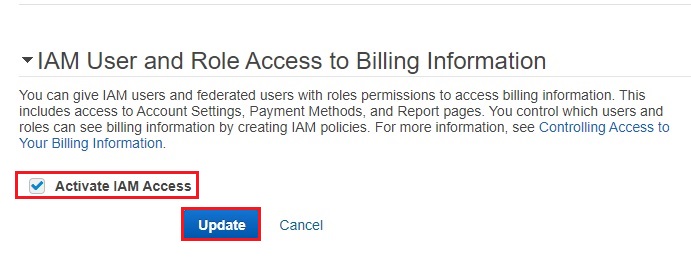
3- Select checkbox active IAM access and then click on Update.
How to Create an IAM Role AWS Amazon
How to Create Application Access URL
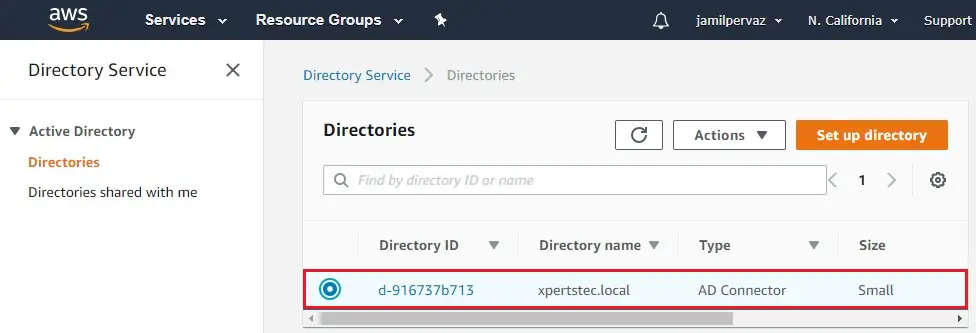
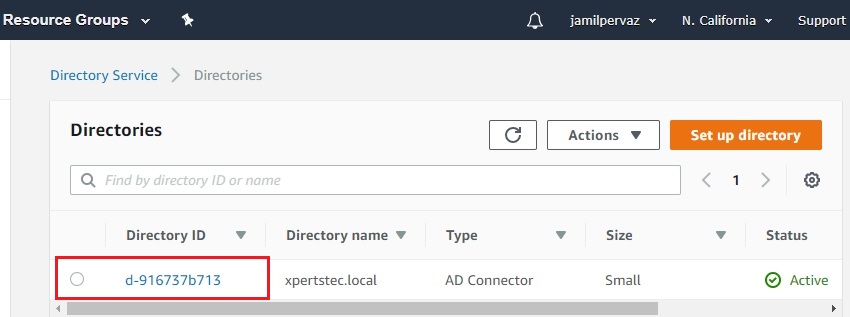
1- In the AWS management console select Directory Service.
2- In the Directories page, select your directory ID.
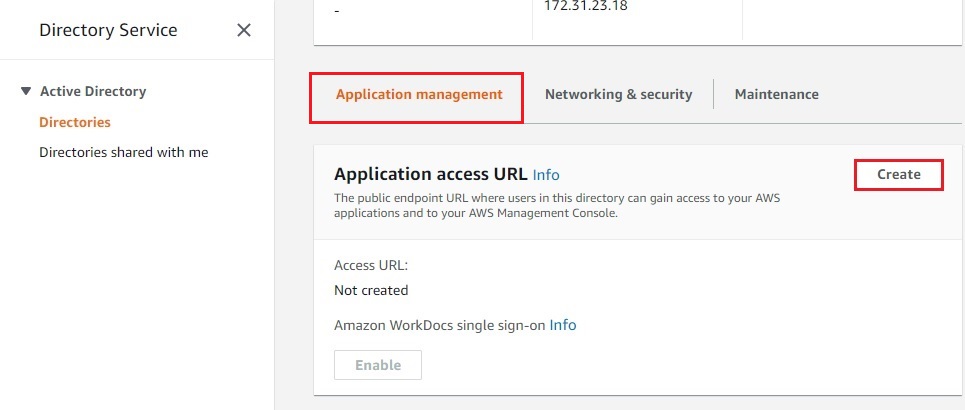
3- Directory details page, select the Application management tab.
Application access URL section, select on the Create button.
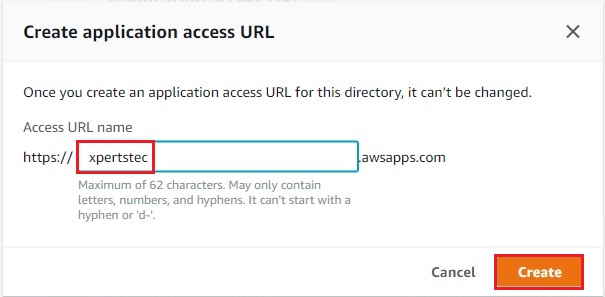
4- Enter a URL name (your domain controller example – xpertstec) and then select Create.
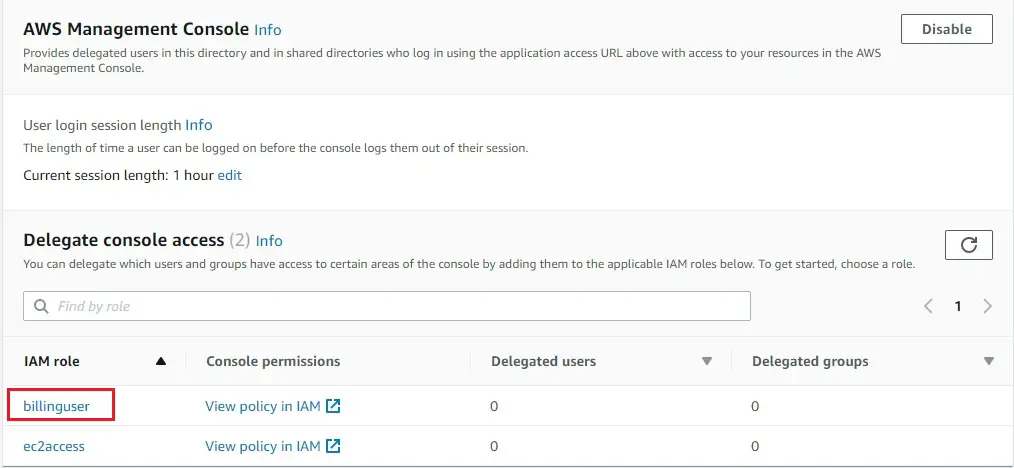
5- Next to AWS Management Console select Enable.
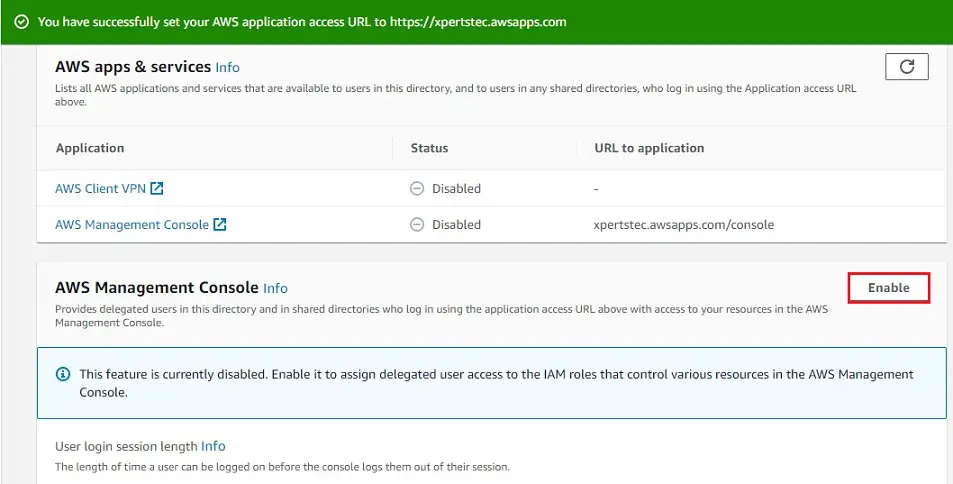
6- Now you can seed Delegate console access, click on billinguser under IAM role.
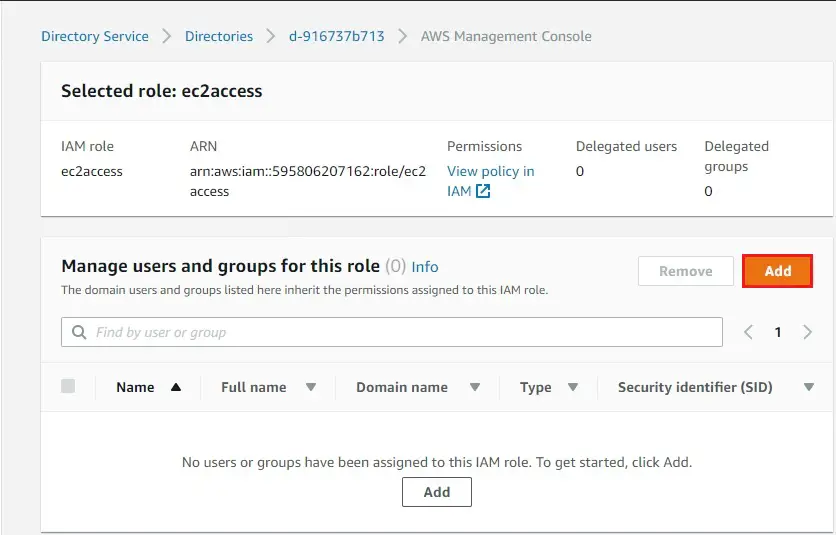
How to Assign Users or Groups to an Existing IAM role
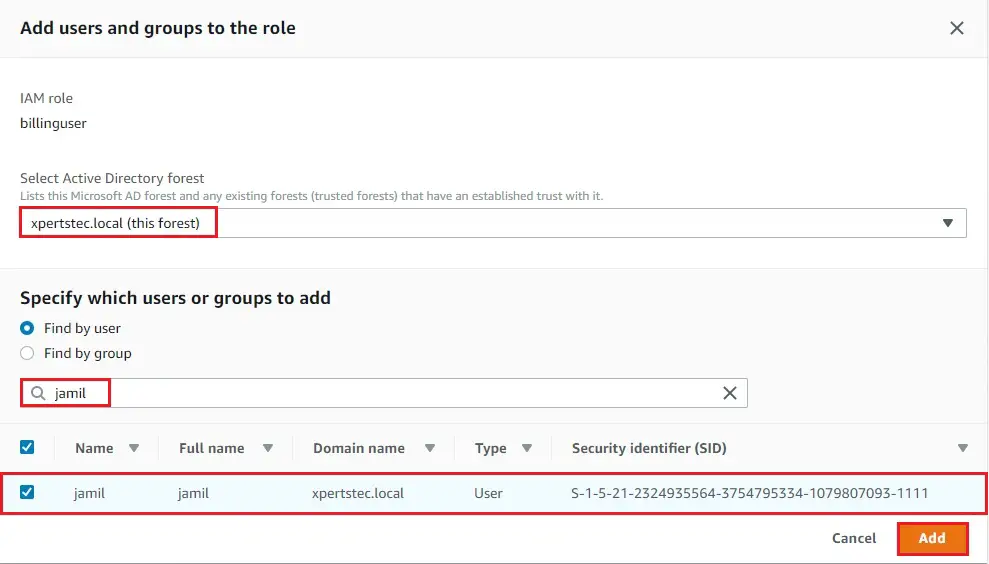
1- Selected role page, under Manage users and groups for this role click on Add.

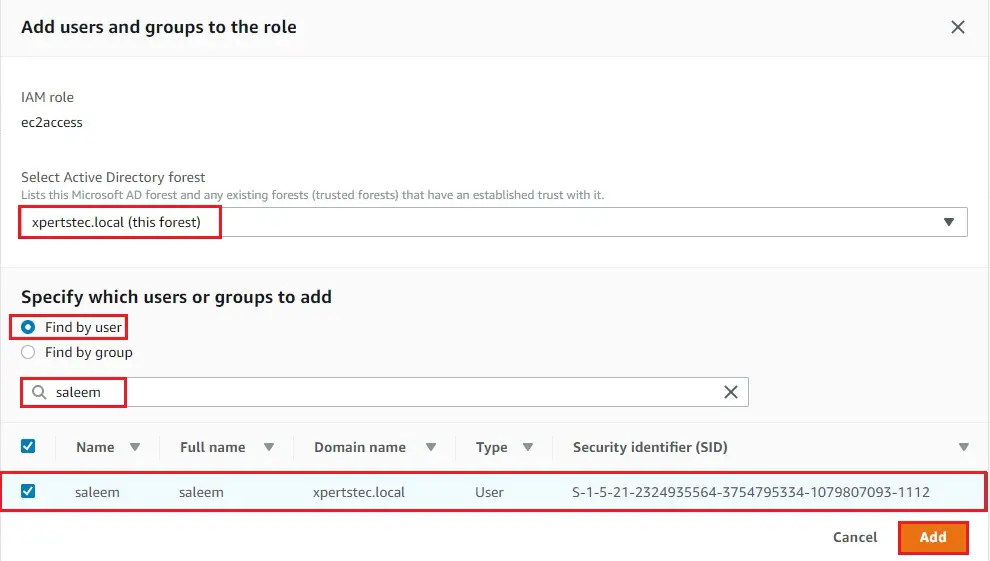
2- Add users and groups to the role page, under Select Active Directory Forest, choose your active directory (example: xpertstec.local) whichever contains where the accounts that need access to the AWS Management Console. Under Specify which users or groups to add, select find by user and then type the name of the user. In the list select the user you want to add. Select Add to finish.
3- Assigned the users to the role.
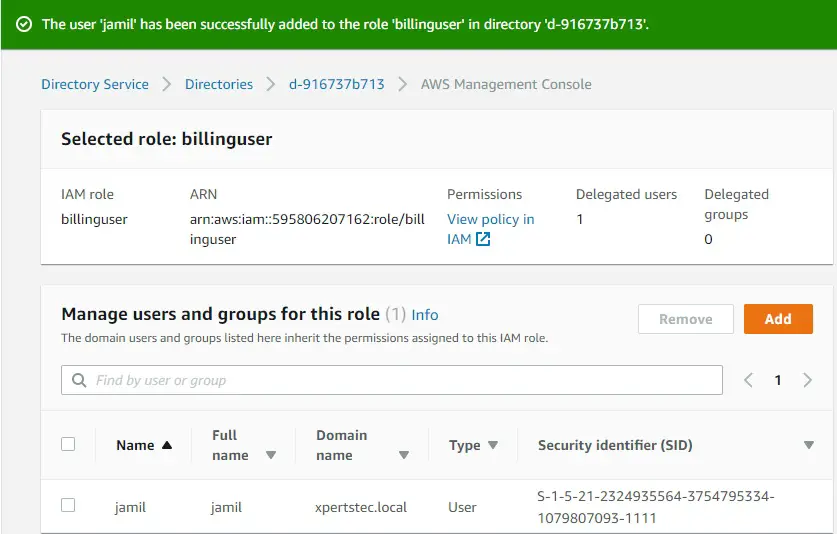
4- Select 2nd role (ec2access) under IAM role.
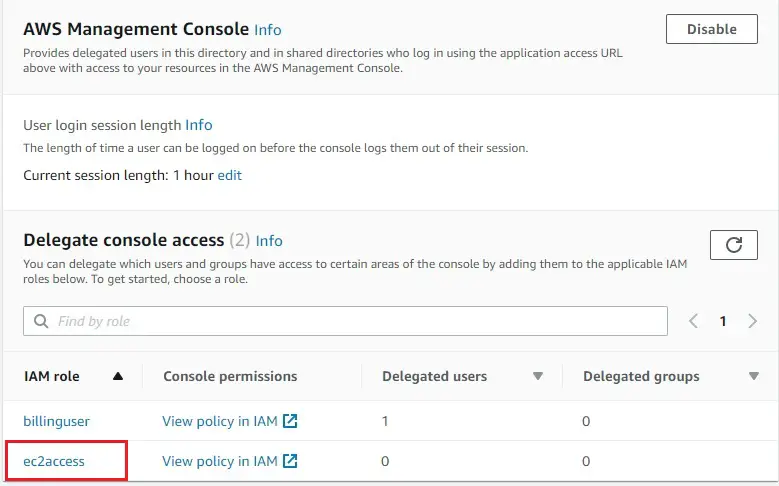
5- Select Add.
6- Select your active directory, search name, select it and then click Add.
7- Assigned the 2nd user to the role.

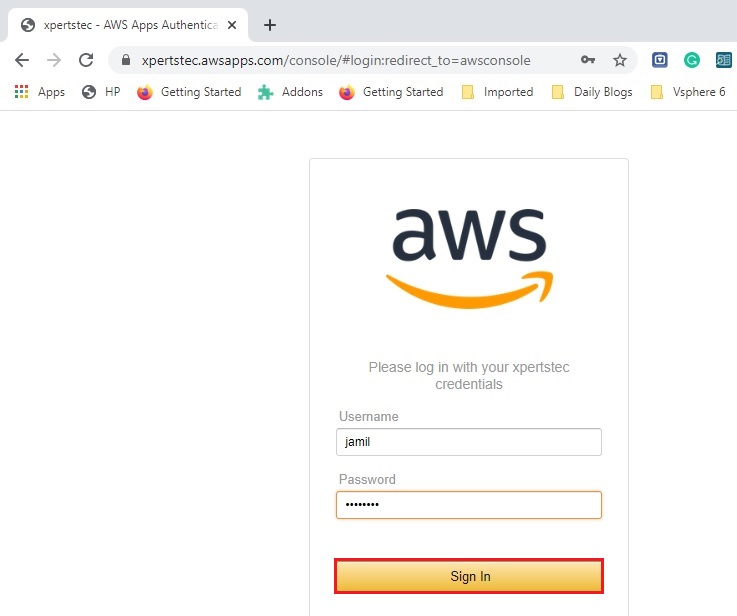
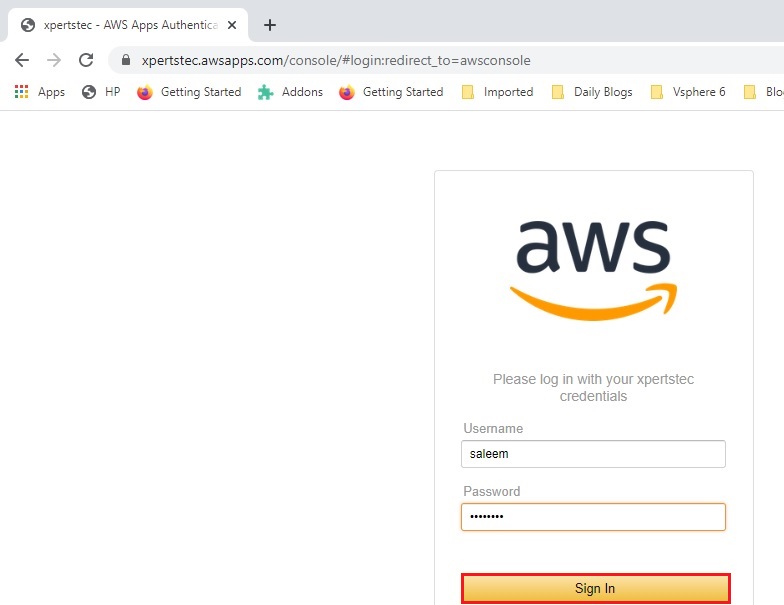
Configure Directory Services in AWS – Testing.
1- Open directory service click on directory ID.
2- Application access URL, under access URO (xpertstec.awsapps.com) copy this.
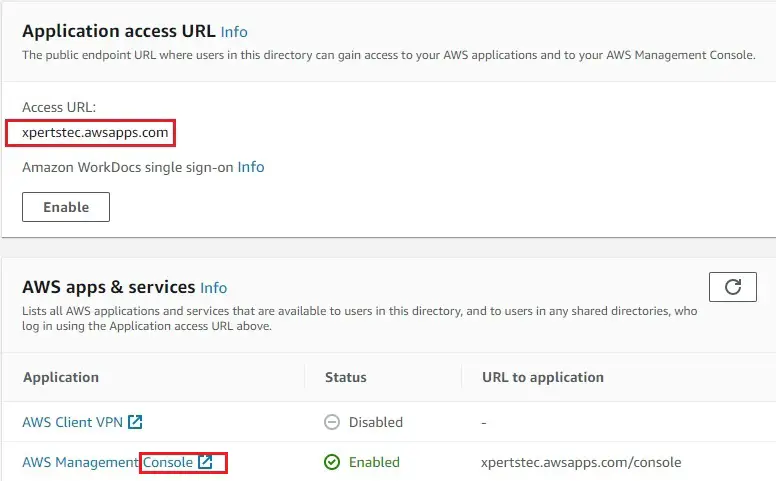
3- Open web browser and paste it bar with /console (example: xpertstec.awsapps.com/console) and press enter.
Type username, password and click sign in.
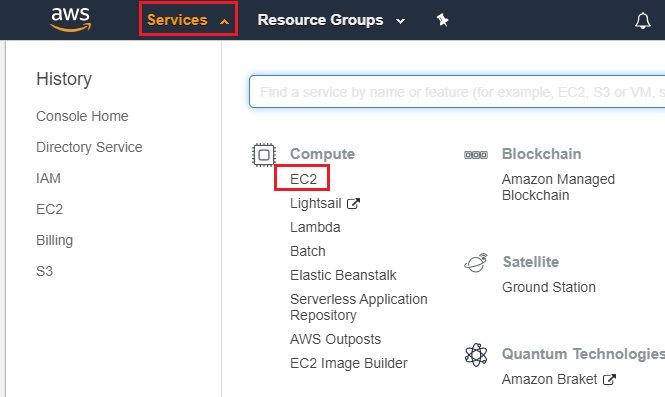
4- Click services tab and then click on EC2.
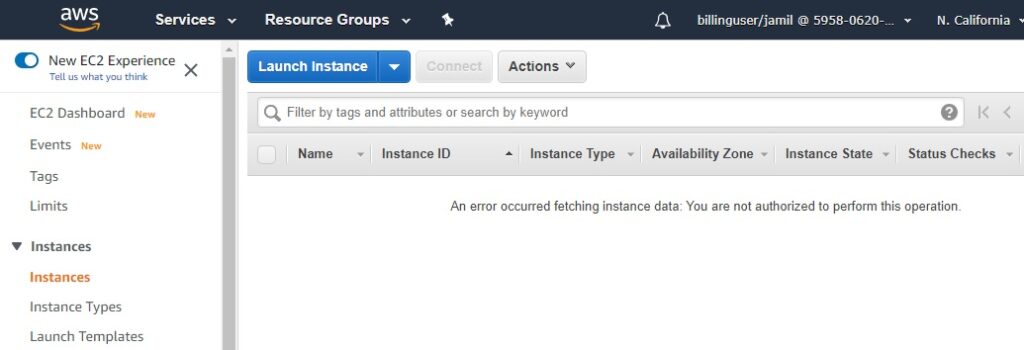
5- Now you can see this user is unable to create EC2 instance because he doesn’t have permission, The user has only billing permission.
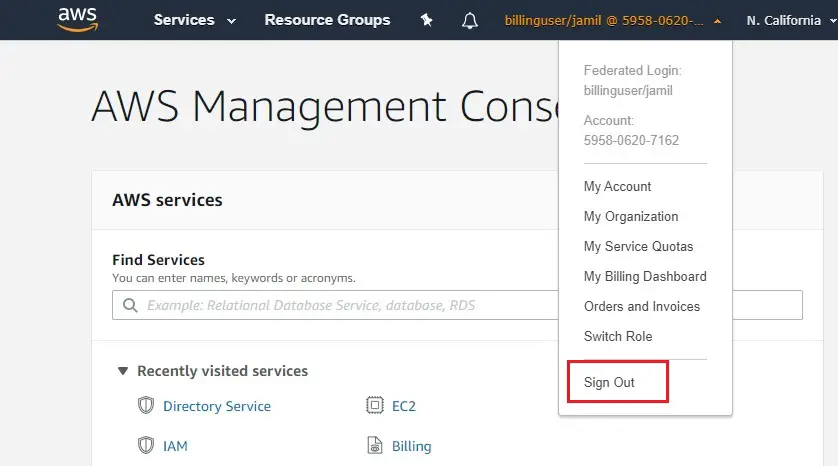
6- Sign out this user.
7- Sign in with 2nd user (saleem).
8- Select EC2.
9- This user have full control.