.")
Connect iSCSI Storage vCenter 7, In this blog, I will explain how to connect Openfiler iSCSI Storage to VMware vCenter 7.
How to install Openfiler. Click Install Openfiler
How to Configure Openfiler as iSCSI shared storage. Configure Openfiler
Connect Openfiler iSCSI Storage VMware vSphere
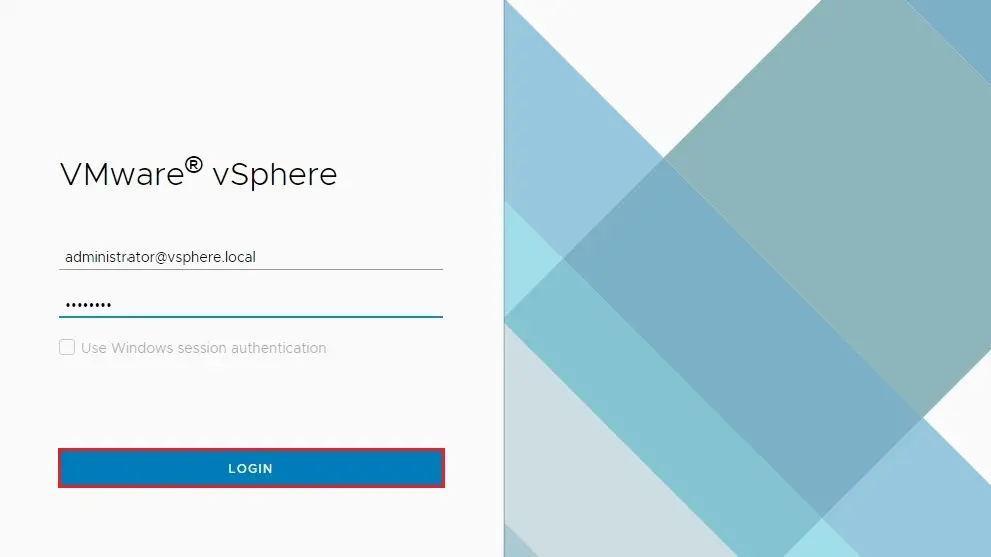
1- Open browser, type your vCenter fully qualified name or IP Address, type username and password and then click on login.
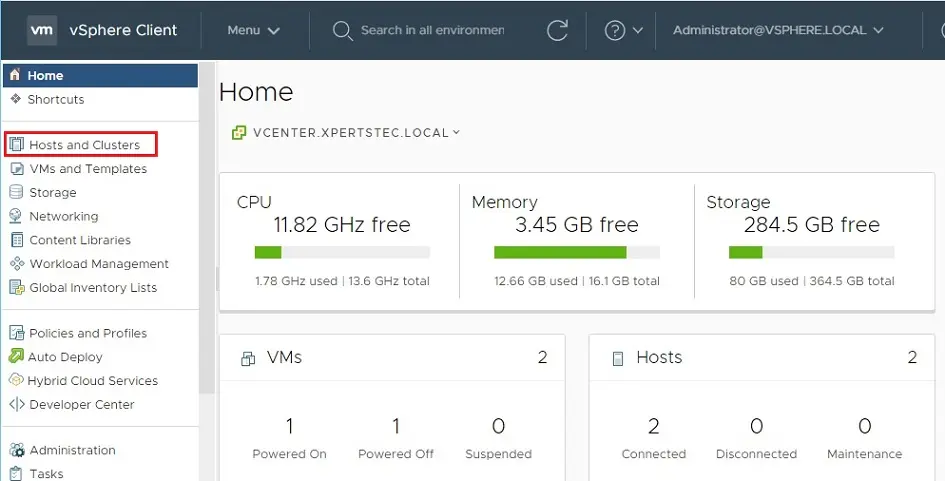
2- After login to your vCenter Server, so under home tab click Hosts and Clusters.
VMware vCenter 7
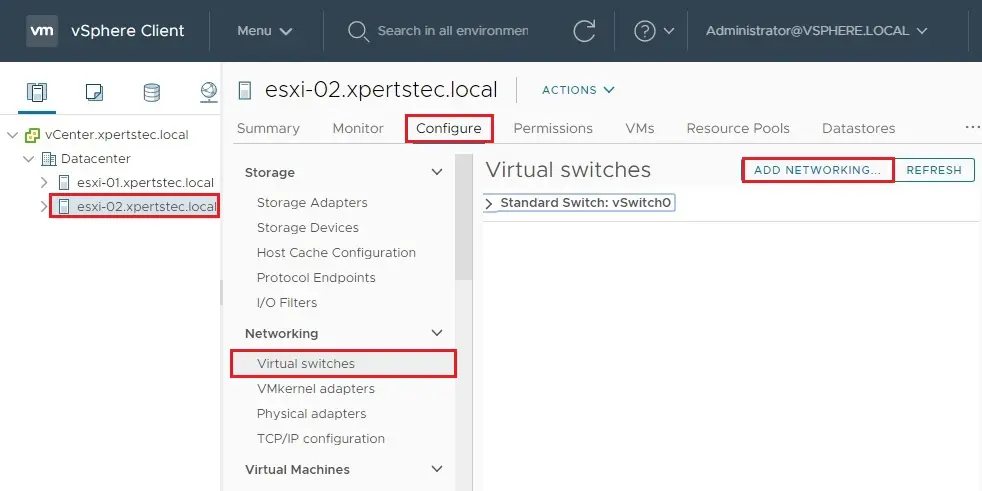
3- Click on ESXi host, Select Configure tab, under Networking, select virtual switches and then click on Add Networking.
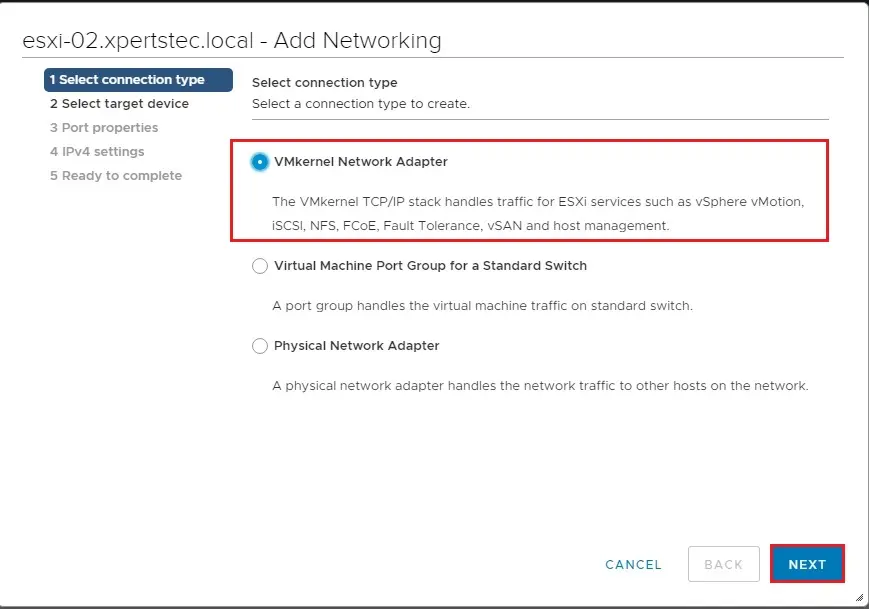
4- Select the VMkernel Network Adapter and then click Next.
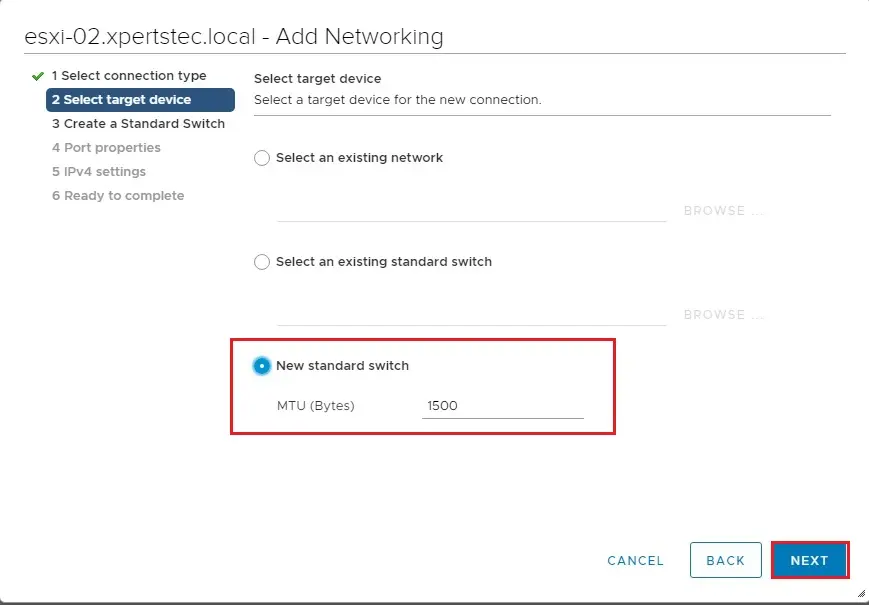
5- Select new standard switch and click next.
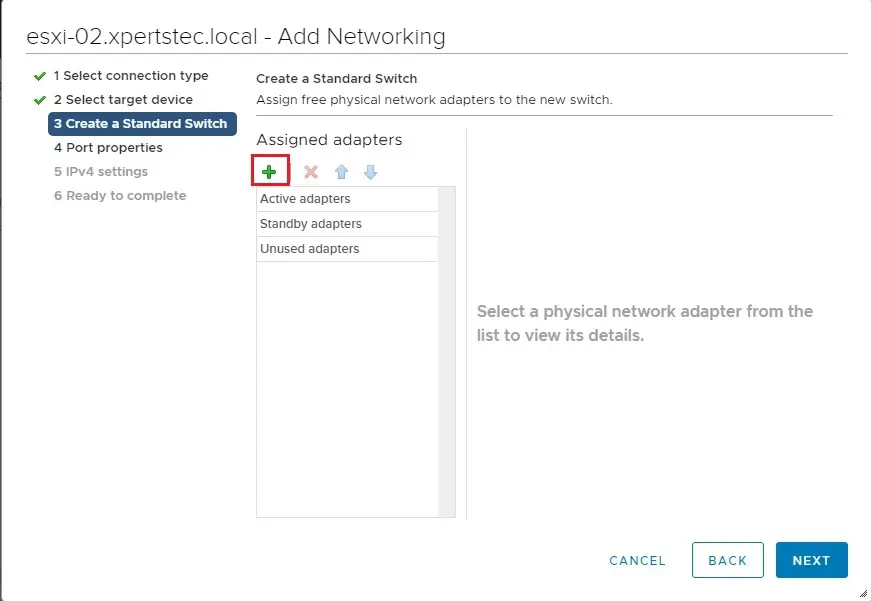
6- Click the + sign to assign network adapter.
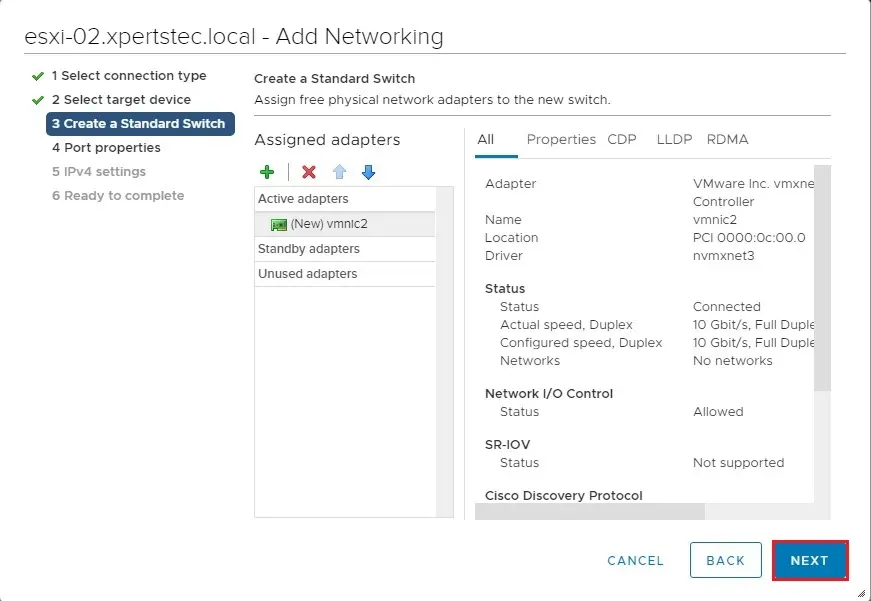
7- Select Network adapters and click ok.

8- I have selected one adapter (you can select multiple adapters) click next.
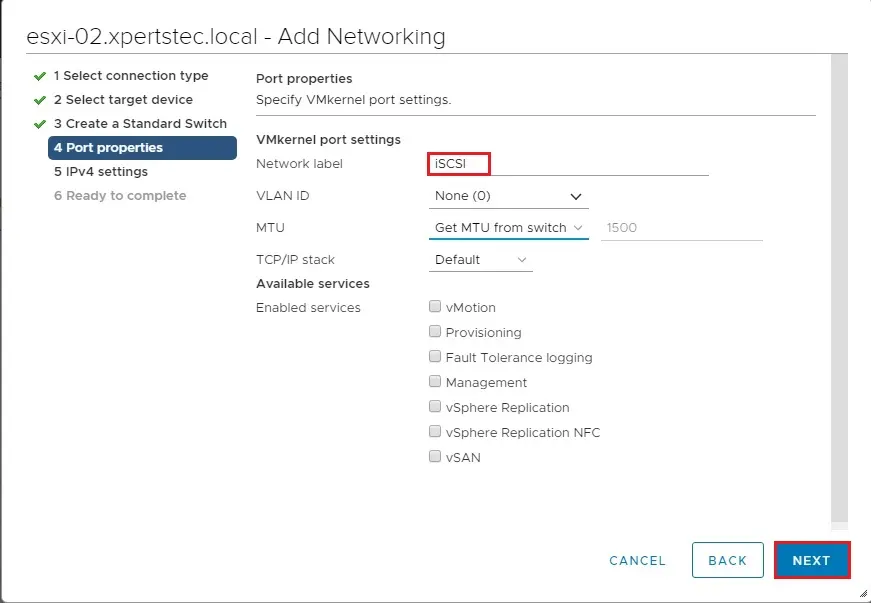
9- Type a Network name and click next.
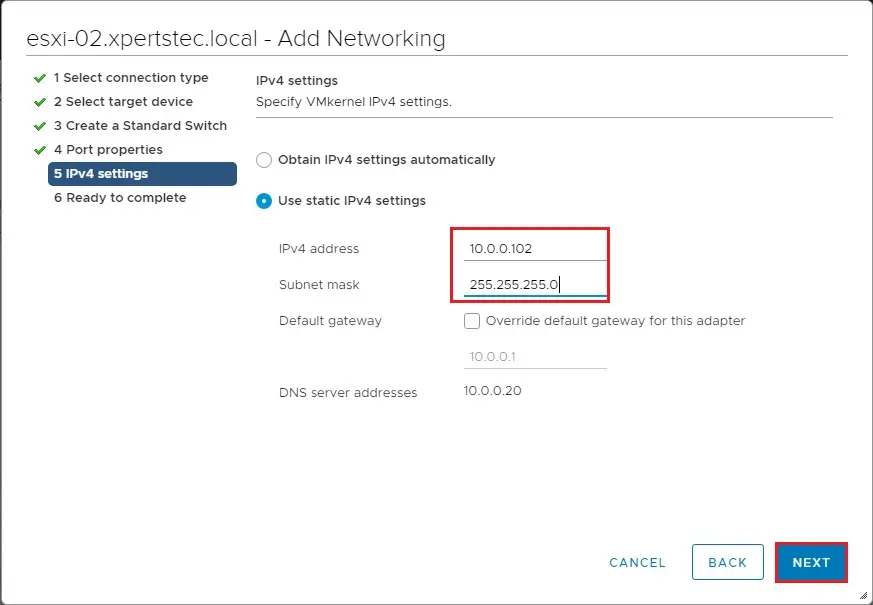
10- Select use static IPv4 setting and type the IP address, subnet mask and click next.
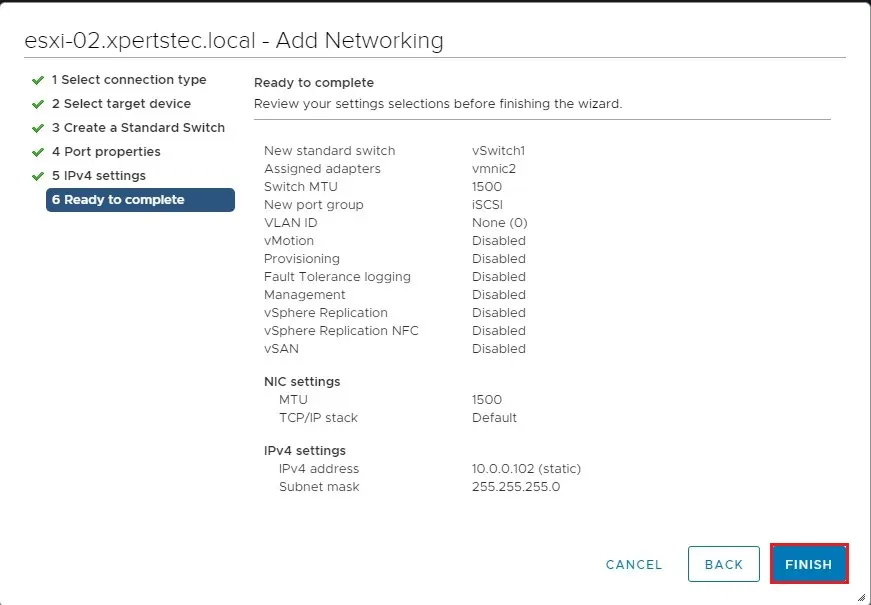
11- Review the settings and click the finish button to complete the switch configuration.
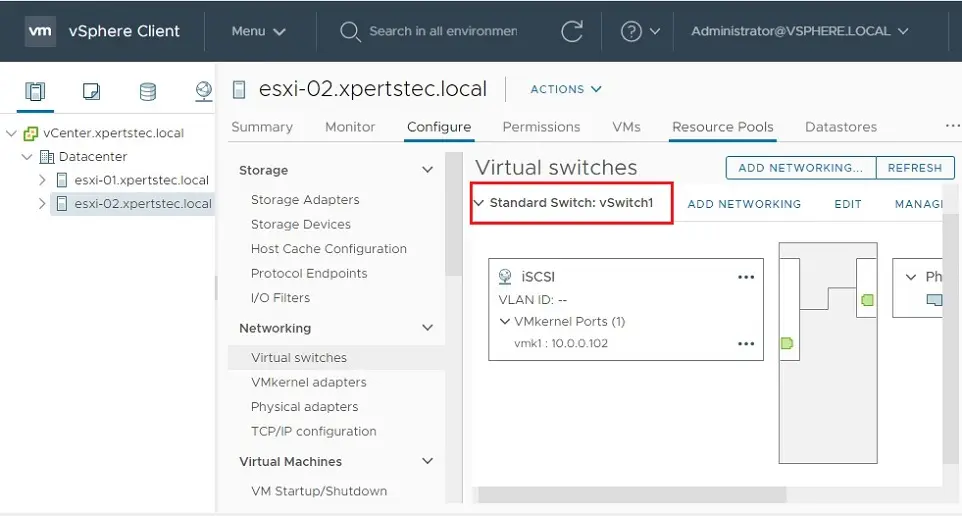
12- Now vSwitch1 has been created successfully.
Connect Openfiler iSCSI Storage
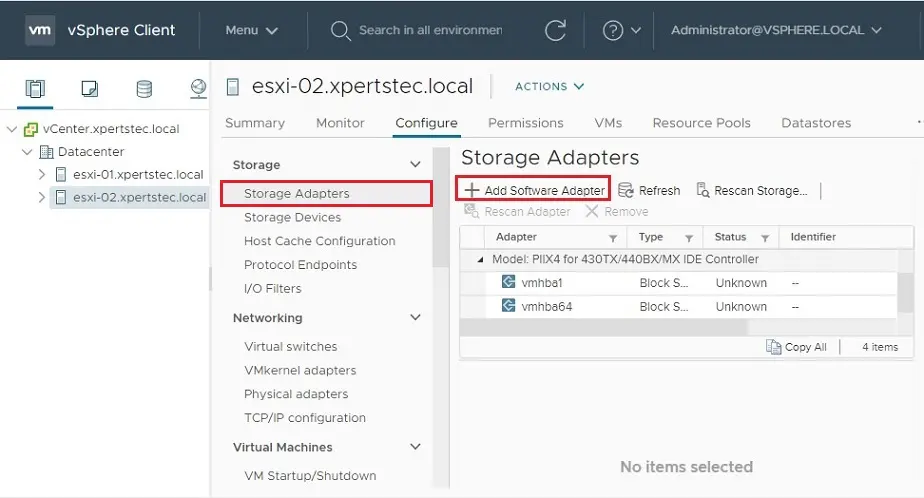
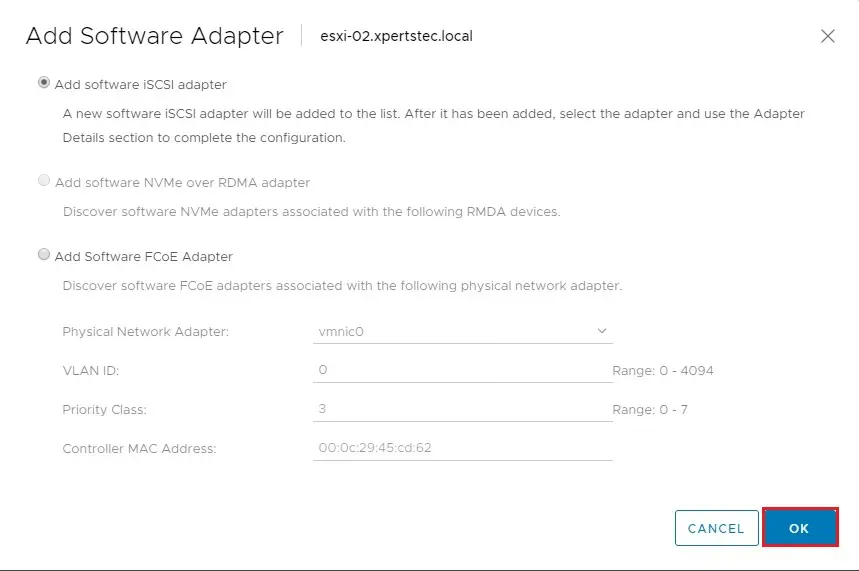
13- Under Storage, Click on Storage Adapters, Click on + Add Software Adapter to enable software iSCSI adapter.
14- Click the ok button.
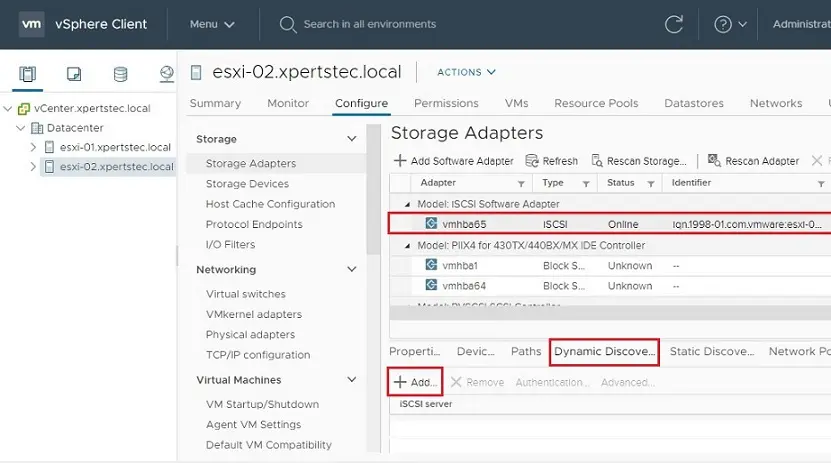
15- Select iSCSI software adapter, under dynamic discovery, click the + add the button to add storage target iSCSI server.
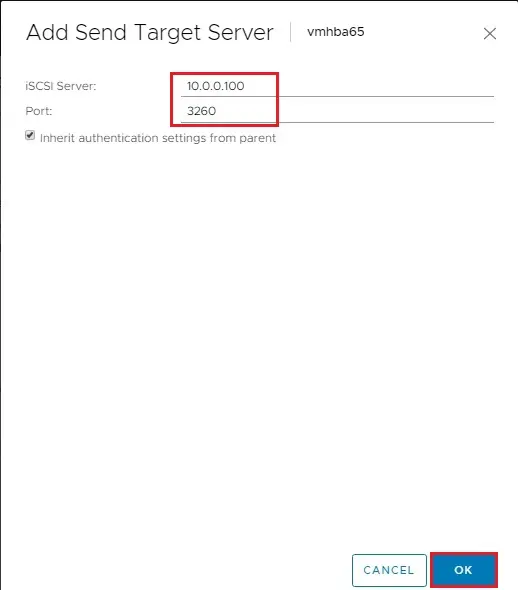
16- Type the IP address of your iSCSI server and then click ok.
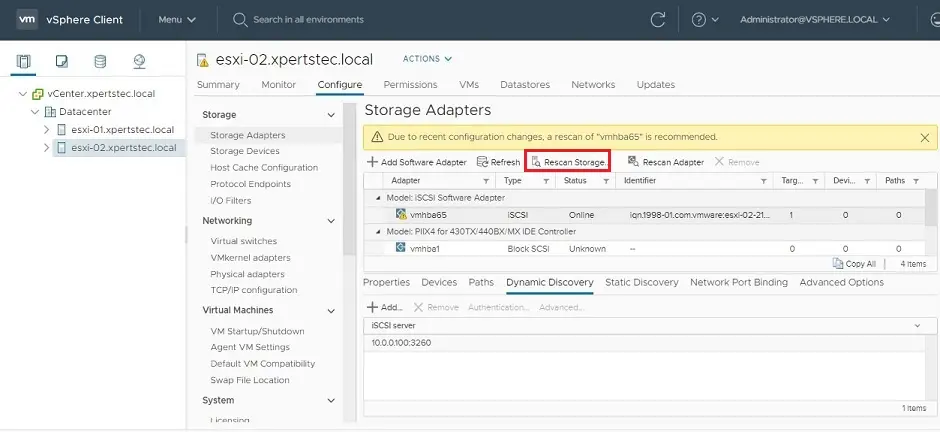
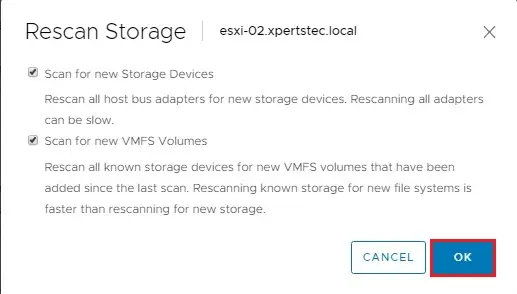
17- Select the rescan storage tab.
18- Click ok.
19- Click the + Add button under Network Port Blinding to select Network Adapter.
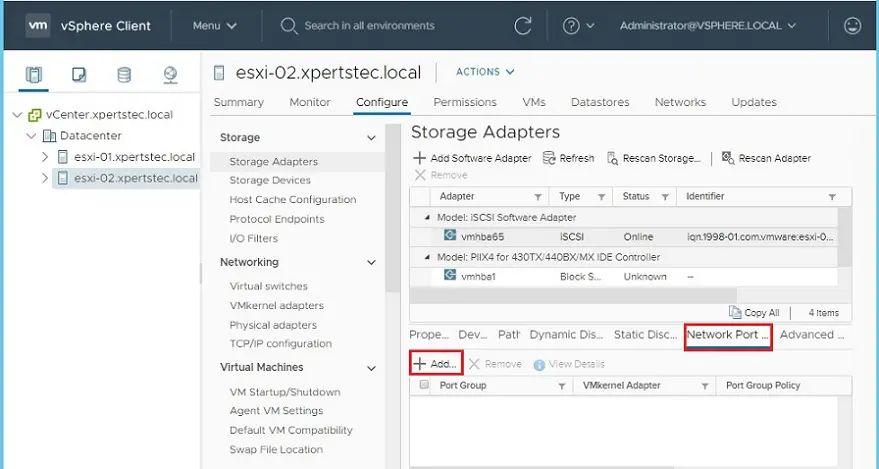
20- Select the VMkernel network adapter and then click OK.

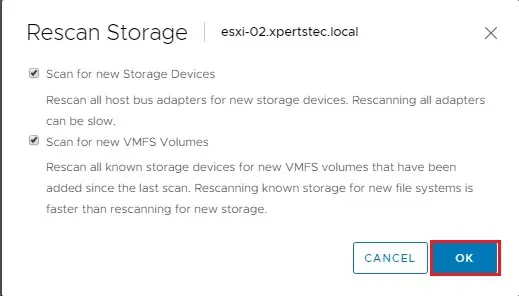
21- Click on rescan storage tab to see configuration changes.
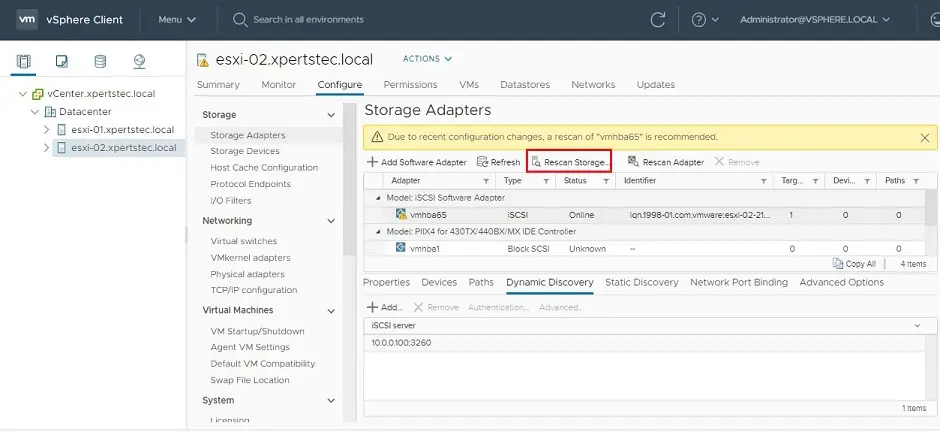
22- Click ok.
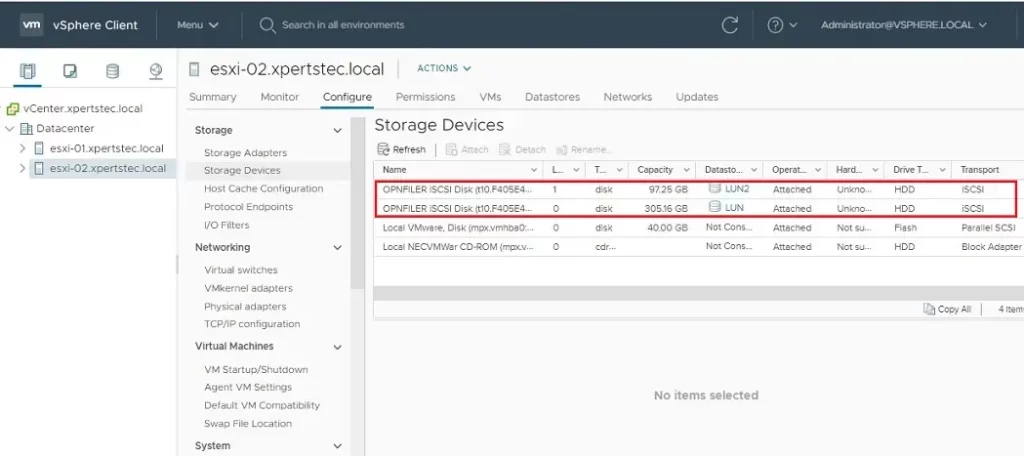
23- Select storage devices under storage to see 2 devices shown.
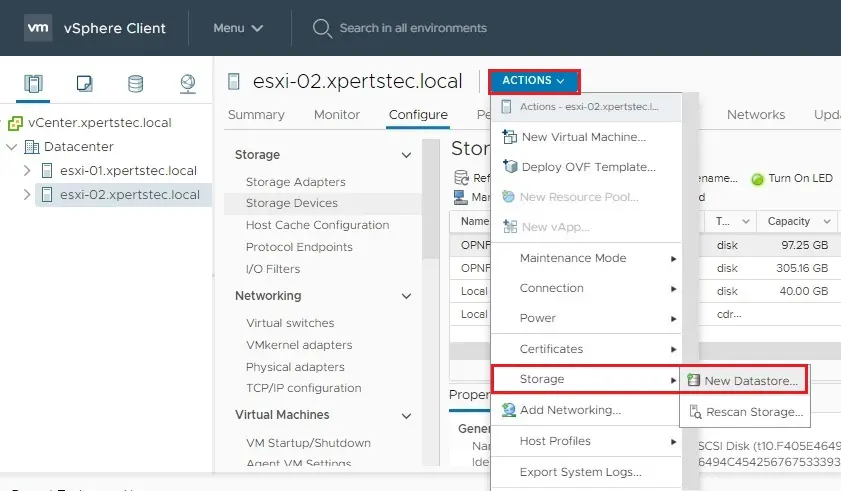
24- Select ESXi Host, storage adapter, Action menu, click storage and then click new Datastore.
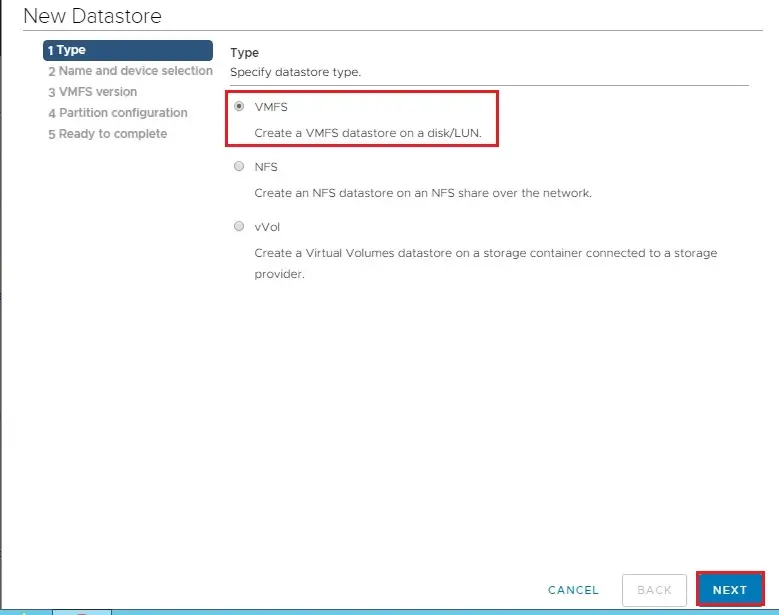
25- Select the datastore type and click next.
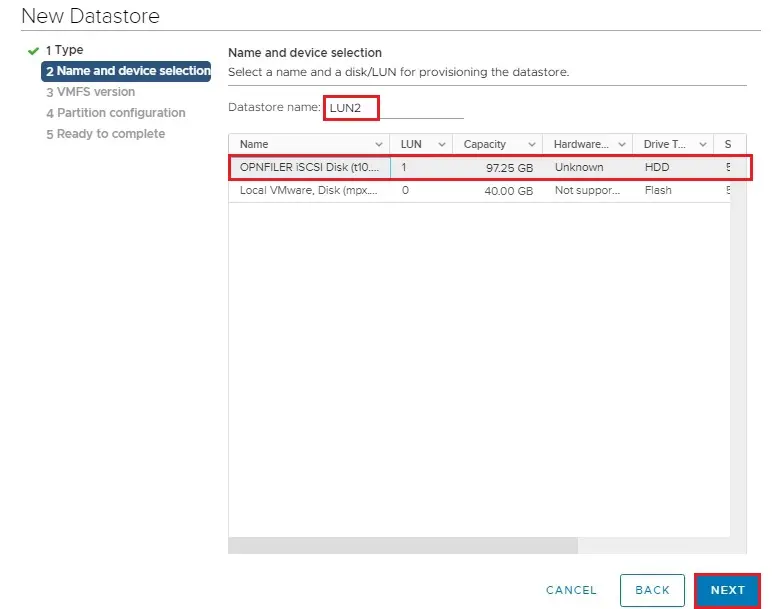
26- Type datastore name, select one of openfiler iSCSI disk and then click next.
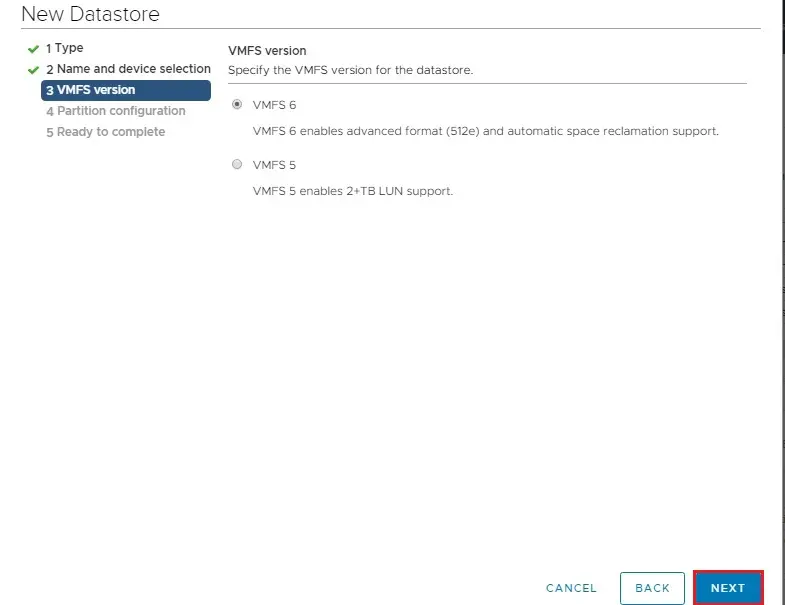
27- Select VMFS version and click next.
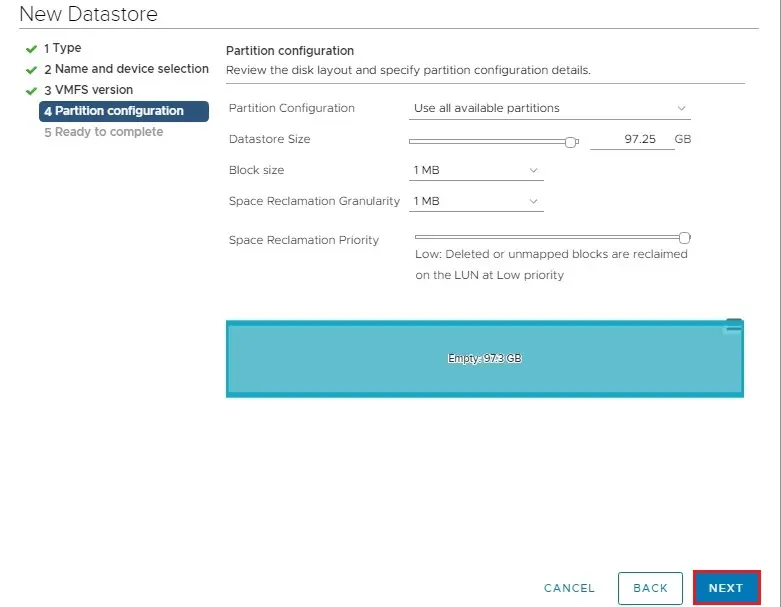
28- Select datastore size and click next.
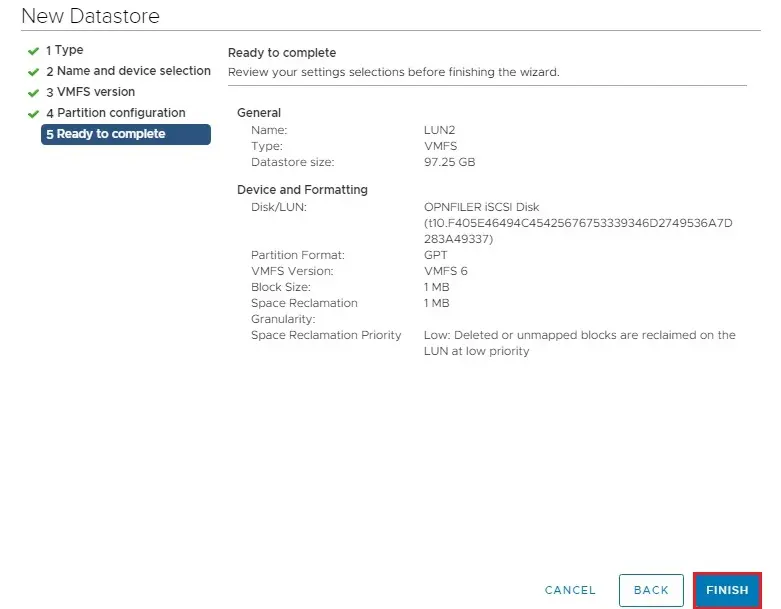
29- Review the new datastore configuration and click finish to complete the process.
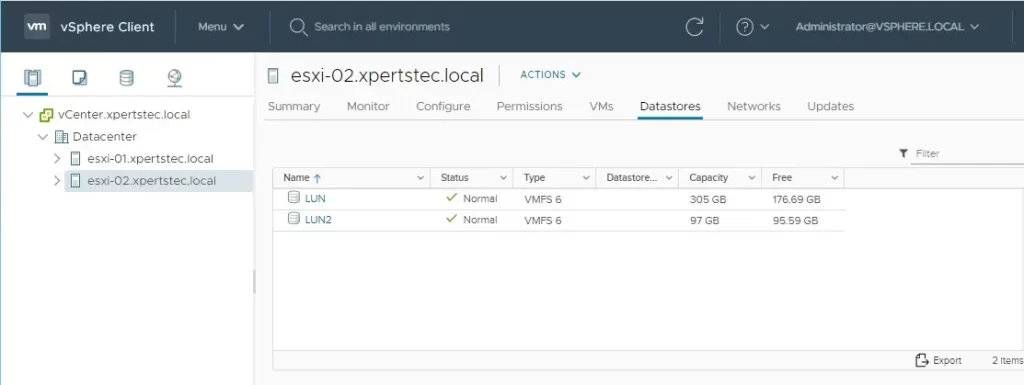
30- Datastore LUN has been added successfully.
For more details click here