Learn the steps to install Windows 11 in Hyper-V Virtual machine running on Windows 11 to experience the OS. Hyper-V is a virtualization platform that permits installing nearly all types of operating systems virtually. It is obtainable as a standalone system to run on bare metal machines or you can use it as an additional feature in Windows pro editions. Let’s have a look at how to Install Windows 11 on Hyper-V. There are different ways to install Windows 11 in a virtual machine like Oracle VirtualBox, VMware Player, and VMware Workstation. In a meantime, there is a simple way to install Windows 11 using Microsoft’s own virtual machine Hyper-V. So, in this blog, you will learn how to run Windows 11 in Hyper-V in Windows 11.
I’m sure many of you have already upgraded your Windows in Microsoft’s Windows Insider Program Microsoft has launched the testing circumstances of Windows 11. Some Windows users will upgrade their Windows when it’s the official launch and recommended.
Table of Content
- How to Enable Hyper-V in Windows 11
- Create Windows 11 Virtual Machine
- Edit Windows 11 Hyper-V Virtual Machine
- Clean installation of Windows 11
- Windows 11 Basic Setups
How to Enable Hyper-V in Windows 11
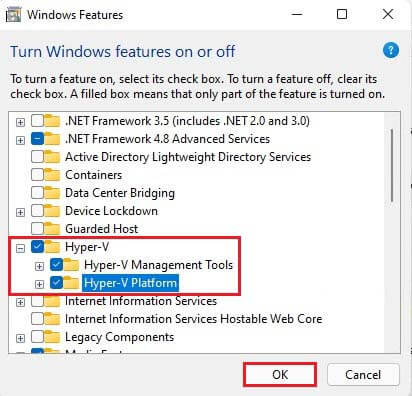
To Enable Hyper-V on Windows 10, first, you need to enable the Hyper-V feature on your Windows 11 to start using this Microsoft hypervisor program.
Type Turn Windows Features on or off, launch Run command (Windows+R). Type optionalfeatures in the open box and then click ok.

Scroll down, find Hyper-V in the features list, and select checkbox Hyper-V Management Tools, Hyper-V Platform. Click ok
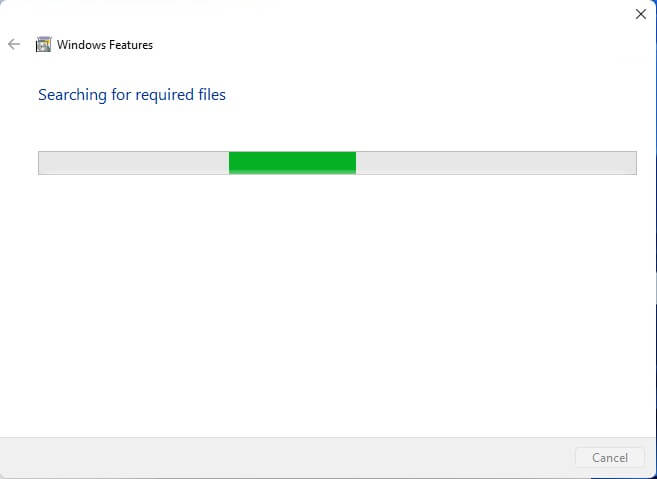
Start enabling Hyper-V features in Windows.
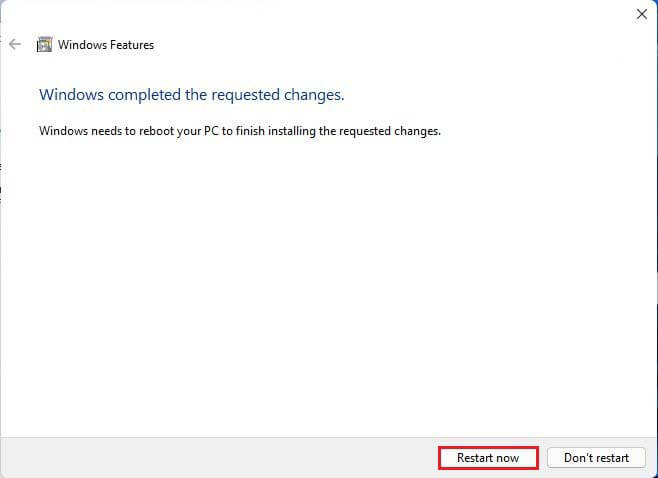
Once installed, select Restart now.
Install Windows 11 Using Hyper-V in Windows 11
So, here you can find the guide to install Windows 11 on Hyper-V in Windows 11.
Create Windows 11 Virtual Machine
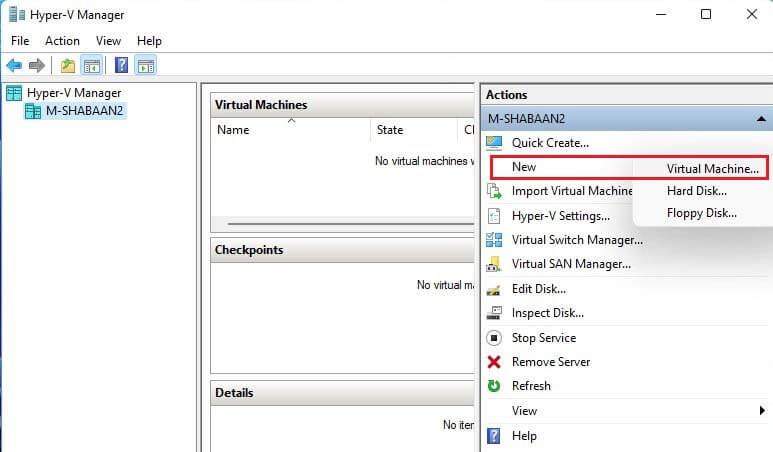
Click on the Windows search button, type Hyper-V Manager and then open it.

Under the Action menu, click on New and then Virtual Machine.
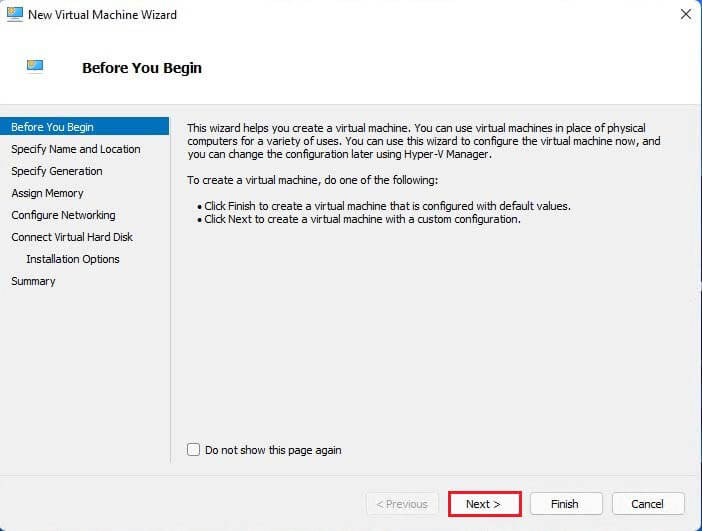
New virtual machine wizard, Click Next.
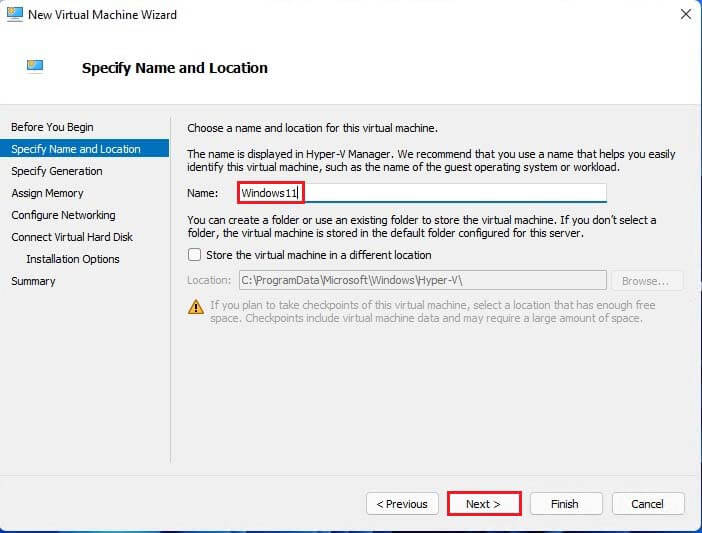
Type a virtual machine name and then click Next.
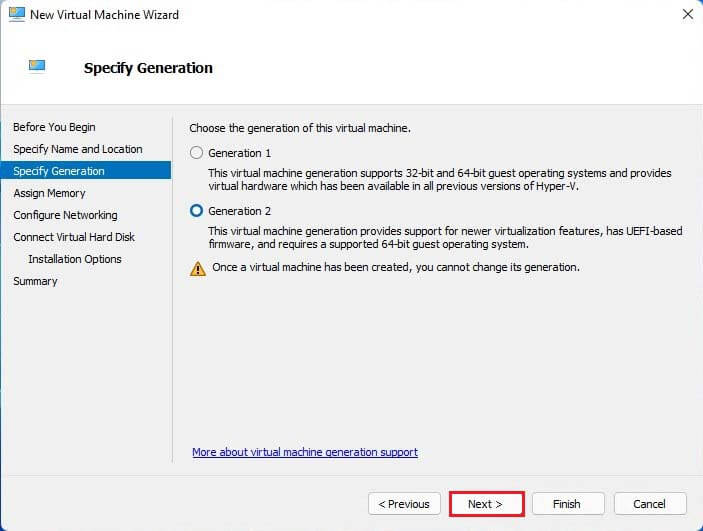
Choose Generation 2 and click next.
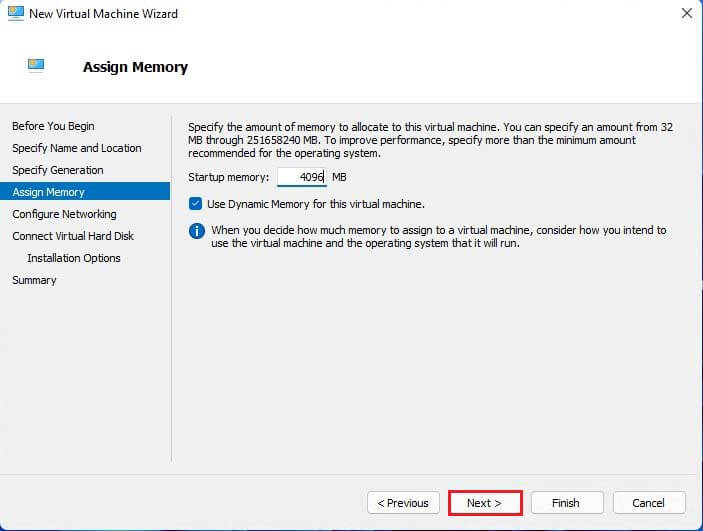
Assign the Memory/RAM you wish to provide to your Windows 11 VM, this must be at least 4 GB or higher. Click Next.
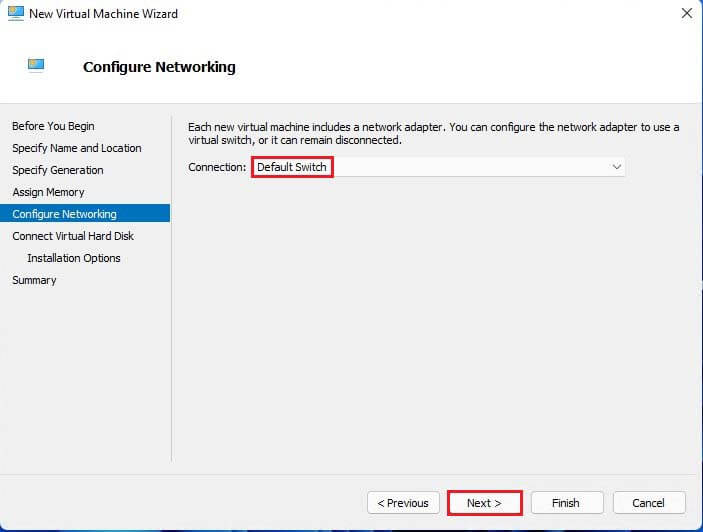
From the Connection Drop-down box, choose Default Switch to provide network connectivity to the virtual machine and then click Next.
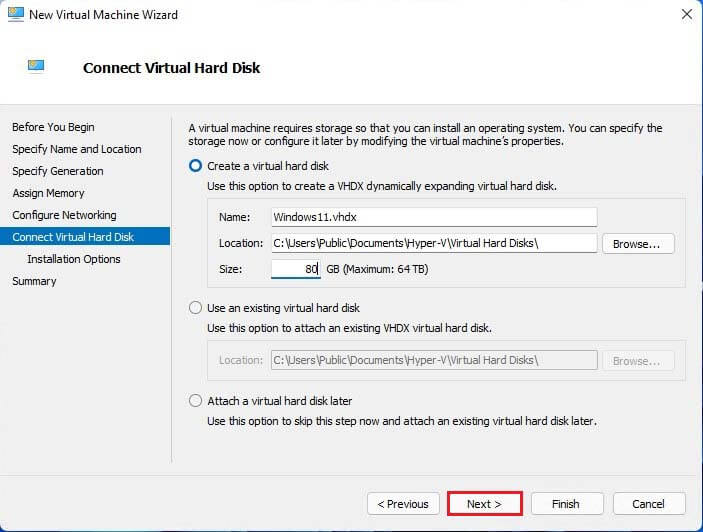
Select the Hard disk size that you wish to assign Windows 11 and click next.
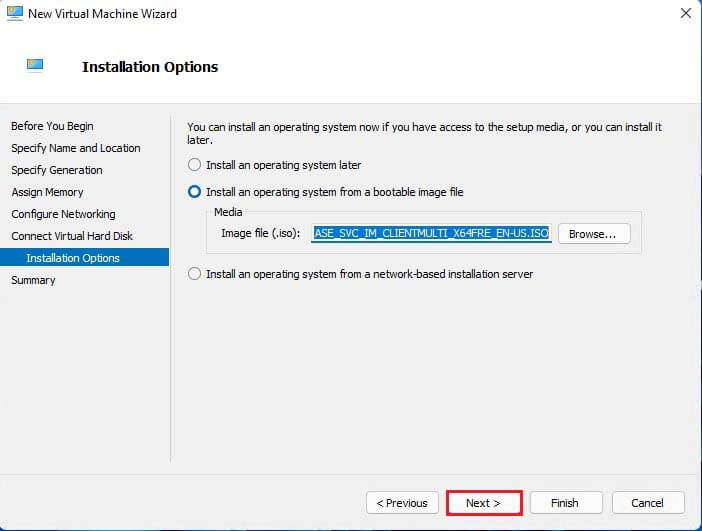
To choose a Windows ISO image file, select the checkbox Install an operating system using a bootable image file and then click Browse.
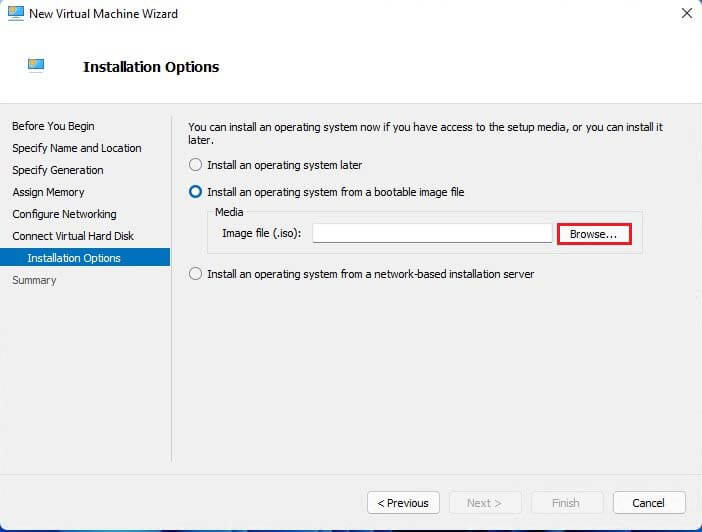
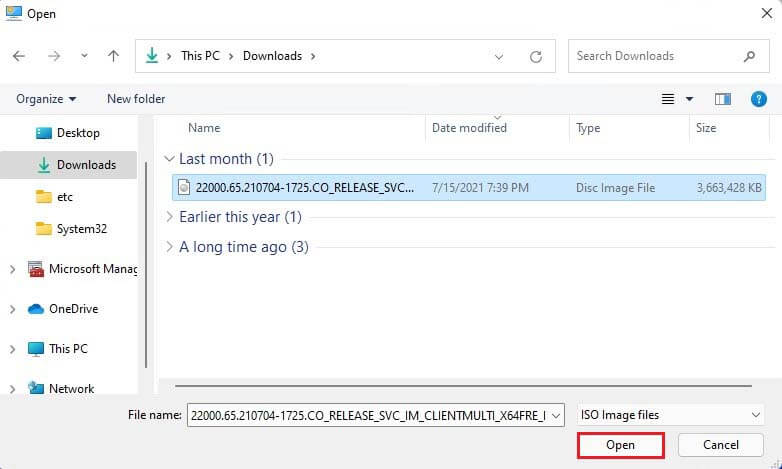
Select your Downloaded Windows 11 ISO image file and then select open.
Click Next.
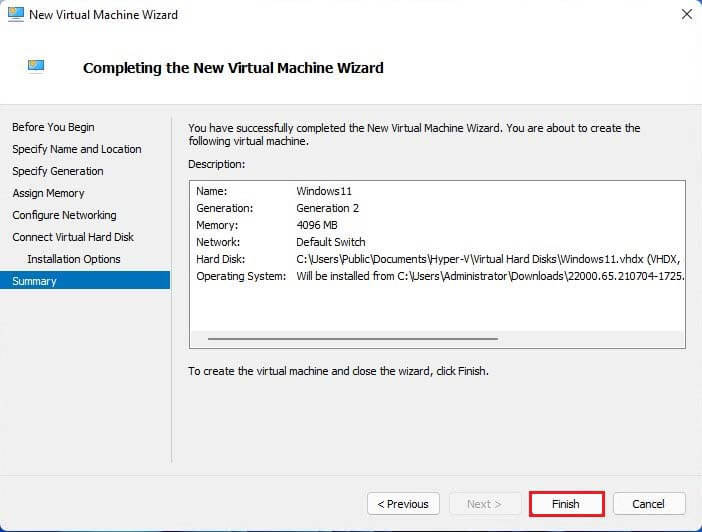
Review the virtual machine summary and click on the Finish button.
Edit Windows 11 Hyper-V Virtual Machine
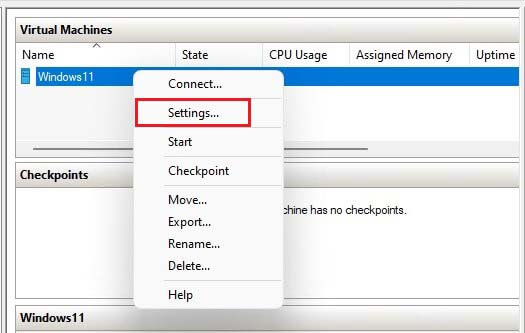
Right-click the Hyper-V virtual machine and then click on Settings from the menu.
Click on the Security option from the left pane and then enable the following options.
Enable Secure Boot,
Enable Trusted Platform Module, click ok.

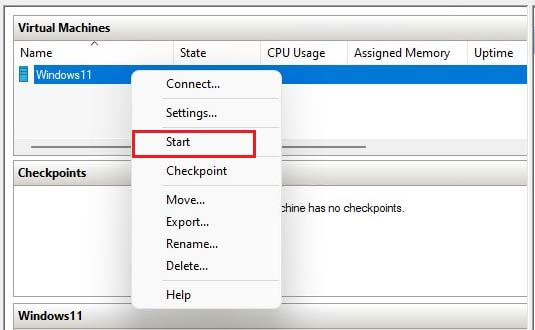
Right-click Hyper-V VM and then select start.
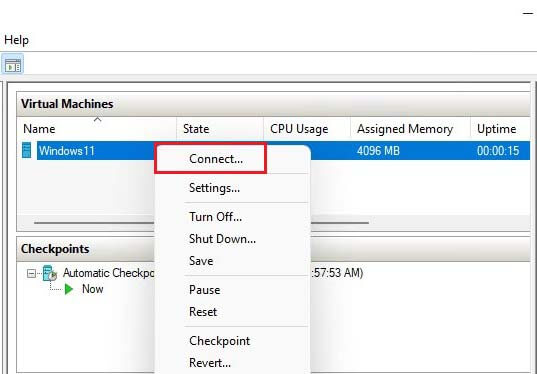
Once again right-click on Windows 11 virtual machine and then click Connect.
Clean installation of Windows 11
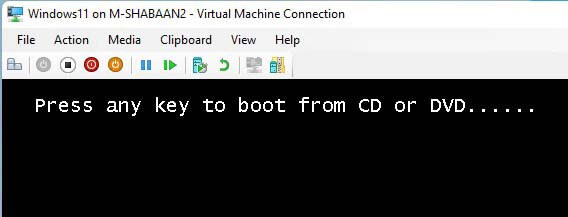
Press a key to boot
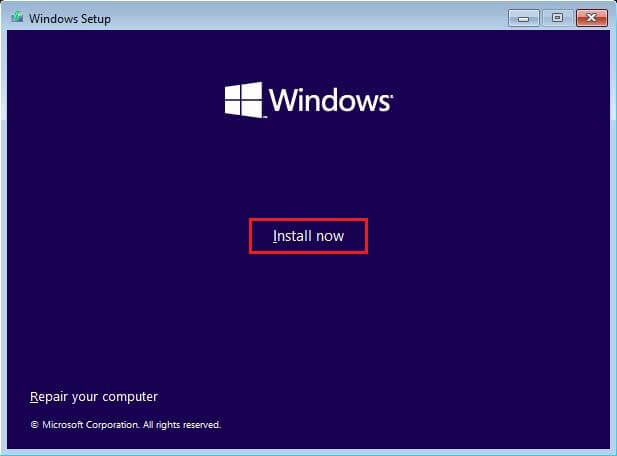
Windows 11 setup screen, click Next.

Click Install Now.
Click on I don’t have a product key.

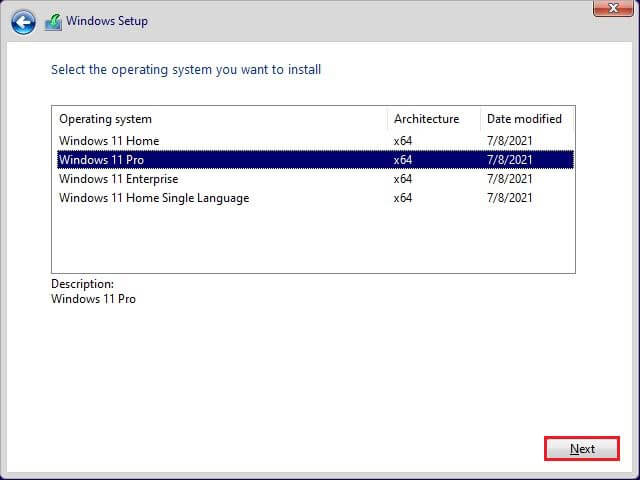
Choose a Windows 11 operating system and then click Next.
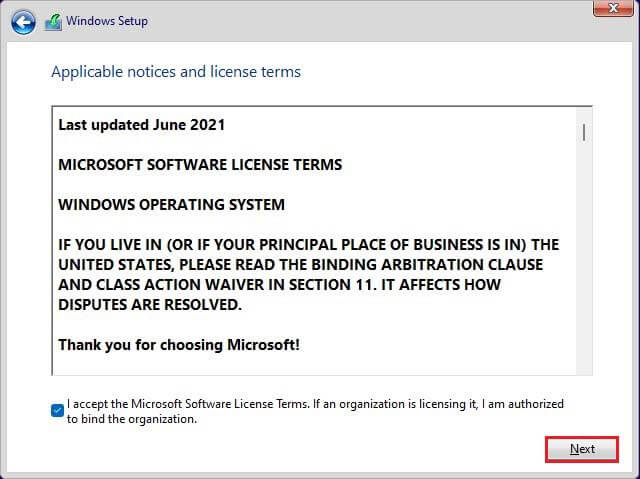
Click next after accepting Microsoft Software License Terms.
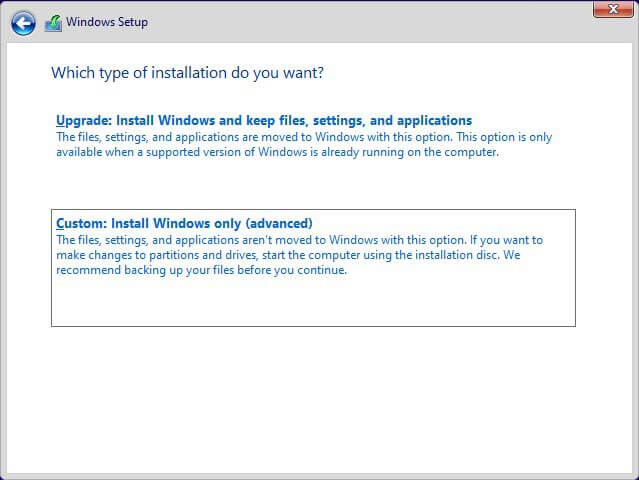
Choose custom
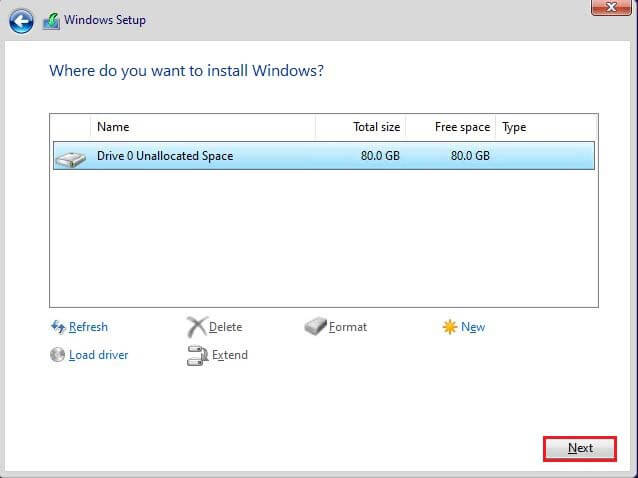
Select the drive and then click Next.
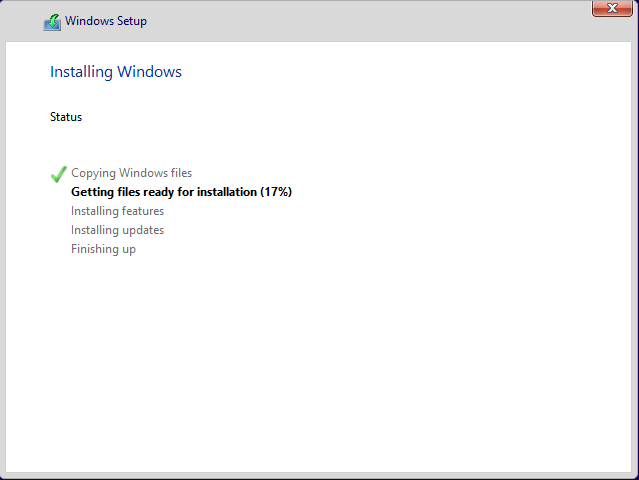
The Windows 11 installation will start.
Windows 11 Basic Setups
Choose your country or region and then click Yes.

Select the keyboard layout, click next
Set up for personal use, click next
Add your Microsoft account, click next
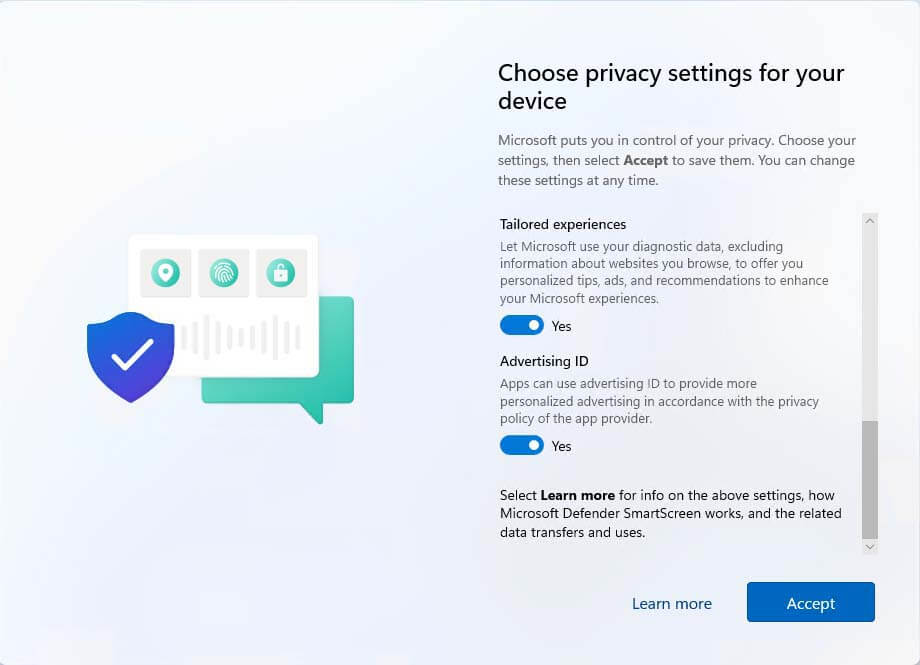
Choose privacy settings and then click Accept.
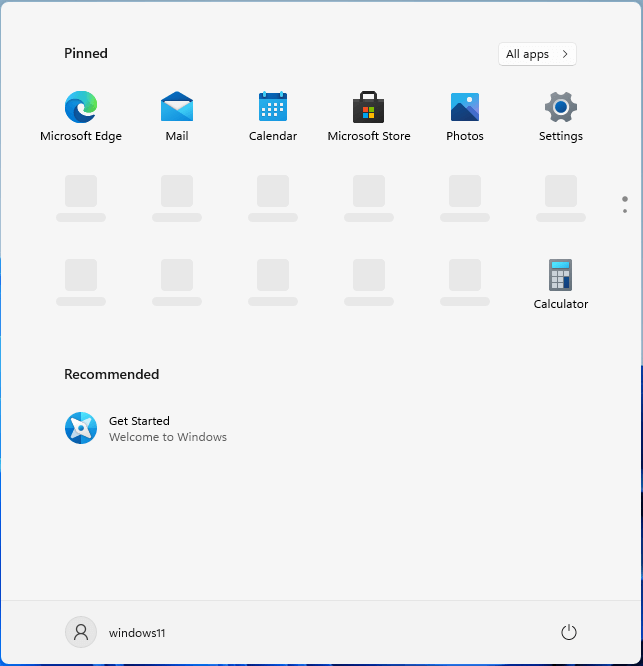
Done, Windows 11 is successfully installed on Hyper-V Manager
This is the way you can install Windows 11 in Hyper-V in Windows 11.