In this blog, I will describe a step-by-step guide for the installation of Microsoft Exchange Server 2019. The installation considers one server deployment of Exchange Server 2019.
Exchange Server 2019 Requirements
Exchange Server 2019 Prerequisites
The first thing is to the installation of any version of Exchange is to prepare the Active Directory environment where the Exchange Server will be installed.
Exchange 2019 prerequisites for preparing Active Directory.
1- .NET Framework 4.7.2 or later
Install .NET Framework 4.7.1 or .NET Framework 4.7.2 as supported by your OS. Note: .Net Framework 4.7.2 is already included so it isn’t required to download or install with Windows Server 2019.
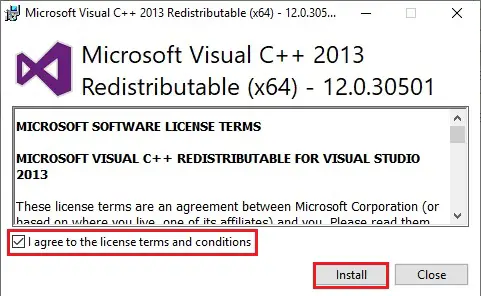
2- Download Visual C++ Redistributable Packages for Visual Studio 2013
Double click setup files to Install Visual C++ Redistributable Packages for Visual Studio 2013 and select I agree to the license terms and conditions and click on Install.
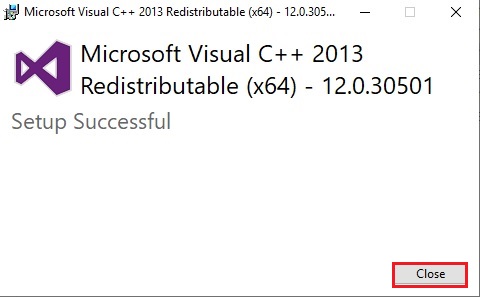
3- Now setup successful and click on close.
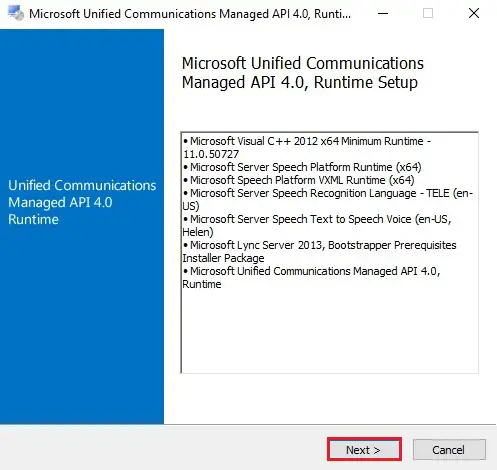
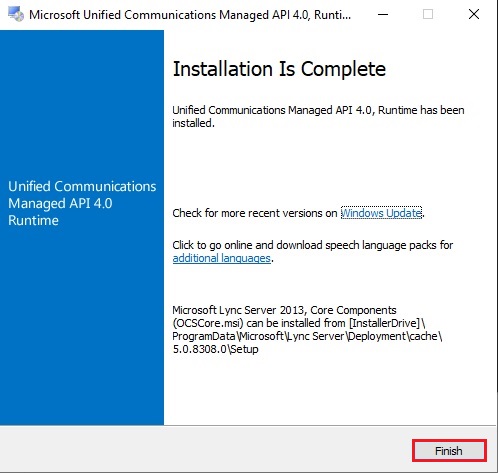
4- Download Unified Communications Managed API 4.0.
Double click setup files to Install Microsoft Unified Communications Managed API (UCMA) 4.0 so, click on next.
5- Select I even have read and accept the license terms and click on install.

6- Installation completed and click on finish.
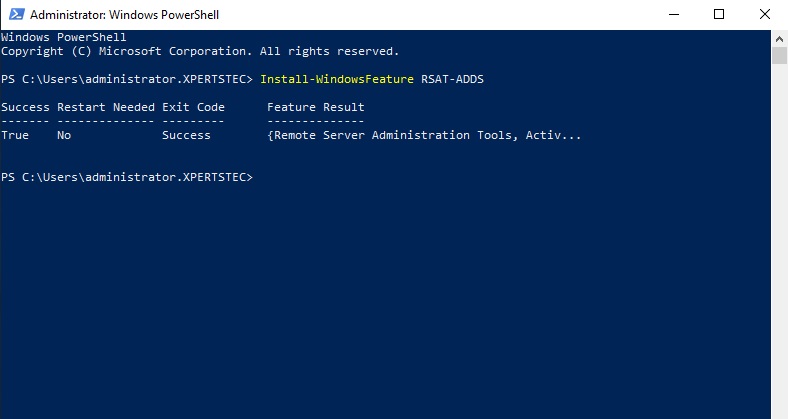
7- Open a Windows PowerShell and then type the below command
Install-WindowsFeature RSAT-ADDS
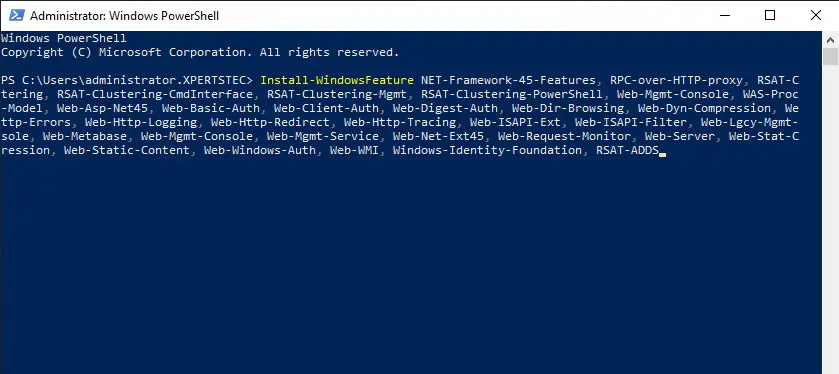
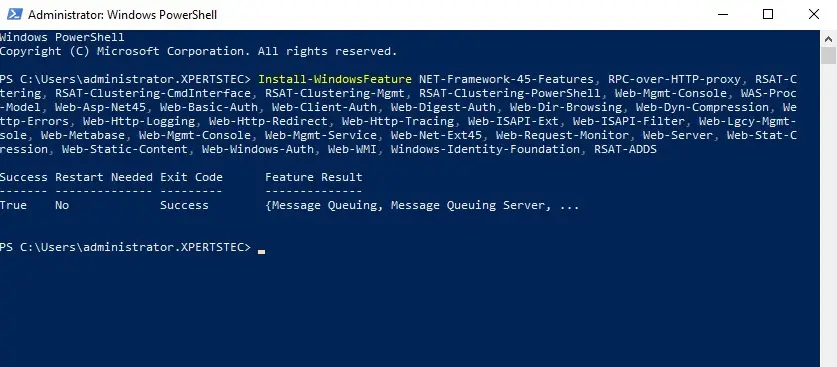
8- Run the below command to install the server prerequisites
Install-WindowsFeature NET-Framework-45-Features, RPC-over-HTTP-proxy, RSAT-Clustering, RSAT-Clustering-CmdInterface, RSAT-Clustering-Mgmt, RSAT-Clustering-PowerShell, Web-Mgmt-Console, WAS-Process-Model, Web-Asp-Net45, Web-Basic-Auth, Web-Client-Auth, Web-Digest-Auth, Web-Dir-Browsing, Web-Dyn-Compression, Web-Http-Errors, Web-Http-Logging, Web-Http-Redirect, Web-Http-Tracing, Web-ISAPI-Ext, Web-ISAPI-Filter, Web-Lgcy-Mgmt-Console, Web-Metabase, Web-Mgmt-Console, Web-Mgmt-Service, Web-Net-Ext45, Web-Request-Monitor, Web-Server, Web-Stat-Compression, Web-Static-Content, Web-Windows-Auth, Web-WMI, Windows-Identity-Foundation, RSAT-ADDS
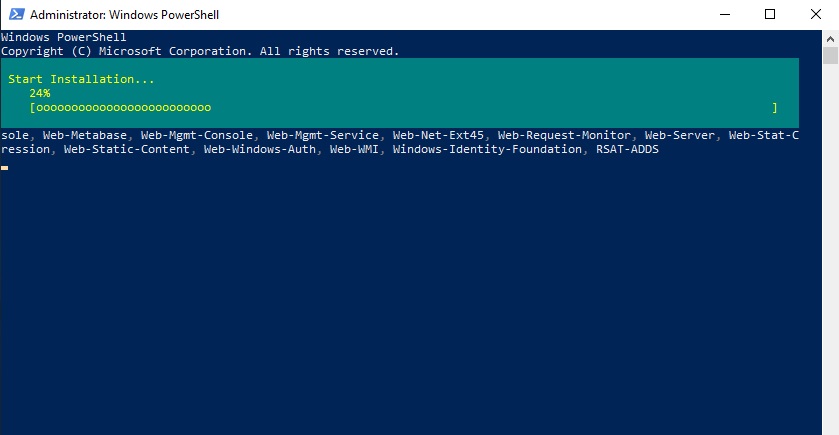
9- Default running process.
10- Exchange server 2019 prerequisites Installation completed.
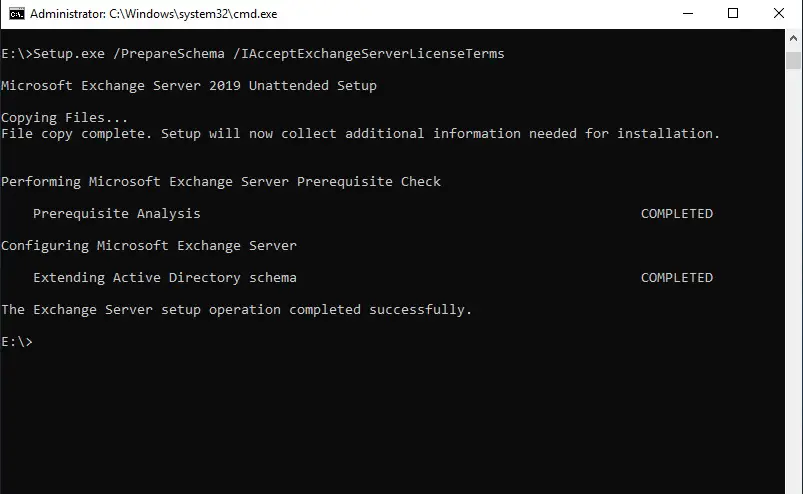
11- Prepare Schema
Open up a Command Prompt
Mount the Exchange Server 2019 Installation Media
Navigate to the Exchange Installation media path
then type the following command.
Setup.exe /PrepareSchema /IAcceptExchangeServerLicenseTerms
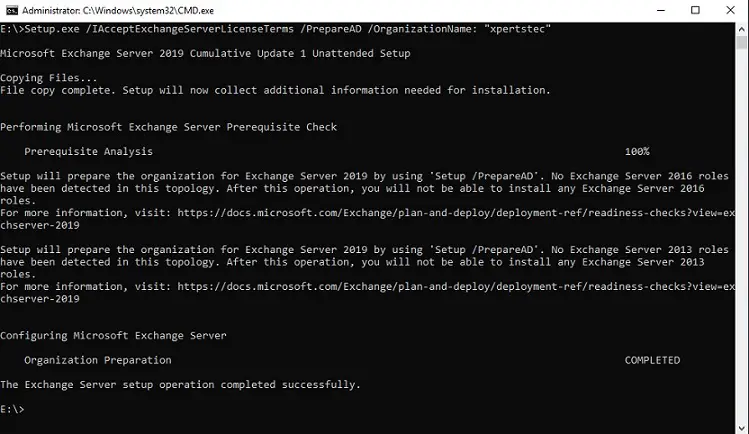
12- Prepare Active Directory
then type the following command.
Setup.exe /IAcceptExchangeServerLicenseTerms /PrepareAD /OrganizationName: “xpertstec”
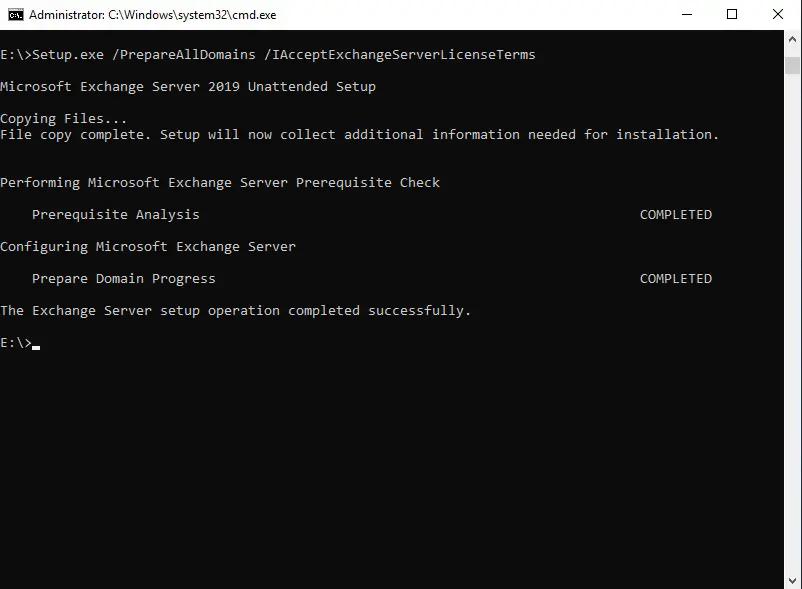
13- Prepare Domains
then type the following command.
Setup.exe /PrepareAllDomains /IAcceptExchangeServerLicenseTerms
14- Installing Exchange Server 2019
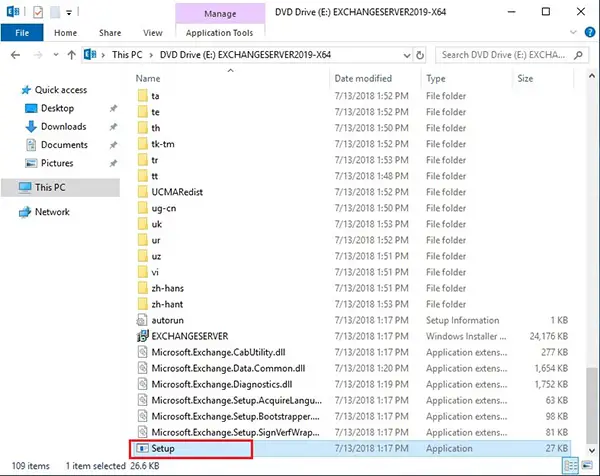
Mount the Exchange Server 2019 Installation Media
Double click on Setup.exe to start Exchange Server 2019 installation.
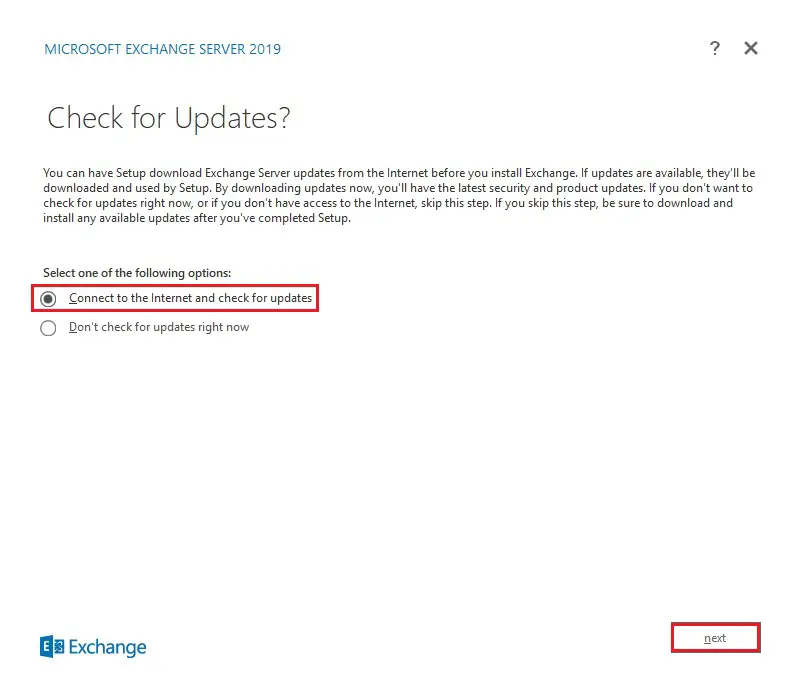
15- Check for Updates page and select connect to the Internet and check for updates for Exchange 2019 and then click on next.
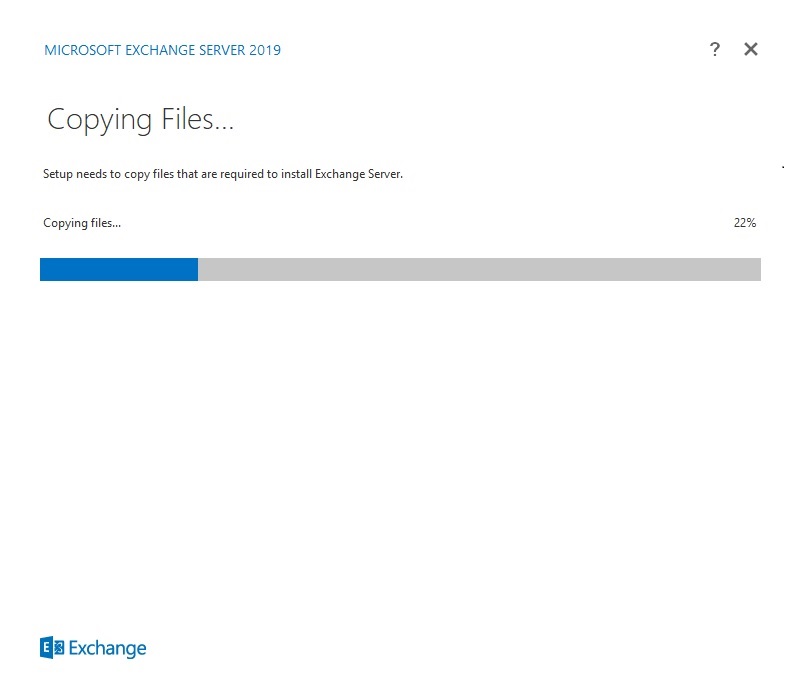
16- The setup will copy the installation files to the local drive so then prepares for the installation
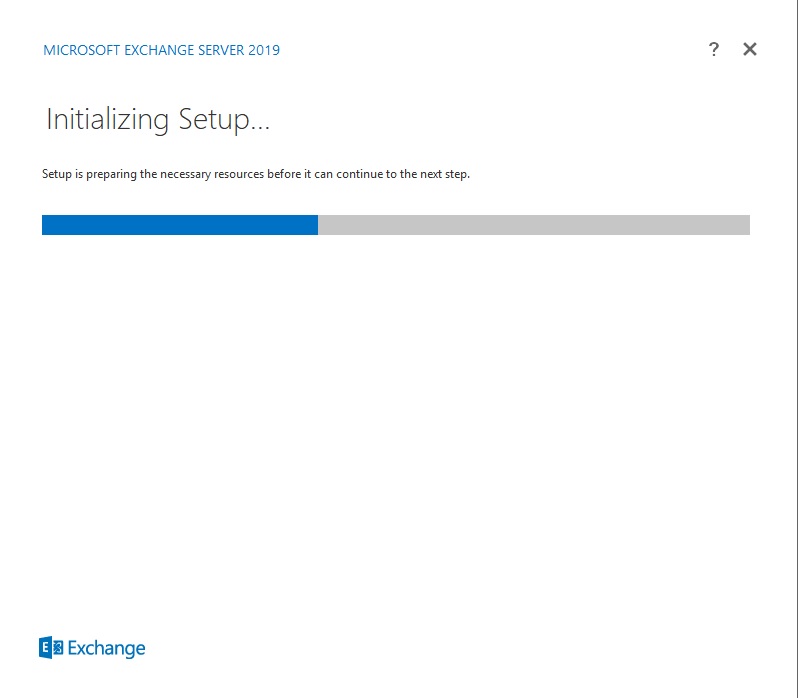
17- So initializing setup.
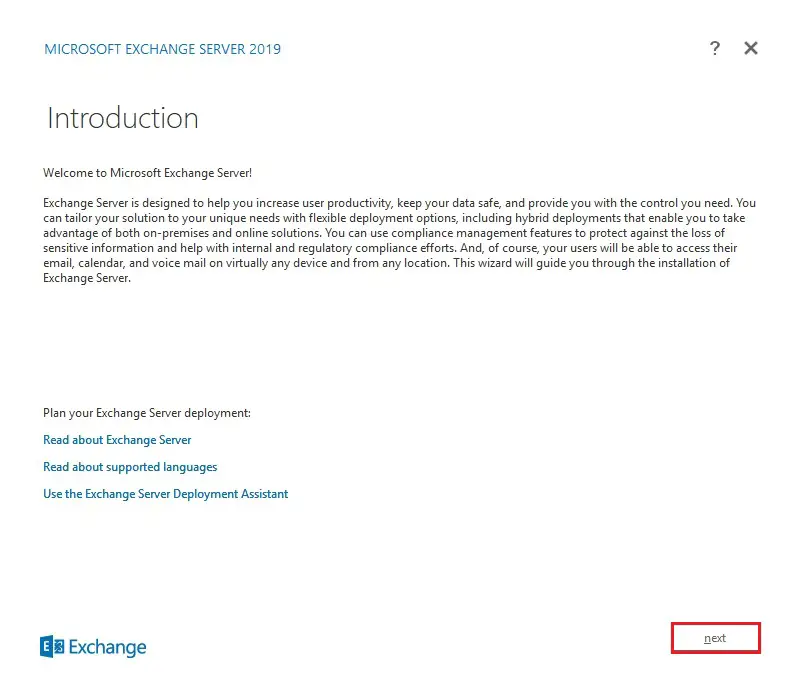
18- The Introduction page so clicks on next.
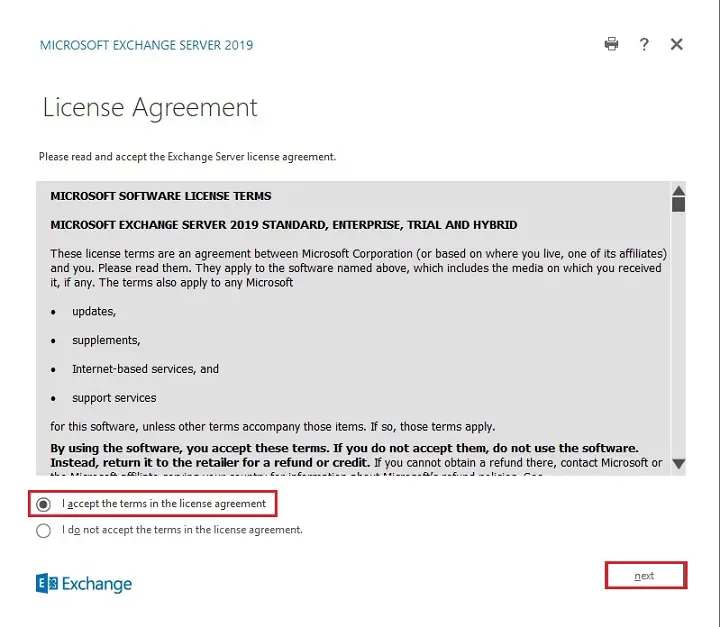
19- On the License Agreement page select, I accept the terms in the license agreement and then click on next
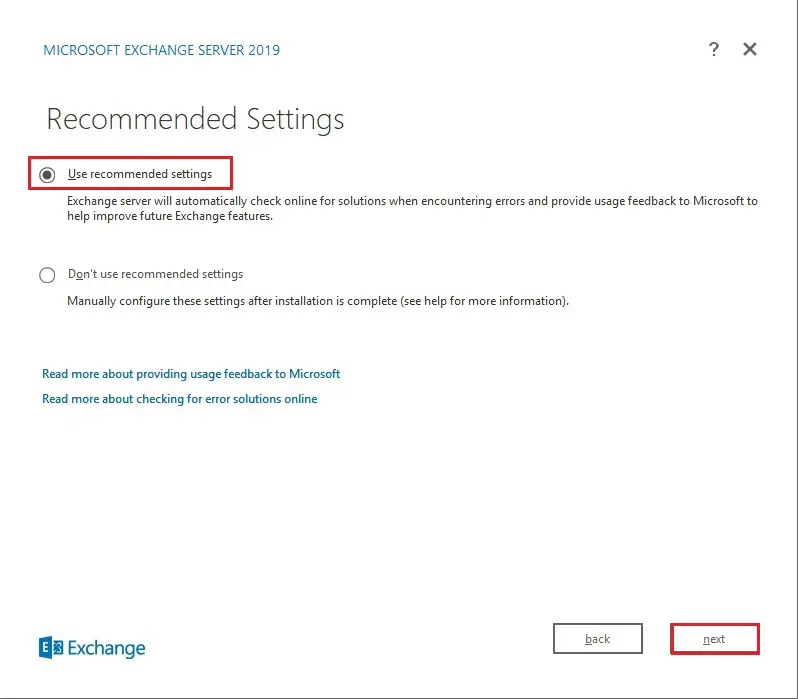
20- Select the use of recommended settings and then click on next.
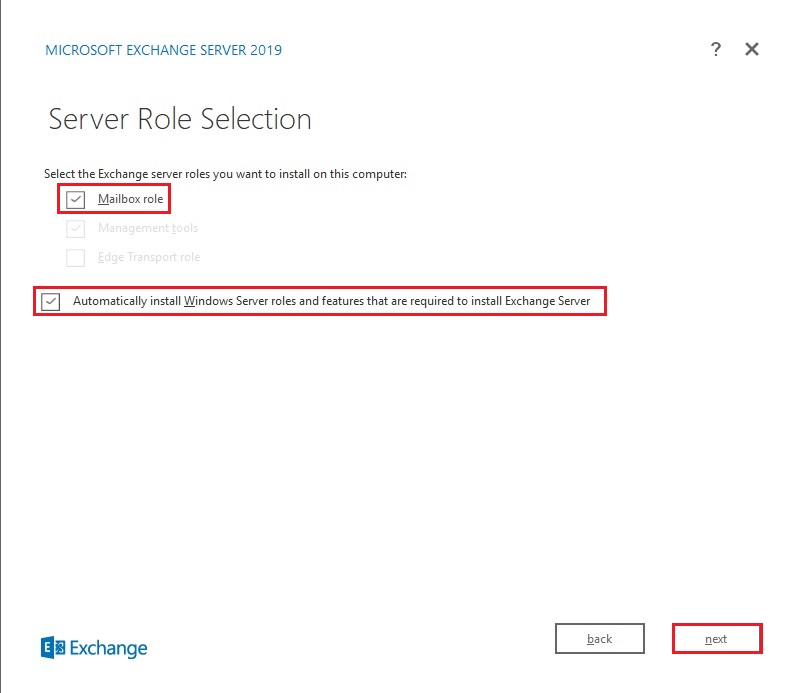
21- Microsoft Exchange 2019 only has a Mailbox role and Edge role only. Select Automatically install windows server roles and features that are required to install the exchange server so click on next.
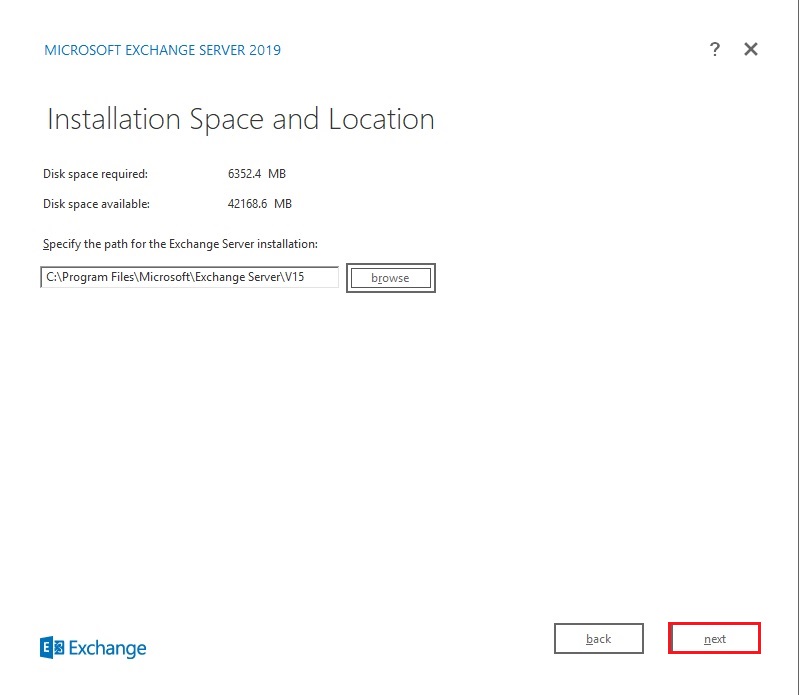
22- On the installation space and location page and then click on Next.
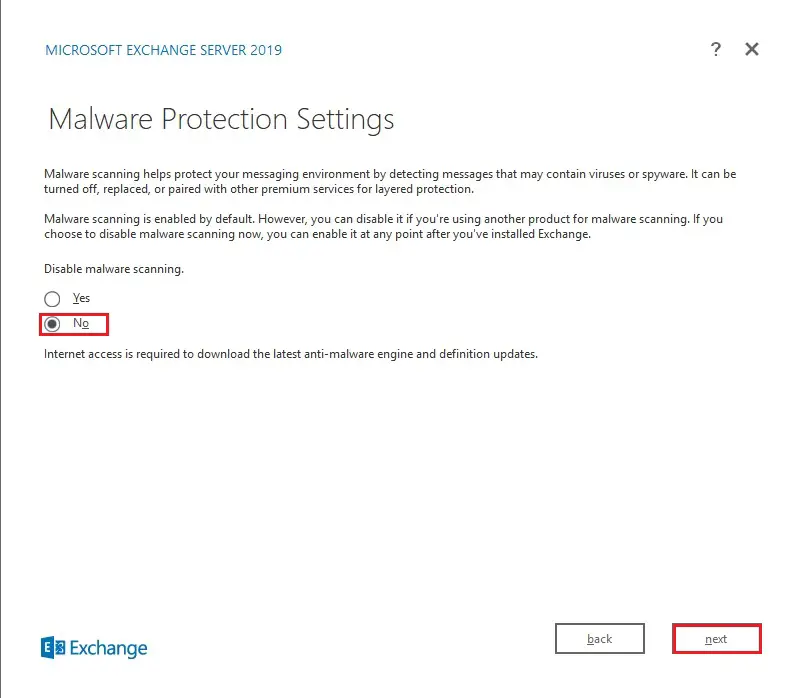
23- Malware Protection Settings page. You can choose to enable or disable malware scanning and then click on next.
24- On the Readiness Checks page view the status to work out if the organization and when the server role prerequisite checks completed successfully and then click on install.

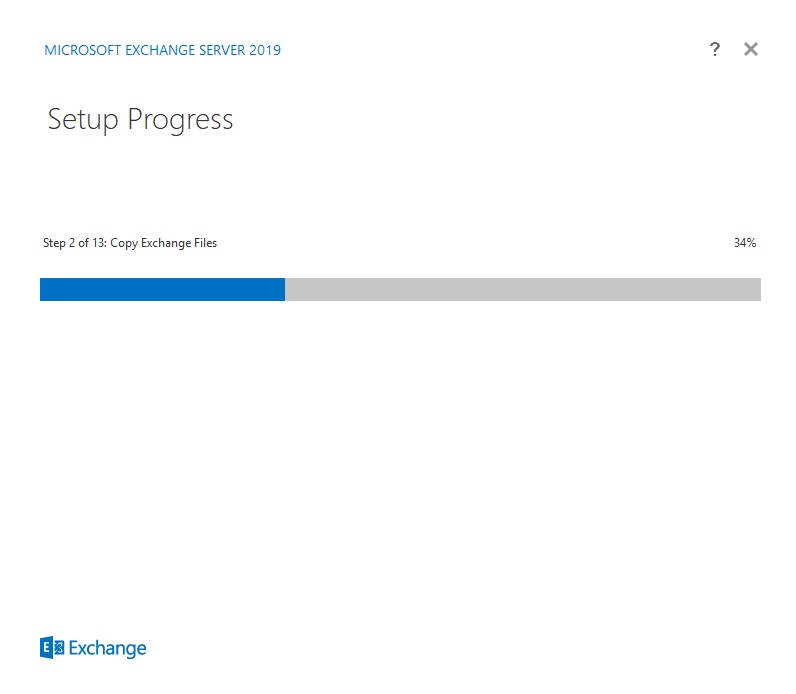
25- Now the installation started and that will take time its depend on your environment.
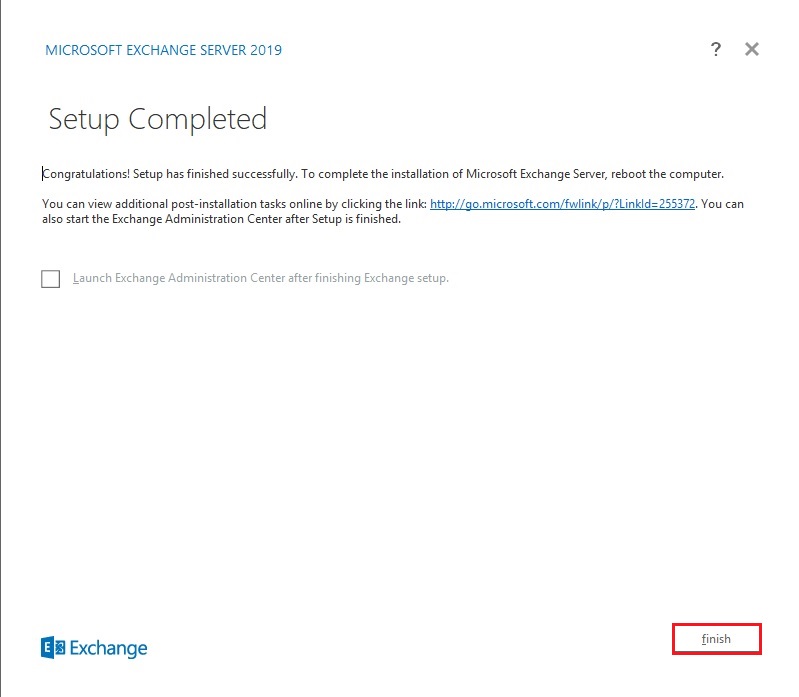
26- Exchange 2019 setup completed successfully so click on Finish and reboot the server.
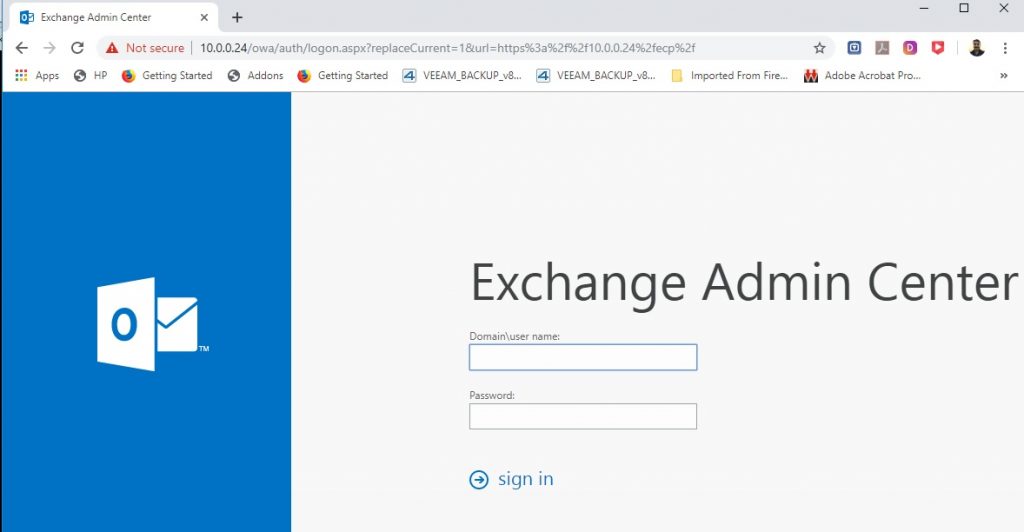
27- Open your web browser and then type URL https://localhost/ecp
Type username and password click on sign in.
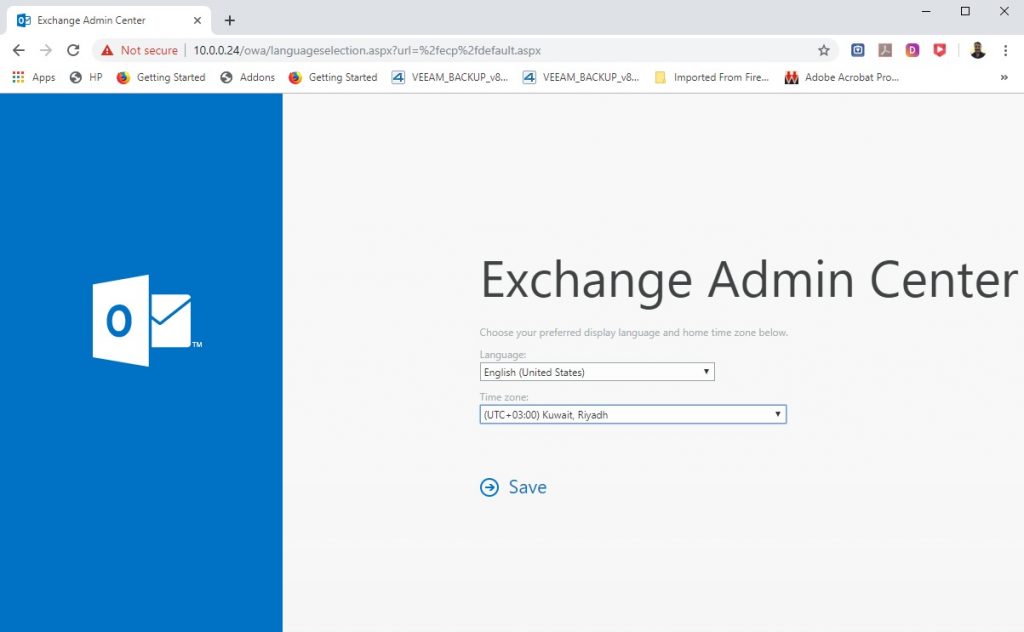
28- Select Language and Select Time zone and then click on Save.
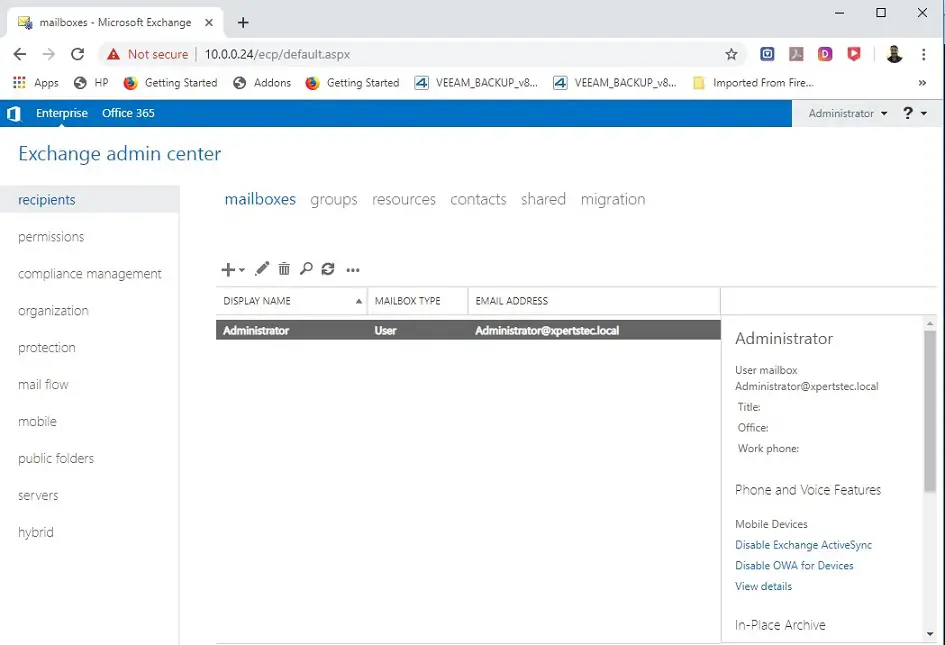
29- Review the tabs and sections in the Exchange Admin Center
30- Get-ExchangeServer.

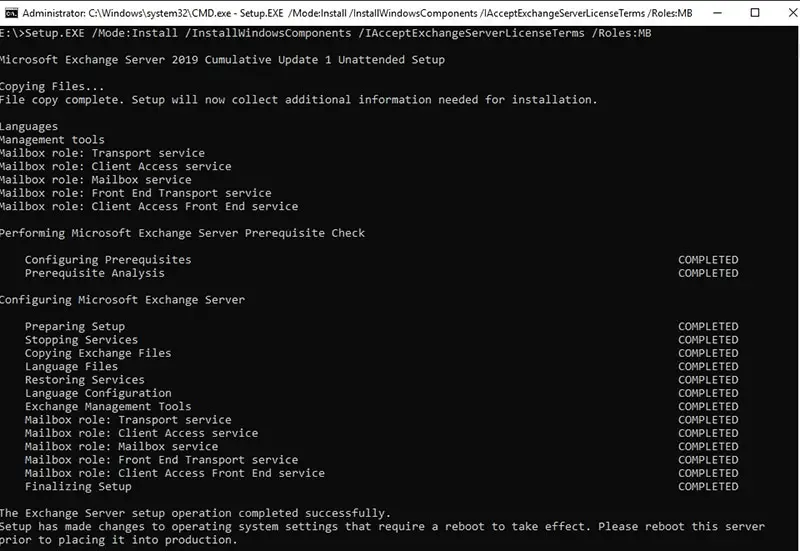
31- Installing exchange 2019 using PowerShell command
Setup.EXE /Mode:Install /InstallWindowsComponents /IAcceptExchangeServerLicenseTerms /Roles:MB
For more details click here
Exchange 2019 External and Internal URL Virtual Directories Configure


Thank you