Migrate Server 2008 to 2012, In this blog, I am using my Server2008 (windows server 2008 R2 STD SP1) and my SRV2012 (new Windows Server 2012 Standard)
Migrate Server 2008 R2 Active Directory To Server 2012
1- First we need to use a domain account which is a member of Domain Admins and Enterprise Admins Groups and member of the Schema Admins group. I am using the domain Administrator account which is already a member of all these groups.

How to Raise the Forest Functional Levels and Domain Functional Levels in Windows Server 2008 R2.
2- Click Start, select Administrative Tools, then Active Directory Domains and Trusts.

3- Right-click Active Directory Domains and Trusts and then select the Raise Forest Functional Level.

4- Select an available forest functional level “Windows Server 2008 R2 and then click Raise.

5- Click OK.
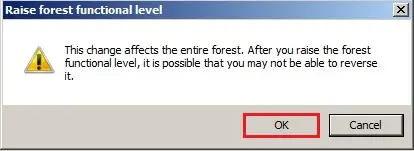
6- The functional level was raised successfully, so click ok.

Now Raising the Function Level of the Domain
7- Right click on the Domain name, (xpertstec.local) and then click Raise Domain Functional Level.

8- It has already got raised the Domain Functional Level to Windows Server 2008 R2, so click Close.

Prepare the Active Directory Schema for Windows Server 2012
9- Insert the Windows Server 2012 installation disk into the Windows Server 2008 R2 Domain Controllers.
10- Click Start > right click prompt > select Run as administrator.

11- Type D: and press Enter D is the windows server 2012 installation disk.
12- Type the command cd d:\support\adprep

13- Now type adprep /forestprep

14- Type the letter C and then press enter

15- And then type adprep /domainprep and then press enter.

Install Windows Server 2012 and join it to the Windows Server 2008 Domain Controller.
17- How to Install Windows Server 2012, Click here
18- How to change the computer name in Windows Server 2012, Click here
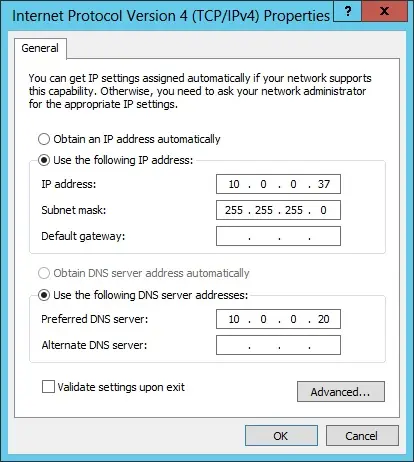
19- You will also need to set up the IP Address of the SRV2012 server.
How to Join Windows Server 2012 to a Domain Controller.
21- How to Join Windows Server 2012 to a Domain, Click here.
22- After the server reboots, we need to logon to the server with a domain administrator username. So Click on the Switch User button.

23- Click other user.
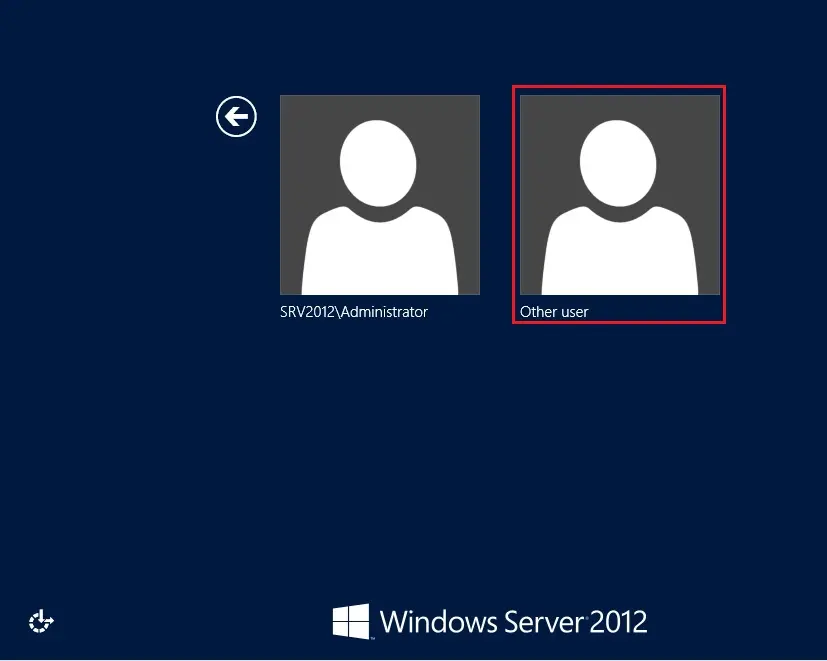
24-Type the domain administrator username and password. The domain name will be replaced beside Sign in to :xpertstec

Setup Additional Domain Controller
25- How To Create Additional Domain Controller (ADC) In Windows Server 2012, Step by step, Click here.
26- After setting an Additional Active Directory Domain Controller.

Transferring the Flexible Single Master Operations (FSMO) Role.
I have a Windows Server 2008 Domain Controller ( server2008 ) and have an additional Windows Server 2012 domain controller (SRV2012). to finish the migration, we’d like to transfer 5 FSMO roles to the new domain controller.
- Schema Master
- Domain Naming Master
- PDC
- RID pool manager
- Infrastructure Master
27- To find who is currently holding FSMO > open command prompt > so run the following command, netdom query fsmo

The FSMO Server roles are currently with the Windows Server 2008 R2 domain controller (server2008).
Using Active Directory Schema Master snap-in to transfer the Schema Master role.
Migrate Server 2008 to 2012
28- Open Command Prompt in administrative mode and then type regsvr32 schmmgmt.dll

29- Open Microsoft Management Console MMC

30- Click File and then select Add/Remove Snap-in…

31- From the left side, under Available Snap-ins > select Active Directory Schema > then click Add and click ok.

Change Domain Controller
32- Right click Active Directory Schema and then select Change Active Directory Domain Controller.

33- Select this Domain Controller or AD LDS Instance > click on the domain controller that you want to be the schema master role and then click ok.

34- Click ok.
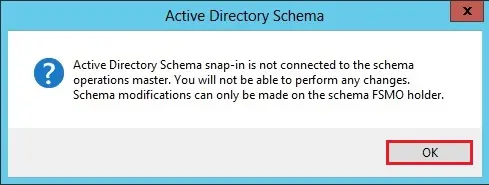
35- In the console1, right click Active Directory Schema [SRV2012.xpertstec.local] and then select Operations Master.

36- Click Change.

37- Click Yes.

38- Operations Master successfully transferred, so click ok.

39- Now confirm your current schema master which is SRV2012, so click close.

Using Active Directory Domains and Trusts to transfer the Domain Naming Master Role.
40- From the Start Screen, open the Active Directory Domains and Trusts.

41- Right-click Active Directory Domains and Trusts and then select Change Active Directory Domain Controller.

42- Select this Domain Controller or AD LDS Instance > click on the domain controller that you want to be the schema master role and then click ok.

43- Right click Active Directory Domains and Trusts and then select Operations Master.

44- Click YES to confirm the transfer of the Domain Naming role.

45- The operations master was successfully transferred, so click ok.

46- Confirmed the domain naming operation master role and then click close.

Using Active Directory Users and Computers snap-in to transfer.
RID, PDC, and Infrastructure Roles.
47- From the Start Screen, open the Active Directory Users and Computers.
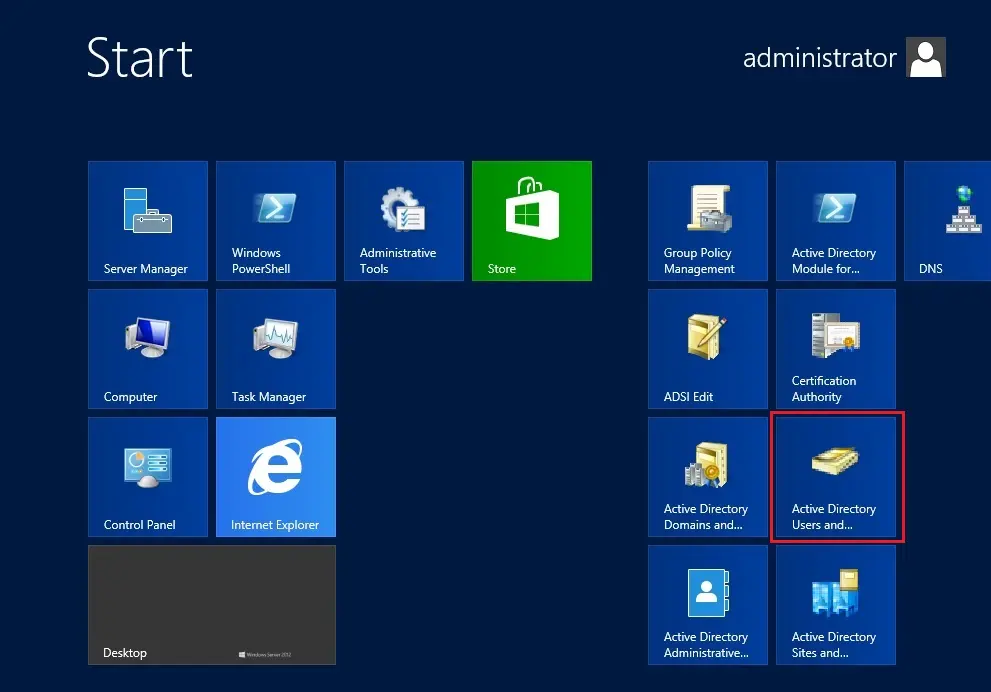
48- On the SRV2012 server > open Active Directory Users and Computers, right-click on your domain xpertstec.local and then click Operations Masters.

49- On the Operations Masters, Select RID, then select the Change button.

50- Click Yes.

51- The operations master role was successfully transferred, so click ok.

52- Verify that Operation master now transferred to our new Server SRV2012.xpertstec.local

53- On the Operations Masters > Select PDC and then select the Change button.

54- Click Yes.

55- The operations master role was successfully transferred, so click ok.

56- Verify that Operation master now transferred to our new Server SRV2012.xpertstec.local

57- On the Operations Masters > select Infrastructure and then select the Change button.

58- Are you sure you want to transfer the operation master role, so click on Yes.

59- The operations master role was successfully transferred and then click on ok.

60- Verify that Operation master now transferred to our new Server SRV2012.xpertstec.local

61- Now we need to check if the roles were properly transferred > open command prompt and type “netdom query fsmo” you have successfully transferred all of your FSMO roles to the SRV2012.
Now Migrate Server 2008 to Server 2012 Completed

Now the final step is to remove (uninstall) server2008 Active Directory domain controller.
Remove Active Directory Server 2008
62- Click Start > click Run type dcpromo and then click on ok.
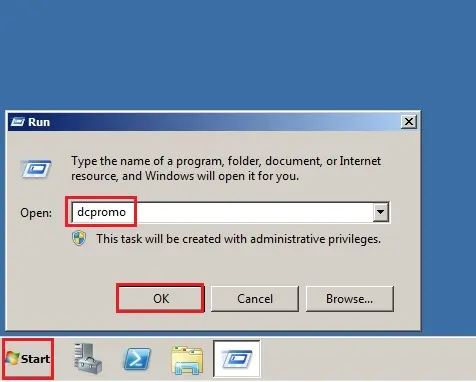
63- Welcome to the Active Directory domain services installation wizard, click next.

64- The Active Directory domain controller has the global catalog service, make sure your primary DC also has the service enabled and then click ok.

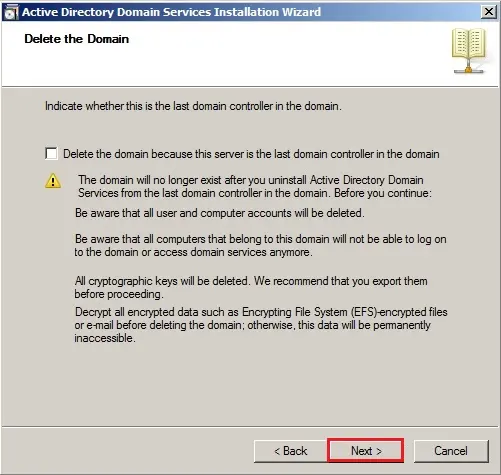
65- Confirmed that the Delete this domain, because this server is the last domain controller in the domain, is UNCHECKED and click on next.
66- Type a password for the Administrator account on this server and click next.

67- Review the summary (remove active directory domain services from this computer) and click next.

68- Check the Reboot on completion box to restart the server after the service has been removed.

69- After rebooting server2008 DC Login and open Server Manager.

70- In Server Manager under Roles Summary, click Remove Roles.

71- Remove server roles wizard, click next.

72- Uncheck Active Directory Domain Services, DNS Server and click next.

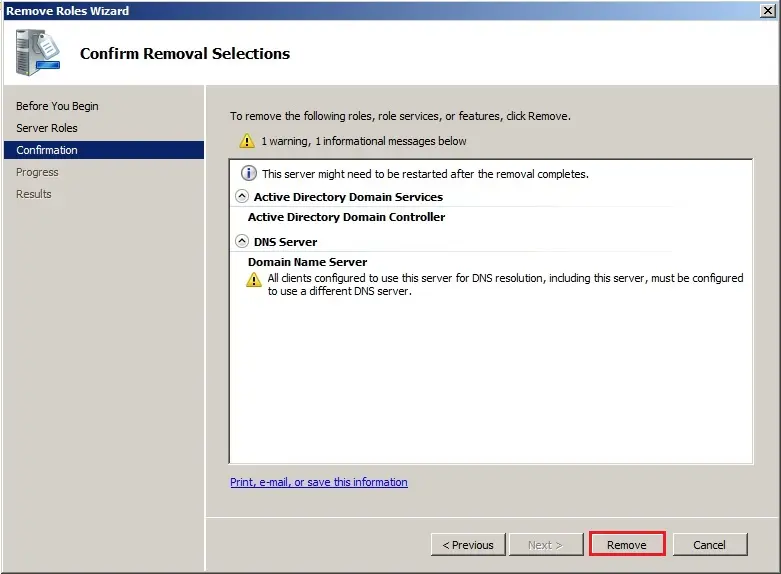
73- Confirm removal selection and click Remove.
74- Active directory domain service removal results restart pending, click Close.

75- Do you want to restart now, click Yes.

76- After rebooting server log back to server2008, active directory domain services removal succeeded and click Close.

Unjoin the Windows server 2008 machine from the domain.
77- Click Start > right-click computer and select properties.

78- From windows server 2008 system properties, click change settings.

79- On the System Properties click Change.

80- Select workgroup type in a workgroup name and click ok.

81- After you leave the domain a warning message appears, click ok.

82- Welcome to the workgroup, click ok.

83- Click ok to restart the server.

84- System Properties, click Close.

85- Click restart now or restart later and then shut down this server.

Also, read this: Micrate Active Directory From Server 2008 to 2019
For more details click here


