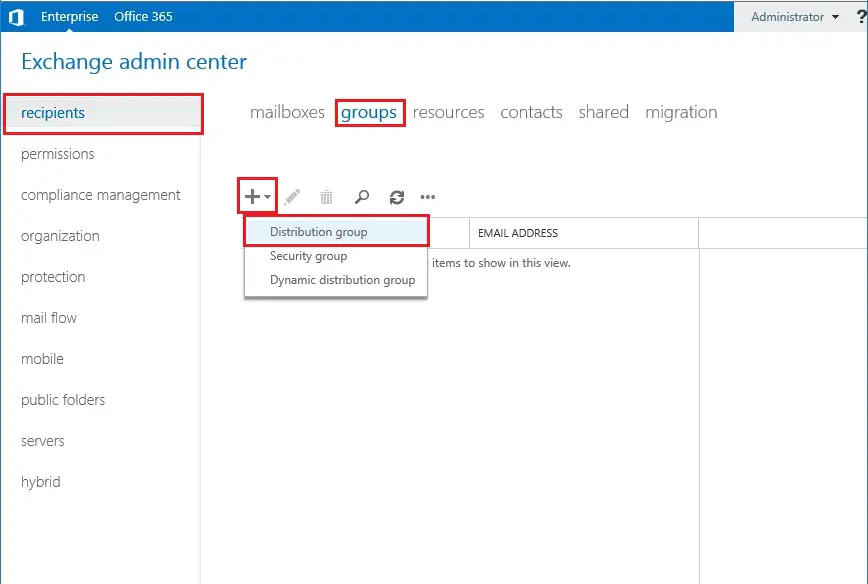
How to create Distribution Group in Exchange server 2019.
In this blog, I will create a distribution group named ITDepartment for ITDepartment users. So when somebody sends an email to [email protected] the email will be sent to all the members of ITDepartment group.
Create a Distribution Group Exchange 2019
1- Login to Exchange Admin Center(EAC) > click recipients > select groups > Click “+” Add so click distribution group.
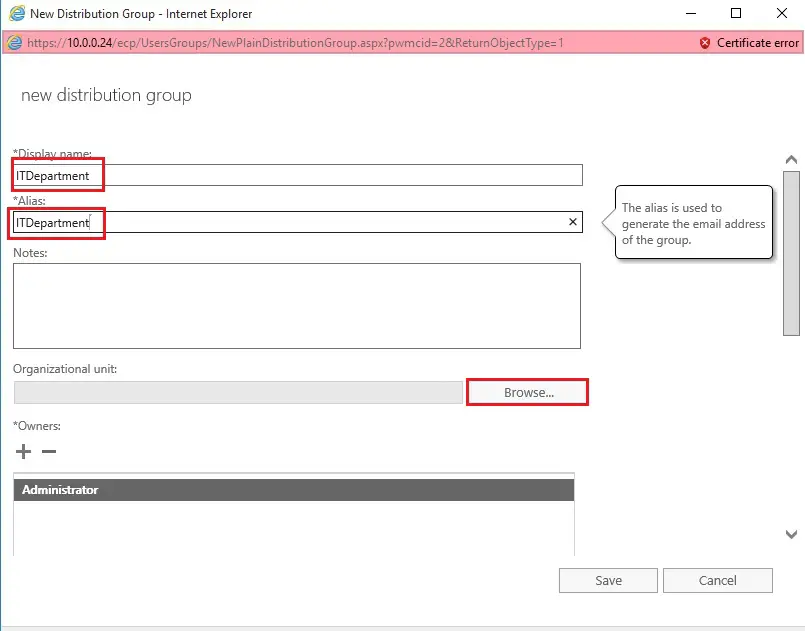
2- So we need to type Display name and alias of the group name. Under the Organization unit and click on browse.
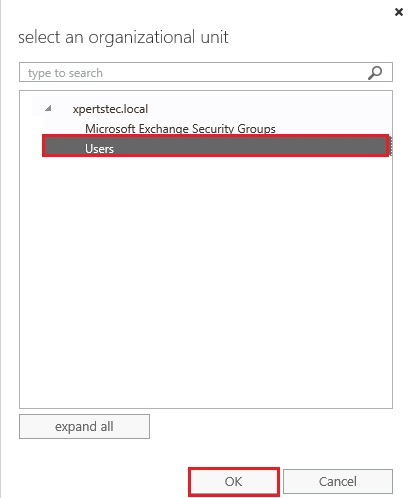
3- Select the particular OU. Here, I have selected Users. So, The dist group will be created in the Users OU and click ok.
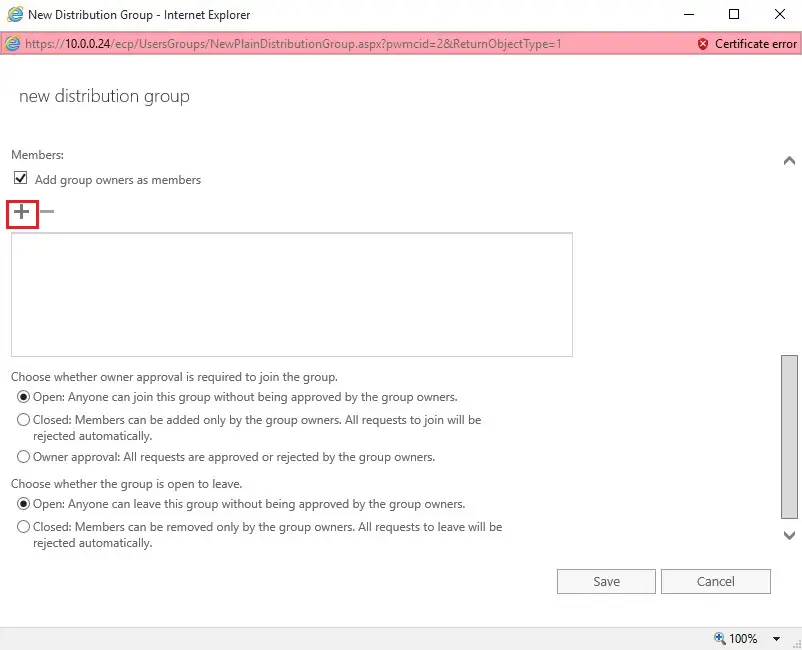
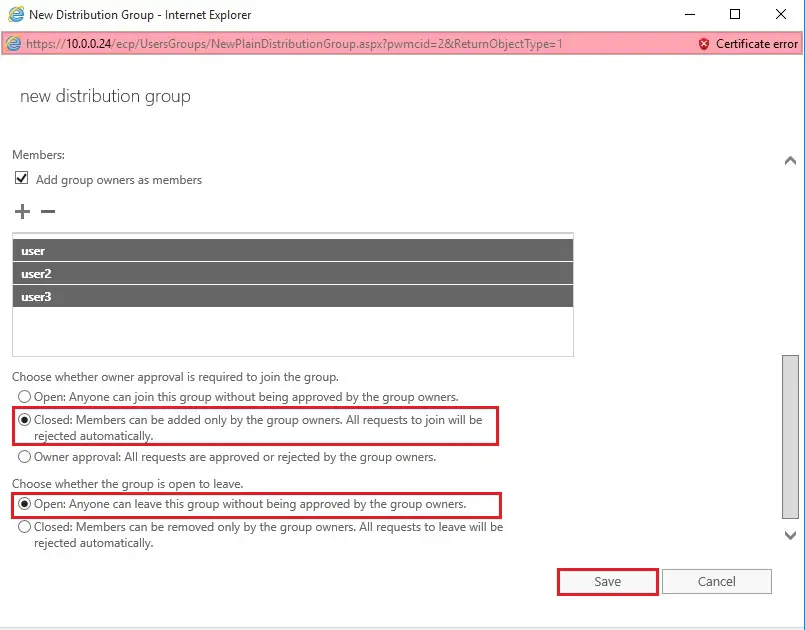
4- Under Members click, so click the “+” icon.
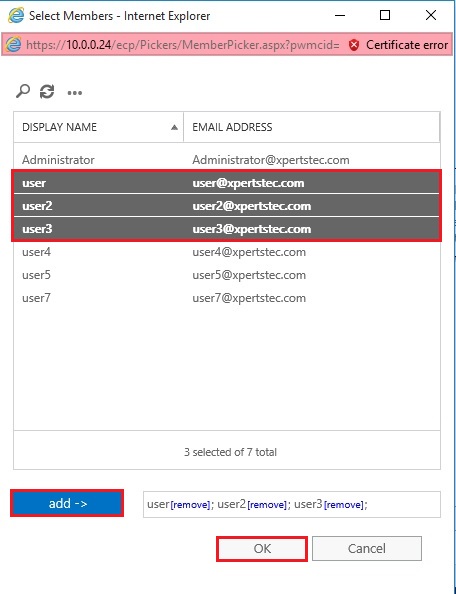
5- Select user you want to add in the group so click add and click ok.
6- I have selected Closed, which means members can be added only by group owners. likewise, there are two choices for users quitting the group, Open or Closed. Here, I even have selected Open which allows any group member to go away the group without a gaggle owners’ approval. and click on save.
save.
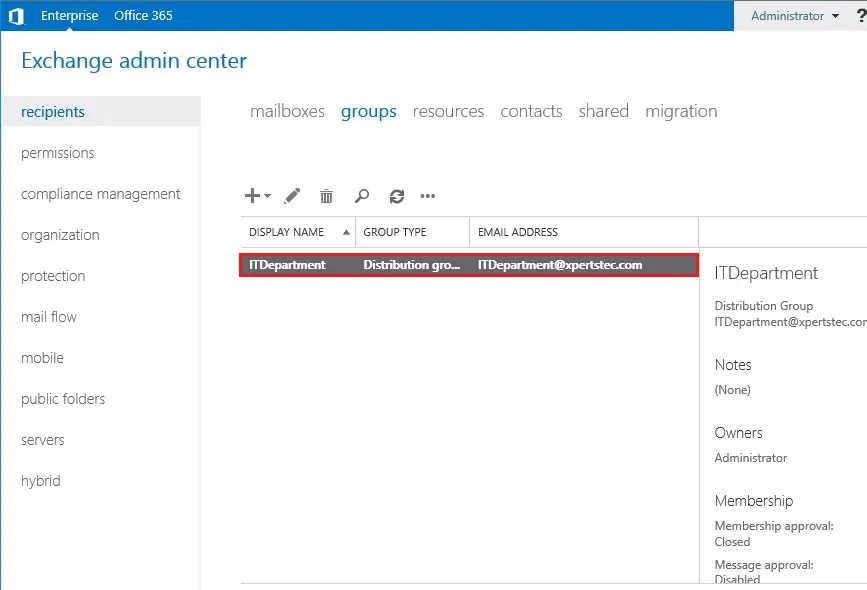
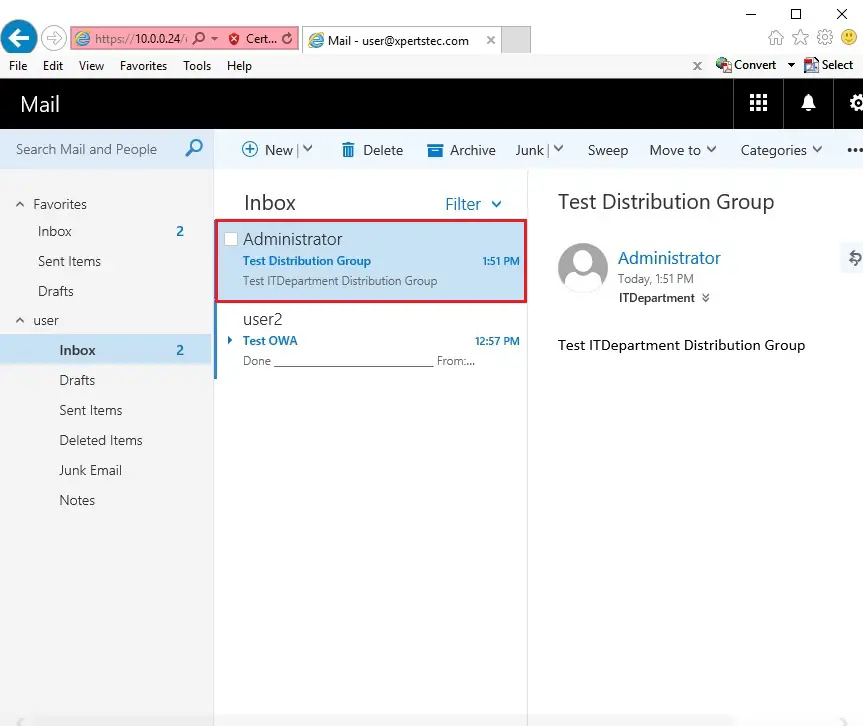
7- As you can see below the group created with [email protected] email address. By default, only users inside the organization can send emails to this group.
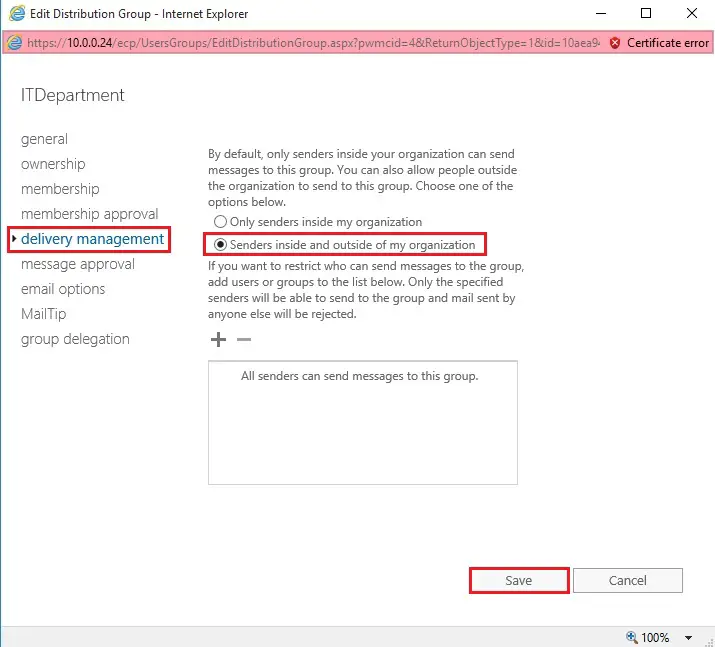
8- Select the Distribution group and click on edit and select Delivery Management.
So, choose senders inside and out of doors my organization clicks on save.
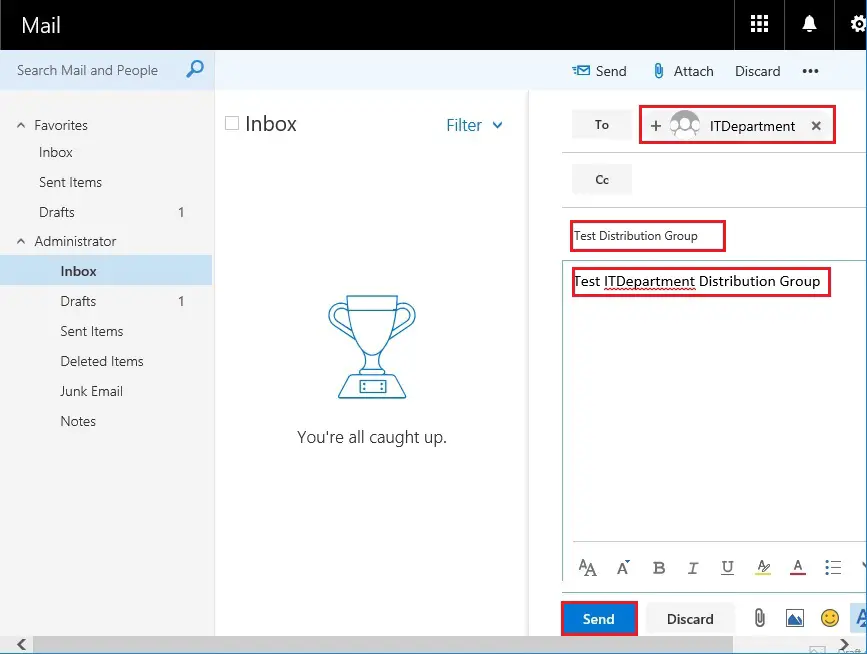
So, now test by sending an Email.
9- Login Outlook Web App > select new mail and type Dist group name (ITDepartment) and type Subject and click send.
10- Now I received an email.
11- Use Exchange PowerShell to make a distribution group
This example creates a distribution group with an alias ITSupport and the name ITSupport. The group will created within the default OU and anyone can join this group without the approval of the group owners.
New-DistributionGroup -Name “ITSupport” -Alias ITSupport -MemberJoinRestriction open
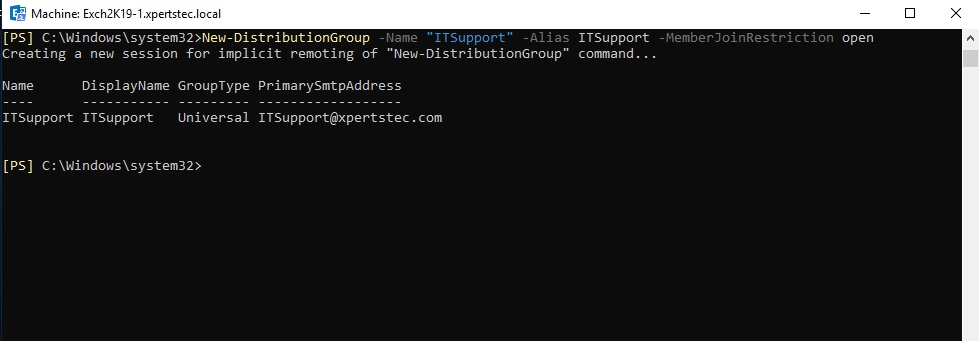
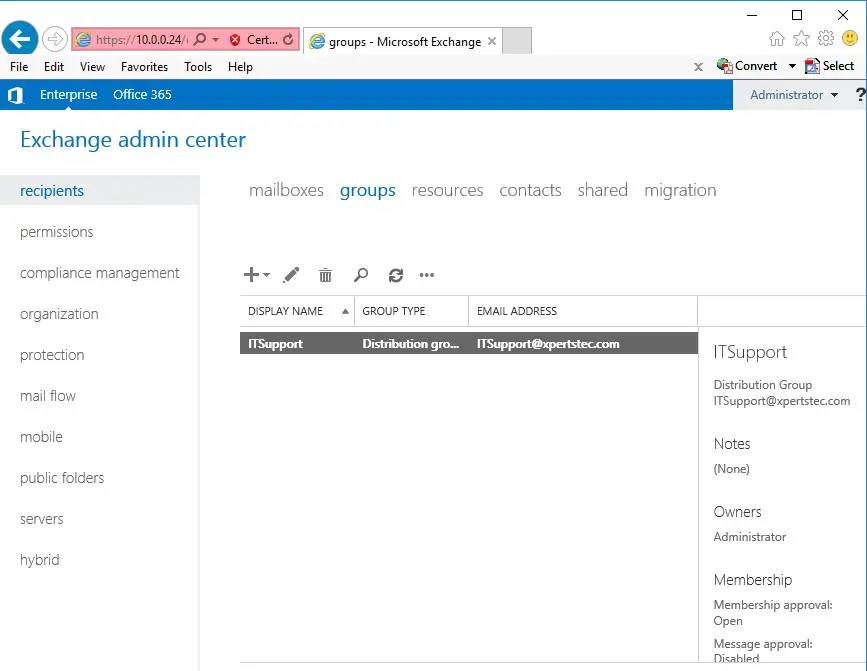
12- ITSupport Distribution group successfully created.
For more information click here
How to Create Security groups Exchange 2019