Microsoft Azure

How to Configure MARS Agent Backup Schedule

This article is a part of the series: In this guide, I am going to configure MARS Agent Backup Schedule. The Microsoft Azure Backup console looks like very familiar to Windows Server Backup.

Setup and Configure Azure Backup

Azure Recovery Services vault

Download and install MARS Agent and vault credentials

Recover Data Using MARS Agent

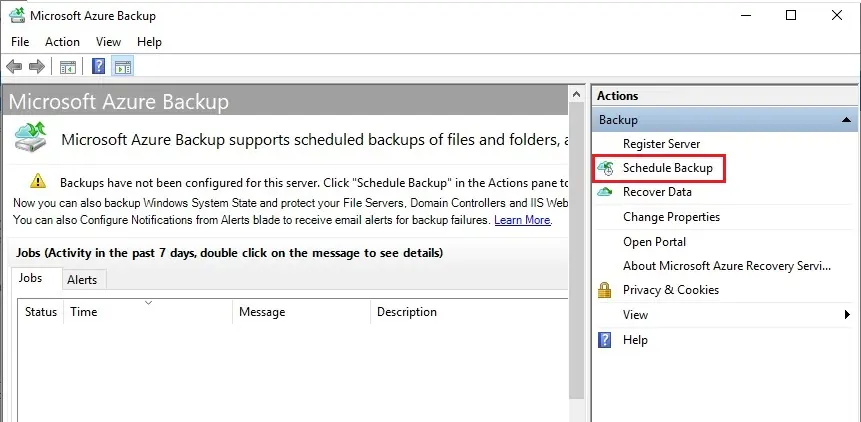
1- Click Schedule Backup to begin.

microsoft azure backup agent

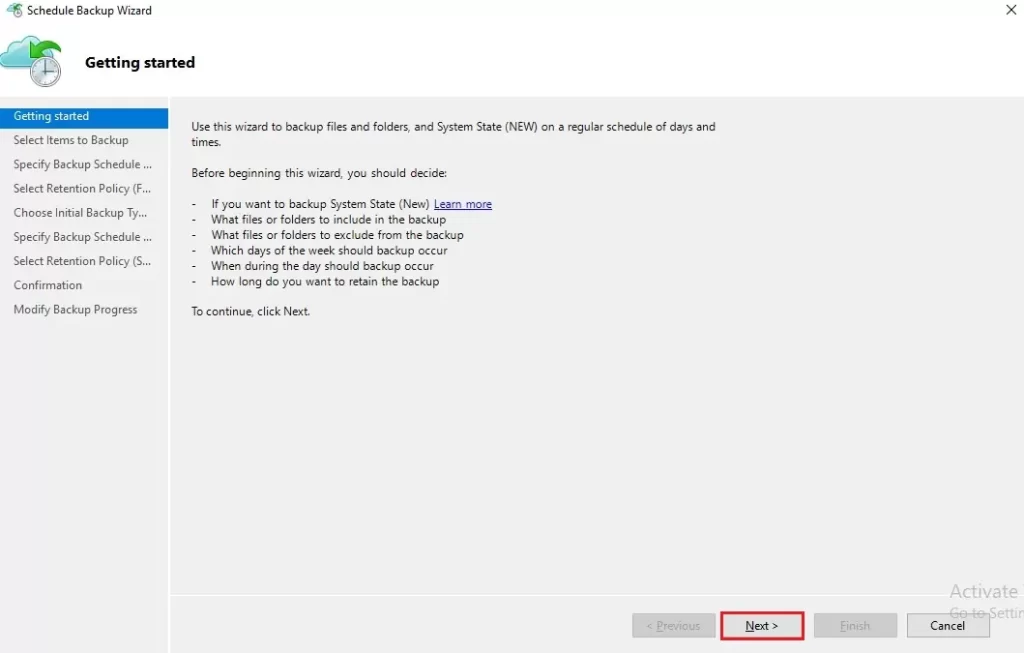
2- Azure schedule backup wizard click next.
buy valtrex online http://iddocs.net/images/layout4/gif/valtrex.html no prescription pharmacy

azure schedule backup wizard

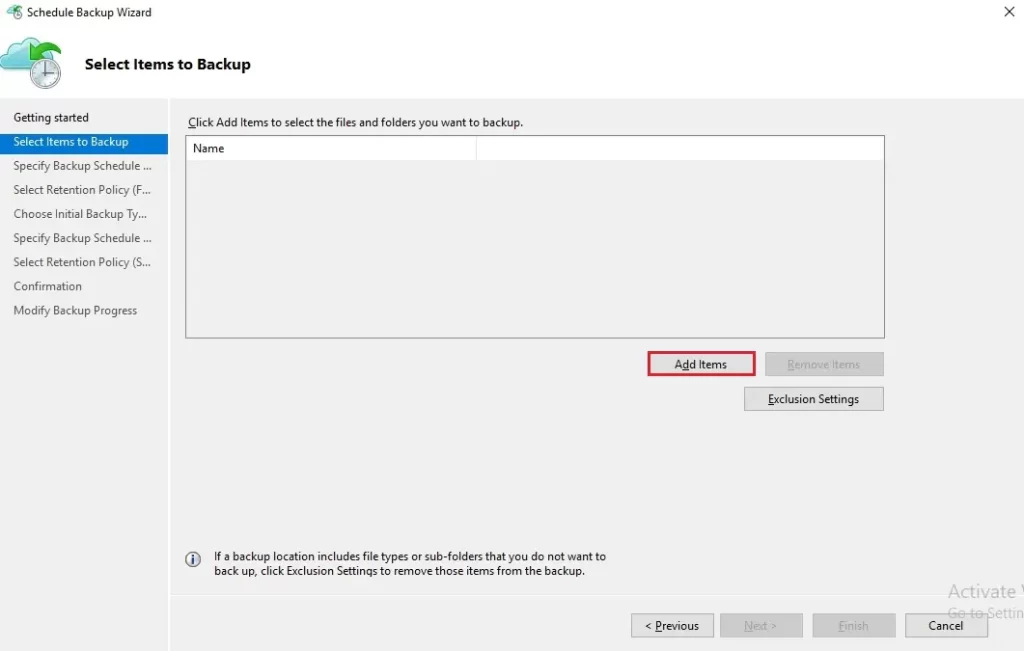
3- Select item to backup, select add items.

azure schedule backup add items

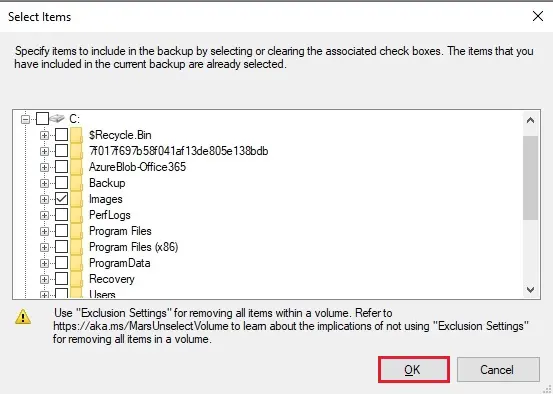
4- Add the items you need to backup and then click ok.

windows explorer

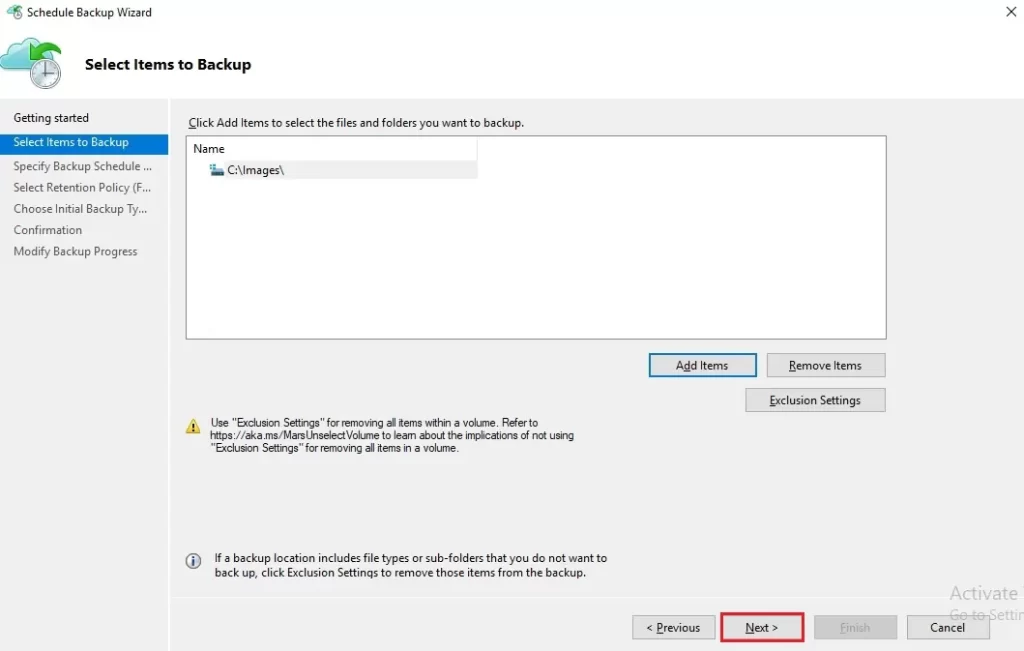
5- Click next.

azure schedule backup add items

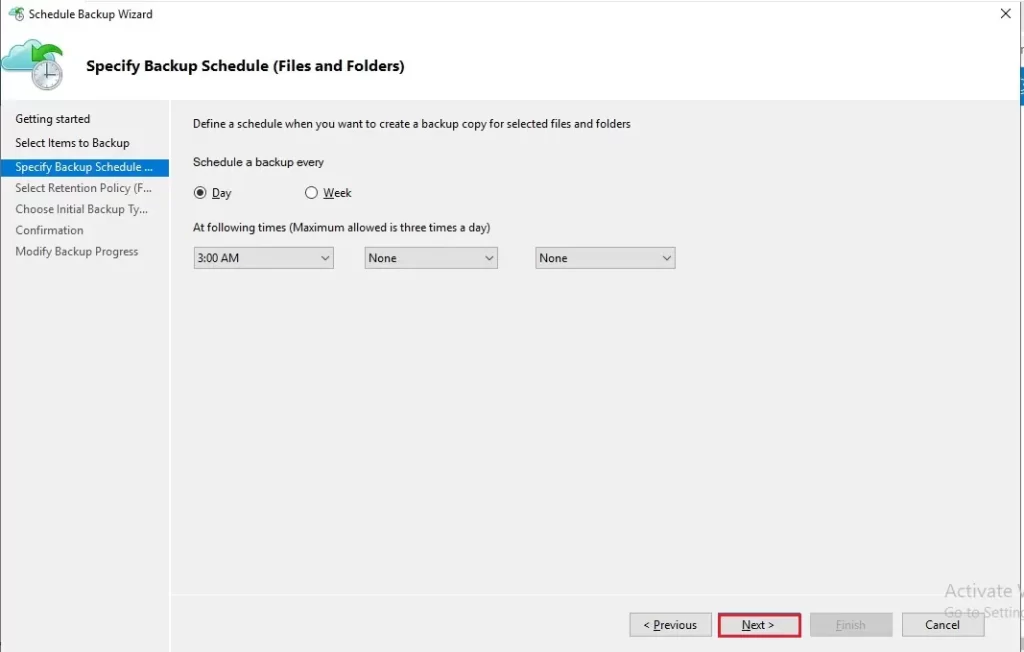
6- Specify backup schedule and then click next.

azure schedule a backup

7- Select retention policy and then click Next.
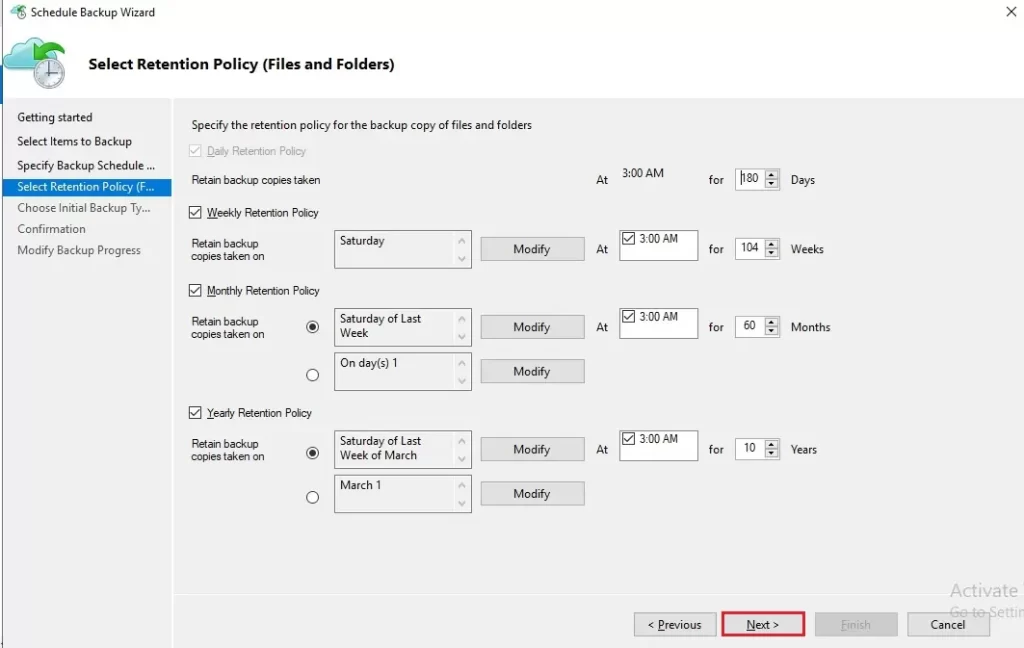
azure schedule retention policy

8- Most of us will just choose online to upload the backup directly from the server into the Azure cloud.
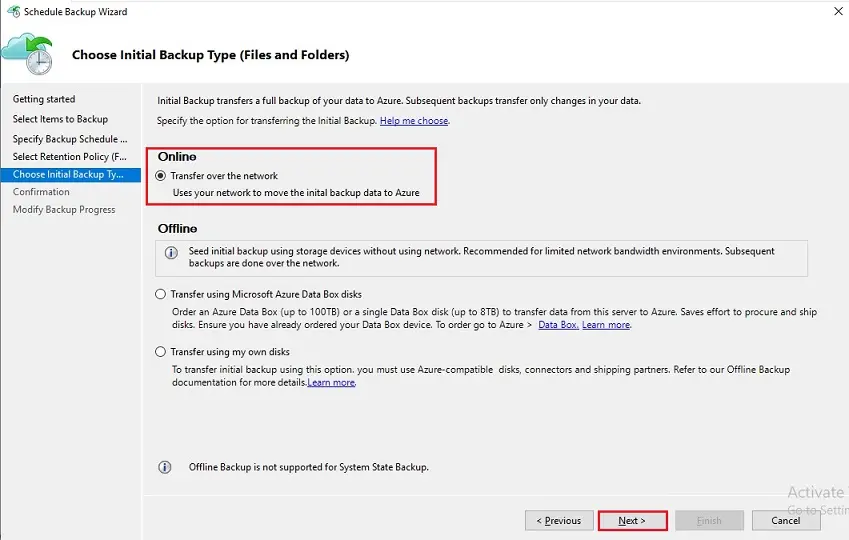
azure schedule intial backup

9- Review your selections and then click Finish.
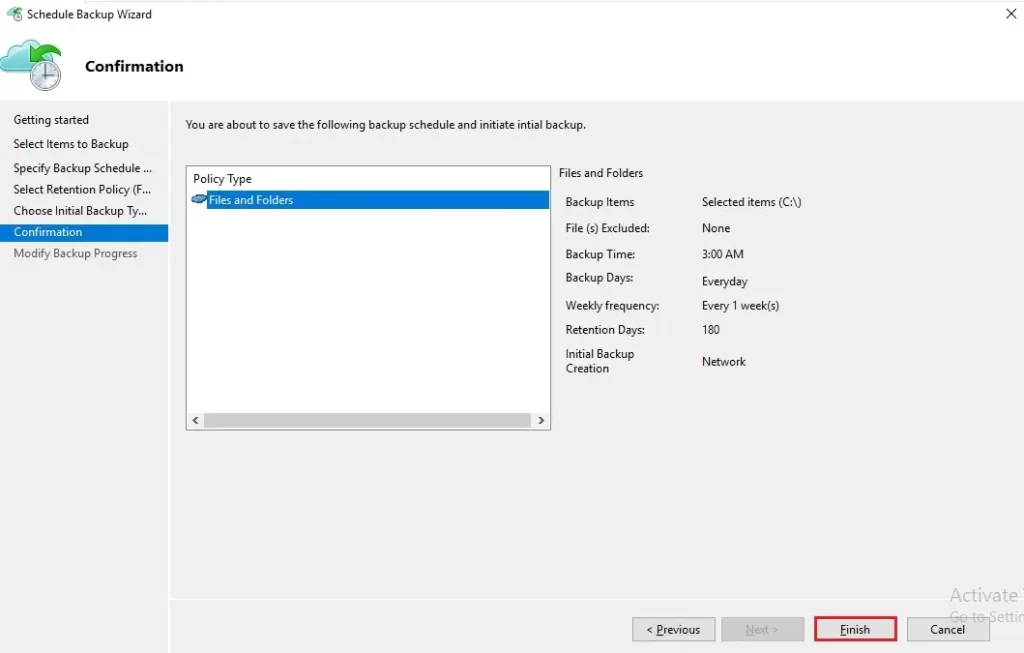
azure schedule backup confirmation

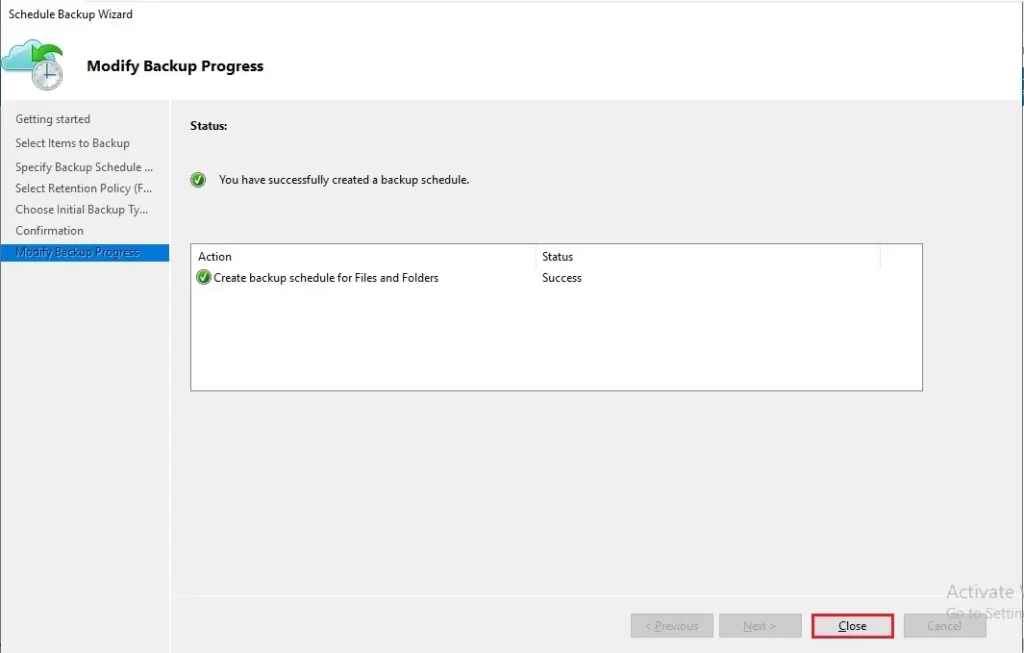
10- Click close.

azure schedule modify backup process

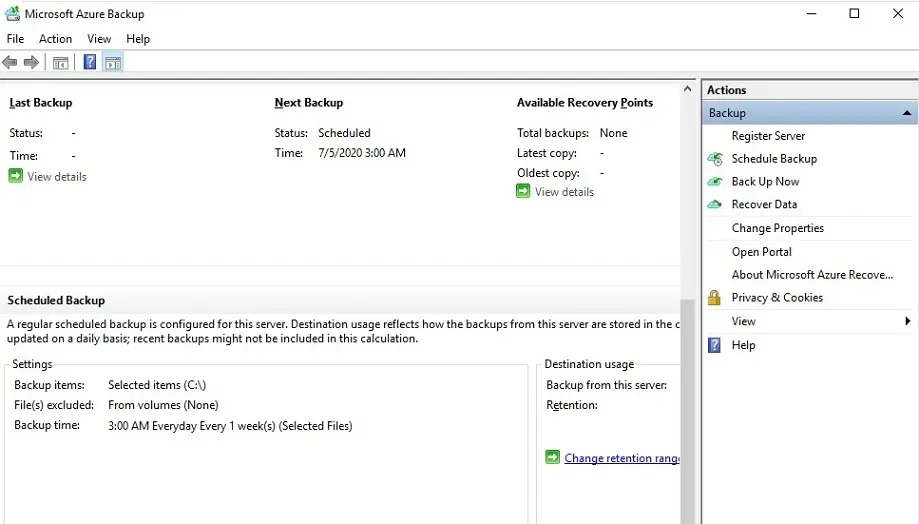
11- Backup schedule.

microsoft azure backup agent

For more details Configure MARS Agent Backup Schedule visit Microsoft

Jamil Parvez

Jamil Pervez works as a Network Administrator, based in Kuwait with a Primary focus on Microsoft technologies. Microsoft Certified MCSE, MCTP, MCITP, CCNP, CCIP, CCVP with 20 years of experience in administering Windows Servers, Exchange, VMWare, Veeam B&R, Veritas BackupExec.

Related Articles

Leave a Reply

Back to top button