Create Hyper-V Virtual Machine, in this guide first I will create a virtual switch, which can be used to ensure communication between VMs. A virtual switch enables the connection of VMs to both physical and virtual networks. As well as, a virtual switch can be used for migrating VMs from one physical host to another.
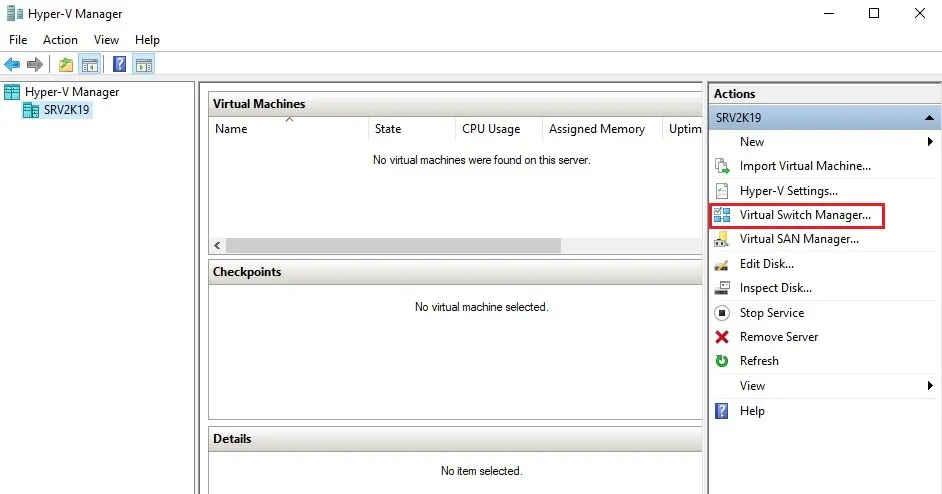
1- Open Hyper-V Manager, select the Hyper-V host computer name and then select virtual switch manager from action menu.
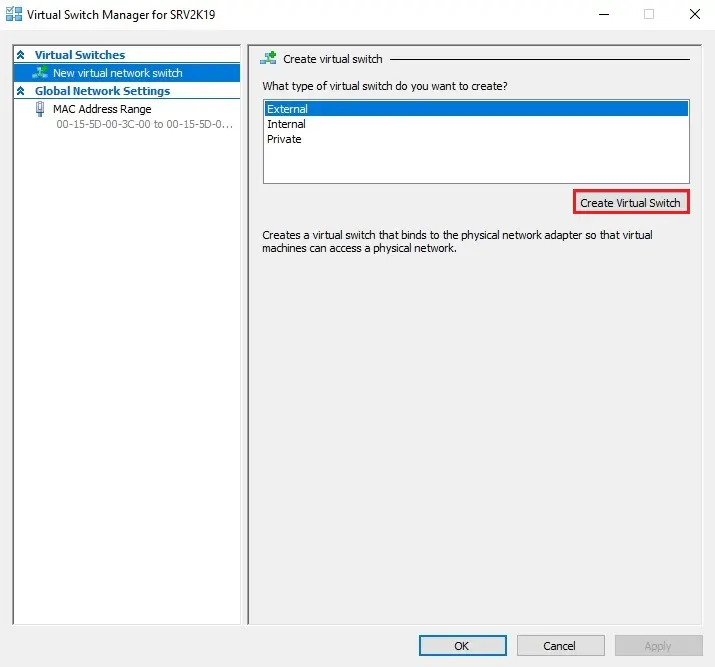
2- Virtual Switch Manager will open, where we can select the type of virtual switch that we need. There are 3 types of virtual switches available. Select Create New Switch.
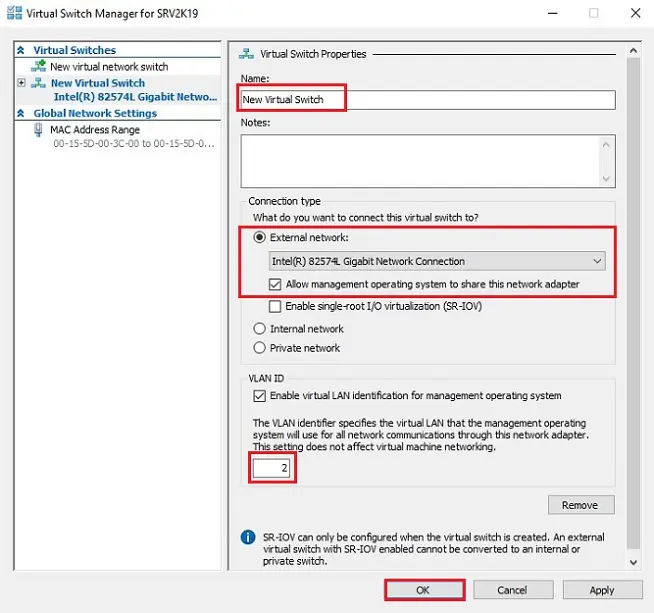
3- Virtual Switch Manager Properties type a virtual switch name and type some additional information in the Notes section.
Configure the connection type by selecting the network type you need the virtual switch to connect to (external, internal, private).
Select a local area network (LAN) that will be used for network communications, choose to enable virtual LAN identification for the management operating system. This feature is available for external and internal networks.
You can manually set up VLAN ID, which will then be associated with a certain VLAN and used for future network communications.
Click OK.
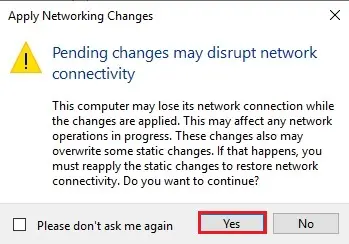
4- Click the Yes button to apply networking changes.
4- Click the Yes button to apply networking changes.
Create Hyper-V Virtual Machine under Hyper-V Manager
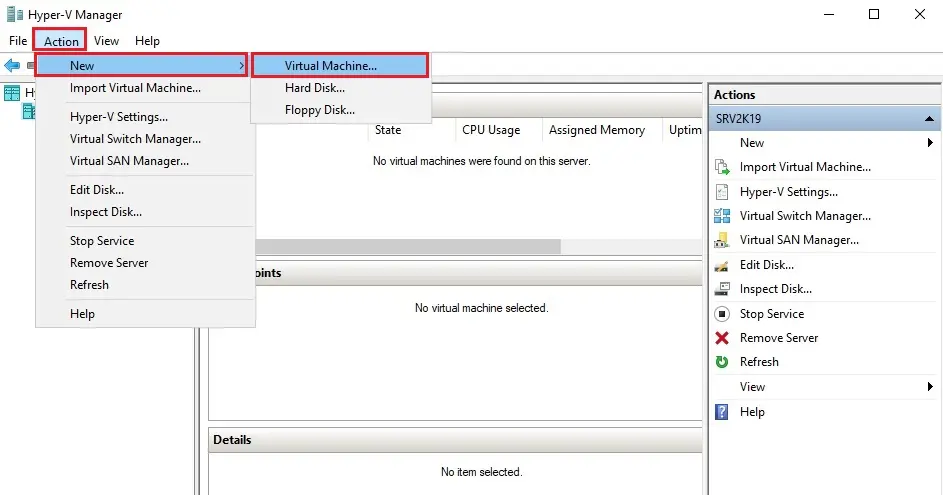
5- Select the Actions menu, click New and then click Virtual Machine.
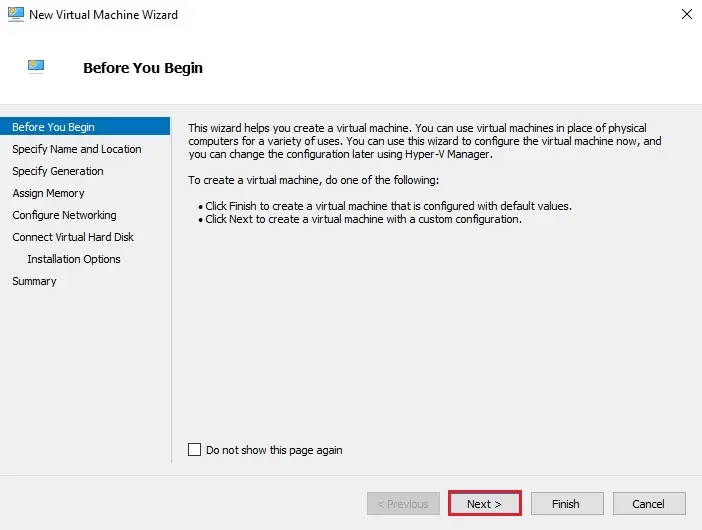
6- New Virtual Machine Wizard click next.
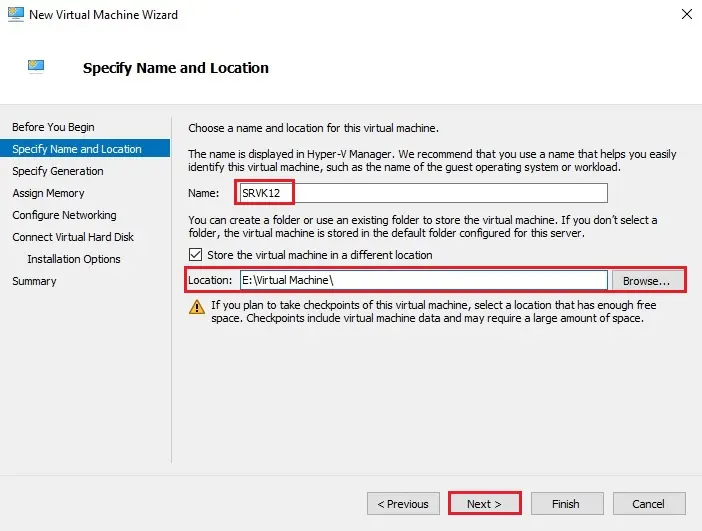
7- Type a Virtual Machine name. In the VM location, you can either leave the default one.
If you want to use a different location, then click the Browse button to select and then click Next.
8- In the Generation section, you can select the generation of the VM and then click next.
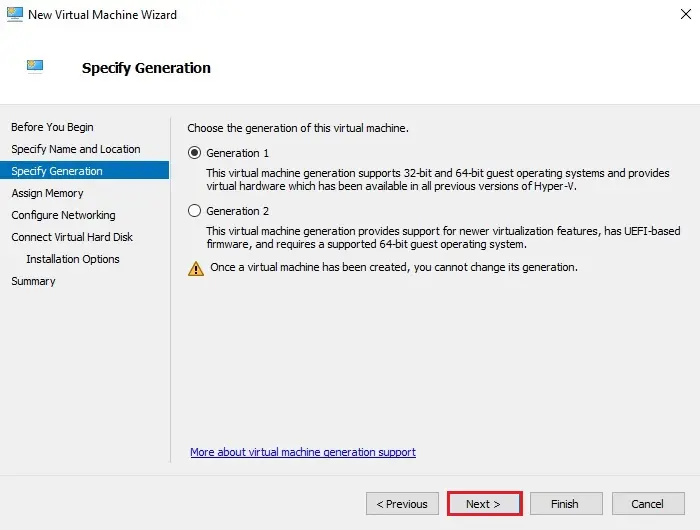
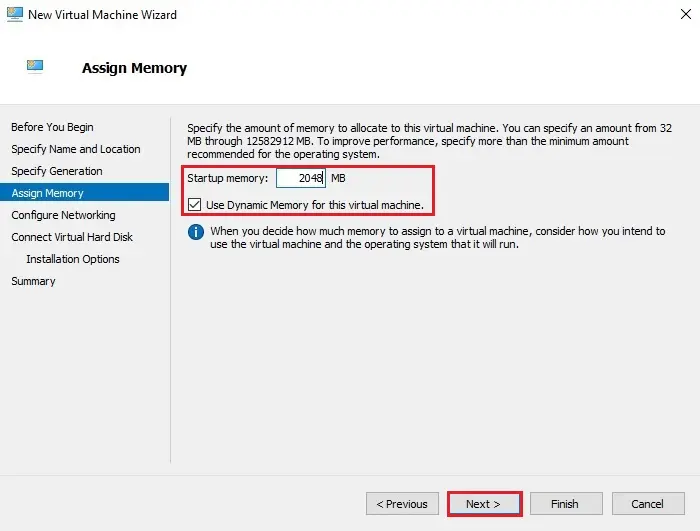
9- Create a Hyper-V Machine, specify the amount of memory that assigned to the VM, and then click Next.
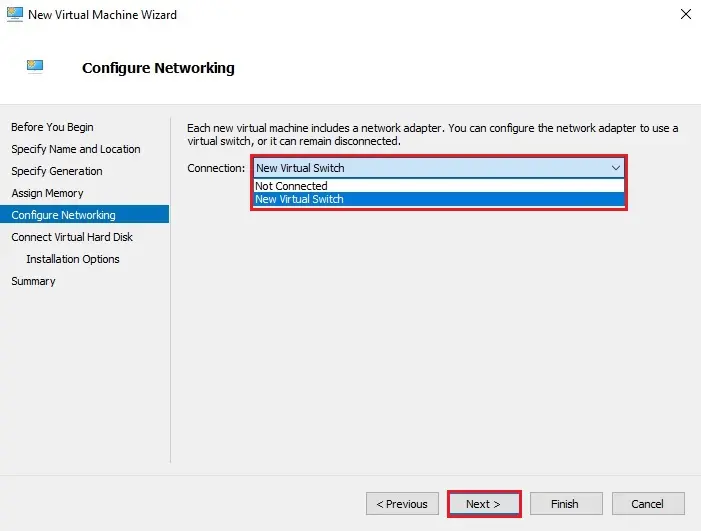
10- Select a virtual network that will be use for connecting the VM to the network. In this lab, I have select a virtual switch that one created earlier.
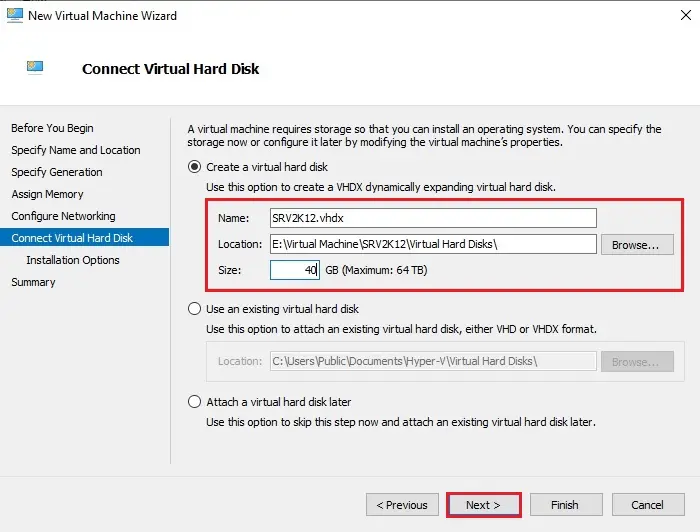
11- Configure the virtual hard disk requirements. In this section, we can create a new virtual hard disk, which requires specifying its name, location, size, and then click Next.
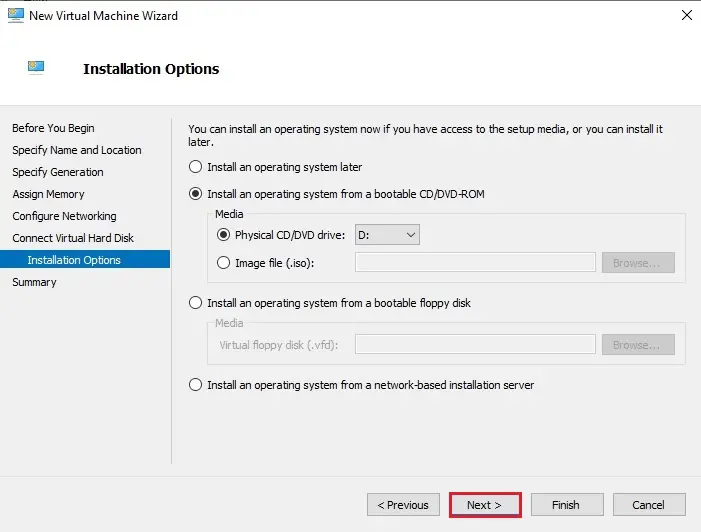
12- Installation Options section opens where you can specify configurations right away or postpone it for later. Here, you can install a guest OS by selecting the ISO file. Click next.
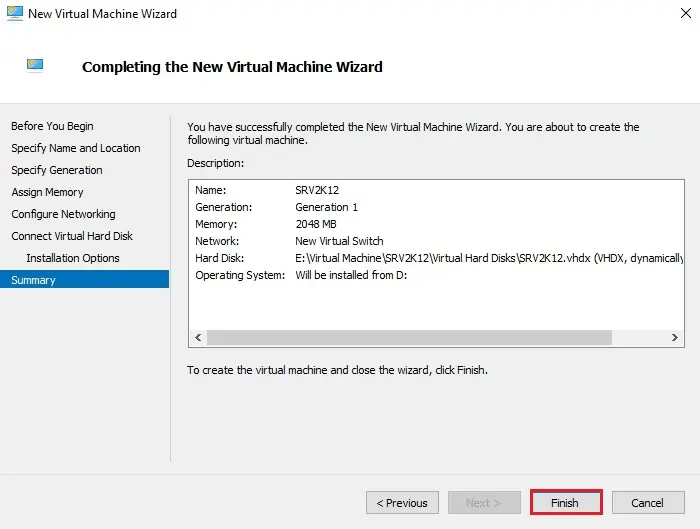
13- Create Hyper-V Virtual Machine, review the Summary, and then click the Finish button to create the VM.
14- Inserting the disk into the drive …

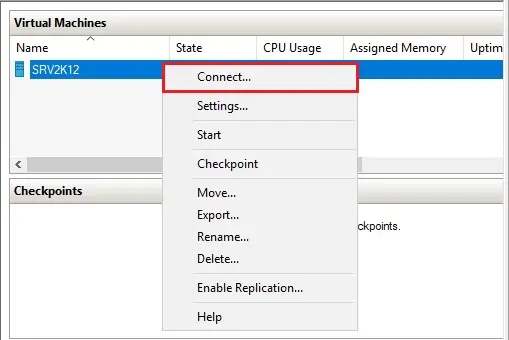
15- Right click on virtual machine and then click connect.
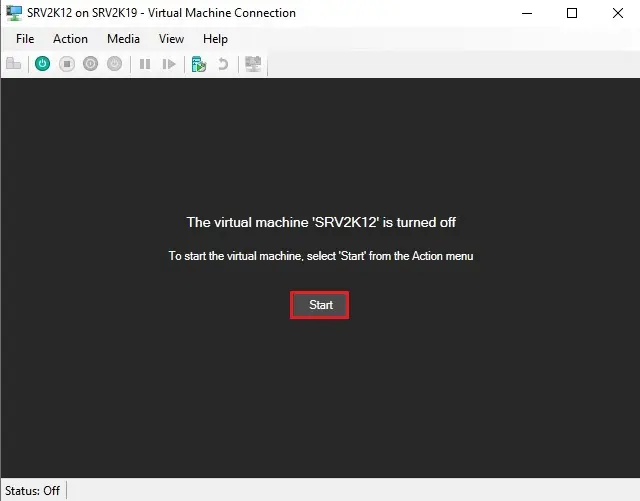
16- Click the start button.
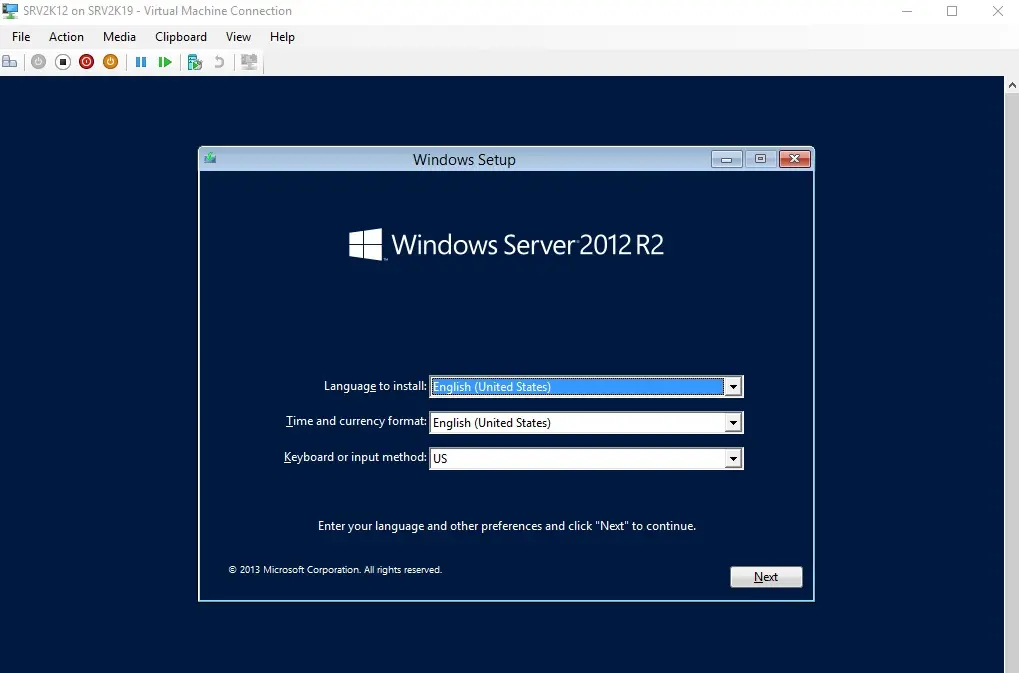
18- Windows Server installation.
How to Create Hyper-V Virtual Machine Using PowerShell
New-VM -Name “SRV2K12-2” -MemoryStartupBytes 2GB -SwitchName “New Virtual Switch”
NewVHDPath “E:Virtual MachineSRV2K12-2.vhdx -NewVHDSizeBytes 40GB
Add-VMHardDiskDrive -VMName SRV2K12-2 -path “E:Virtual MachineSRV2K12-2.vhdx”
Set-VMDvdDrive -VMName SRV2K12-2 -ControllerNumber 1 -Path E:Server 2012.iso Start-VM -SRV2K12-2
Read more: How to Install Kali Linux on Hyper-V Virtual Machine.
For more information, visit Microsoft


