
In this guide, I will explain how to create protection groups in Veeam backup and replication. We need to add computers that we plan to protect with Veeam Agents to the inventory in Veeam Backup & Replication console. The Veeam Backup & Replication, ensured computers are organized into protection groups. So, we can create one or more protection groups that include computers of offer different discovery or different types & deployment options.
Note:
If you don’t want to create protection groups, for example, if you plan to control only a small number of computers in your infrastructure, you can add the essential computers directly to a Veeam Agent backup job. The Veeam Backup will be automated add such computers to the Manually Added protection group.
If you want to know about creating protection groups, then click here
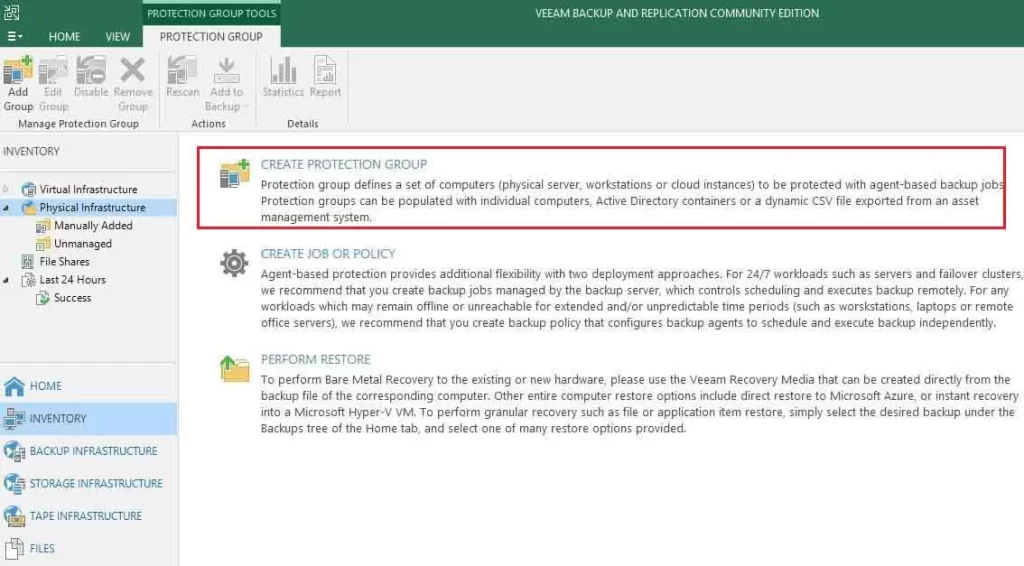
Create Protection Groups in Veeam Backup
1- To create the New Protection Group,
Choose the Inventory option, choose Physical Infrastructure option and then choose Create Protection Group.
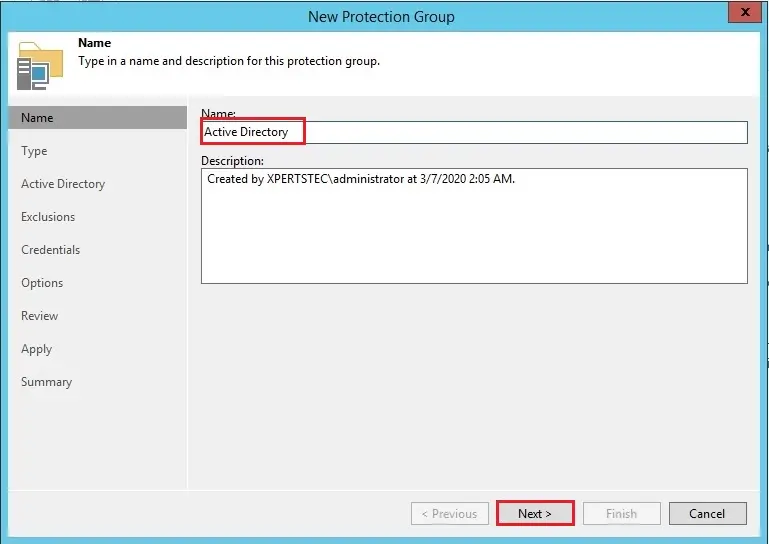
Protection Group Name and Description
2- In the Name box, enter a name for the protection group.
In the Description field, provide a description for future referral. The default description details contain information about the user that added to the protection group, time, and time when the protection group was created.
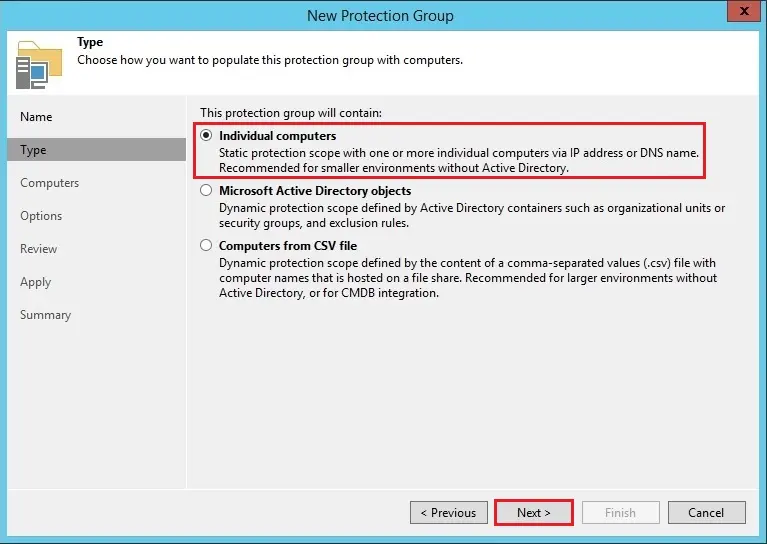
3- Choose the type of the protection group and then select next.
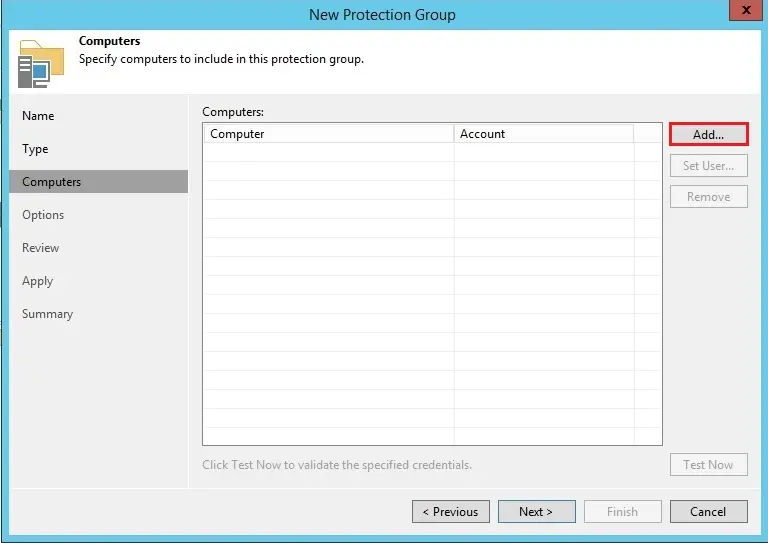
Specify Protection Scope
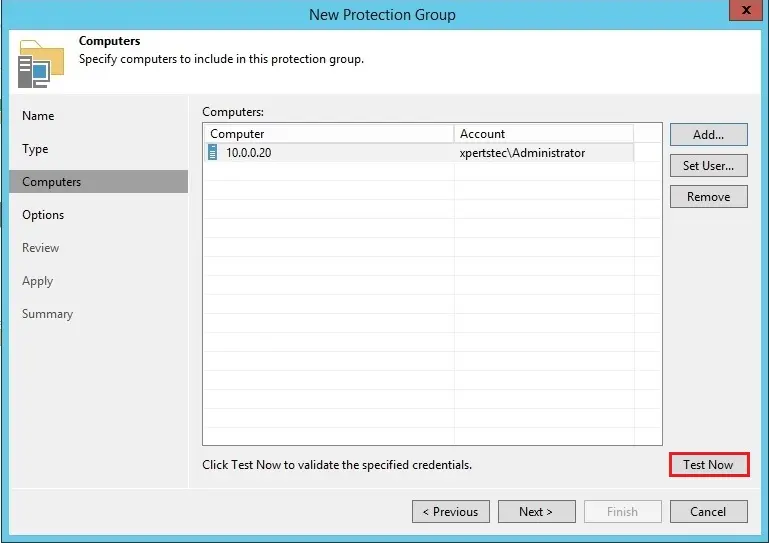
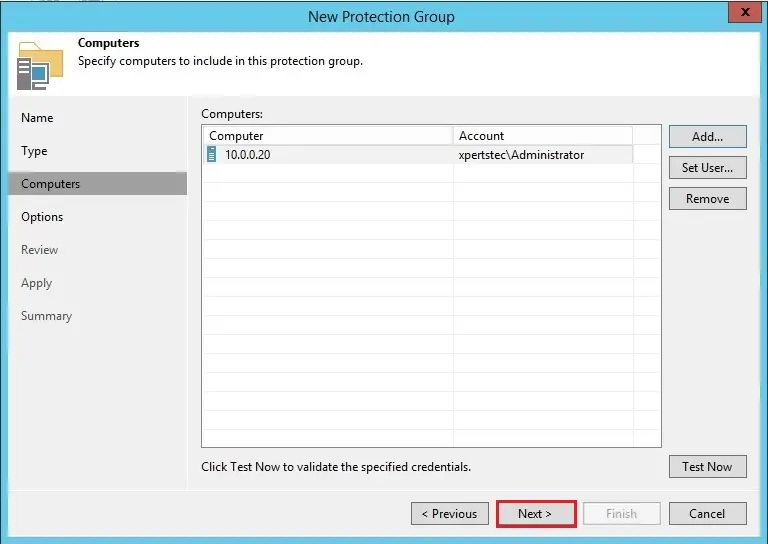
4- This step of the wizard, you can indicate the computers that you want to add to the protection group. Click Add
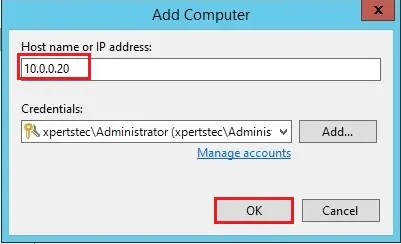
5- In the Add Computer window, in the Hostname or IP address field, enter a full DNS name, NetBIOS name, or IP address of the computer that you want to add to the protection group.
From the Credentials list, select a user account that has the administrative permissions on the computer that you would like to add to the protection group. Veeam Backup & Replication will use this account to connect to the protected computer and fulfill the necessary operations on the computer: upload and install Veeam Agent, and so on.
If you have not set up credentials previously, click the Manage accounts link or click Add on the right to add credentials. For more details click here
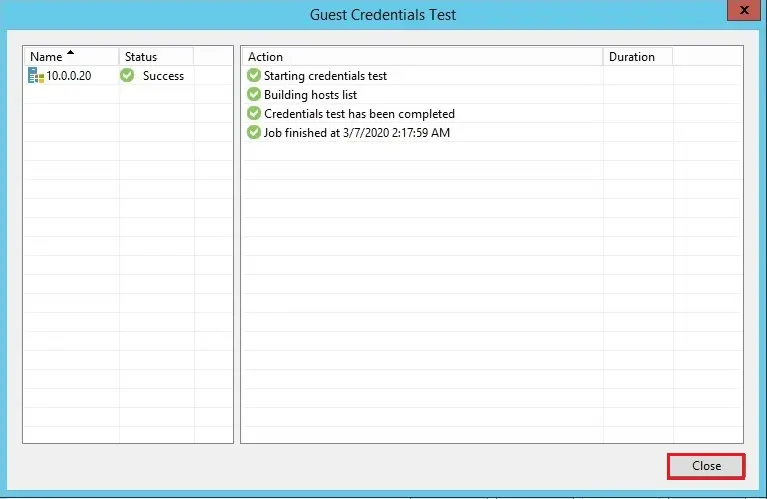
6- If you want to know more about if Veeam Backup & Replication can communicate with PCs added to the protection group, so click Test Now. So the Veeam Backup and Replication will use the credentials to connect to all computers in the list.
7- Click close.
Note:
If you want to choose to manually add Linux-based computers to the list of trusted hosts in Veeam Backup & Replication, when we test credentials for an unknown Linux-based computer within the protection group settings, the test process will complete with the failed position. It happens because Veeam Backup & Replication cannot connect to the not trusted computer before you add this computer to the list of trusted hosts. To know more about how to Add Computers to Trusted Hosts List.
8- Click Next.
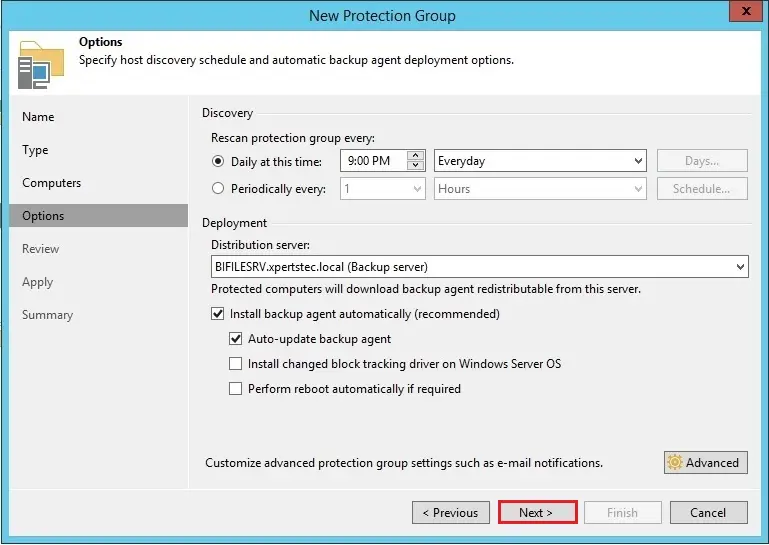
9- Specify the new protection group backup schedule options and then click next.
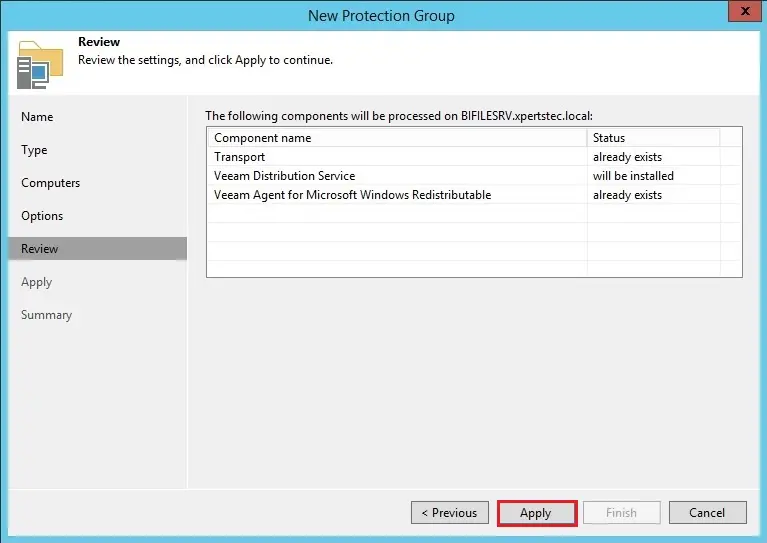
10- Review the settings and then click apply.
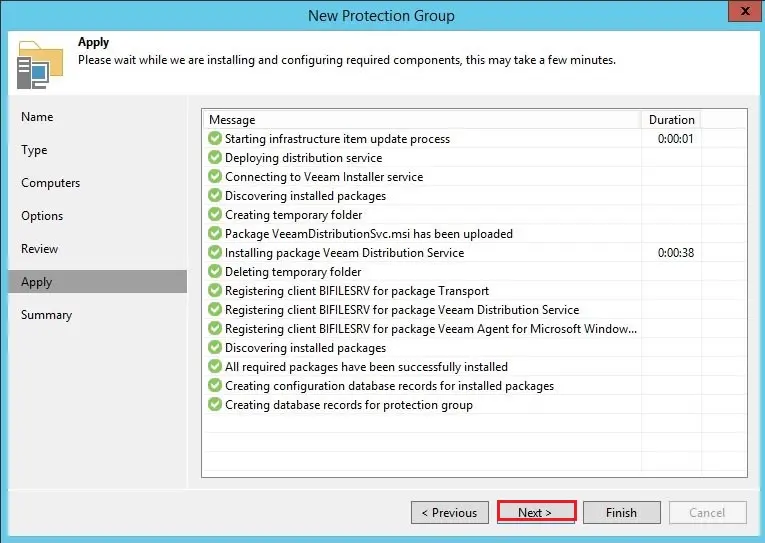
11- Click next.
12- Select the checkbox run discovery when I click finish.
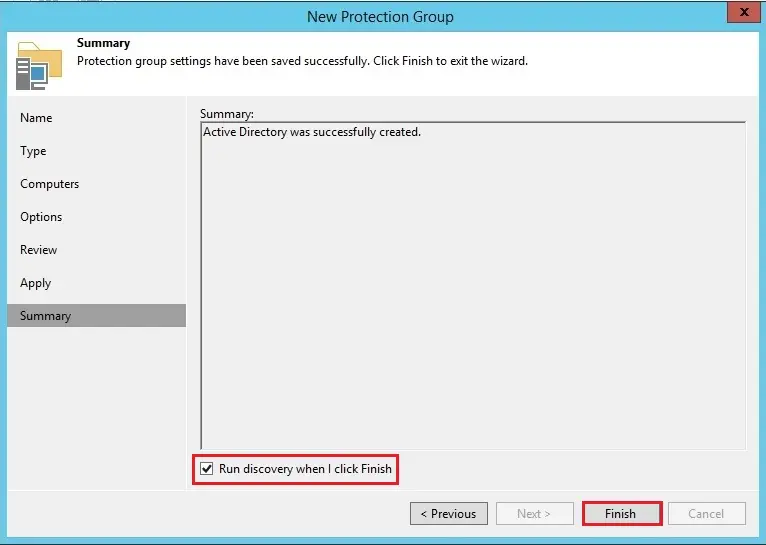
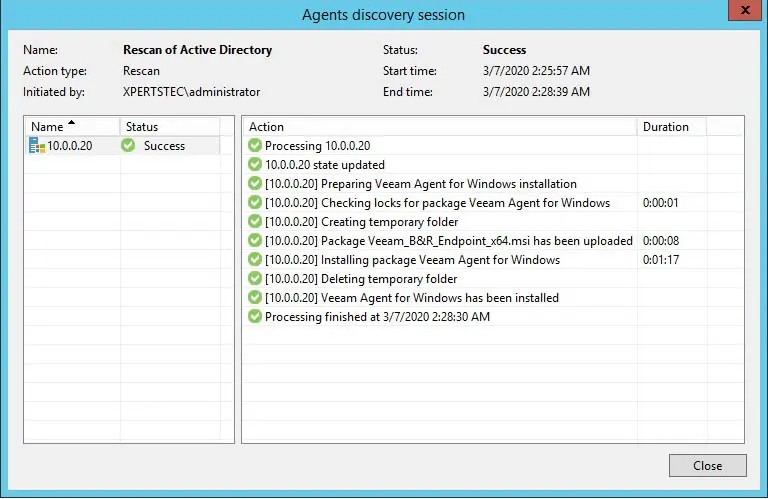
13- Rescan of active directory completed successfully click the close button.
Watch this video on XpertsTec YouTube.