This article is part of the series; in my previous article How to Create Azure Recovery Services Vault. In this article, I will show you how to install Microsoft Azure Recovery Services (MARS) agent. MARS is as well known as an Azure Backup agent.
Azure Backup uses the MARS agent to backup files, folders, & system state from on-premises VMs and Azure virtual machines. These backups are stored in a Recovery Services vault in Azure.
Directly on on-premises Windows machines. These VMs can back up directly to a Recovery Services vault in the Azure.
In the Microsoft Azure virtual machines that run Windows side by side with the Azure VM backup extension. The Azure Backup agent backs up specific files and folders on the VM.
In a MABS (Microsoft Azure Backup Server) instance or a System Center DPM (Data Protection Manager) server. In this layout, machines & workloads back up to MABS or Data Protection Manager. Then Azure recovery services agent or Data Protection Manager uses the MARS agent to back up to a vault in Azure.
Article Series
Setup and Configure Azure Backup
Configure MARS Agent Backup Schedule
Download MARS agent and your vault credentials
Login to Azure Portal
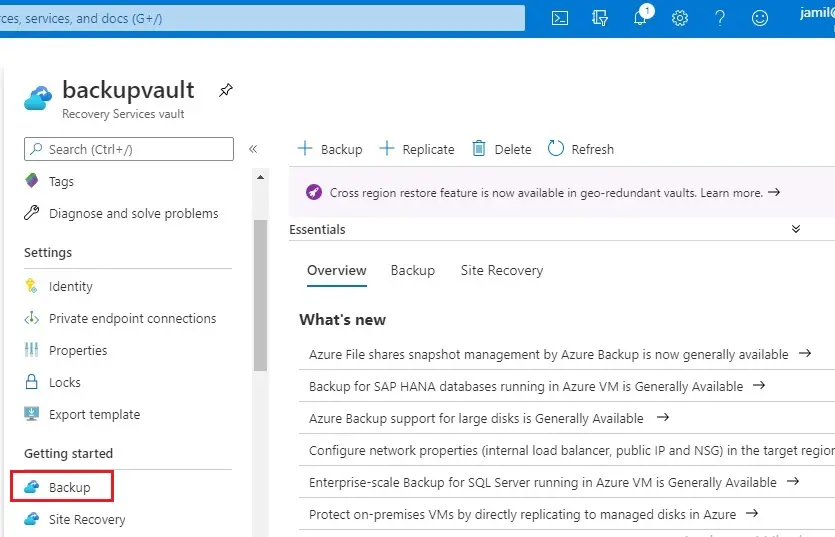
1- Select your vault, then select Backup under Getting Started.
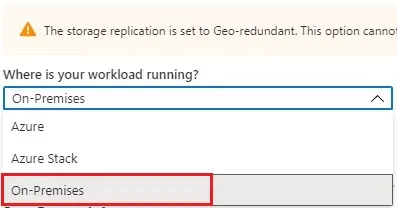
2- Choose On-premises
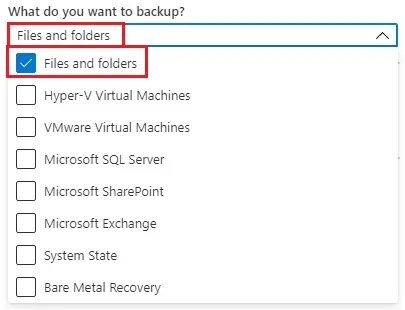
3- Select Files and folders and/or System State in this article I am only selecting (files and folders).
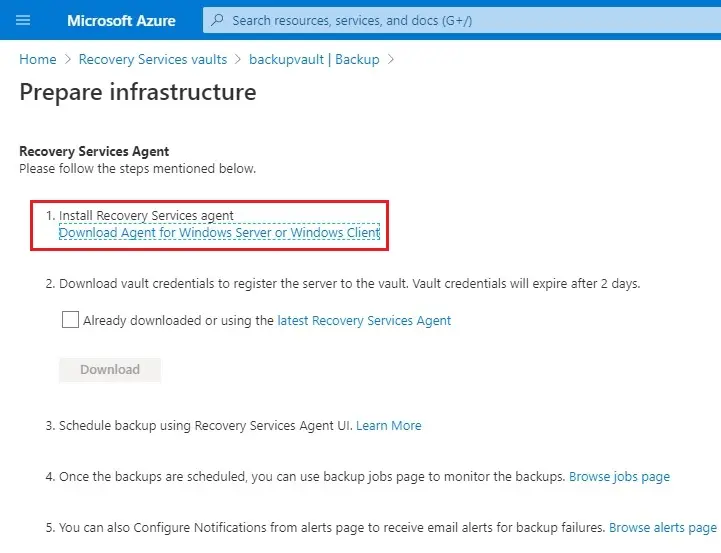
4- Select Prepare Infrastructure

5- Click the links for Download Agent for Windows Server or Windows Client under recovery service agent.
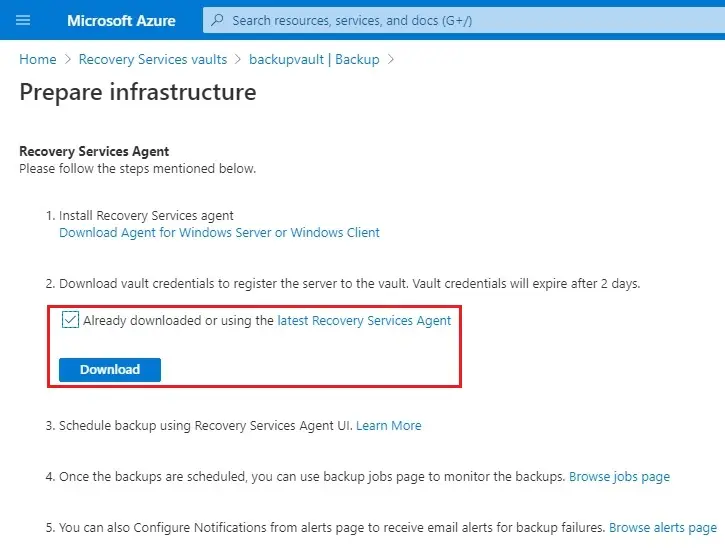
6- Download vault credentials.
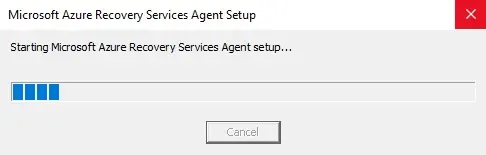
7- Azure recovery service agent setup
Install Microsoft Azure Recovery Services Agent
Install the agent and provide credentials
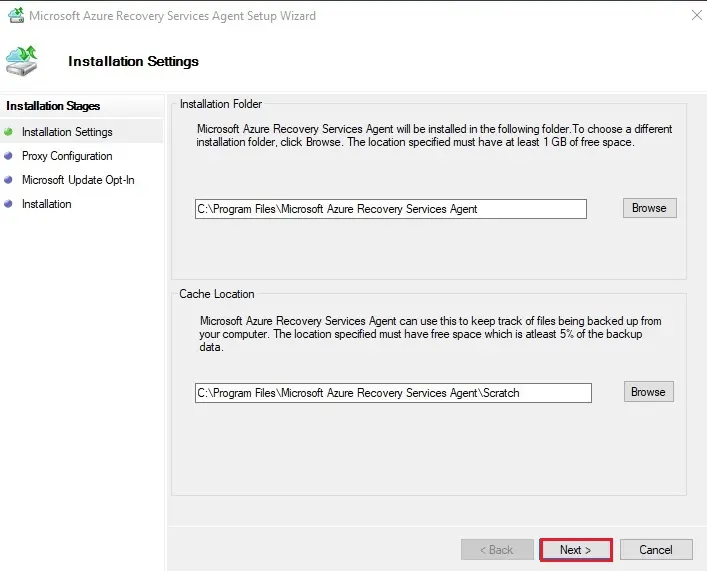
8- Azure Recover services agent setup wizard, click next.
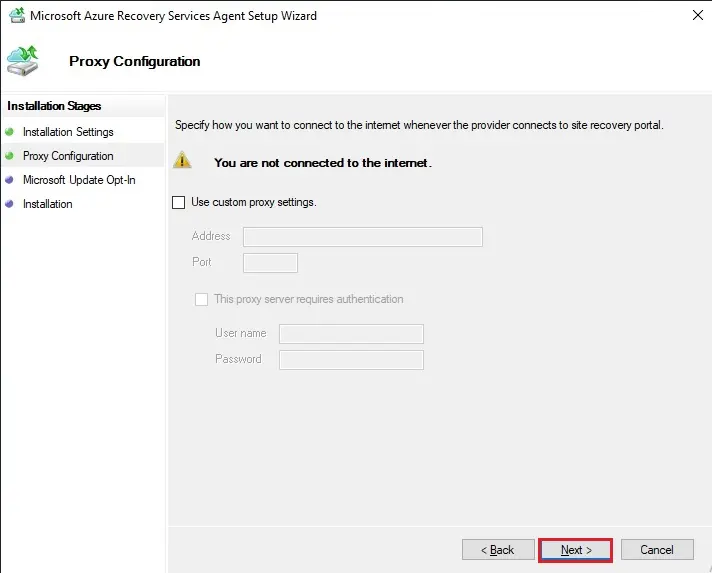
9- Port configuration select next.
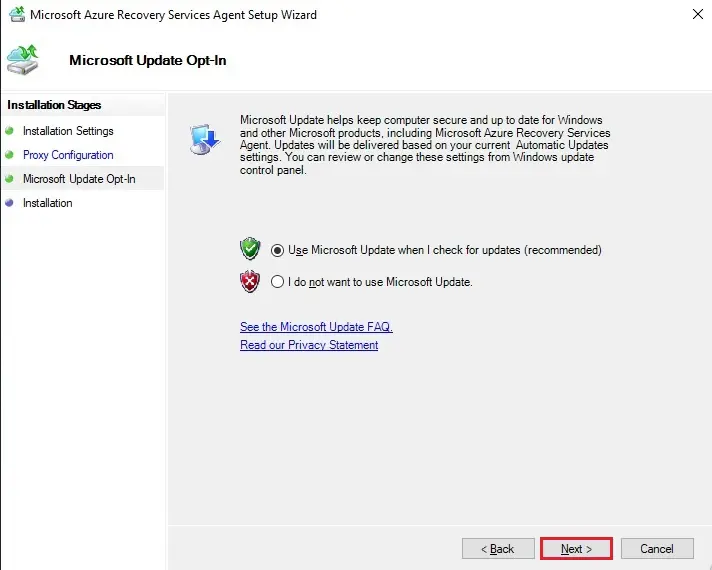
10- Microsoft Update Opt-in click next.
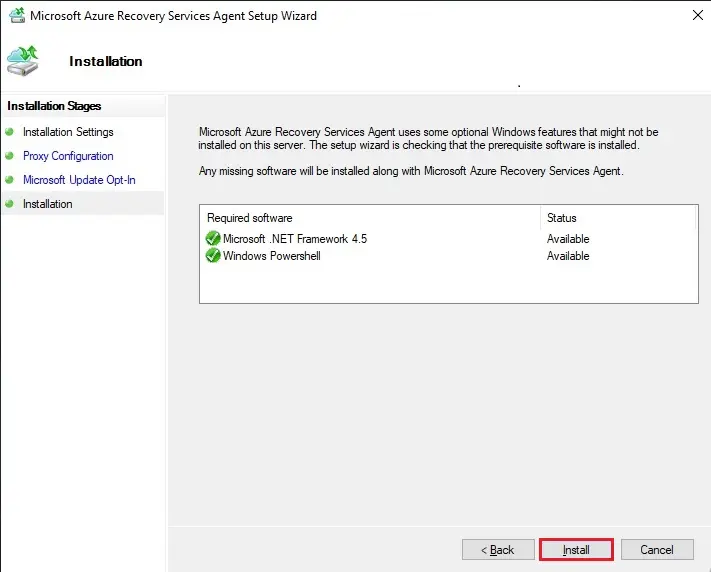
11- Select install button to start the installation.
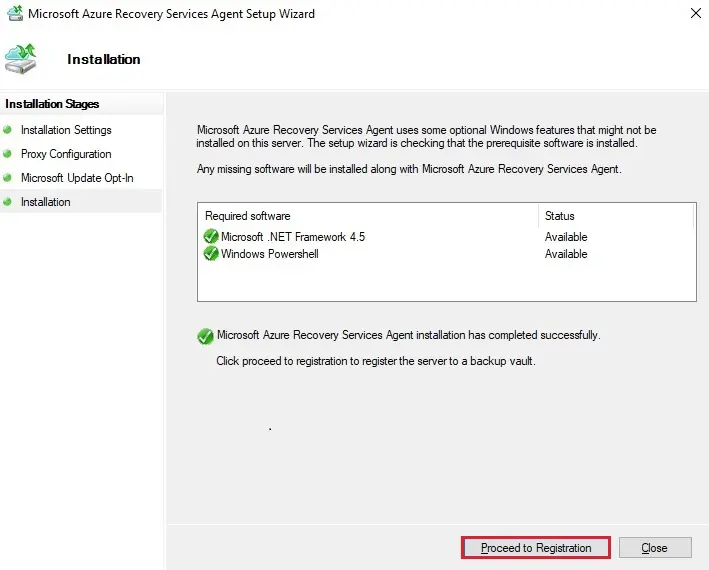
12- Azure agent installation completed, so click Proceed to Registration.
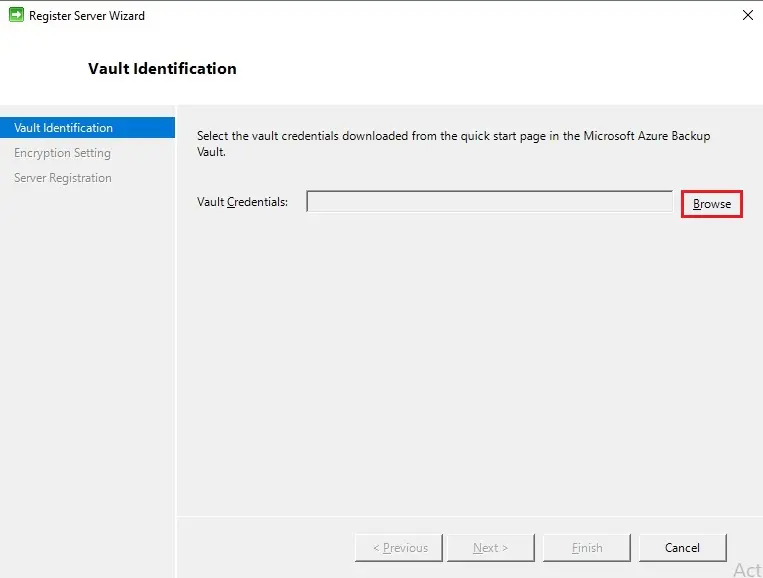
13- Click on Browse
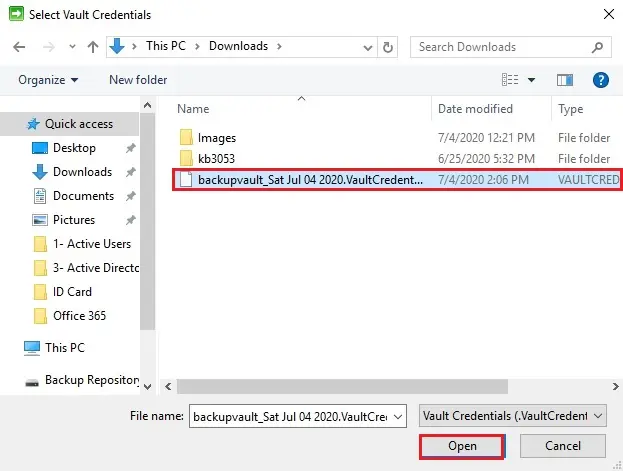
14- Select the credentials you downloaded earlier from Azure and then click open.
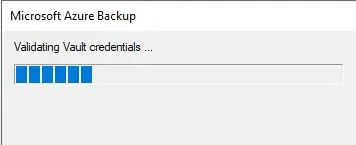
15- Validating Vault credentials
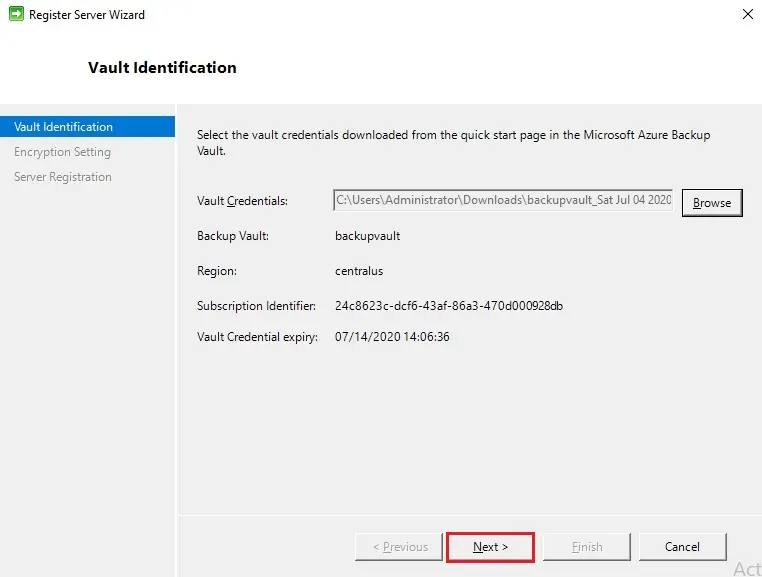
16- Click next
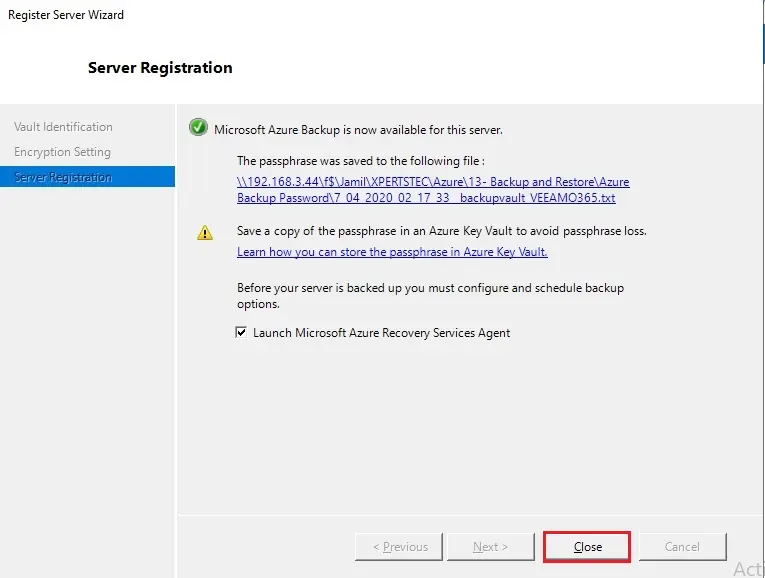
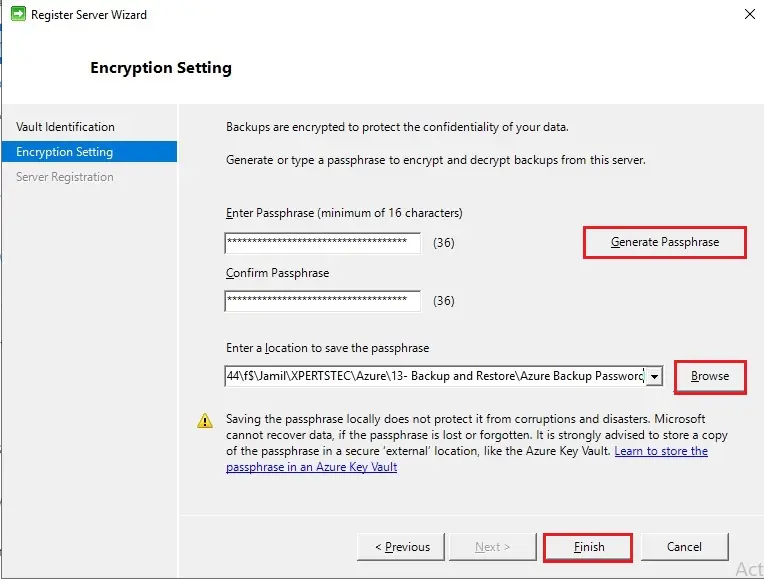
17- After your credentials are validated, select generate passphrase.
Click the browse button to save the file (store this somewhere safe for your customers, not on the local machine).
Click finish.
18- Now you will be given the option to launch the Azure Recovery Services Agent. Click Close to proceed.