
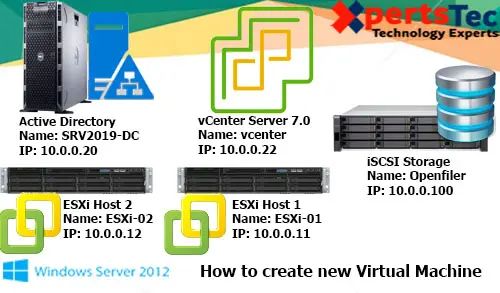
New Virtual Machine ESXi 7 Host, in this blog; I am going to create a new Virtual Machine in VMware ESXi 7 host login with vCenter Server 7.
We need to have a ESXi Host.
Access ESXi through vCenter console or direct vSphere Web client
Step by Step Procedure to deploy a new Virtual Machine
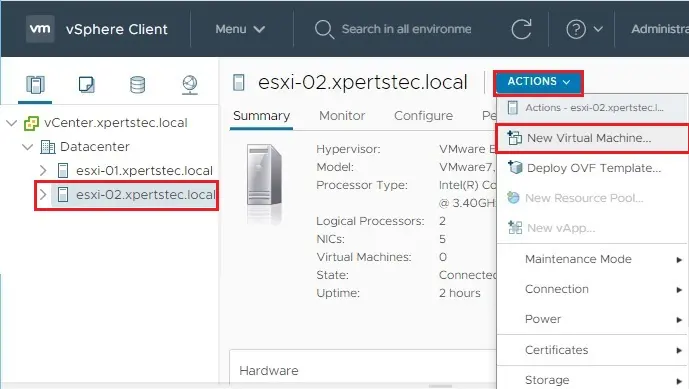
Login to your vCenter Server using vSphere Client.
1- Right click on the host where you want to create a VM, select Action menu and then click on new VM It will open New Virtual Machine Wizard.
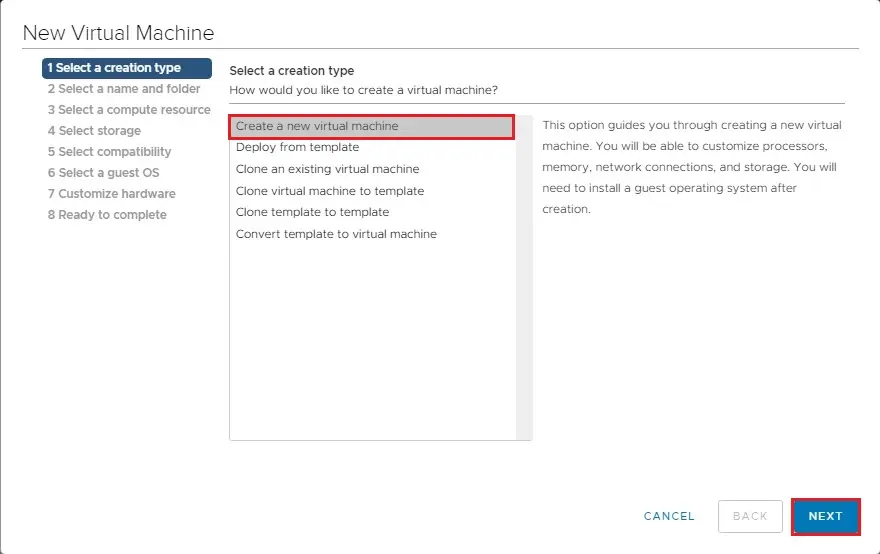
2- Select a creation type option, Select Create a new VM and then click Next.
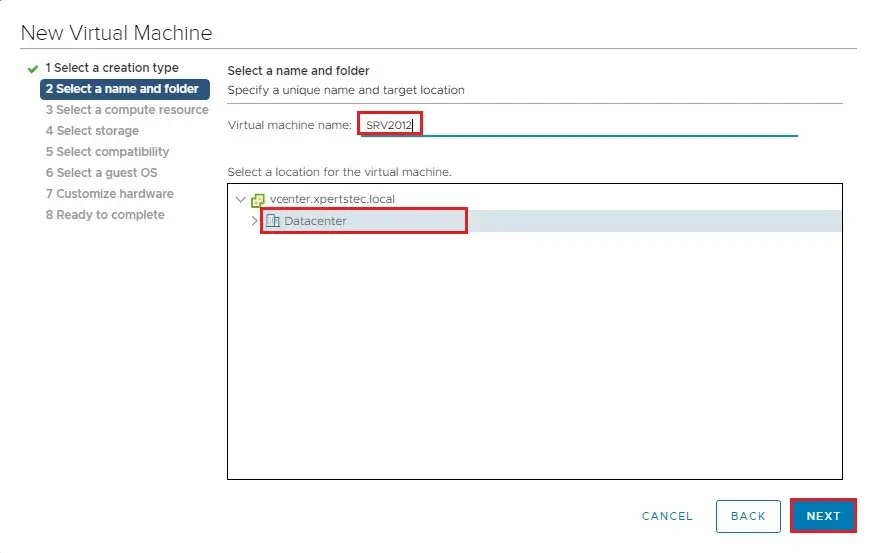
3- Type a name for the new Virtual Machine and Select Datacenter to create the new VM in and then click next.
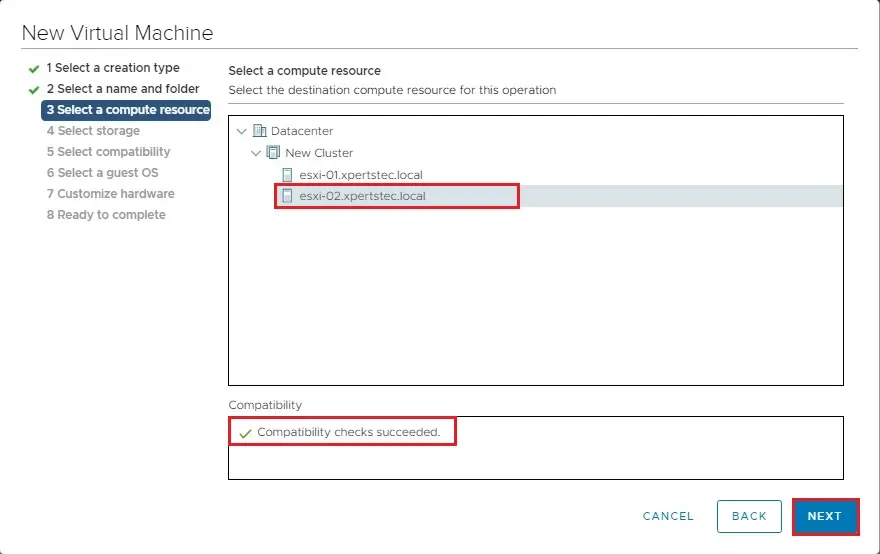
4- Select ESXi host where you want to deploy this Virtual Machine, compatibility checks succeeded and then click next.
5- Select a Datastore in which you want to store the Virtual Machine configuration files and folders and then click next.

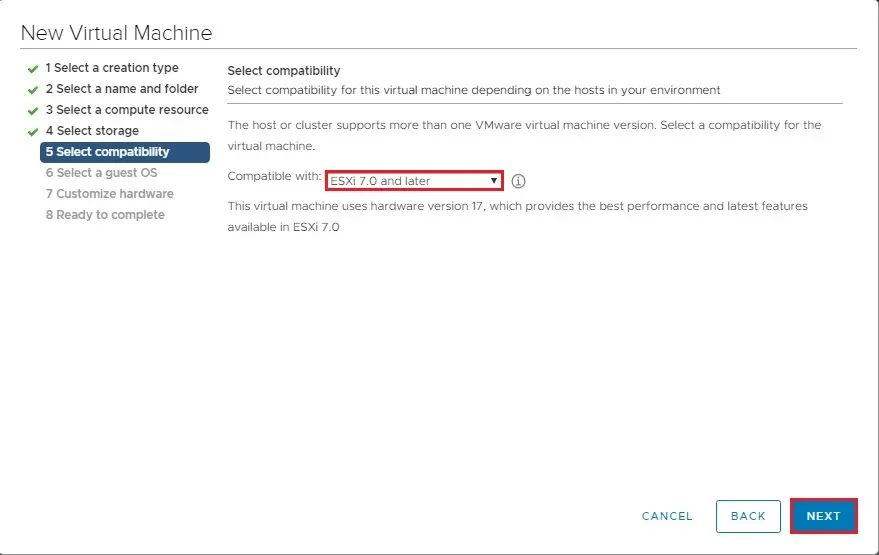
6- Select Compatibility for this Virtual Machine and then click on next.
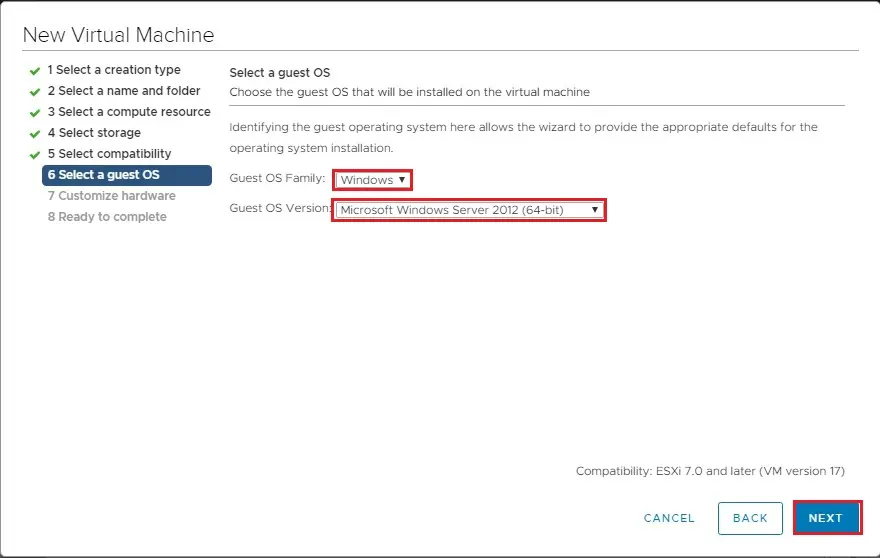
7- Choose the Guest OS Family option (Windows/Linux/Other), select guest OS version that will be installed on the virtual machine and then click next.
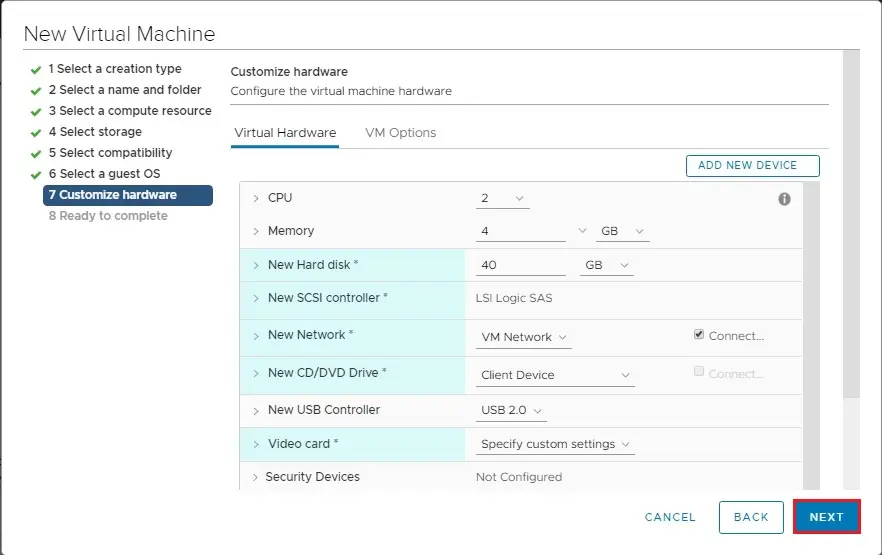
8- Configure the Virtual Machine Hardware as per operating system requirement and then click next.
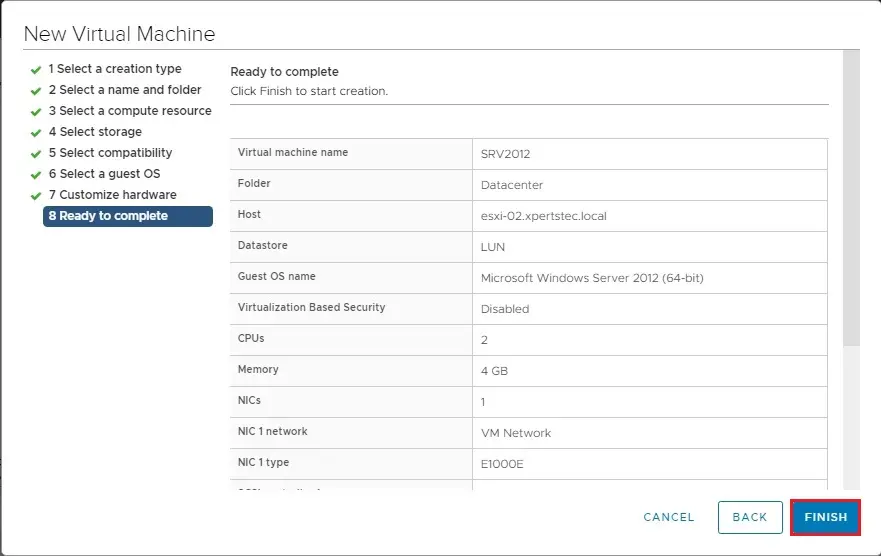
9- Review the new virtual machine configuration and click finish to complete the New Virtual Machine Wizard.
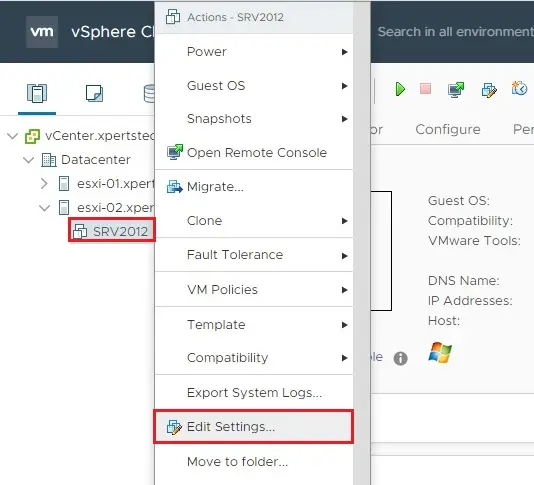
10- A new Virtual Machine has been deployed in ESXi 7 Host, to install Operating System on this VM, Right Click on Virtual Machine and select Edit Settings.
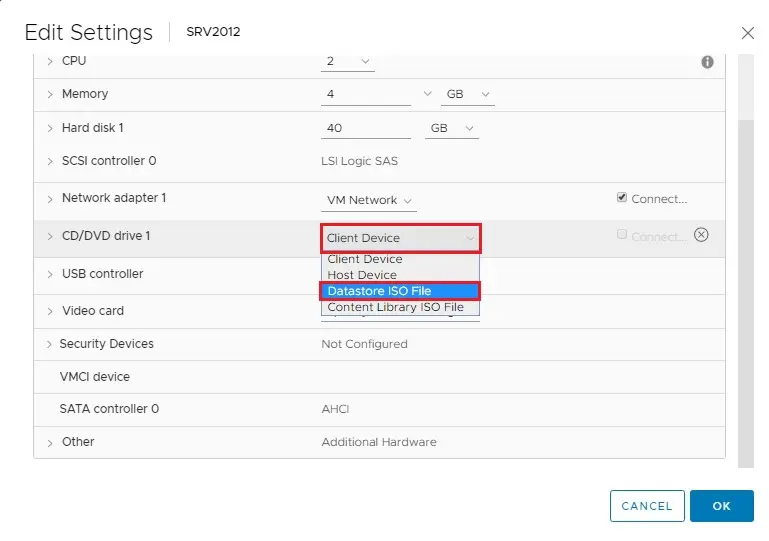
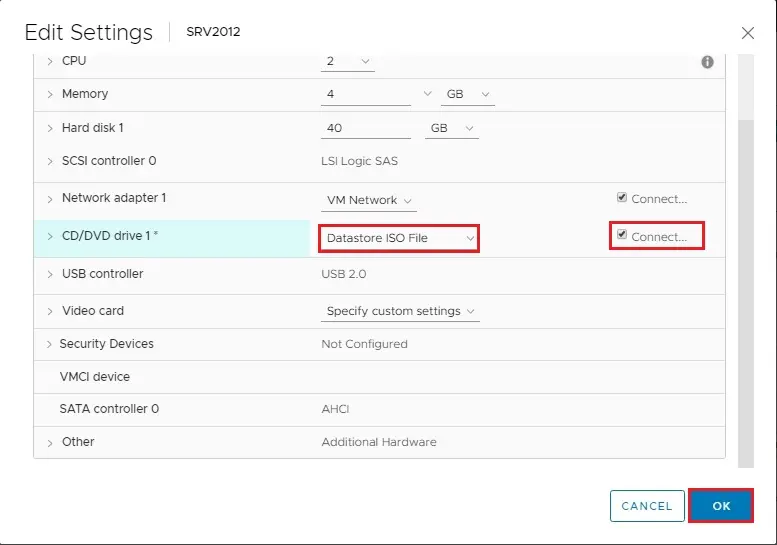
11- To mount your ISO for specific OS, click on client device and select Datastore ISO file.
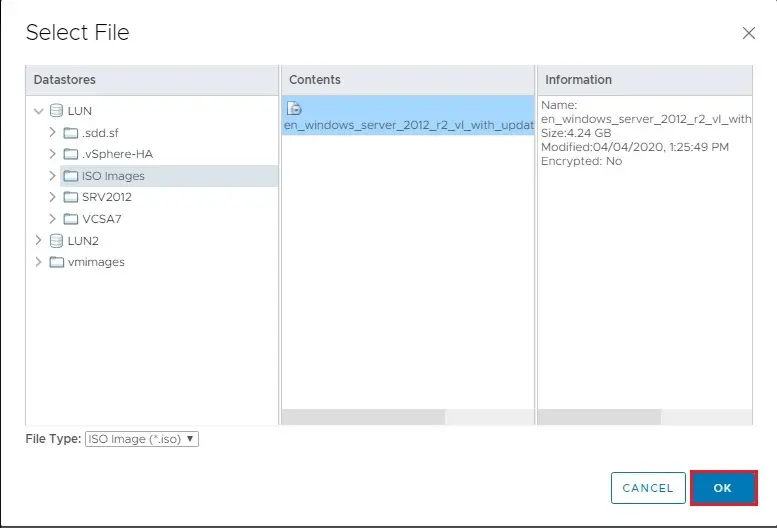
12- Expand your datastore, select the operation system the one you want to install and then click ok.
13- After selecting OS, select connected checkbox and then click ok.
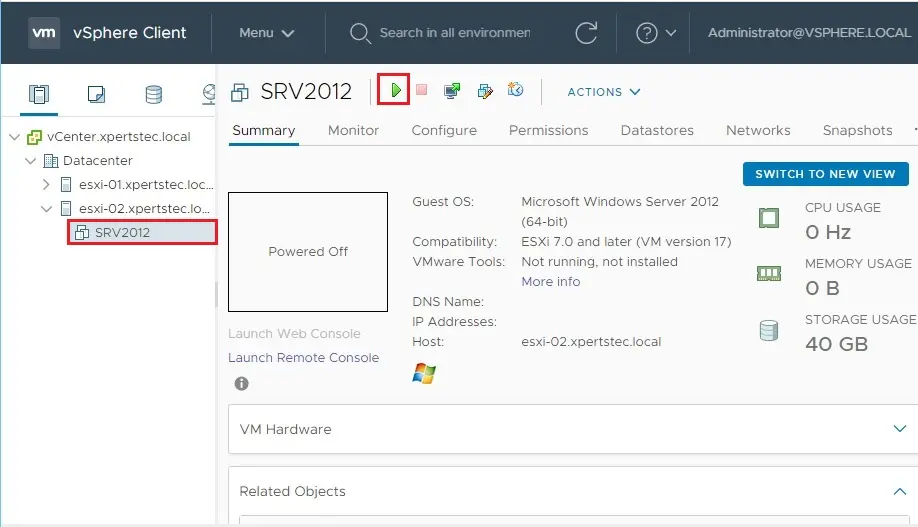
14- Select newly created Virtual Machine and then click Power On icon.
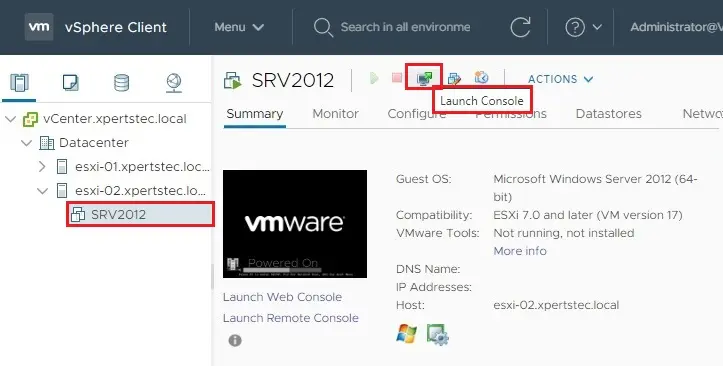
15- Select VM and select Launch Console.
16- Choose launch console option and then click launch
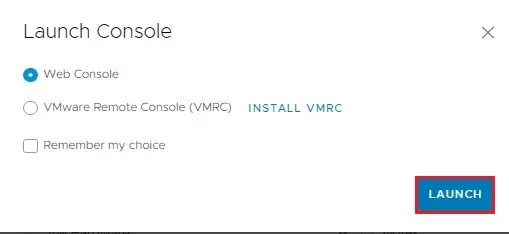
17- Now Windows operating system ready to install.
Related: how to Clone a Virtual Machine in VMware.
Like and subscribe our YouTube channel to watch updated videos.
For more details click here


It’s an remarkable piece of writing in support of all the online viewers; they will get advantage from it I am sure.|
Dear Laurance
Thank you
Does your site have a contact page? I’m having a tough
time locating it but, I’d like to send you an email.
I’ve got some recommendations for your blog you might be interested in hearing.
Either way, great blog and I look forward to seeing it improve over time.
Please send me an email at [email protected] by the way thank you