Install VMware vCenter Server 6.7 for Windows, VMware vCenter Server is a windows materiality that comports datacenter brings admission to control, performance monitoring, and configuration, and unifies resources from individual servers to be shared among virtual machines within the entire datacenter. we will manage all our vSphere products like ESXi and Virtual Machines. vCenter is that the windows application which is provided by VMware which may only be utilized in the windows servers. vSphere Installation and Setup is meant for knowledgeable administrators who want to put in and Configure vCenter Server and deploy and configure the vCenter Server Appliance.
Hardware Requirements Click vCenter 6.7 Hardware Requirements
Storage Requirements Click vCenter 6.7 Storage Requirments
Software Requirements Click vCenter Software Requirments
Database Requirements Click vCenter Database Requirments
Install vCenter Server 6.7 for Windows
Download the VMware vCenter Server 6.7 and Modules for Windows Download VMware vCenter Server 6.7
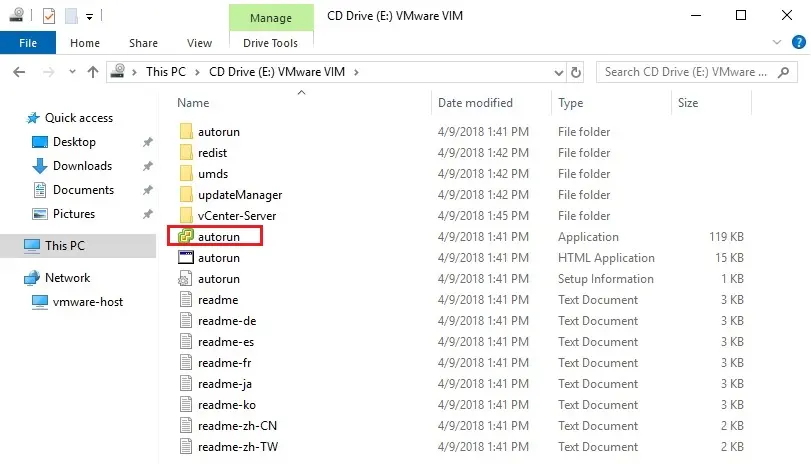
1- After downloading the vCenter Server ISO file, Mount your VMware vCenter Server 6.7 ISO and then double click on autorun.exe to start the installation.
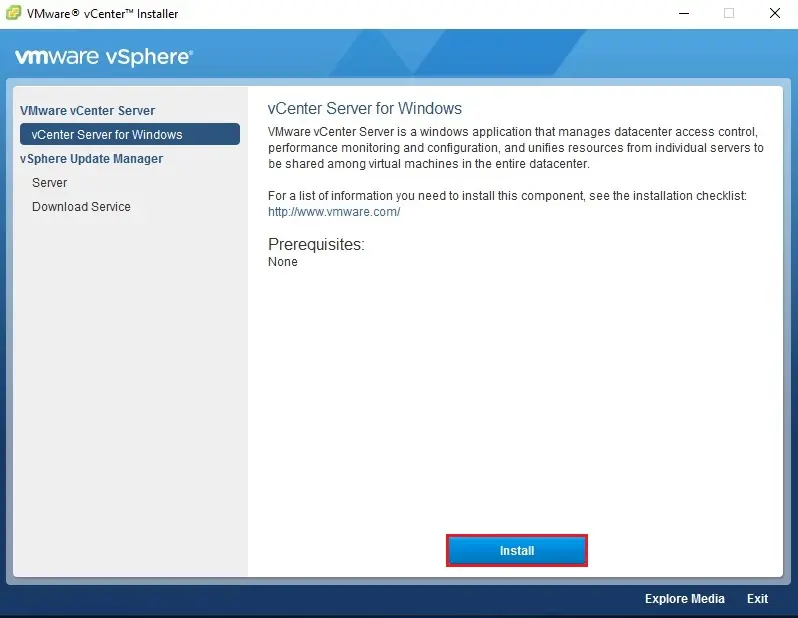
2- The VMware vCenter Installer Windows will open, Select vCenter Server for Windows and then click on the Install button.
3- Welcome to the VMware vCenter Server 6.7 Installer, so click next.
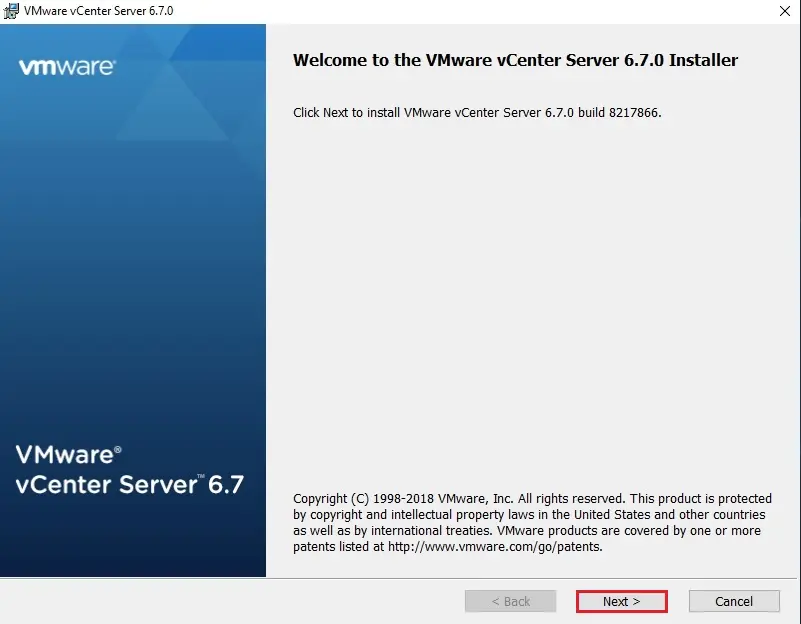
VMware vCenter Installer
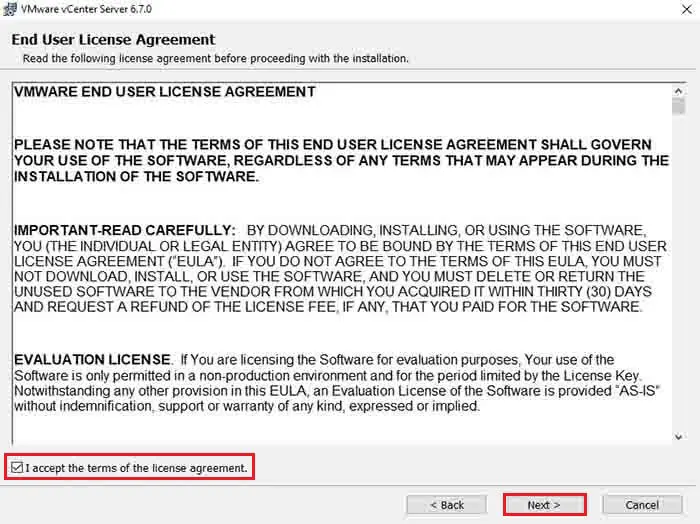
3- Select I accept the end-user license agreement and then click on Next.
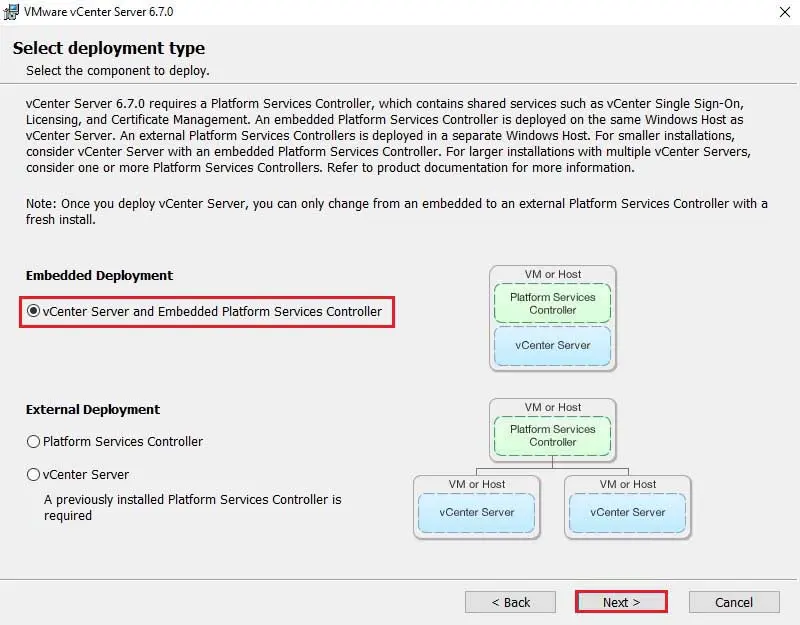
4- Now Under deployment type, Select the vCenter Server and Embedded platform services controller and then click on Next.
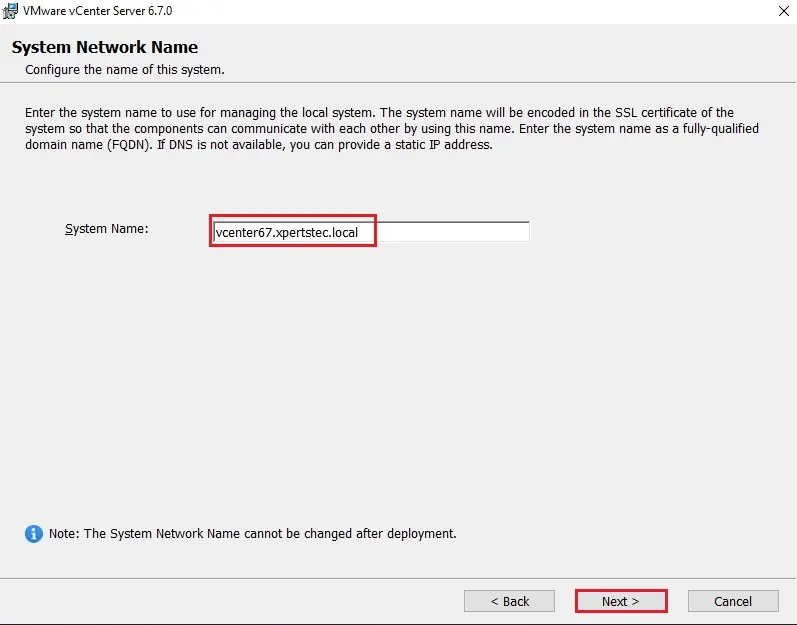
5- Type your fully qualified domain name in the System Name field and then click on Next.
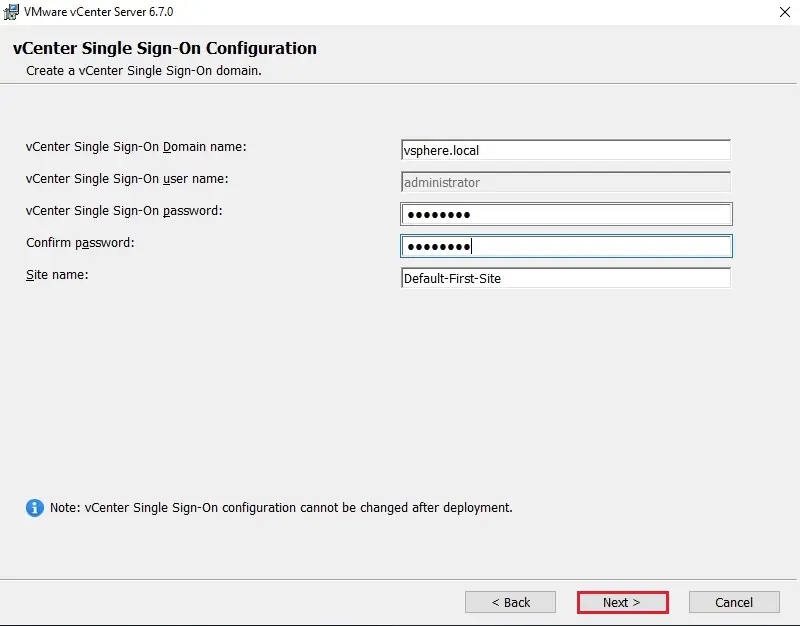
6- vCenter Single Sign-On configuration, Now Leaves it as the default vsphere.local (not the same as your Active Directory name). Type your password for the SSO administrator account and then click on Next.
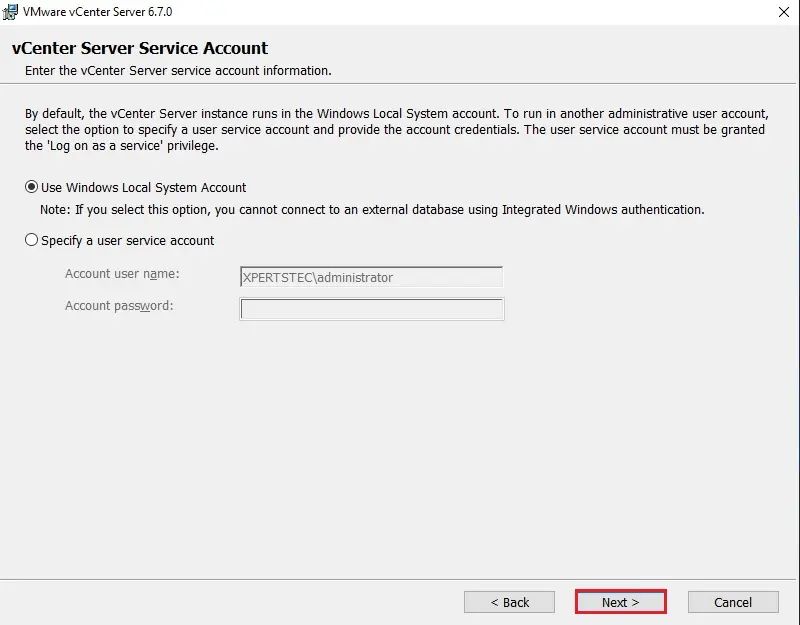
vCenter Server Service Account
7- vCenter Server Service Account, select use Windows local system account and then click on Next.
8- Select the use of an embedded database (VMware Postgres) and then click on Next.
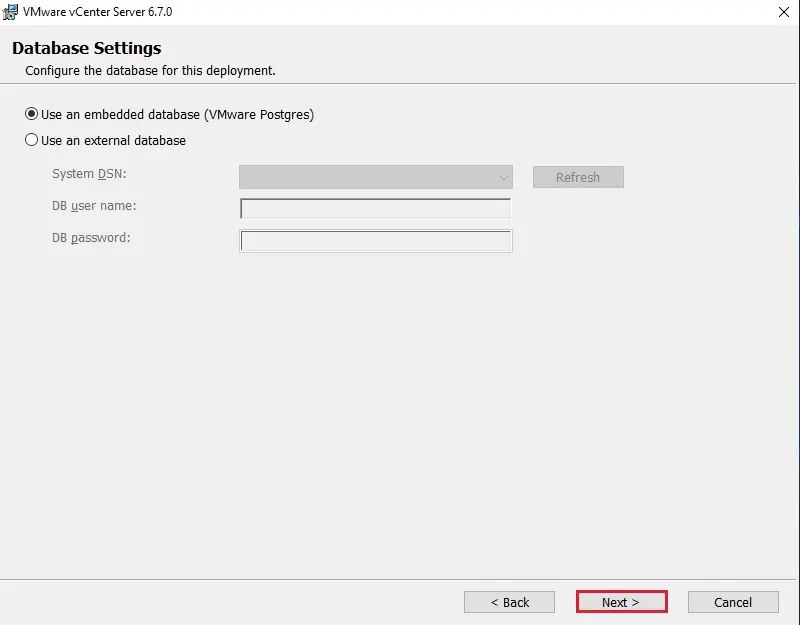
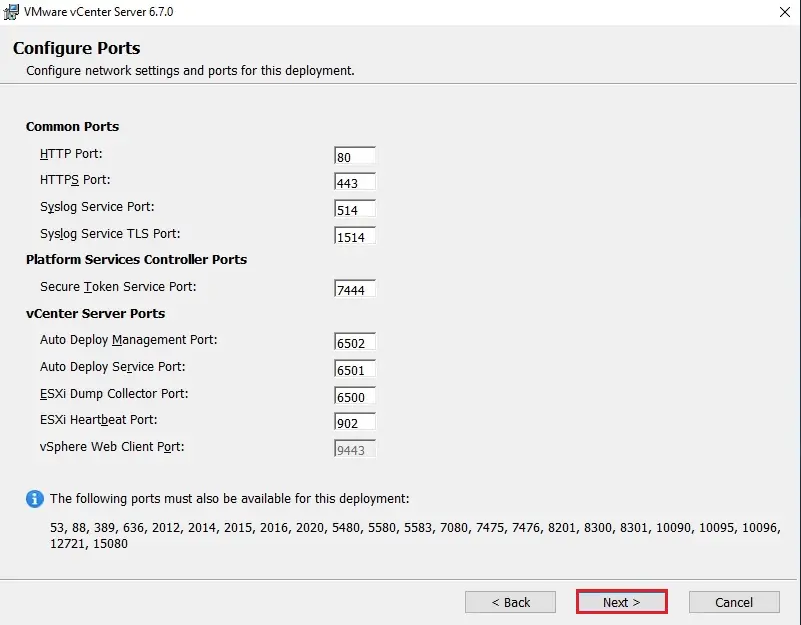
9- Leave the default port configuration and then click on Next.
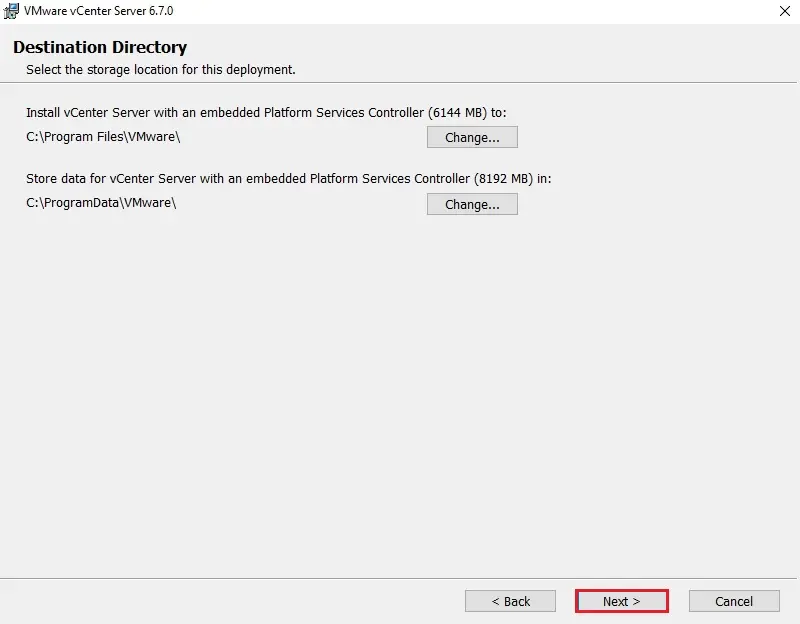
10- Select the destination directory where you want to install vCenter services and then click on Next.
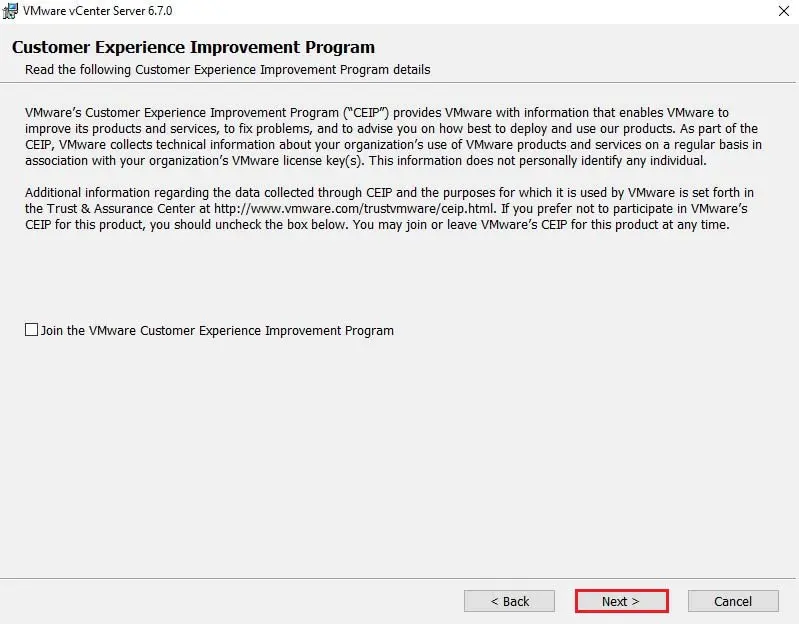
11- Now check or uncheck the VMware Customer Experience Improvement Program and then click on Next.
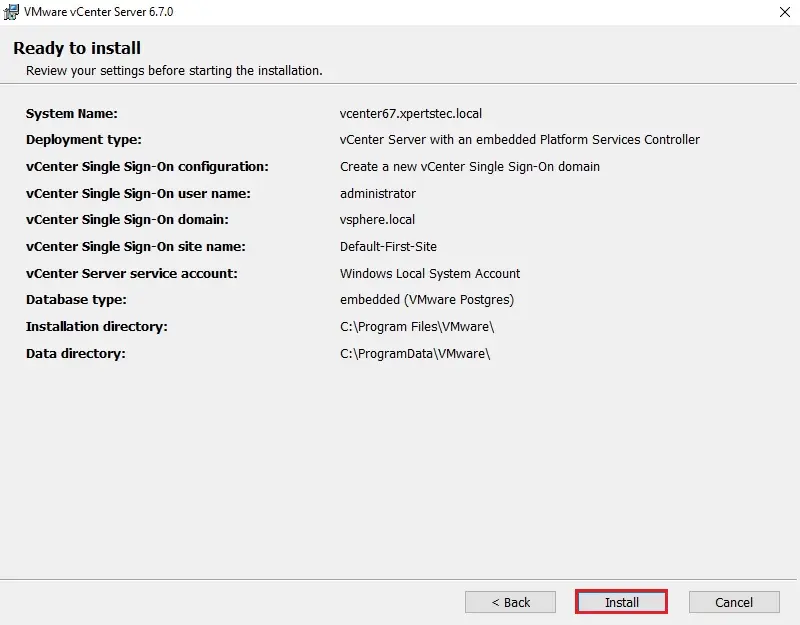
12- Review the VMware vCenter Server configuration and then click the Install button to start the installation process.
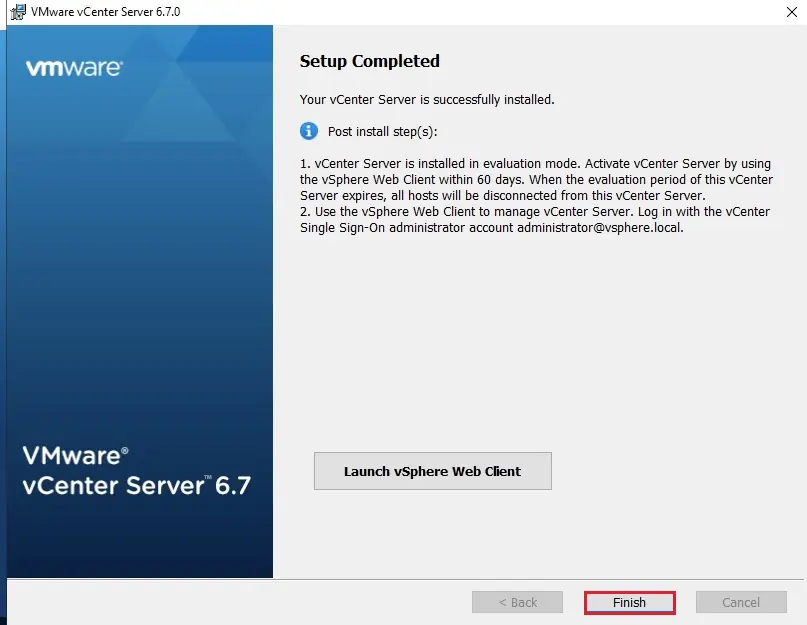
13- Your vCenter Server is successfully installed, so click on Finish.
VMware vCenter Server Post-Installation
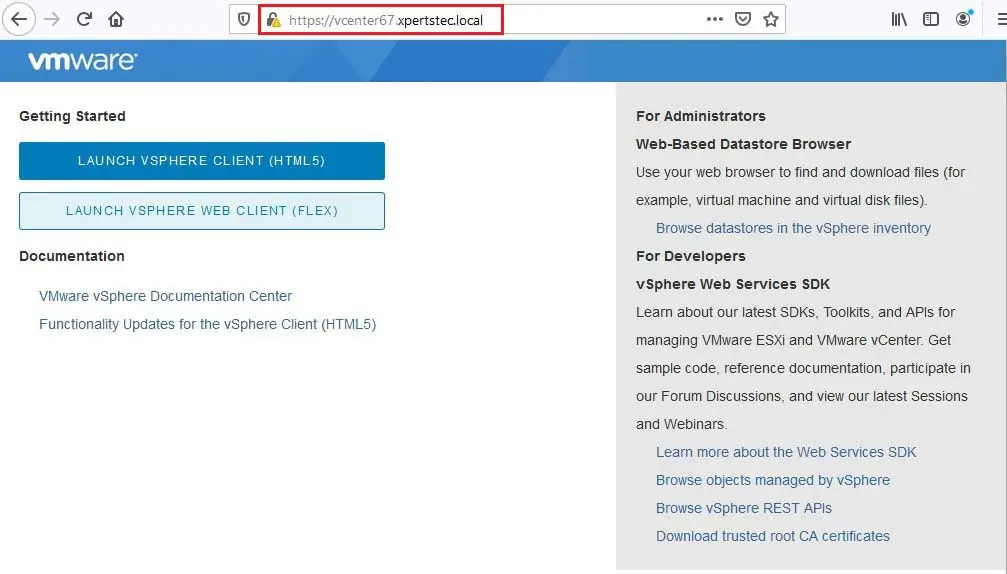
14- Open your browser and type your vCenter IP address or FQDN. Now Connect your vSphere vCenter Server by clicking on Launch vSphere Client (HTML5) or Launch vSphere Web Client (FLEX).
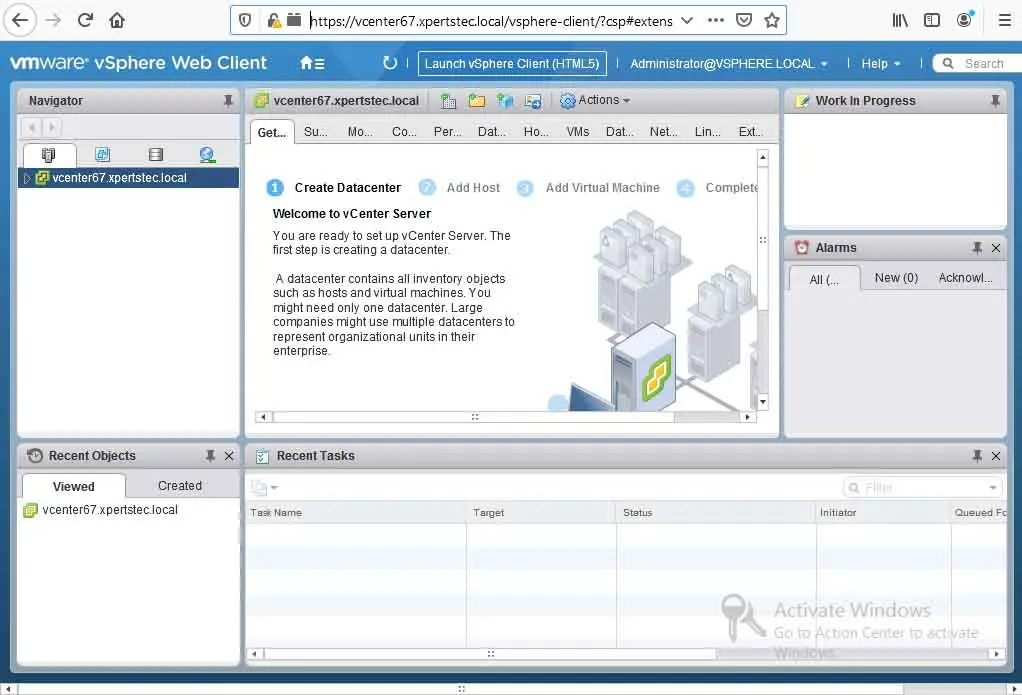
15- VMware vCenter Server 6.7 login with 60 days trial period.


No Comments
It’s hard to seek out knowledgeable individuals on this topic, however you sound like you recognize what you’re talking about! Thanks
Thank you