
Let’s start the process of how to add NAS volumes as a Veeam backup repository.
Veeam backup repository is simply a storage location where the Veeam backup software stores keep backup files, VM copies, and metadata for replicated VMs.
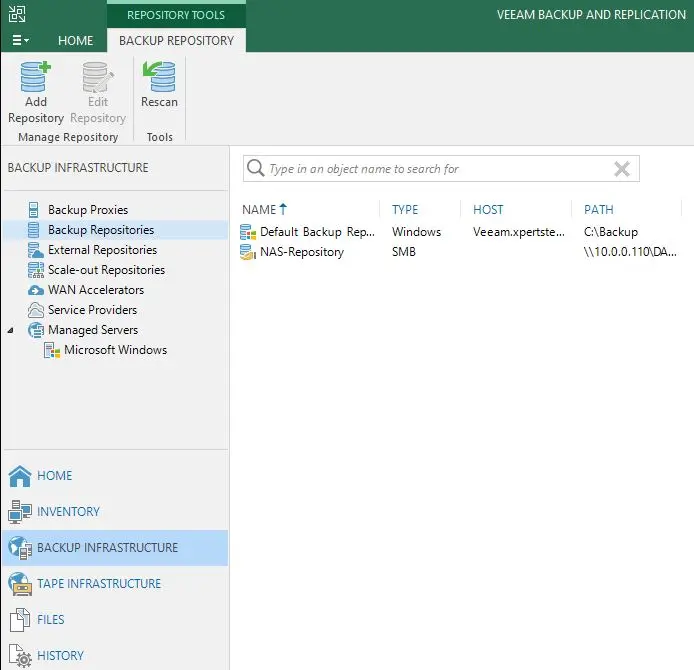
Add NAS Volume Veeam Backup Repository
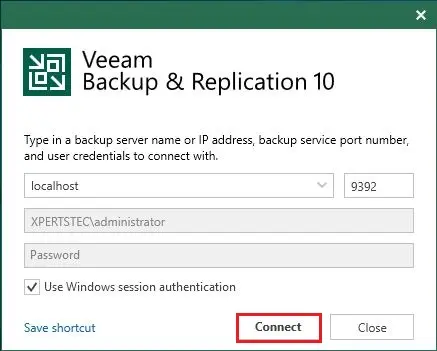
1- Open Veeam console, select connect to add the new NAS volume for backup repository.
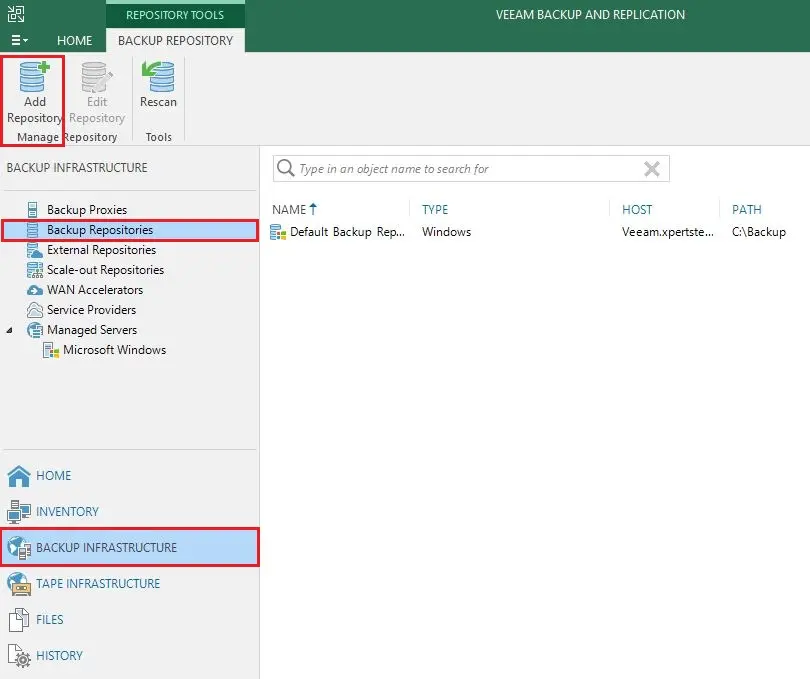
2- Click on Backup Infrastructure, and then click backup repositories. Click add repository.
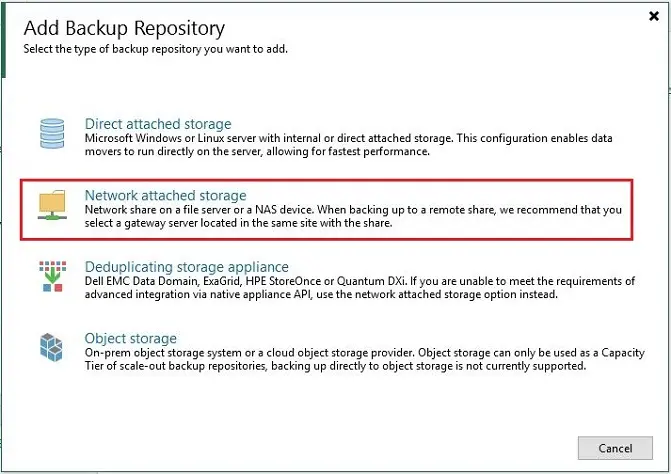
3- Click Network attached storage.
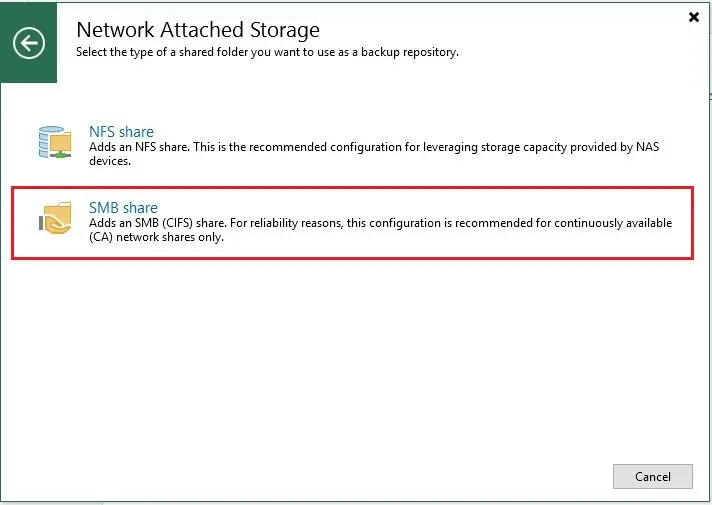
4- Click SMB share.
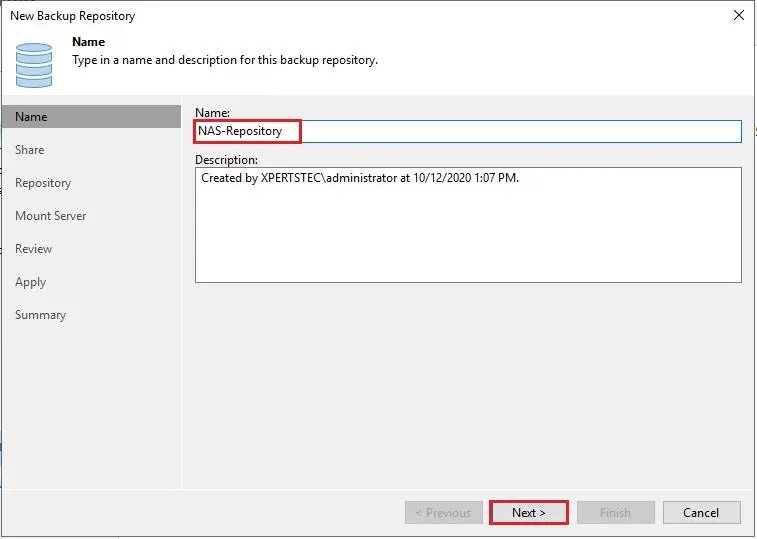
5- Type a repository name and then click next.
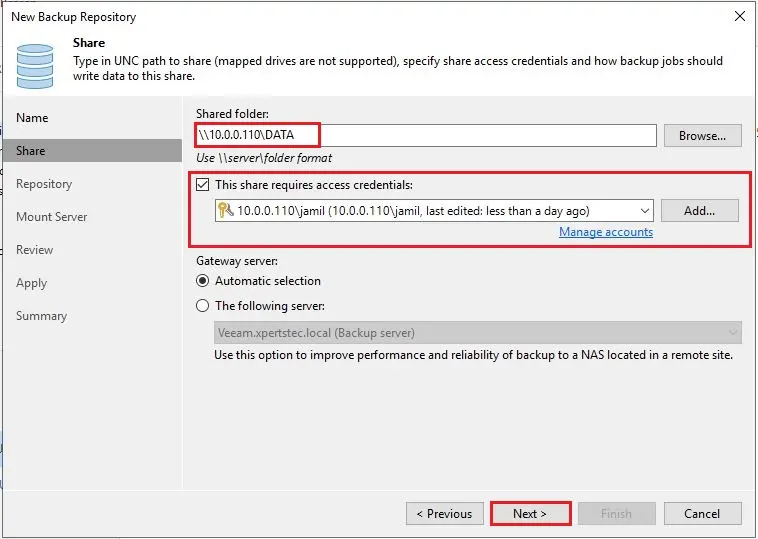
6- Enter the path to the SMB shared folder. Choose your credential and then click next.
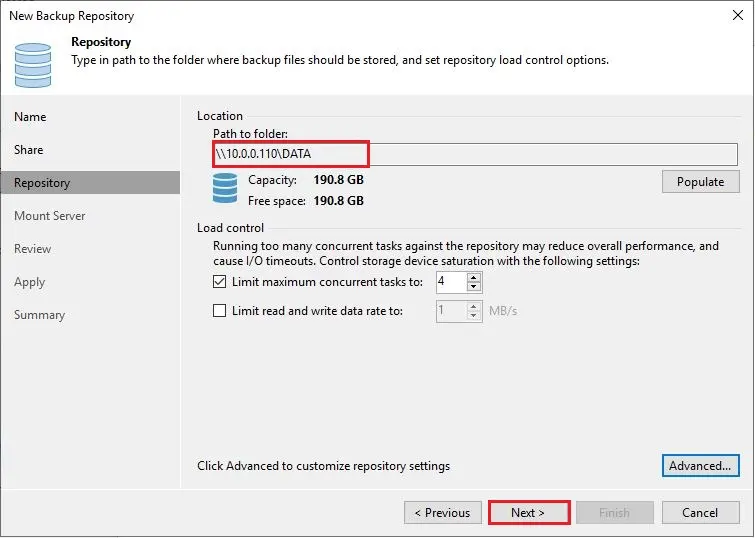
7- Enter the folder path (your SMB share) and click next.
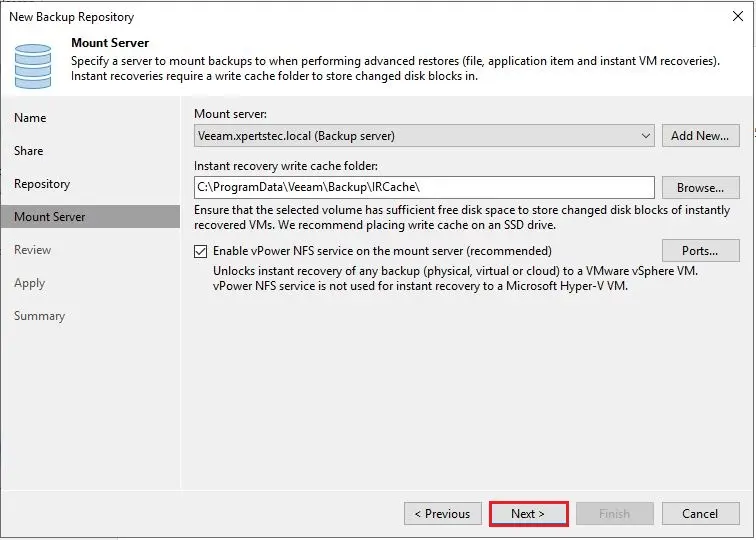
8- Mount server click next.
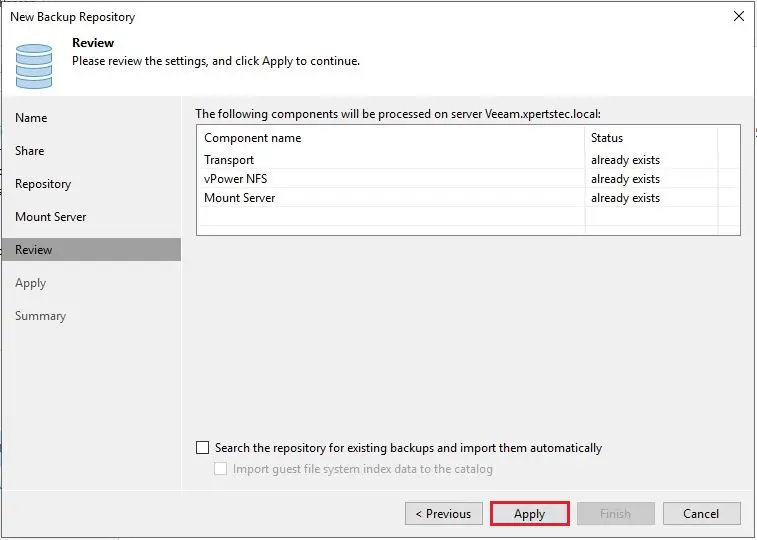
9- At this stage, you can review the backup repository settings and click Apply to create the SMB backup repository.
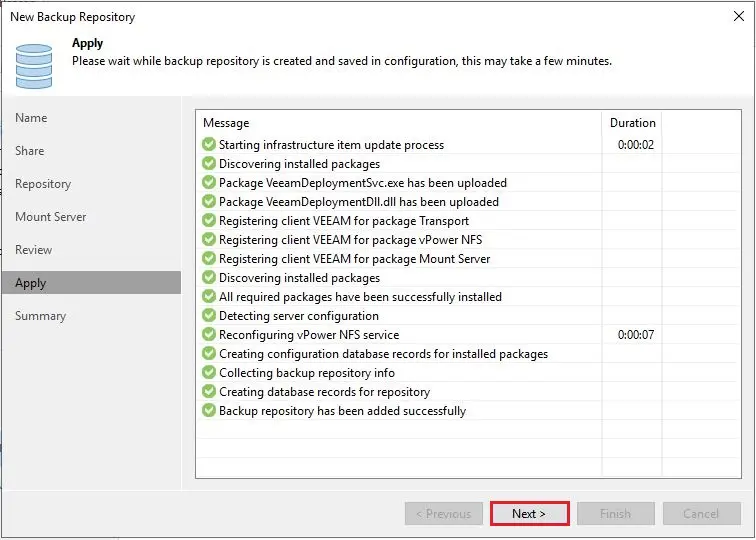
10- After clicking Apply, the Veeam software will display the details of each step being performed. Click next.
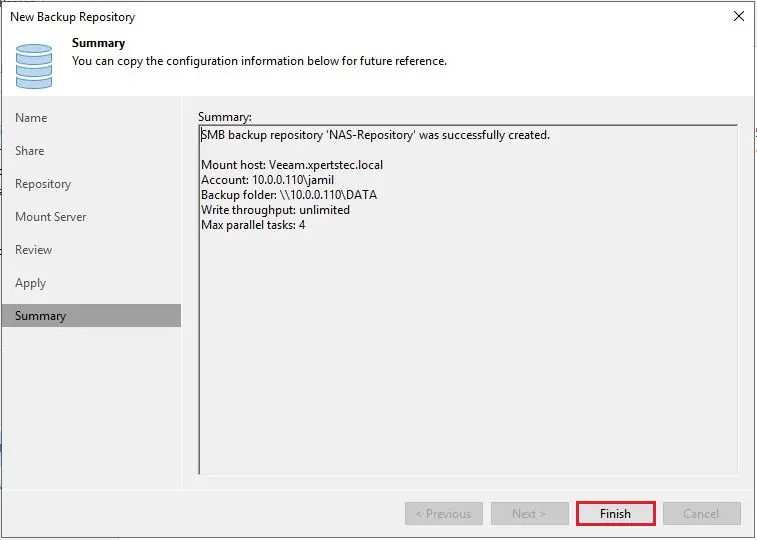
11- Upon completion, you will see the following message indicating that the SMB share has been added as a Veeam backup repository.
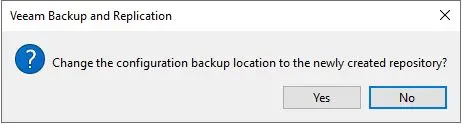
12- If you want to change backup repository then click yes.
13- Your new SMB share backup repository is now ready to use.
How to Add Second Disk Sunrise NAS.
For more details, please click here