 on PC, Laptop.")
In this blog, I am going to Install Android Chrome OS (CloudReady) on a PC/Laptop, or How to turn a Windows laptop into a Chromebook windows computer or laptops, existence simply electronic devices, are not made to run like a dream ever. In this blog you will learn how to install the Neverware CloudReady version of Chrome OS on your Windows system, Macbook, or Chromebook using an 8GB or 16GB USB flash disk. You recognize this particularly if you had a Windows PC that was once carried out up to speed but now it’s a painful slow. This occurs because Microsoft wants to keep Windows fully functional at all times. In following so, implements Windows updates to the operating system that brings the latest features, additional functionality, security updates, and etc.
CloudReady USB Maker
How to Create a CloudReady USB installer Chrome OS.
Plugin the USB device into an available USB slot on the target device computer or Laptop.
Power on the machine while repeatedly pressing the system special boot key. This boot a key difference between different computer manufacturers. (F2, F9, F12 and etc).
A menu will be displayed that will show a number of boot options. Use your keyboard arrow keys to highlight the USB device that represents the CloudReady USB installer.
Install Android Chrome OS (CloudReady)
Chrome OS CloudReady logo screen.
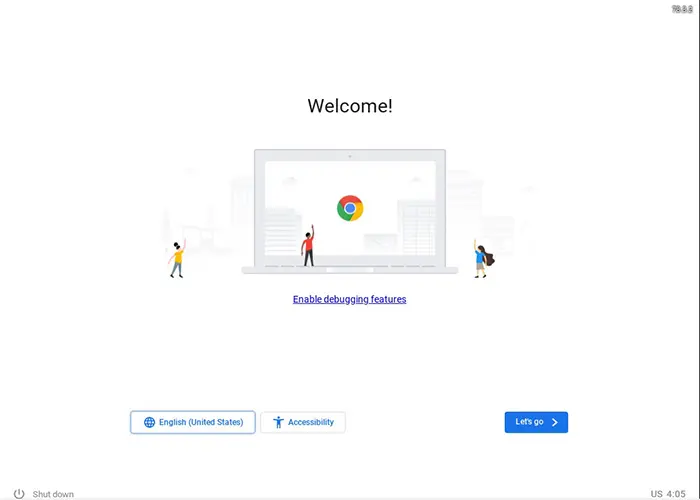
After the Chrome OS CloudReady splash screen and your USB installer have finished starting, you will see the CloudReady (Chromebook) Welcome screen.
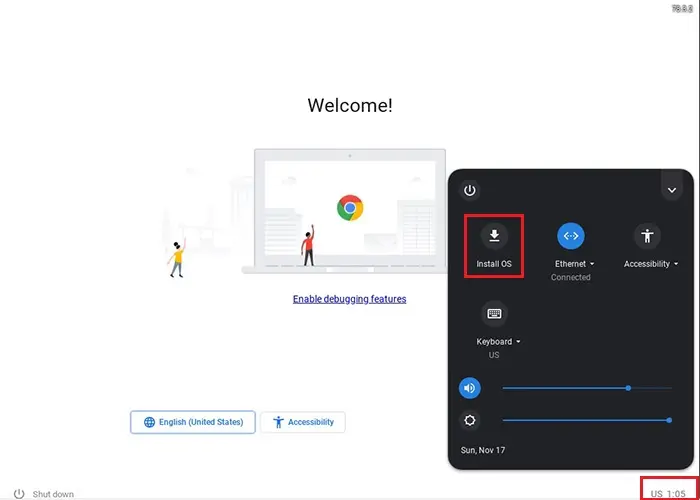
Right side corner of the screen left click on the clock and click on Install Chrome OS.
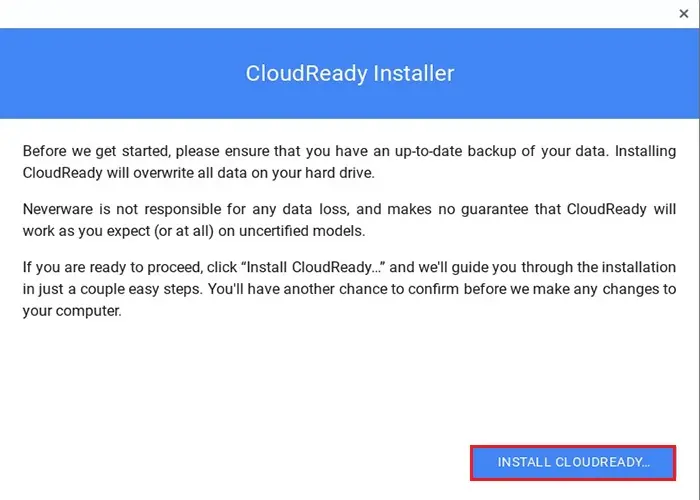
On the CloudReady installer screen, Please make sure that you’ve got an up so far backup of your data. Installation Chrome OS CloudReady will overwrite all data on your disk drive. and click on the install CloudReady button.
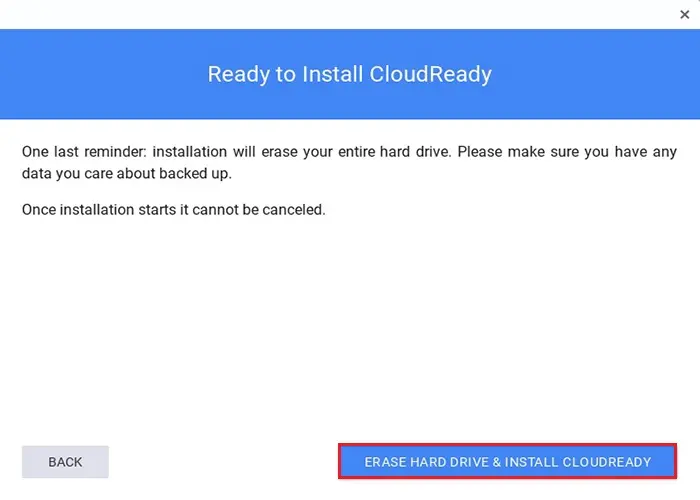
On this screen, the installation will erase your entire hard drive, please make sure you have any data you care about backed up Click ERASE HARD DRIVE & INSTALL CLOUD READY.
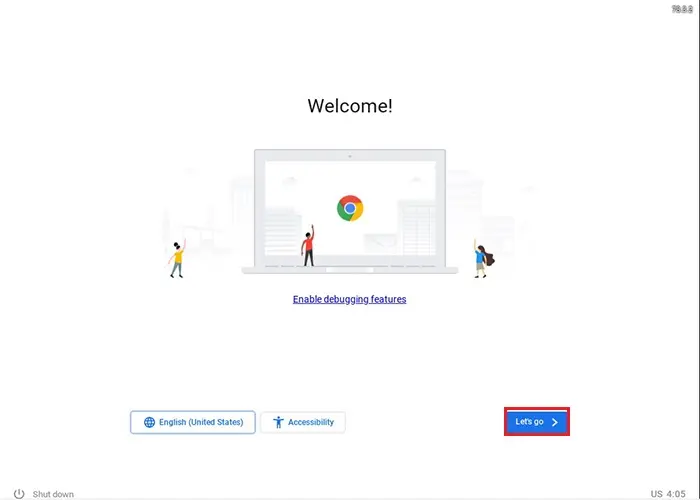
This running process will take between 5 to 20 minutes. Now you will see a welcome screen (Chrome OS) where you can select language or accessibility settings, when ready, click the Let’s Go button.
On this screen, you can configure your network settings to gain access to the internet. You can authenticate to Wi-Fi or attach Ethernet. When your network is ready, click the Next button.

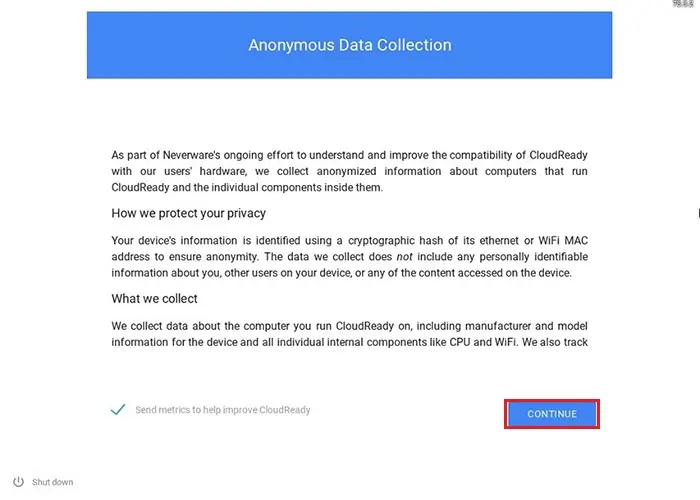
Choose whether or not to participate in Anonymous Data Collection Policy and then click Continue.
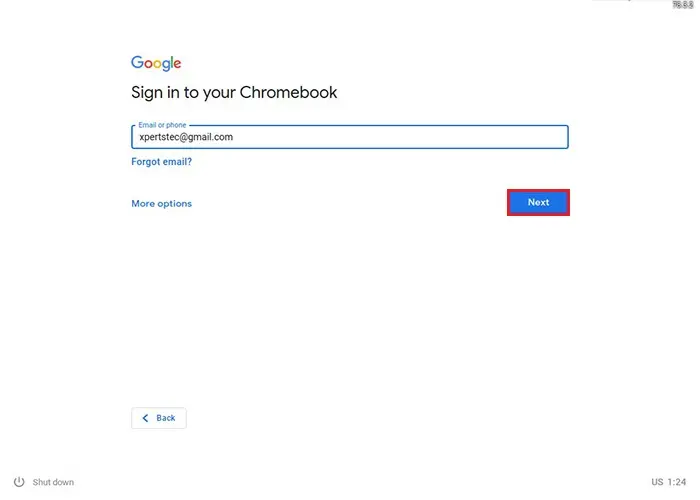
Now sign in with your Gmail account and click next.
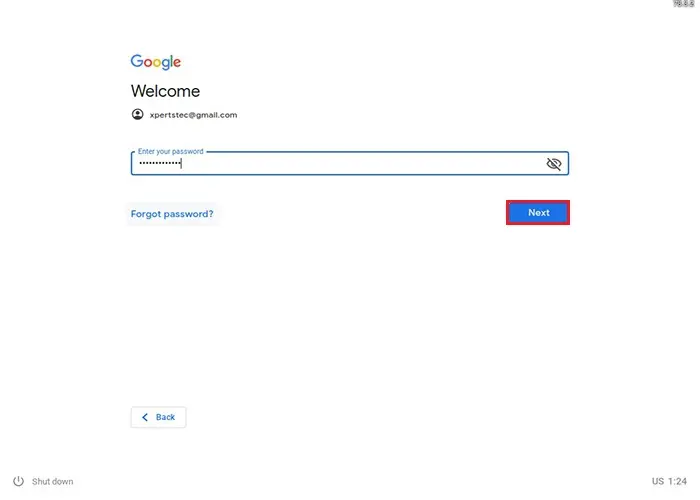
Type your Gmail account password and then click next.
Chrome OS CloudReady home screen.

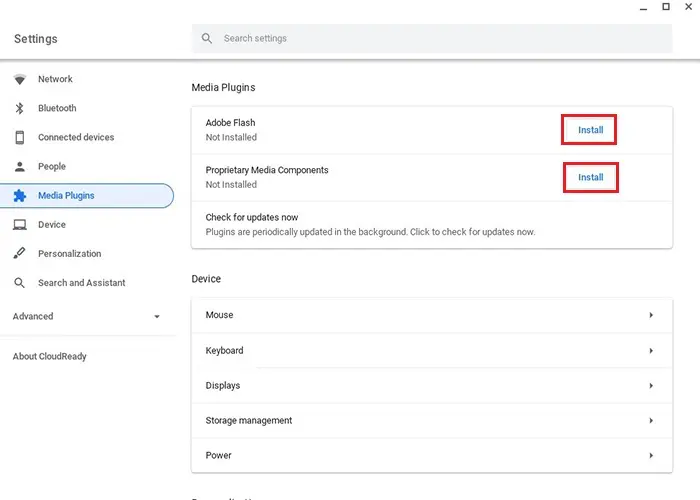
To install Adobe Flash and Proprietary media components.
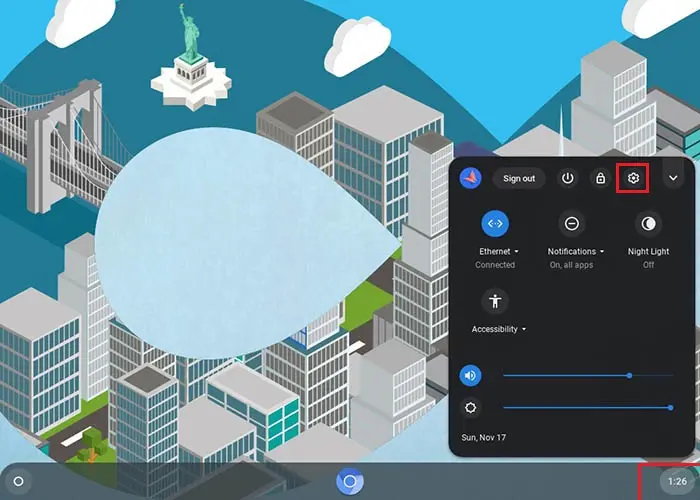
Launch the settings menu.
Right side corner of the screen left click on the clock and then click on the setting button.
Scroll down or search for Media Plugins and then click Install.
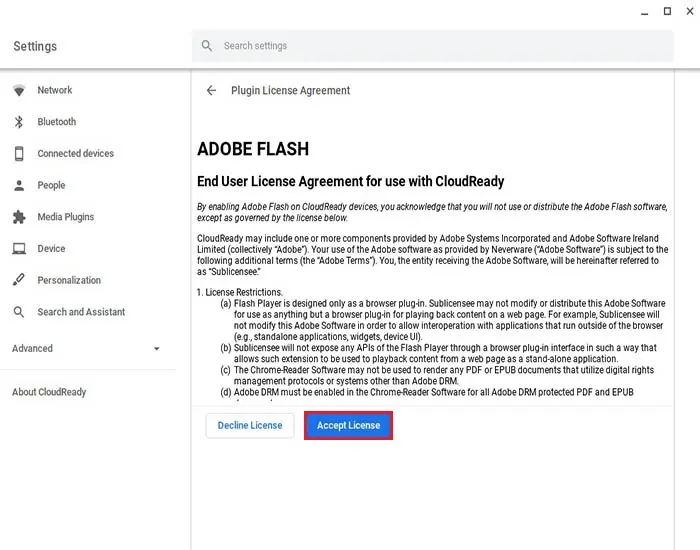
Select the Accept License on the plug-in licensing agreement screen.
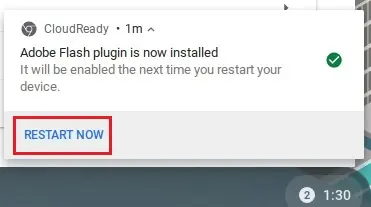
Adobe Flash plugin is now installed, a reboot is required, so select RESTART NOW.
After rester, type your login account password and then hit enter.
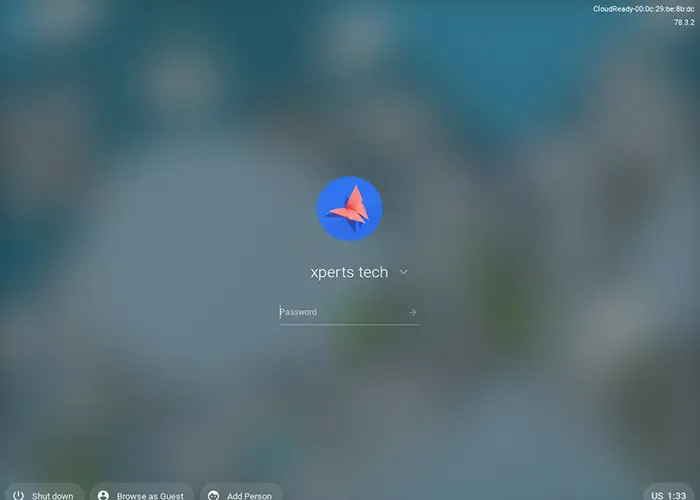
CloudReady, Chromebook home screen.

No Comments
I need to to thank you for this very good read!! I certainly enjoyed every little bit of it. I’ve got you book marked to check out new stuff you post…|
Dear Sara,
thank you
Hey there! Do you use Twitter? I’d like to follow you if that would be ok. I’m definitely enjoying your blog and look forward to new updates.|
Dear Jewel thank you, here you can find my twitter: https://twitter.com/xpertstec