This guide will explain to you how to Create CloudReady USB Installer. Before we start it, have you ever been supposed to Run Chrome OS on your PC (laptop or desktop). As you may know, Chrome OS (CloudReady) is getting popular recently. Google Pixel, the most recent Chromebook device is powered by Chrome OS. It is impossible to get the original Chrome OS and then run it on any system. But no need to worry, if you need to have the experience using Chrome OS (CloudReady) on your existing hardware, you can get Neverware CloudReady. It’s an individual operating system similar to Chrome OS.
The CloudReady USB Maker is the software for creating a CloudReady USB installer.
Download CloudReady
Before beginning the manual USB creation process, first, you need to download the CloudReady .zip file. Please download the CloudReady .zip file to your Windows downloads folder, not to the target USB drive.
The following requirement for the Chromebook USB Installer
Chrome browser.
CloudReady image
Install and open the Chromebook Recovery Utility
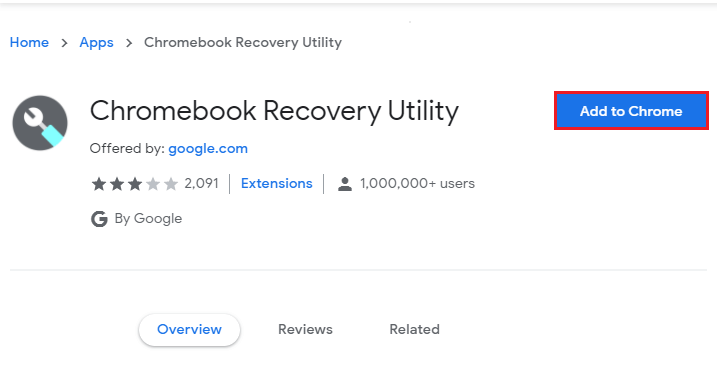
You need to add the Chromebook Recovery Utility to the Chrome browser if you want to create a CloudReady USB installer.
Chromebook Recovery Utility
How to create a recovery media for your Chromebook
Cloudready Extension
Click Add to Chrome button to Add Chrome Recovery Utility to Chrome browser.
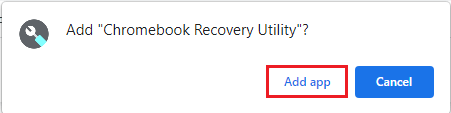
Chrome Recovery Utility window will pop up, then click Add app.
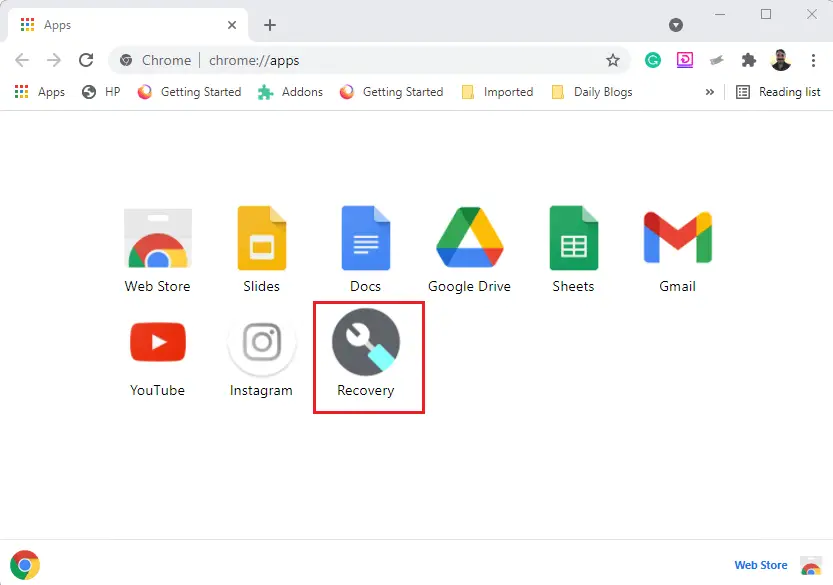
Now the Chromebook Recovery Utility has been installed and will show up on the Apps page of your Chrome browser.
Click on the Recovery icon
Create the USB Installer
Recommended ensuring that the USB you are using to create a chrome USB installer has been formatted before starting the process. To format your USB drive via the Google Chrome Recovery Utility follow the below steps.
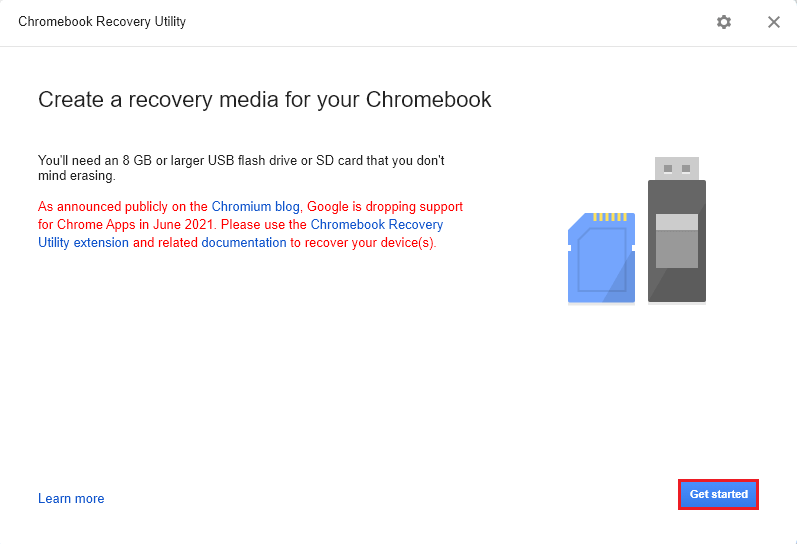
Create a recovery media for your Chromebook wizard, click Get Started.
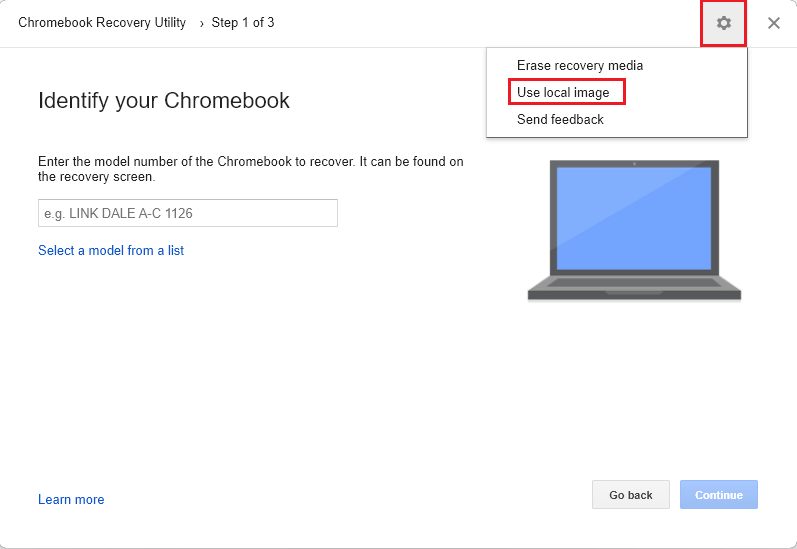
Identify your Chromebook, click on the recovery utility setting icon, and then click on the use local image.
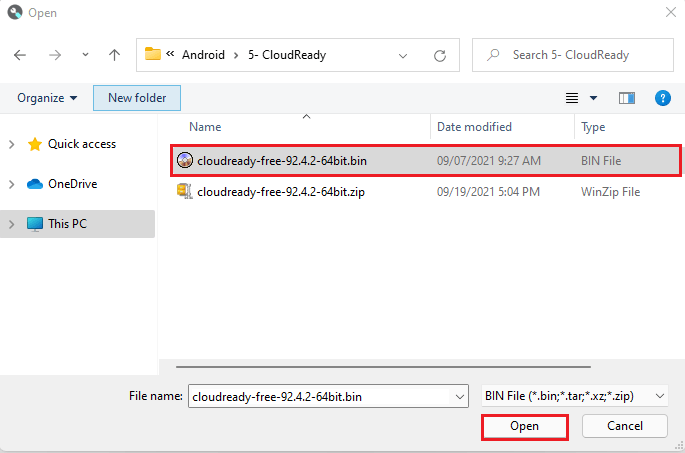
Browse for CloudReady Image, and select the cloudready-free.bin.zip file from your Downloads folder.
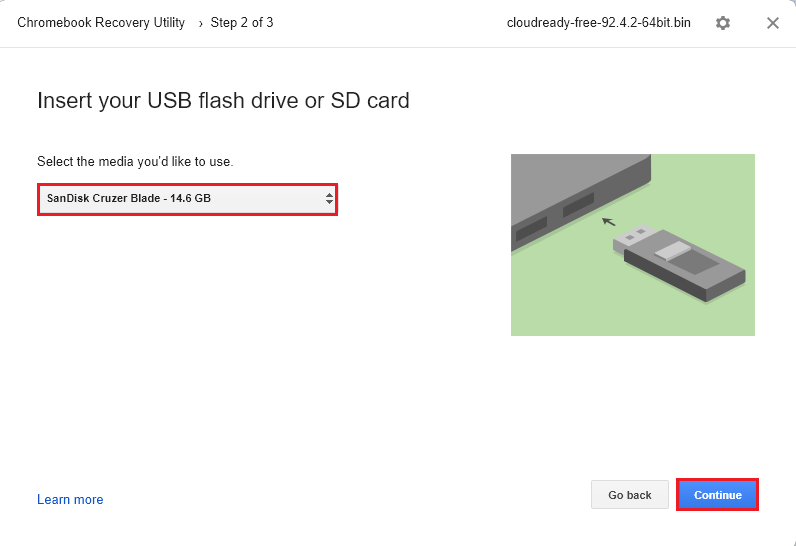
Insert your USB drive and then select it. Click continue
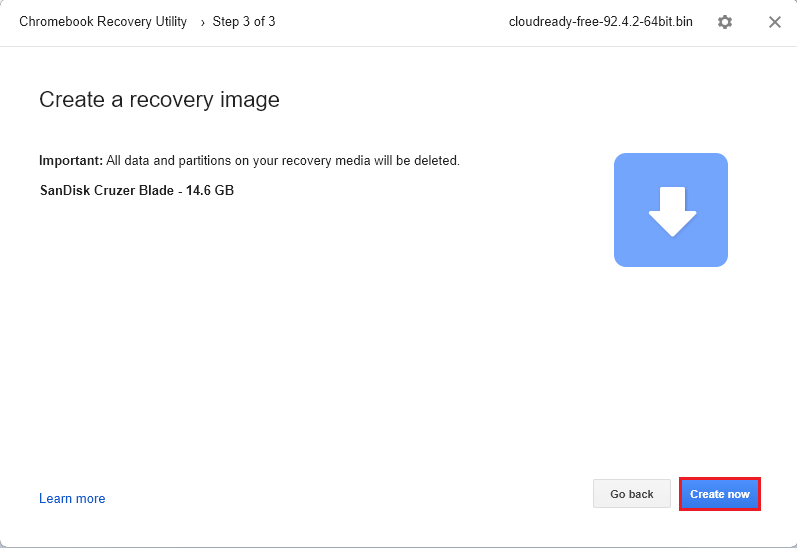
Ready to create a recovery image, click create now.
Creating a recovery image in progress.

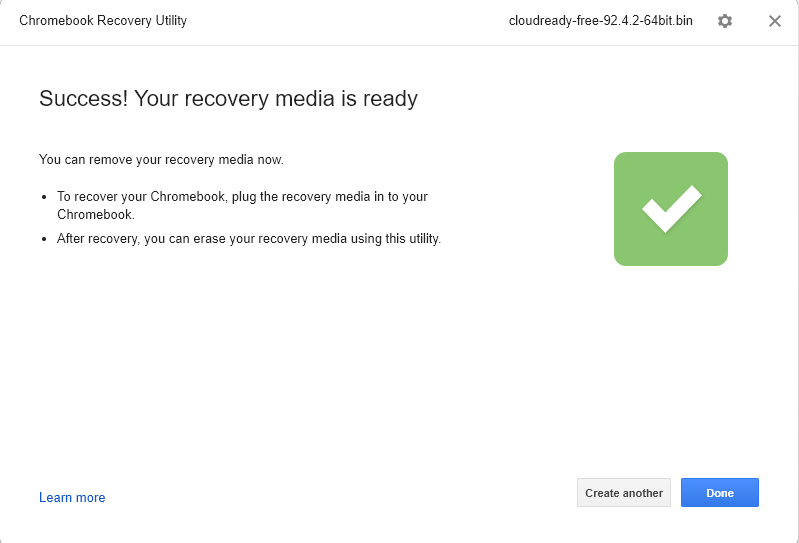
When the process is done, remove the USB disk from your computer.
Now your USB CloudReady installer is ready to use.
How to create a CloudReady USB installer using Windows computer
Download the USB Maker from Neverware
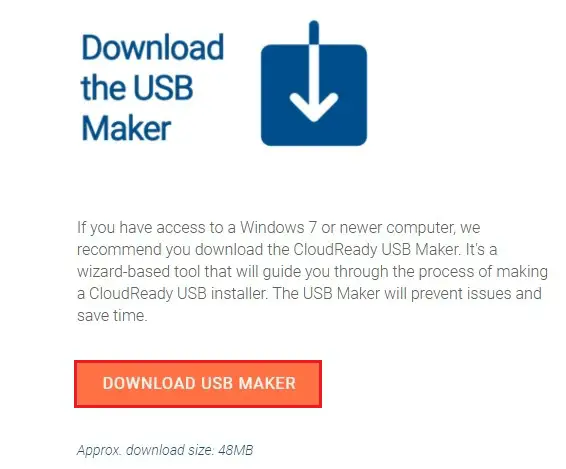
Please make sure you have downloaded the latest version of the CloudReady USB Maker.
Now download the CloudReady image from Neverware

Create a USB installer for CloudReady
Run the program
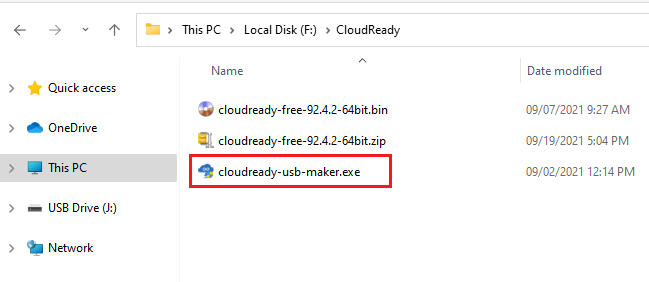
Open your Downloads folder and then double click on the cloudready-usb-maker.exe file.
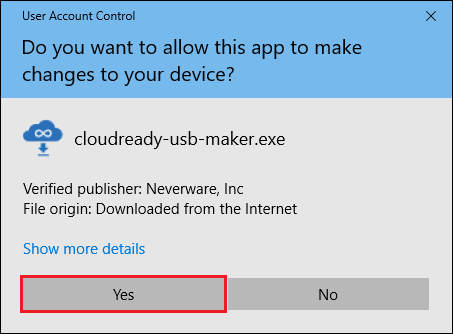
This CloudReady USB installer requires administrative privileges, Click yes.
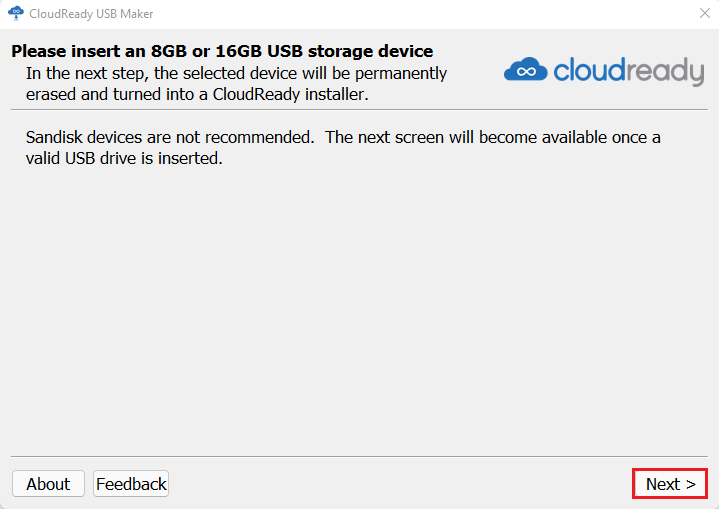
Welcome to the CloudReady USB creation wizard, Insert a flash drive with at least 8 GB higher capacity and then click next.

Click Next
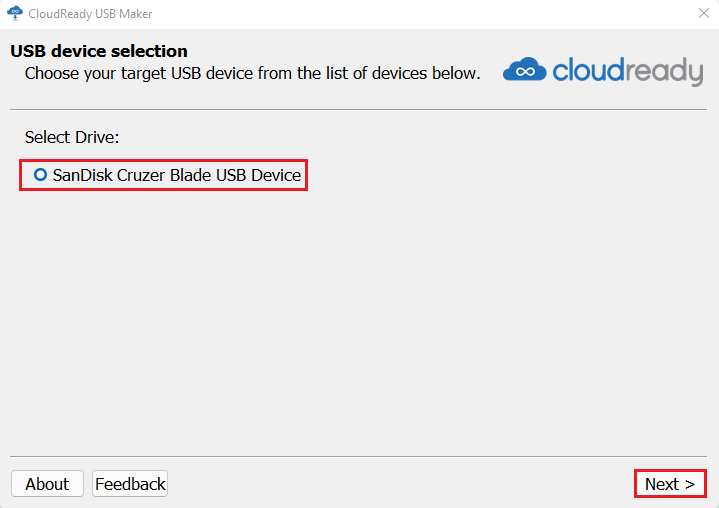
USB device selection, choose the target USB disk use as your CloudReady installation device, and then click Next.
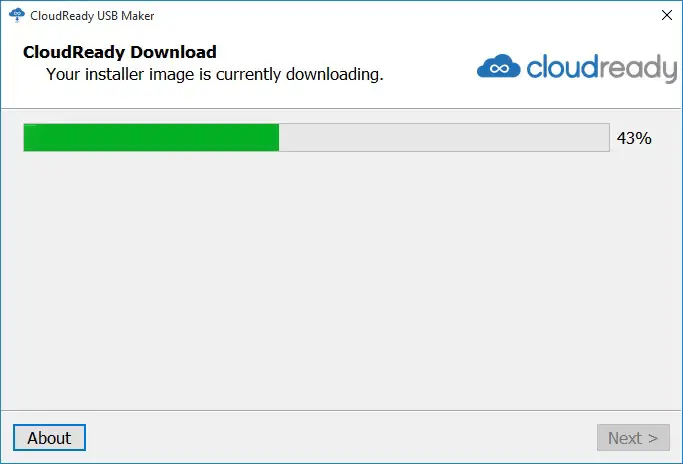
Start creating your CloudReady USB Installer, it may take 20 minutes to create the installer.

The USB maker will start downloading, extract, format, and create a bootable USB device for you to use to install CloudReady on your target devices.
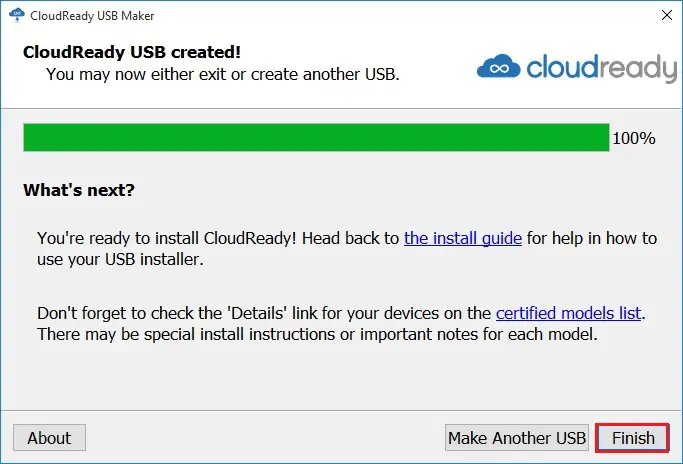
CloudReady USB created successfully, click on finish.