
In this guide, I will show you how to install Windows 11 in VirtualBox in Windows OS. On 24th June, Microsoft announced a new Windows 11. However, if you would like to install and test the new Windows 11 OS then it’s best to install it as a virtual machine like Oracle VirtualBox.
Please make sure you have Windows 11 ISO for VirtualBox.
After that, I would suggest you check your PC Health Check before installing Windows 11. Because it would helpful for you to know whether your system is compatible with the new Windows OS or not.
Download Oracle Virtualbox
Download Virtualbox Extension Pack
Windows 11 System Requirements
Processor – 1 GHz or faster
RAM – 4 GB of RAM
Storage – 64 GB or larger storage
System firmware – UEFI, Secure Boot capable
TPM – Trusted Platform Module version 2.0 version 2.0
Graphics card – DirectX 12 or afterward with WDDM 2.0
Display – Display (720p)
Download and Install VirtualBox Application
Install the Oracle VM VirtualBox
Double-click to run the VirtualBox installation and then click Next.

Click next.
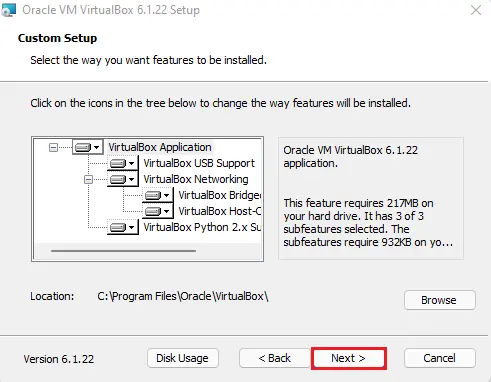
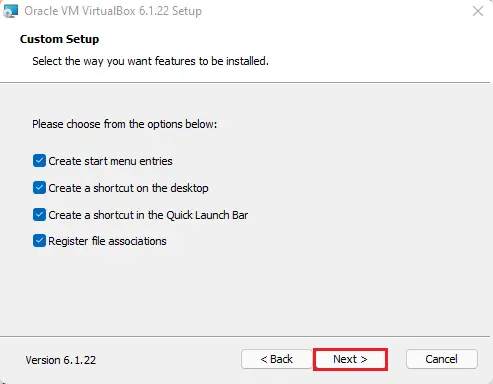
Custom setup, click next.
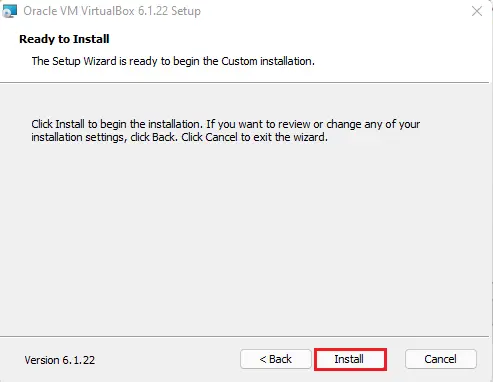
Ready to install Oracle VM VirtualBox, click install.
Click finish.

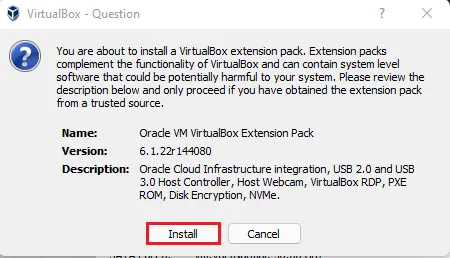
Install Virtualbox Extension Pack
It is a great utility provided by Oracle Corporation. This utility will helps you in improving & adding some additional features to the Virtualbox VM. Installing this plug-in you can get features (Mouse Integration, Drag & Drop, USB support, Internet Connectivity, and etc…
Double-click on the extension pack file and then select the Install button.
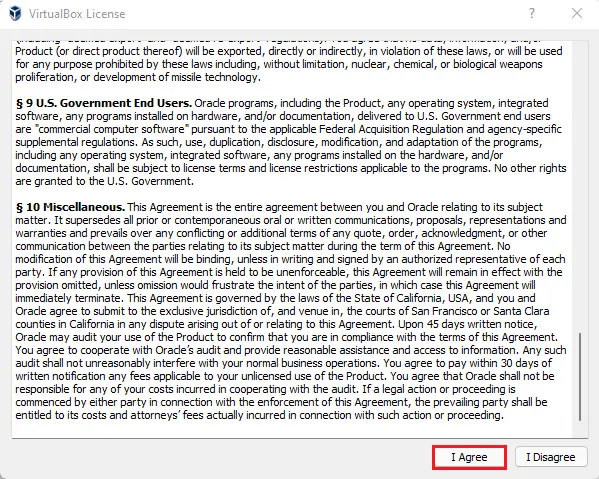
Accept agreement.
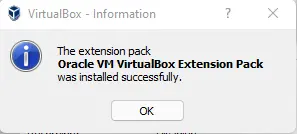
Extension Pack successfully installed.
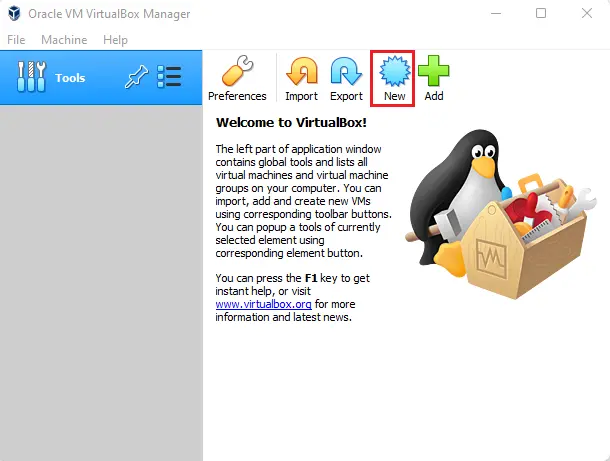
Create Windows 11 Virtual Machine
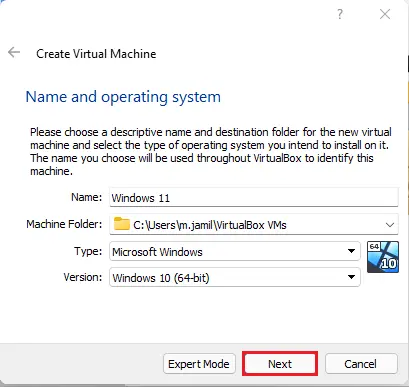
Choose the New icon to create a Windows 11 VM in Virtualbox.
VirtualBox creates a virtual machine wizard,
Name – Type a virtual machine name
Type – Microsoft Windows.
Version – Windows 10 (64-bit) and then click on Next.
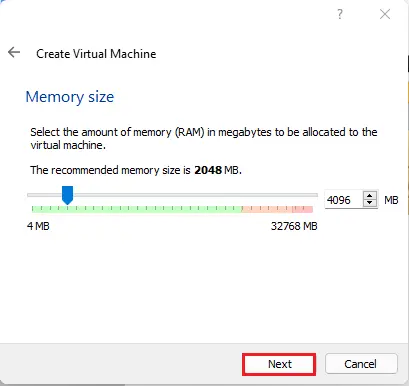
Windows 11 the recommended 4GB memory, adjust the slider, and then select next.
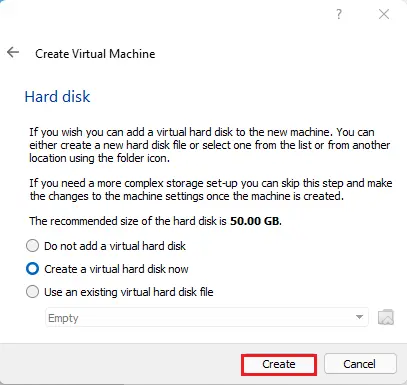
Under the Hard disk section, choose to create a virtual hard disk now and then select Create.
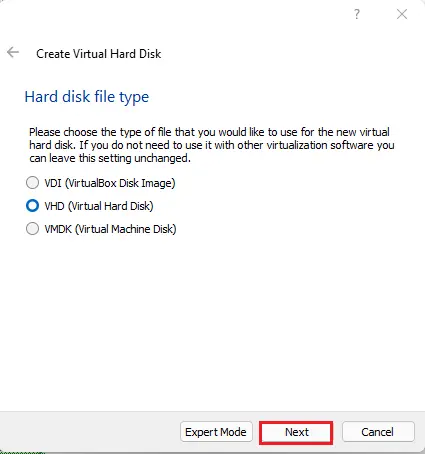
VHD (Virtual Hard Disk) and then select next.
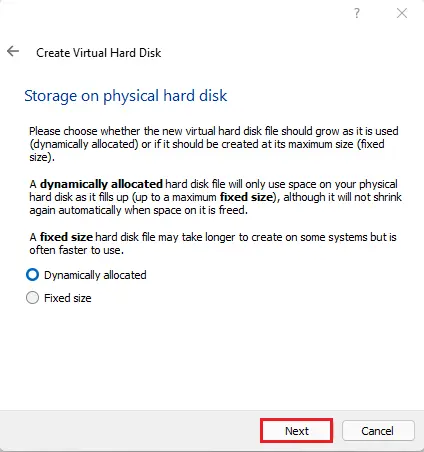
Dynamically allocated and then select next.
Allocate the VM disk size and then click Create.

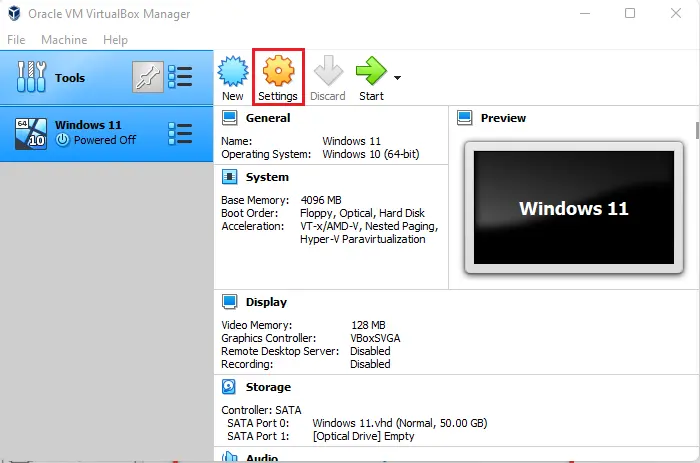
Customize Windows 11 VM
Select the Settings button to edit Windows 11 VM.
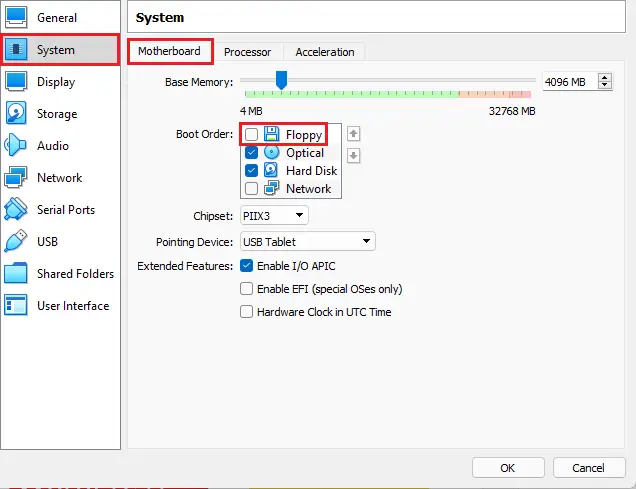
Select the System menu, select Motherboard, and then uncheck the Floppy.
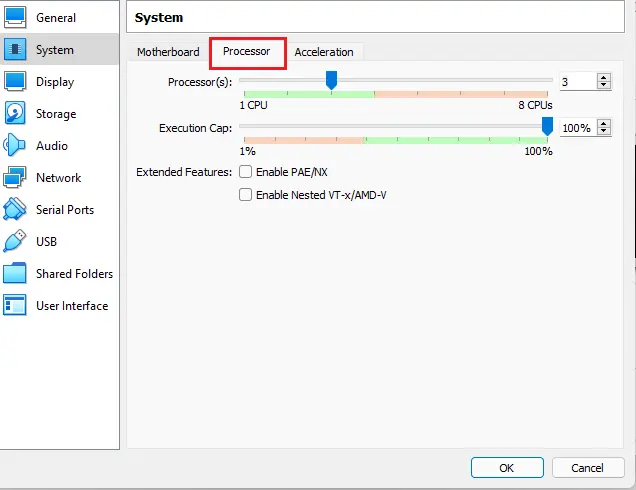
Click on the Processor menu and increase the processors.
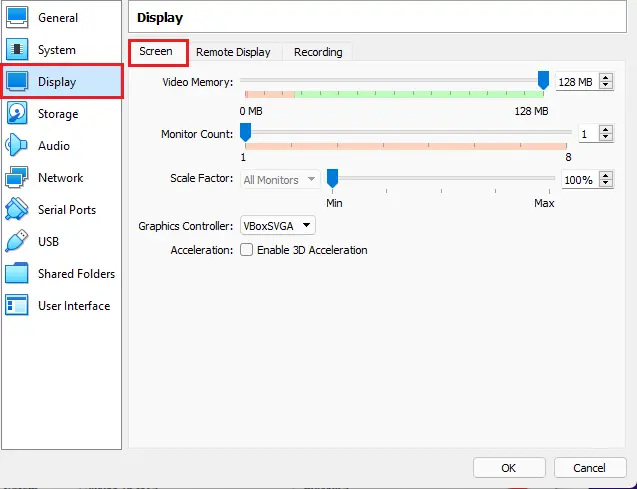
Go to the Display option, select Screen, and increase the video memory (128MB).
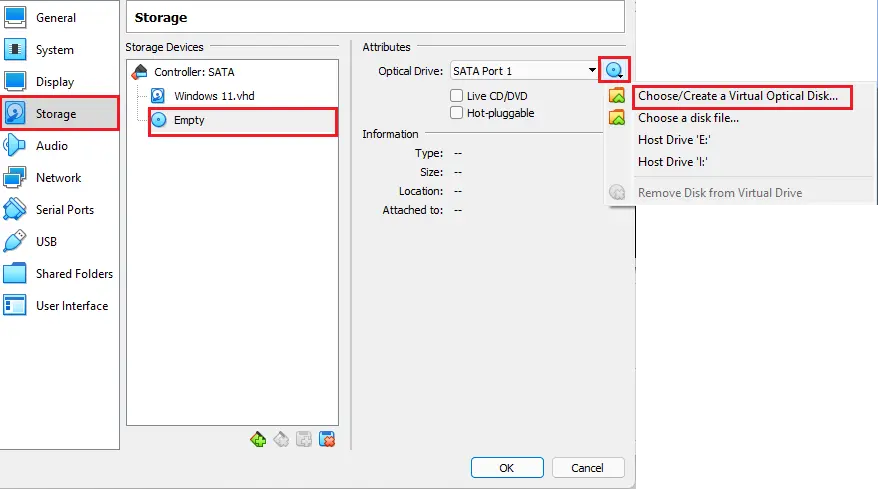
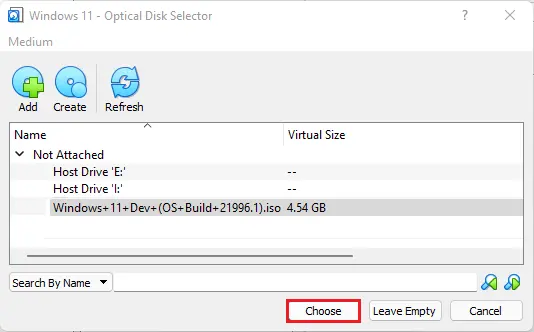
Select the Storage tab, select Empty, click on the blue disk icon and then select Choose/Create a Virtual Optical Disk.
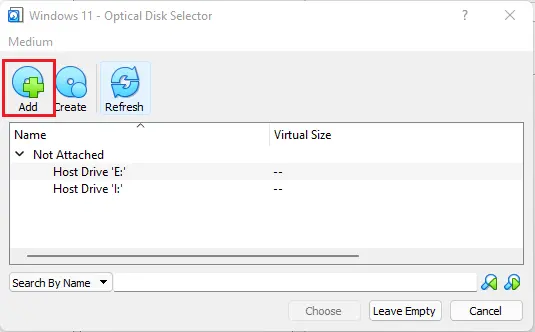
Click Add.
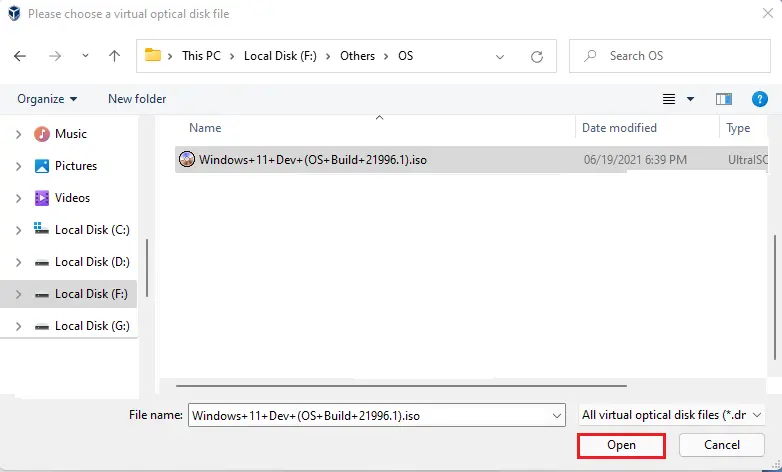
Select the Windows 11 ISO and select Open.
Click Choose button and then ok.
Installing Windows 11 in VirtualBox in Windows 10
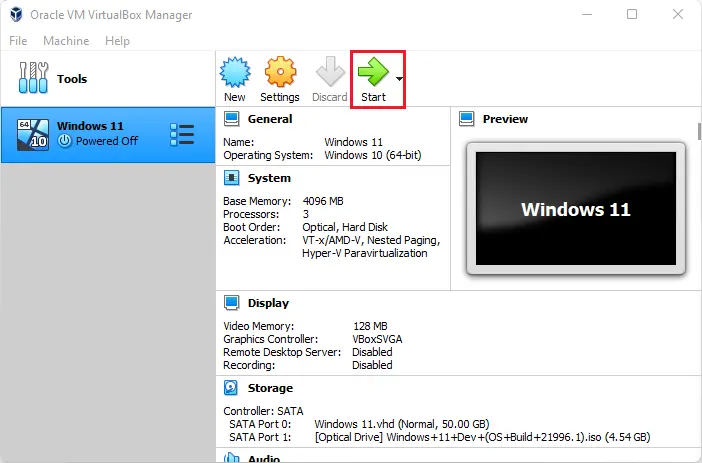
Click Start.
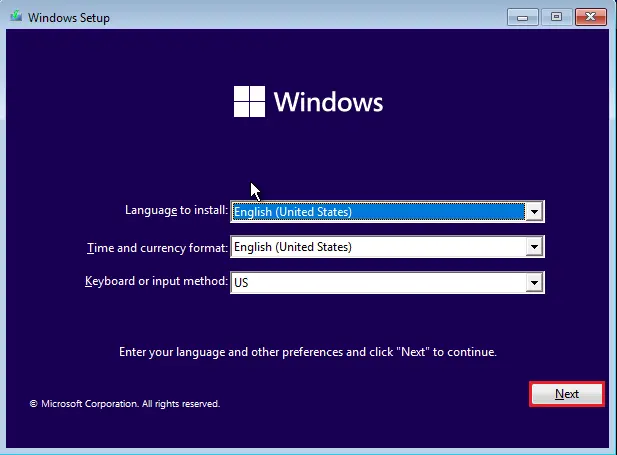
Select the language and click Next.
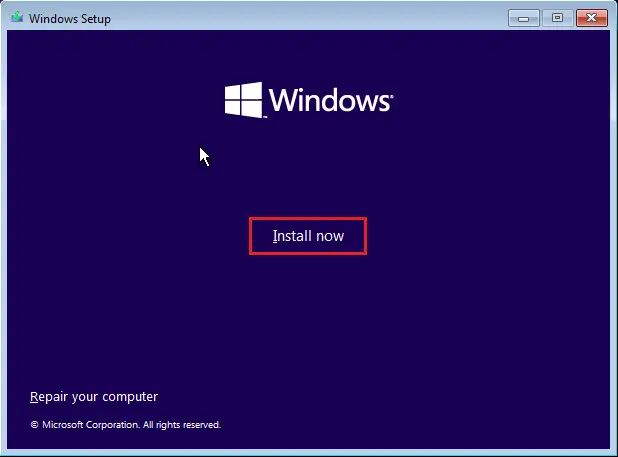
Click Install Now.
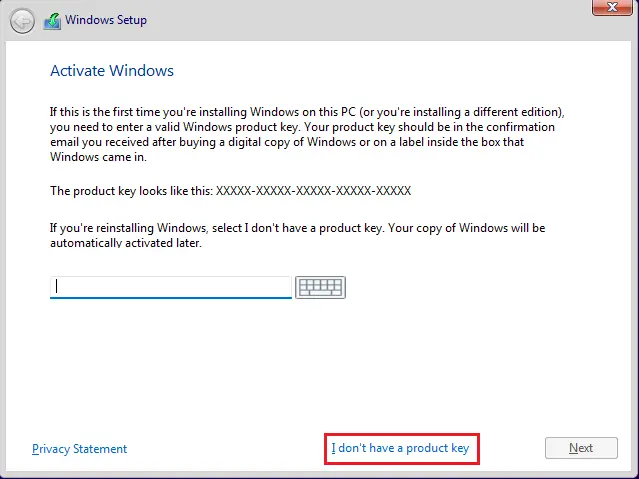
Select I don’t have a product key.
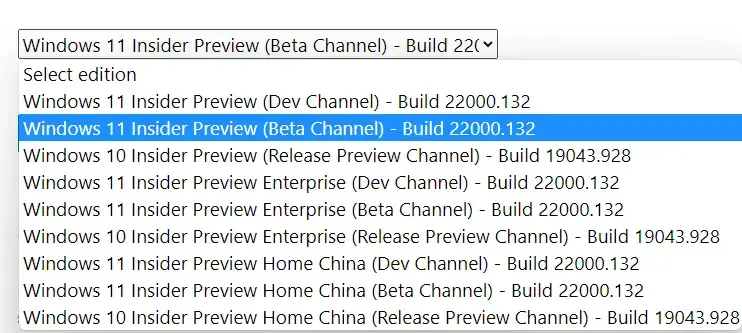
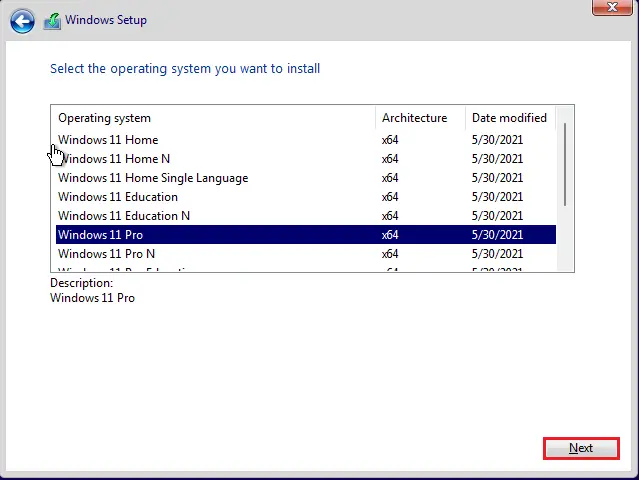
Select your Windows 11 Edition and then click next.
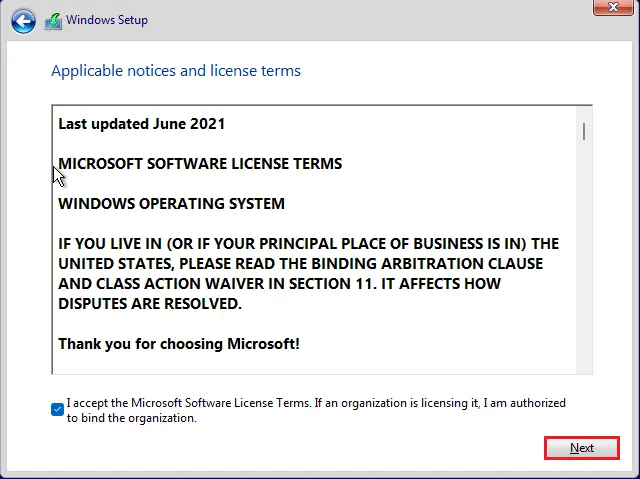
Accept the license terms and then click Next.
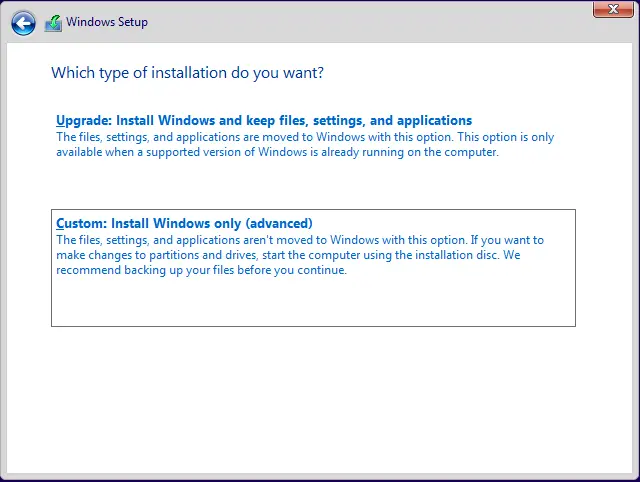
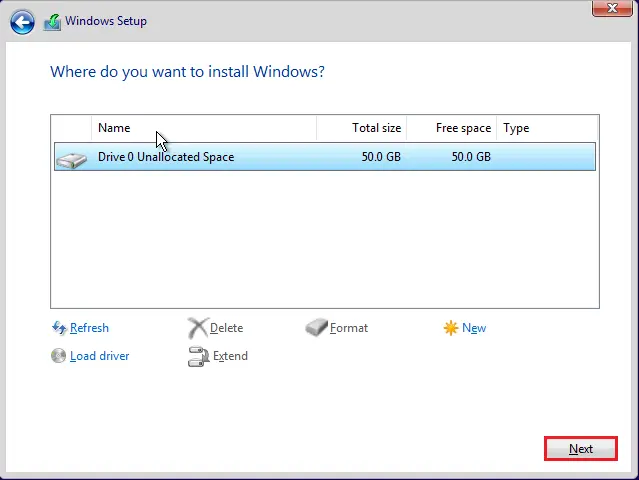
Select Custom: Install Windows only (advanced).
Click next.
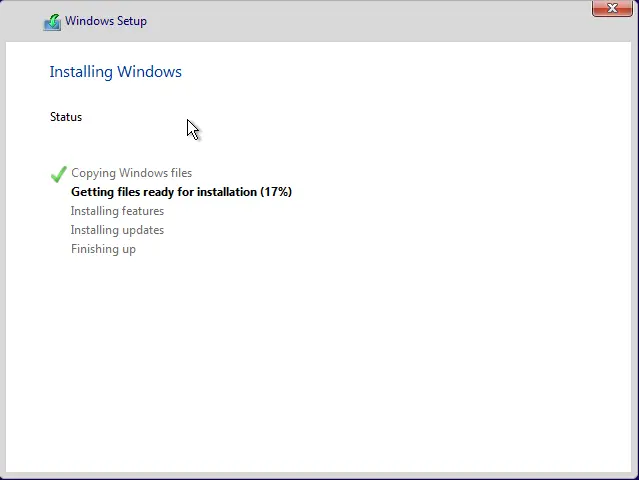
Windows installation process.
Windows 11 Basic Settings
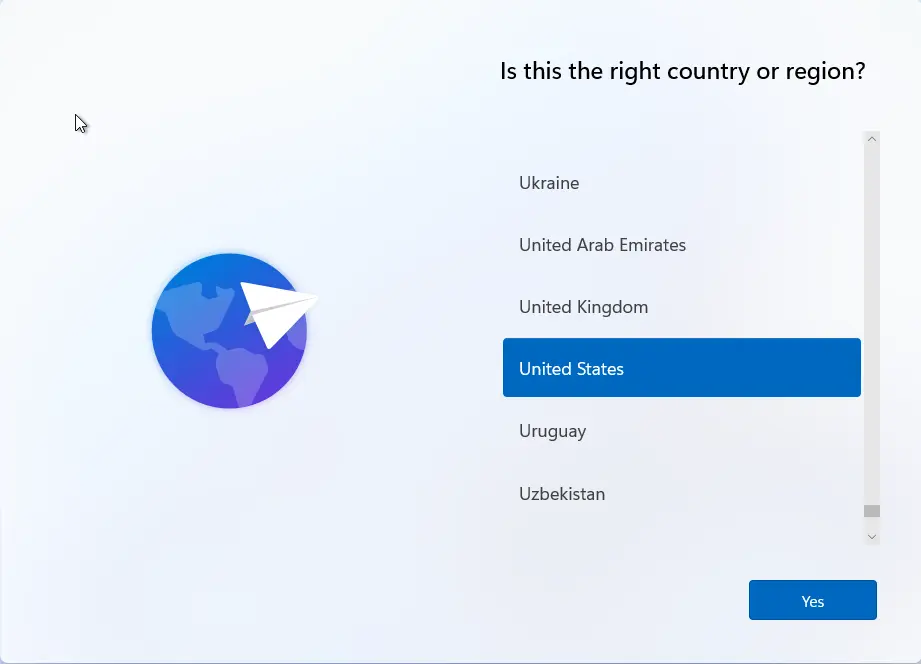
Select your region and then click Yes.
Select the Keyboard layout and click Yes.
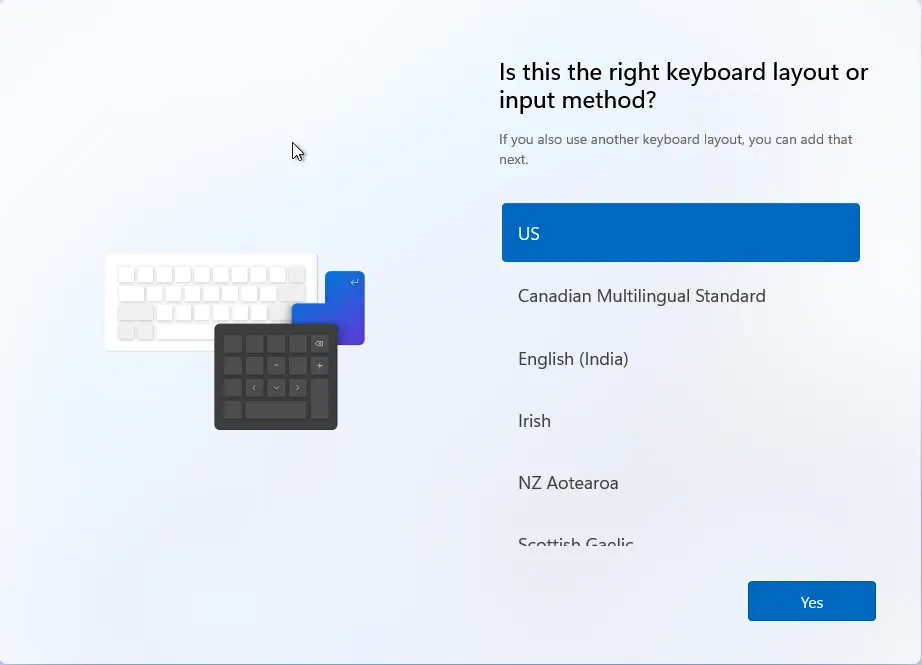
If you need to add another layout, choose to Add layout otherwise Skip it.
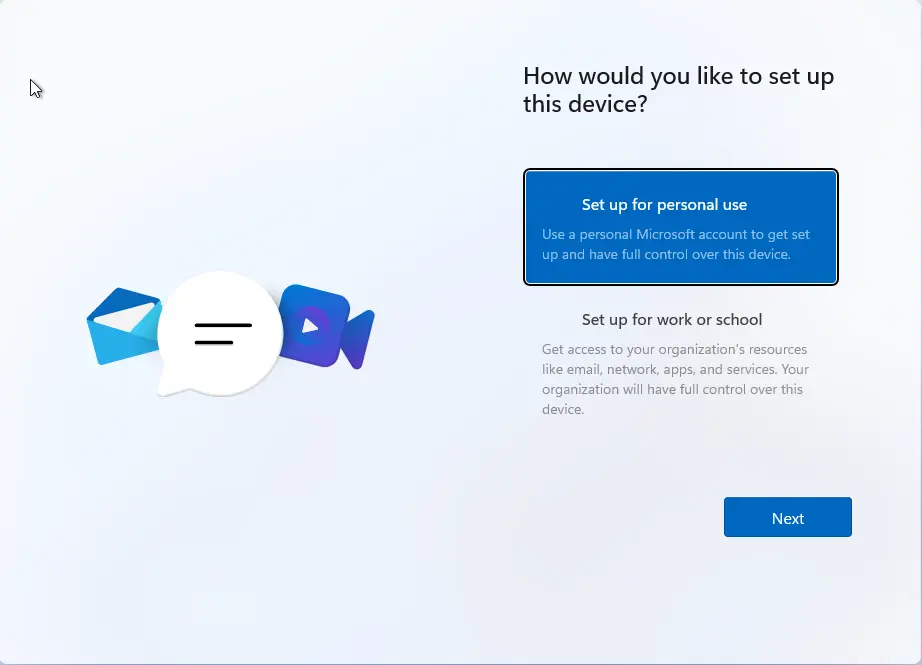
Setup for personal use and then click Next.
Add your Microsoft account and click next
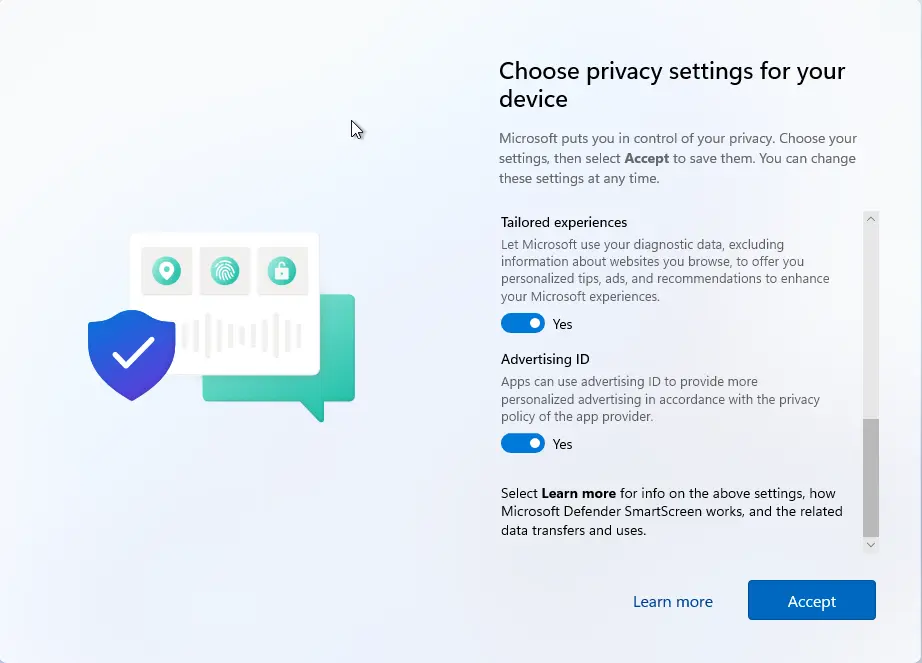
Choose privacy settings and click Accept.
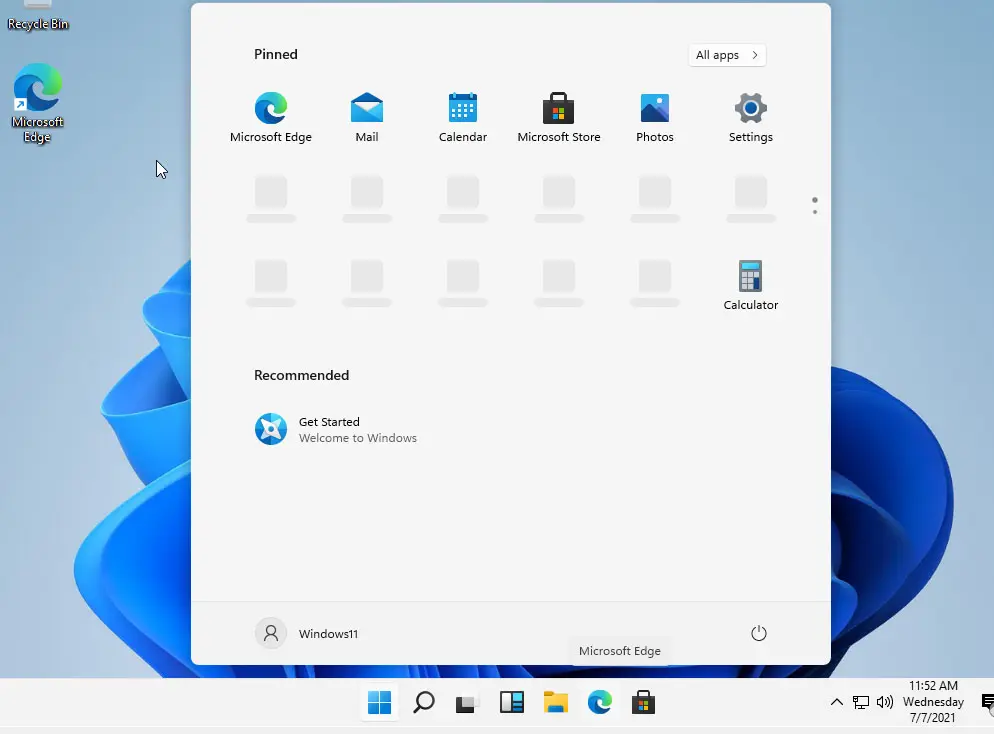
Windows 11 is successfully installed on VirtualBox.
Related: Install Windows 11 on VMware Workstation
Read more: How to Install MacOS Ventura VirtualBox on Windows.