In this article, please follow the steps on how to create a bootable Windows 11 USB drive for Windows 11. Creating a bootable USB drive is always great idea must you ever run into problems with your OS and need to start afresh. Bootable USB drives are also very helpful due to their extreme compatibility and portability.
Now: if you are looking at how to create a Windows 11 USB bootable drive, so you are in the right place.
Requirements:
Windows 11 ISO File
Minimum 8GB USB Flash drive
A Windows Computer
“If you are a tech newbie or a Mac user, please check out UUByte ISO Editor tool for creating a Windows 11 Bootable USB. It is much easiar to use than Rufus.”
Create a Windows 11 USB Bootable Drive
There are lots of bootable disk creation software available on the internet, in this guide, I am going to use a freeware tool called Rufus to create a bootable pin drive.
First, visit the Rufus website and then download the latest version of Rufus from the download section.

No need to install Rufus on your computer. Just double click to launch Rufus.
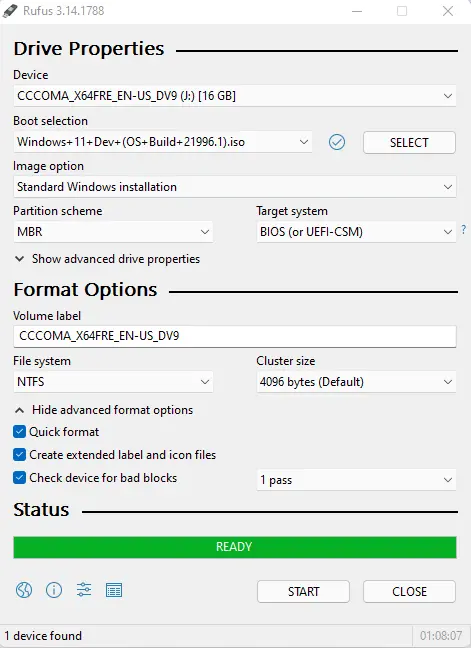
Create a Bootable Windows 11 USB Drive
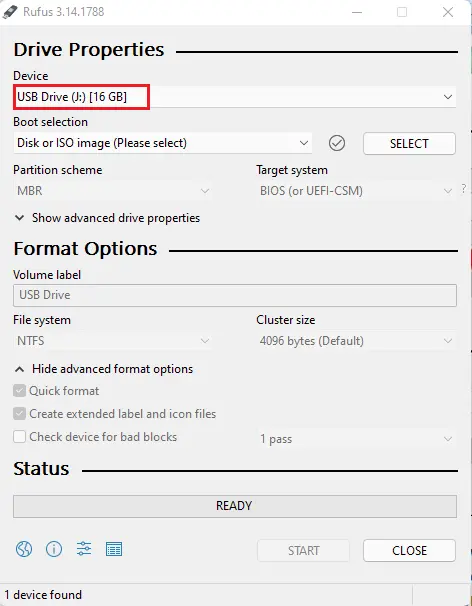
Plugin your USB device into your computer. Rufus will automatically detect it. Or else, you can select your pin drive under the device menu.
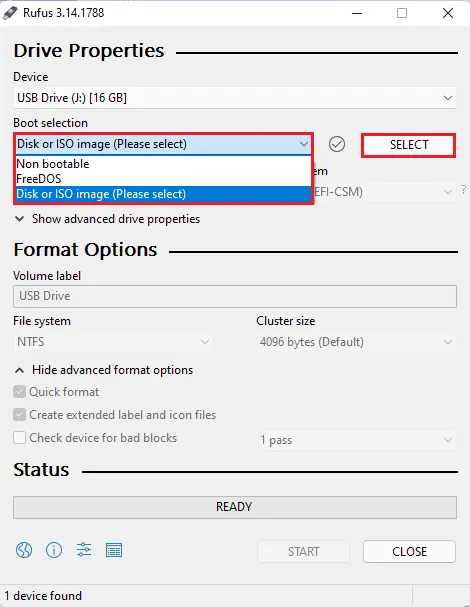
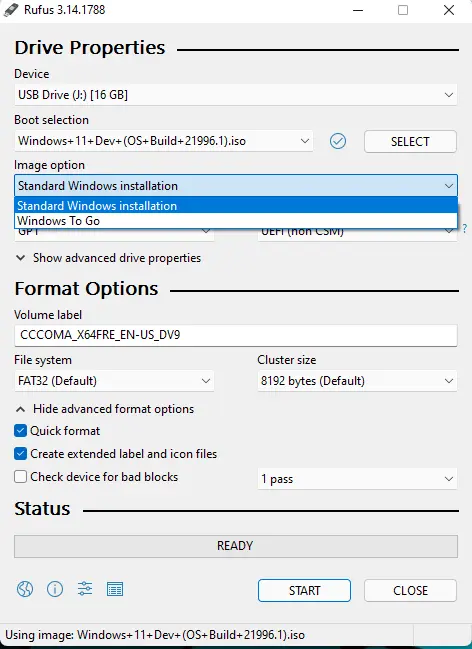
Select your boot selection method for your drive under the boot section. Then select the SELECT button to select the Windows 11 ISO file from your PC hard drive.
Select the Image option.
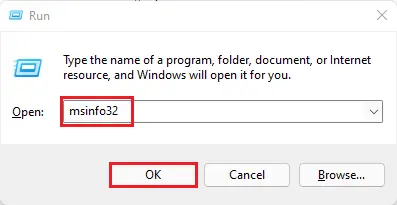
For additional configuration, if you would like to know about the PC BIOS Mode of your target machine. Then press Windows+R, type msinfo32, and then hit ok on the PC you wish to install Windows 11.
Check the BIOS Mode value, it should be either Legacy or UEFI.
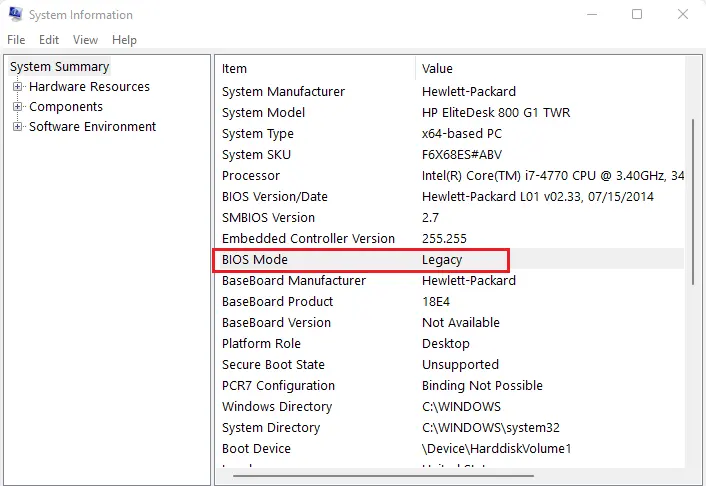
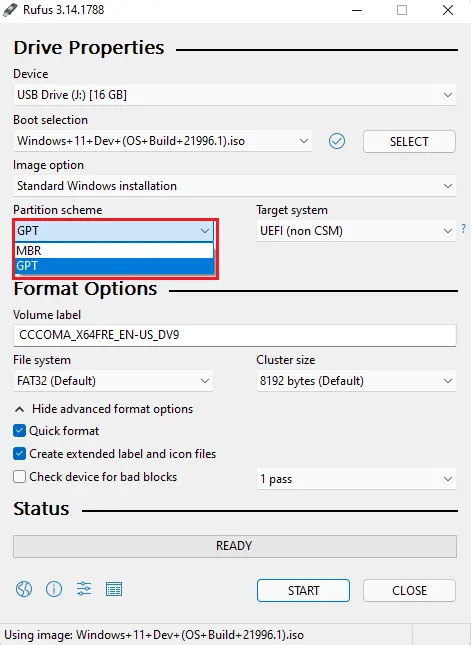
Now go back to Rufus, choose MBR if you’re BIOS Mode is Legacy. If the BIOS Mode is UEFI then choose the GPT option.
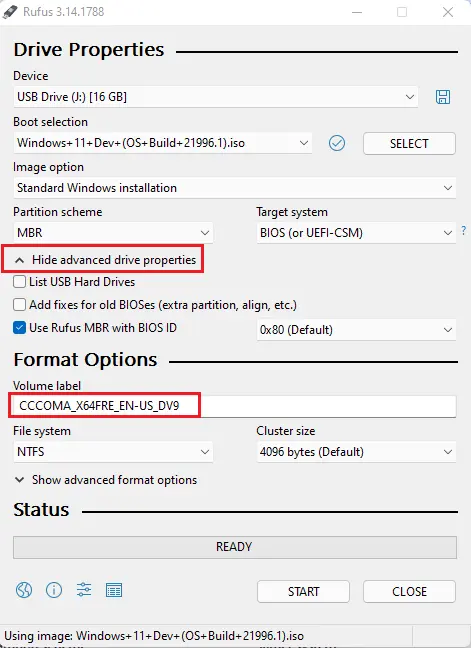
Select Show Advanced Drive properties and leave them as it is.
Under volume label, type in an appropriate name for your bootable USB or leave it default.
Select Show advanced format options; Select (Quick Format, Create extended label and icon files, Check the device for bad blocks) to ensure that there are no bad memory blocks.
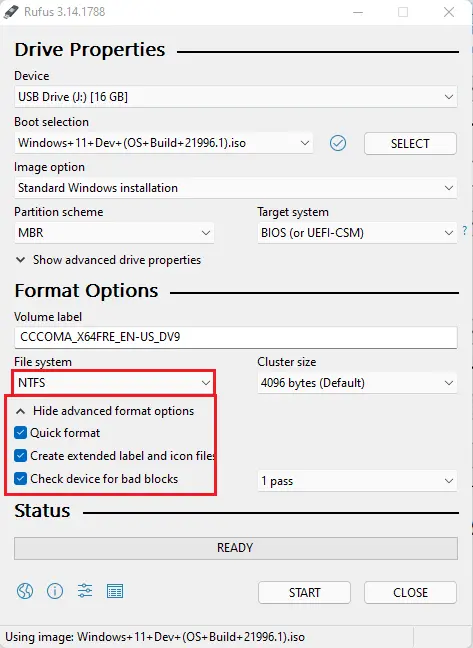
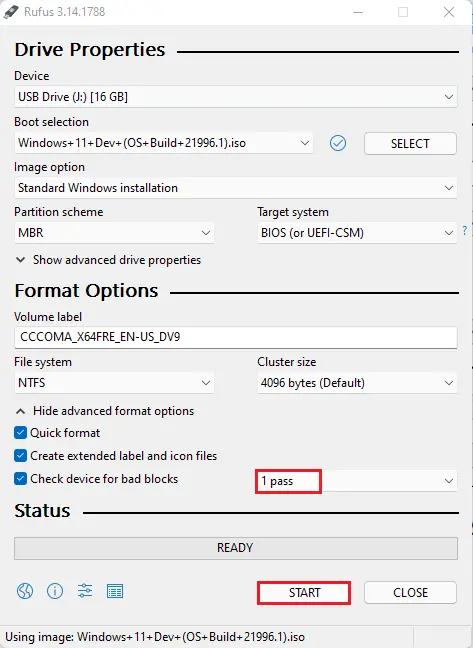
From the advanced format options field, you can choose the test patterns for checking bad blocks on your USB. The default value is set to 1.
Select the Start button to start and create a Windows 11 bootable USB drive.
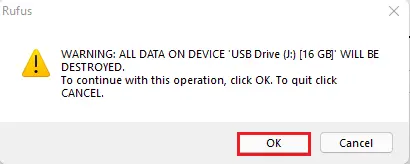
Read the warning and then click OK to start the process.
Be relaxed and let the Rufus tool work to create your Windows 11 USB drive.