In this blog, I am going to show you how to disable/enable autoplay in Windows 10. Windows 10’s AutoPlay enables you to choose default actions for different kinds of media that you insert or plug into your PC.
How to Turn AutoPlay on or off using Settings Menu
The easiest way to enable or disable AutoPlay using Windows 10 Settings menu.
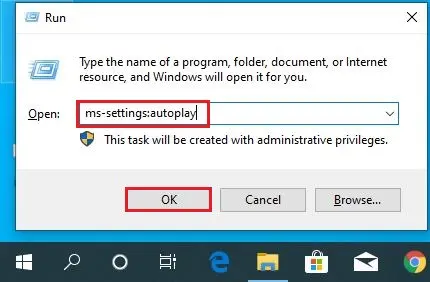
1- Press Windows key + R and then, type “ms-settings:autoplay” in the open box and press enter to open the AutoPlay tab of the Devices section inside the Windows 10 Settings menu.
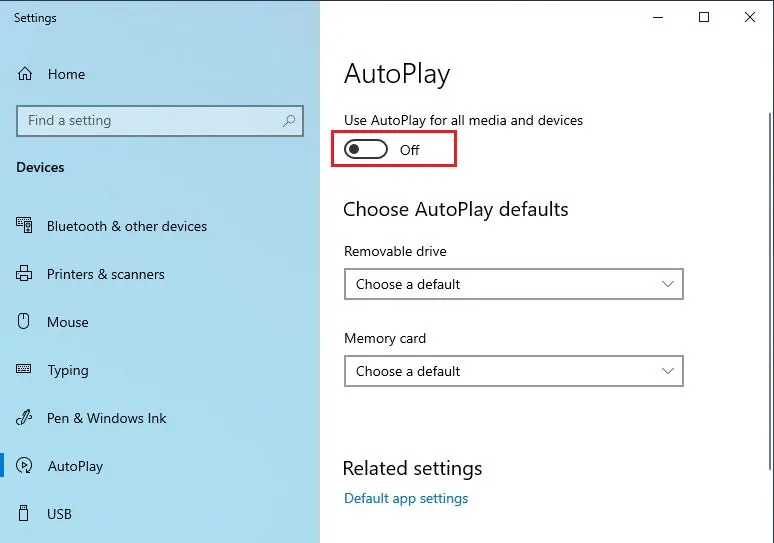
In the AutoPlay option, enable or disable the toggle under Use AutoPlay for all media and devices to turn the feature on and off.
If you want to enable AutoPlay, you can take advantage of this screen by changing the defaults of under Choose AutoPlay Defaults: Removable drive, Memory cards other devices that you might have plugged in.”
No need to reboot your computer.
Disable/Enable AutoPlay in Windows 10 via Control Panel
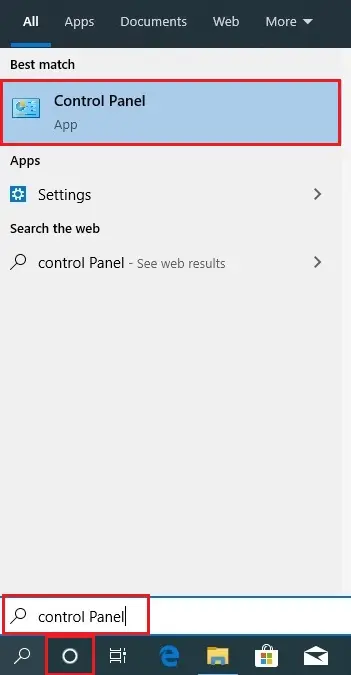
Select search bar, type “control” and then press Enter to open Control Panel.
In the Control Panel, change the View by drop-down menu and then click on AutoPlay.
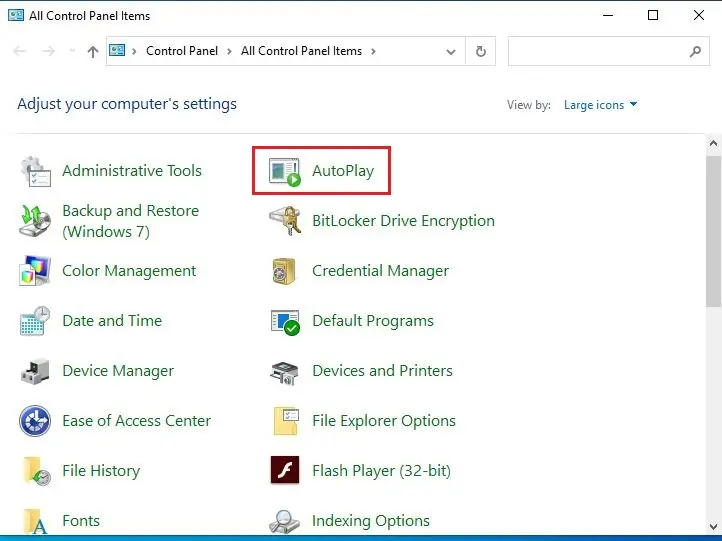
In order to disable AutoPlay, uncheck the box associated with Use AutoPlay for all media, devices and then press the Save button.
If you wish to enable AutoPlay for all devices and media, you can check the box associated with Use AutoPlay for all media and devices and select the Save Button.
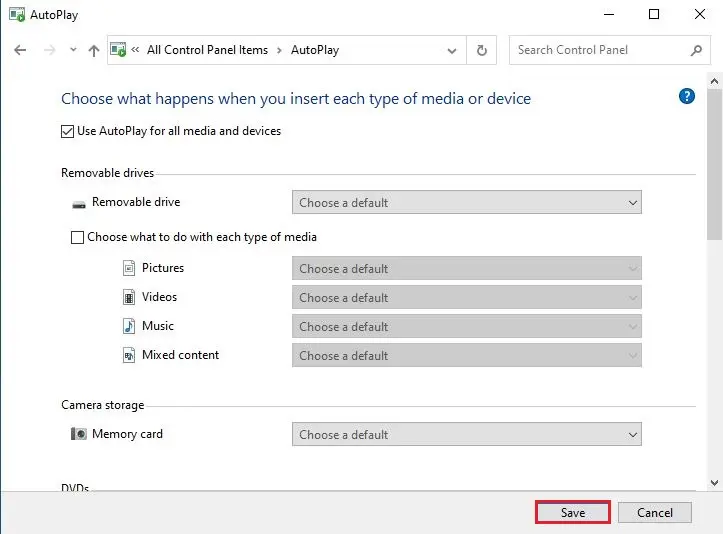
Note: Additionally, we can choose default actions based on devices or media by using the various drop-down menus. If you need to reset the AutoPlay behavior to default settings. Scroll all the way down and click on the Reset all defaults button.
No need to reboot your computer.
Disable or Enable AutoPlay via Registry Editor
Warning: Bear in mind that operating other changes via Registry Editor might affect the overall health of your PC. For the purpose of avoide any unpleasantries, please make sure that you follow up step 2 where we backup the registry for the purpose of ensure a fail-safe method.
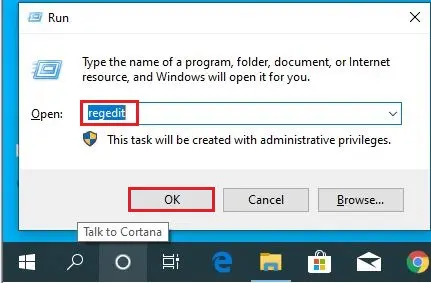
Press Windows key + R and then, type “regedit“, press Enter, and then click on Yes.
In the Registry Editor, select File and then Export. Then, select a name, location for the Registry backup and press the Save button.

Note: If anything goes wrong, select File, Import. And then select the backup that you previously created to restore the Registry to a healthy state.
Using the left pane of Registry Editor, go to the following location.
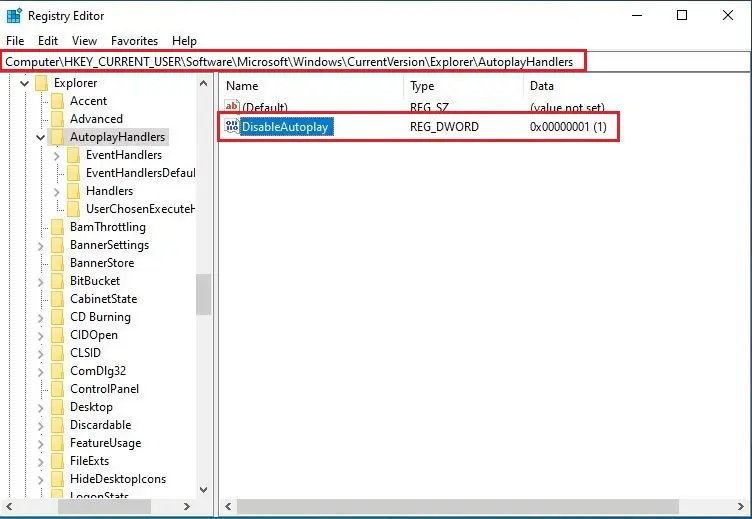
Double-click on DisableAutoplay. Type 0 in the Value data box to enable AutoPlay or type 1 to disable AutoPlay.
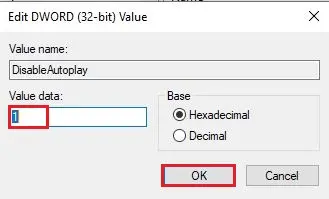
Note: If you are unable to find a DisableAutoplay value inside the previously specified location, you need to create it yourself. Right-click in the empty place and select New, Dword (32-bit) Value Data and then type name DisableAutoplay.
Close the Registry Editor window and then reboot the computer to force the changes to take effect. After the restarting, AutoPlay will be enabled (or disabled).
Disabling/Enabling AutoPlay via Local Group Policy Editor
This method is to be preferred if you are trying to enforce a rule that will apply to all users that are using the machine.
Hold Windows key + R, type “gpedit“, press Enter, and click the Yes button at the UAC (User Account Control) prompt to open the Local Group Policy Editor with administrative privileges.
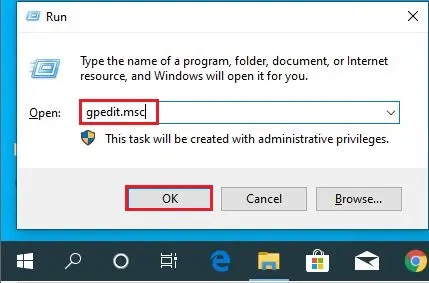
Local Group Policy Editor
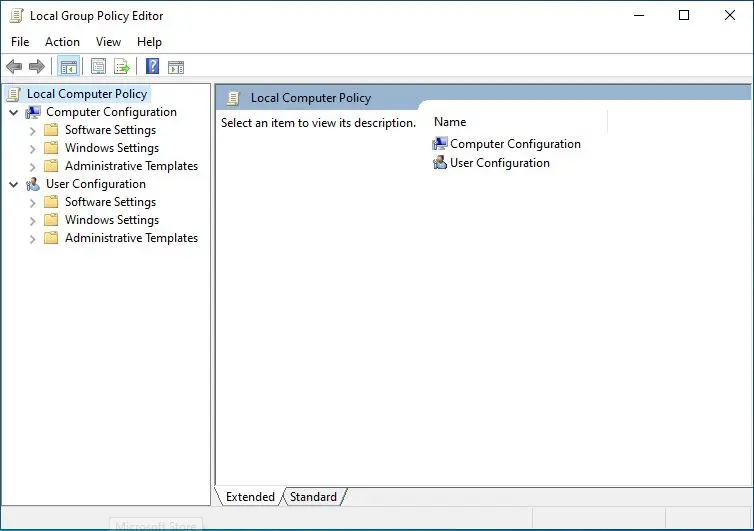
Computer Configuration, Administrative Templates, Windows Components, AutoPlay Policies.
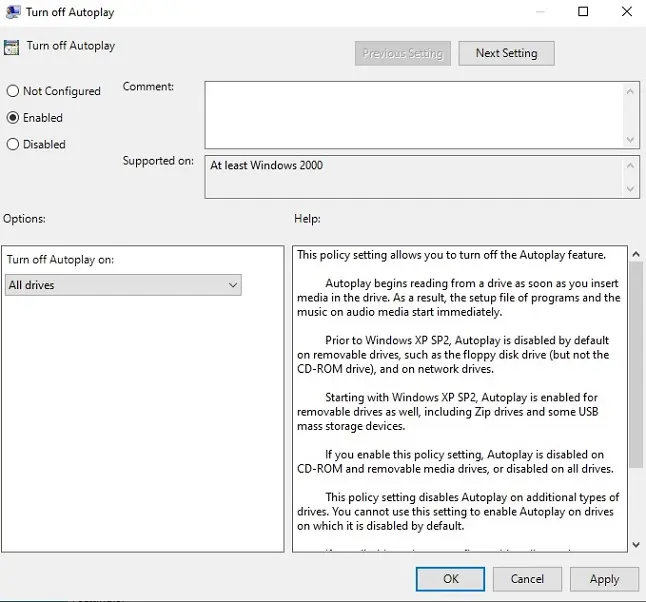
Double-click on Turn off Autoplay.
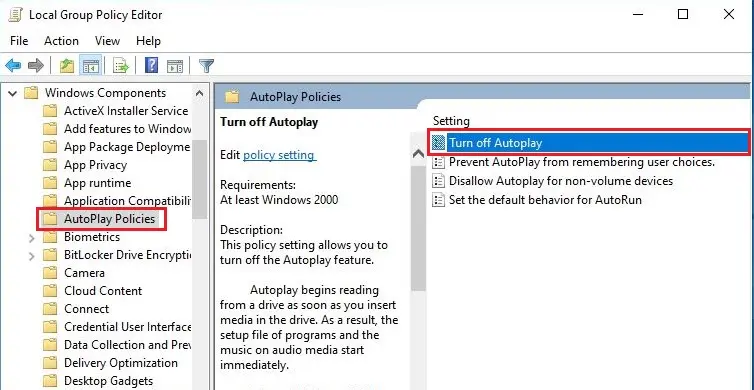
Enable Autoplay – Disabled or Not Configured and select OK.
Disable Autoplay, set the toggle to Enabled and select OK.
Close the Local Group Policy Editor and then reboot your computer to force the changes to take effect.
for more details, click here


