In this article, I will show you how to create system restore in Windows 10. There is a strong chance that your operating system might crash at specific occasions due to some trogons, malware, infected programs, or device drivers incompatible with the operations of Windows. So, at that right at the moment, you would be taunting yourself saying, “Why I didn’t back up my Windows”? This becomes further problematic when you have some important stuff on your PC or you have to do an important task. To avoid this problem, you don’t need to do a full backup of your system that can take a lot of disk space. You want to use an amazing feature inside Windows that lets you rolled back to a certain point if unexpected things occur.
So, this unique feature is called System Restore.
All it done is that it creates a restore point by saving the current state of your Windows. After you have set up the System Restore feature in Windows 10, you can carry full advantage of this feature. Whenever device driver, app, or any update is installed on your PC, Windows could create it automatically or we can also configure it to set it manually.
Advantages of System Restore Feature
We can create a restore point to save the current state of your Windows.
It does not require a large volume of disk space as compared to full-backup.
Configure System Restore Feature in Windows 10.
To create a System Restore Point Feature of Windows 10, we need to enable it inside settings.
Enabling System Restore
How to enable system restore in Windows, follow the below steps.
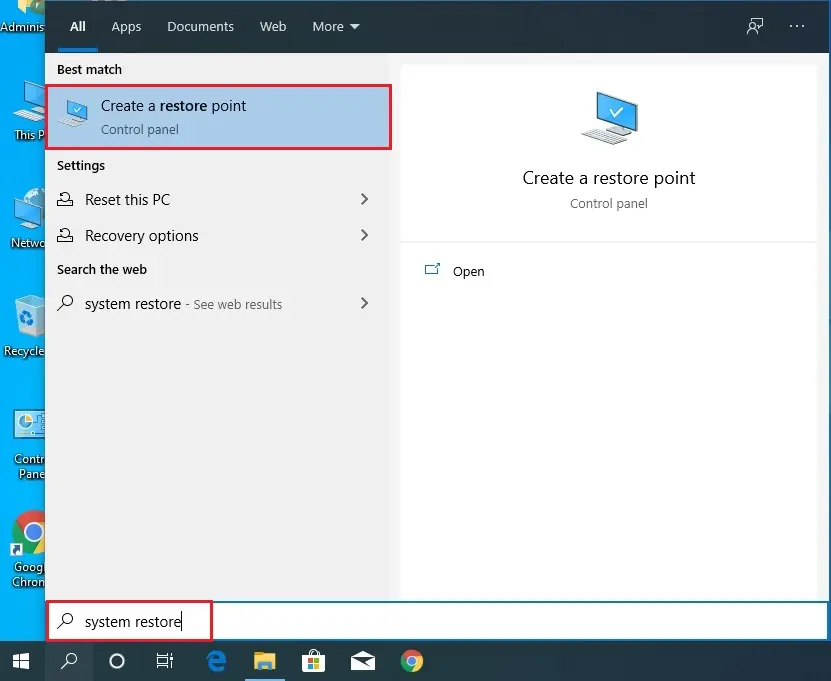
1- Click on Windows Search bar type System Restore and then click on Create a restore point.
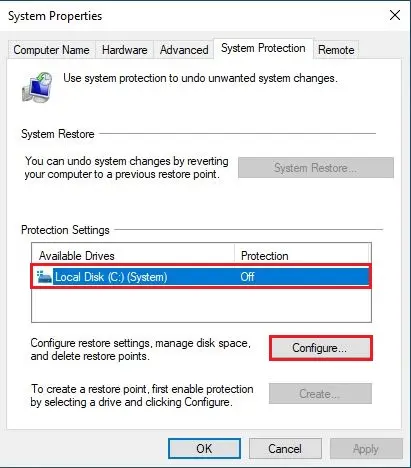
2- Select system protection tab, select available disk (Local Disk C (System Drive) under protection settings.
By default it is disabled, choose that disk and then click on Configure button to enable the protection.
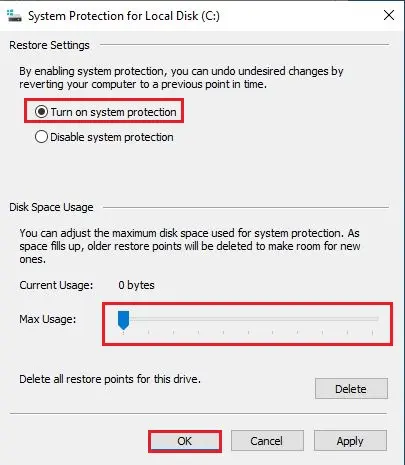
3- Select turn on system protection checkbox; You can also allocate the maximum disk space for system protection. You can set it to whatever value you want and then OK.
Now, the operating system automatically creates a restore point whenever an alteration happens inside your Windows.
Creating System Restore Point
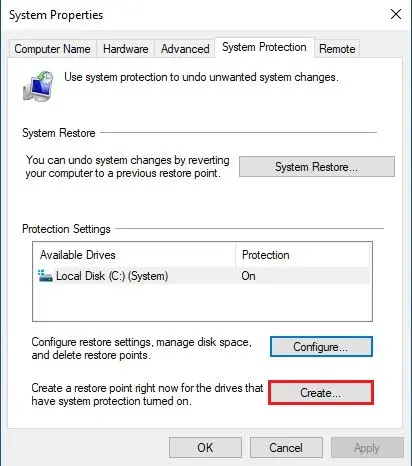
4- If you need to configure a manual restore point.
To create system restores manually, Click on Create button while selecting the Local Disk C inside System protection.
5- Type the description of your restore point. It is important to manage the restore points accordingly.
Click on Create button to start the process.
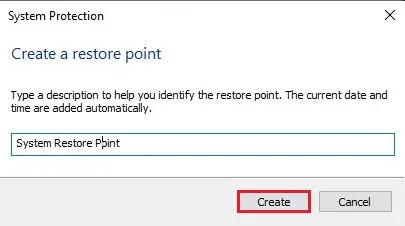
6- Creating a restore point.

7- Restore point successfully created.

For more details please visit Microsoft


