
In this article, we will learn the basic steps of how to configure SMB share on Freenas to share your folder with Windows 10 devices using FreeNAS.
FreeNAS is perhaps one of the best solutions to configure a Server Message Block (SMB) share on your home, office to share files and media with Windows 10, macOS, and Linux users.
First, you need to install the FreeNAS on a PC or server hardware. There are some steps that you want to follow before you can share (SMB) to network users, including creating a new user account, storage pool, and dataset.
How to create new user in FreeNAS
Open FreeNAS in your web browser with FreeNAS IP address.
1- Sign into your root account.
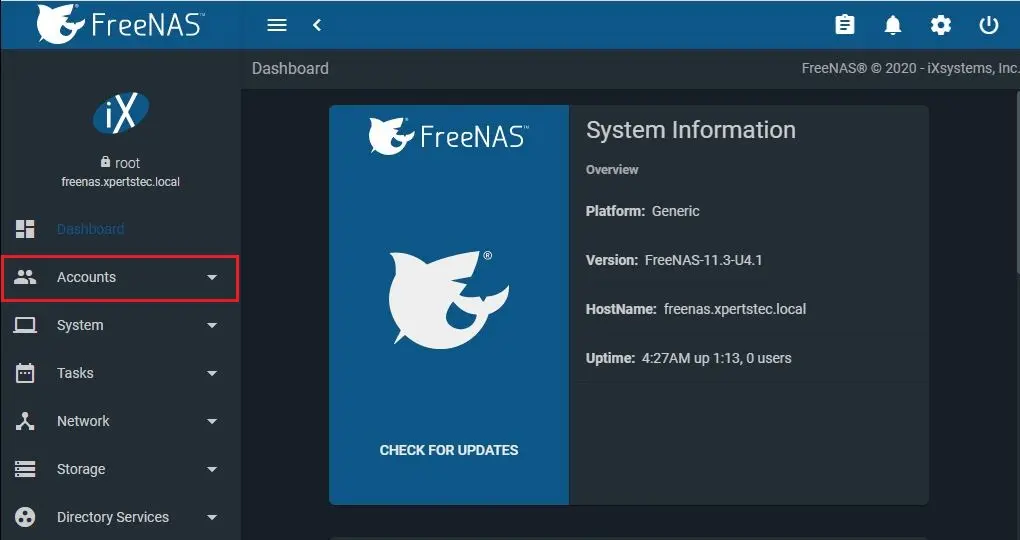
2- Select Accounts.
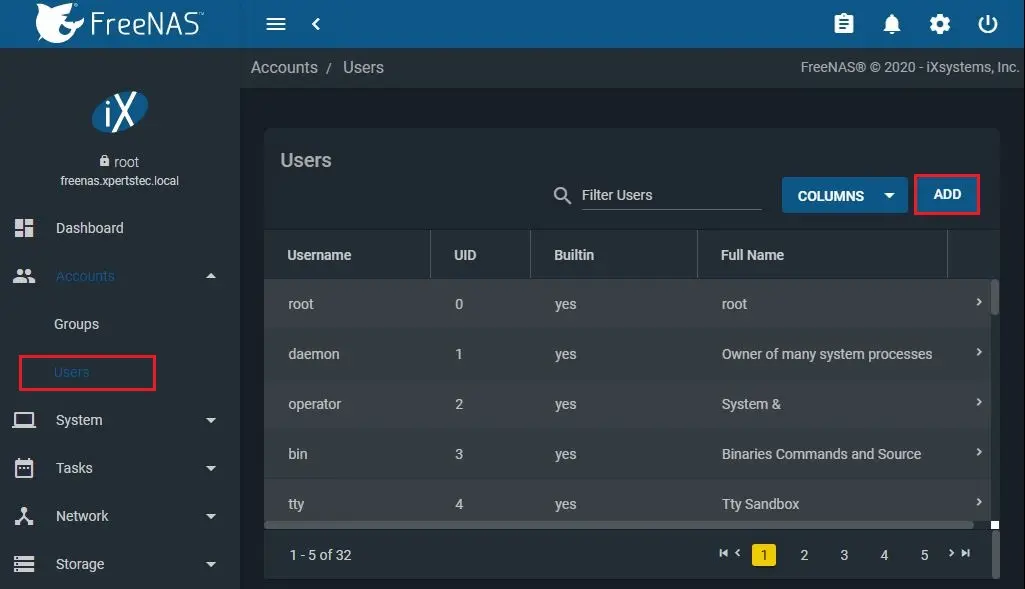
3- Select Users, under the Users section and then select the Add button.
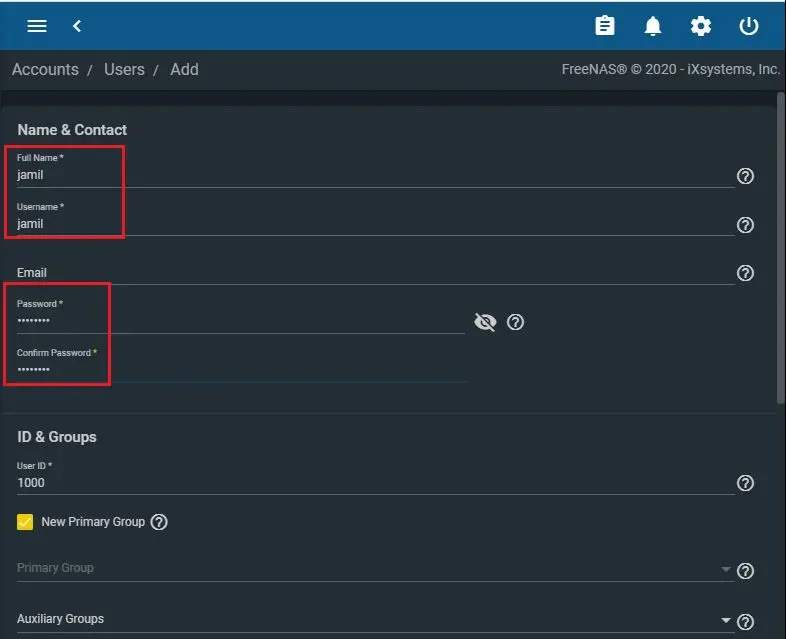
FreeNAS add new Windows share folder
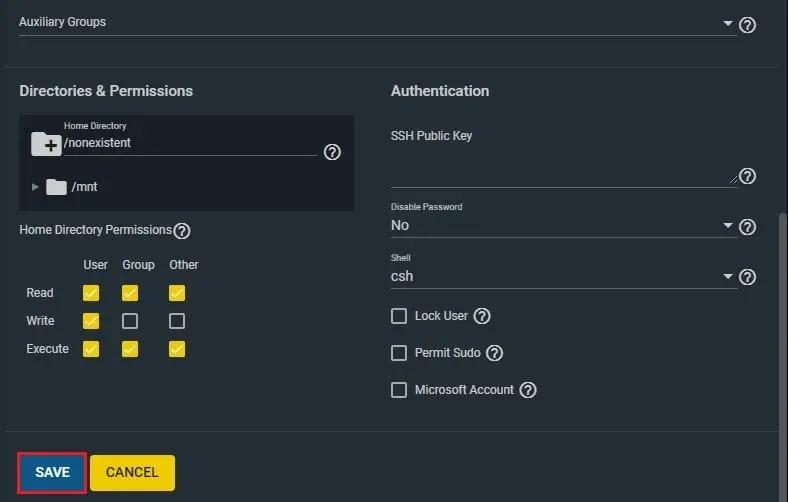
4- Enter a name, username, and password.
5- Scroll down and then select the Save button.
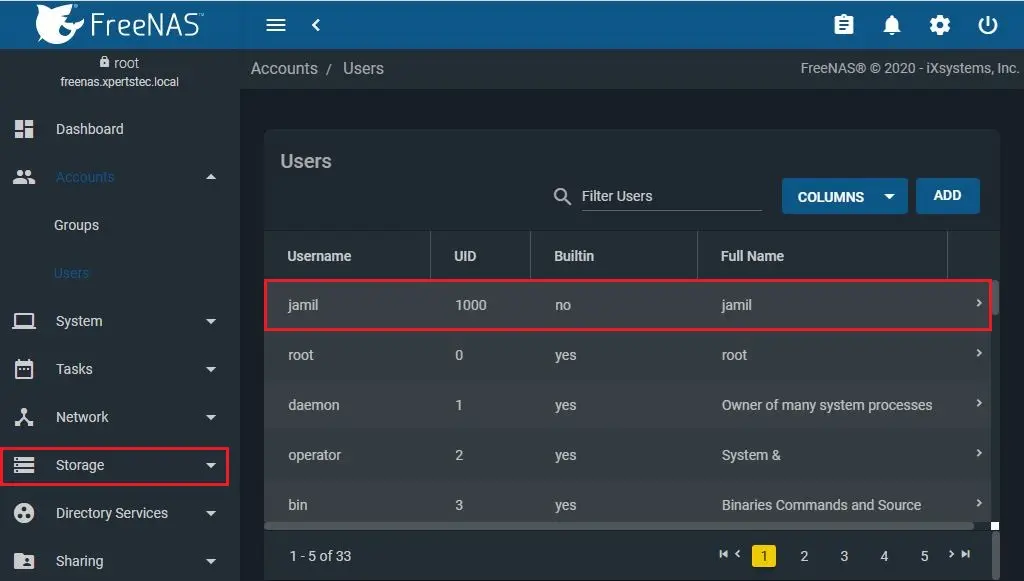
6- User account successfully created. Next step is to create a storage pool, select storage.
How to create a storage pool in FreeNAS
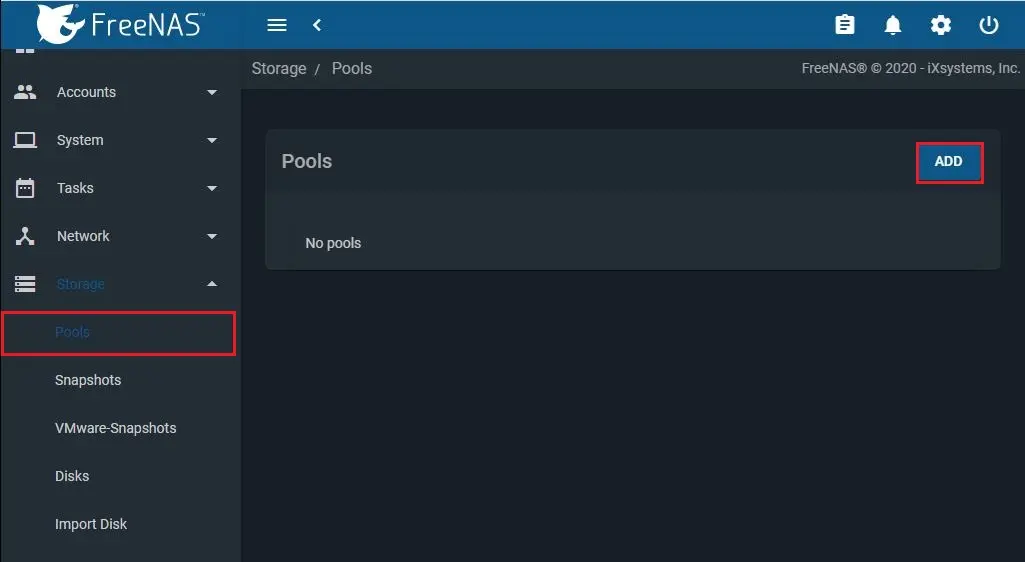
7- Select Pools and then click on Add button.
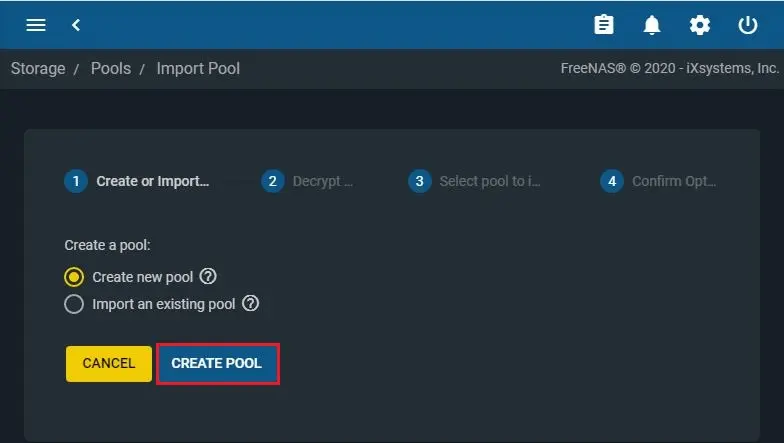
8- Select Create Pool button.
9- Type a name and Check the Encryption checkbox (Optional).
Note: Encryption is not required, but it is recommended, so you don’t have to worry about your data when you need to send a faulty drive to repair or recovery.

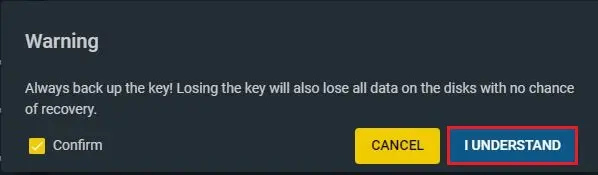
10- Choose confirm checkbox and then choose the I Understand button.
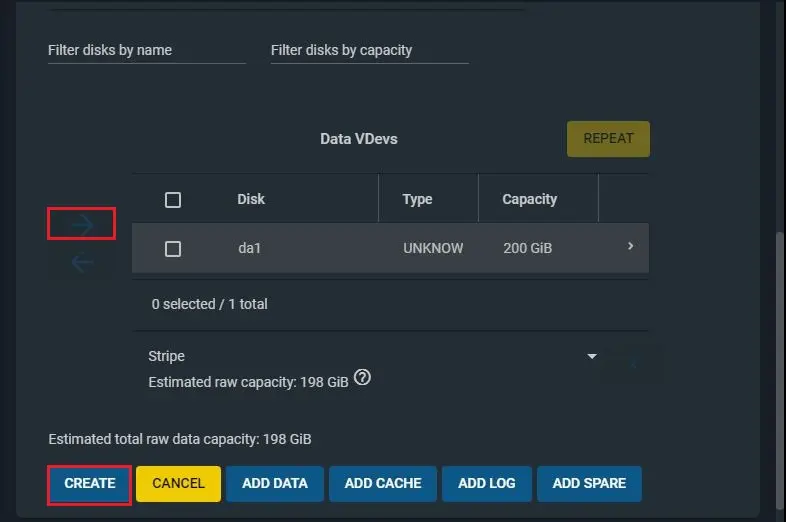
11- Under the Available Disks, choose the drives that will participate in the storage pool.
Click the Right arrow button to add the drives and then click the Create button.
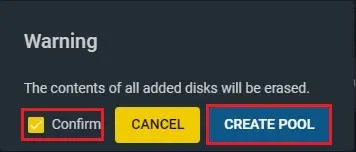
12- Click the Confirm option and then click the Create Pool button.
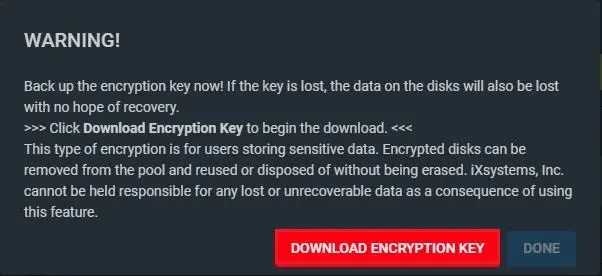
13- Click the download encryption Key button if you selected the Encryption checkbox, and then the done button once you saved the file key.
How to create dataset in FreeNAS
Usually, a dataset is confused as a shared folder, but it is not. Alternatively, it is a unit in the ZFS filesystem that permits you to apply different settings, and it’s the section that will include the network share.
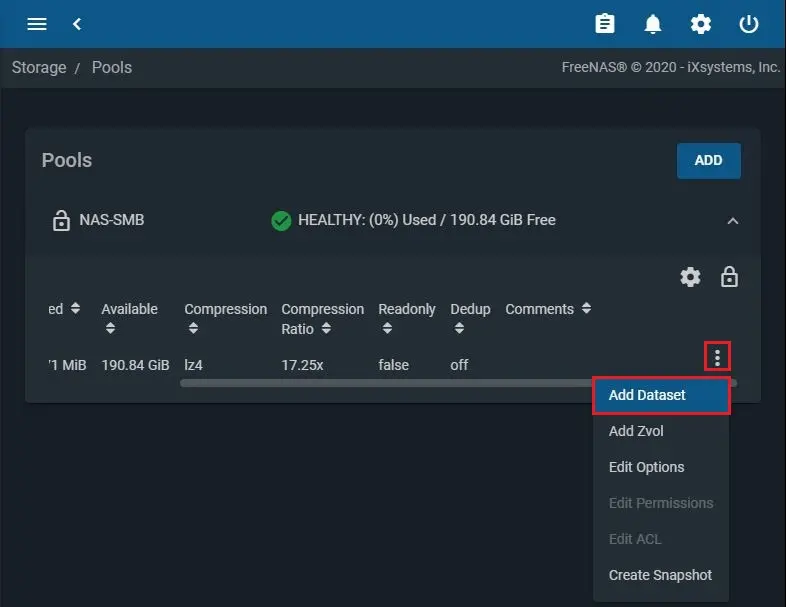
14- Select the 3 dot button and select Add dataset.
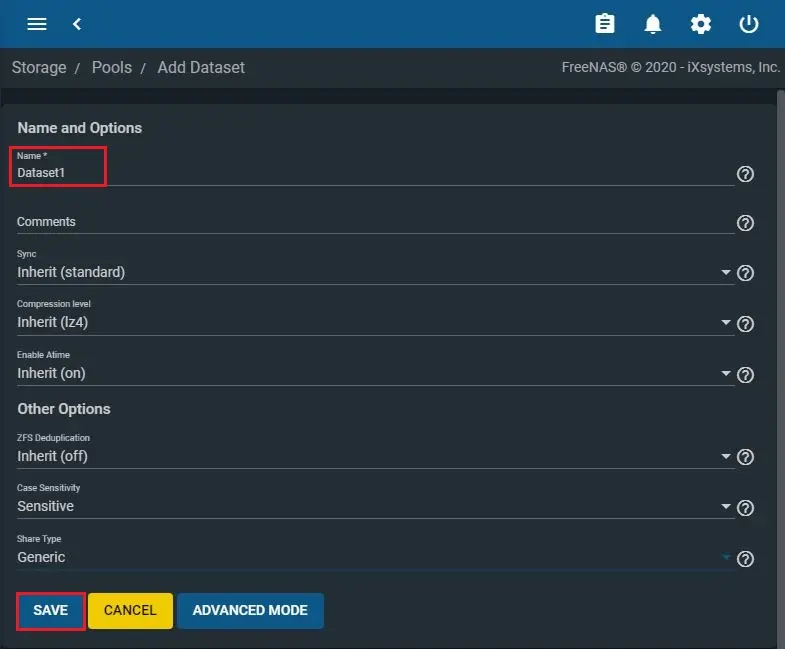
15- Enter a name and then select the Save button.
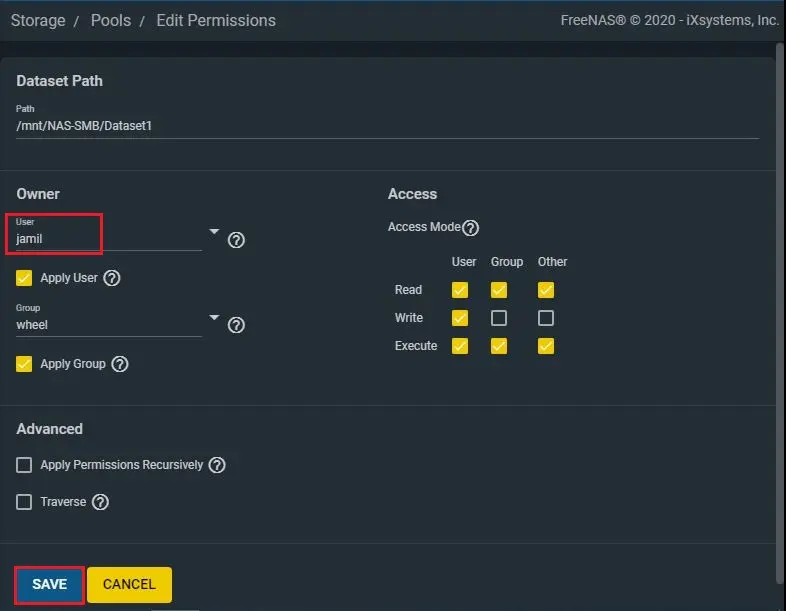
16- Click the settings (…) button next to the dataset and then select the Edit Permissions.

17- Under the User, use the drop-down key and select the user that you created earlier.
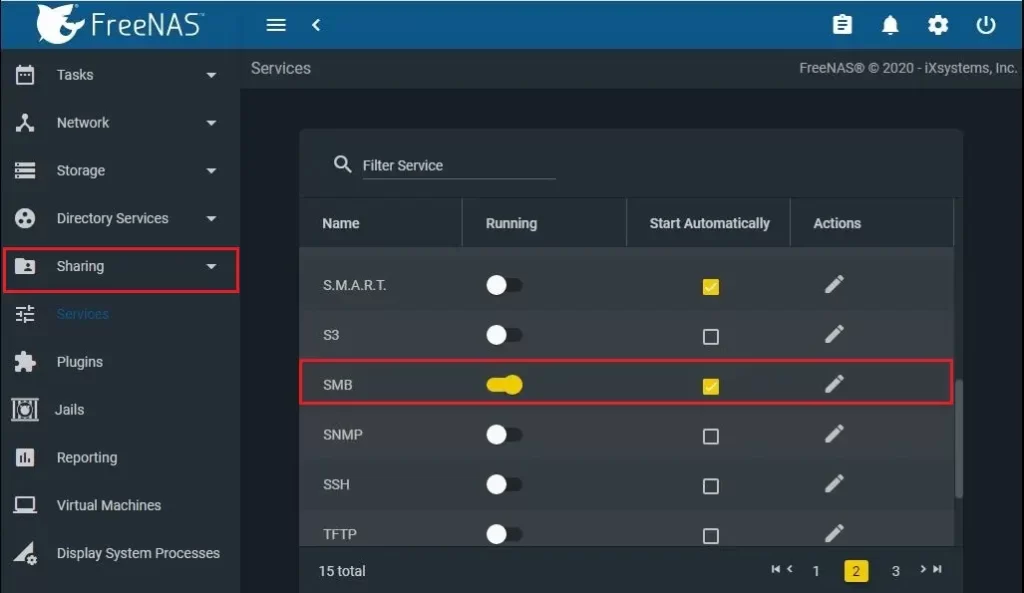
How to enable SMB service in FreeNAS.
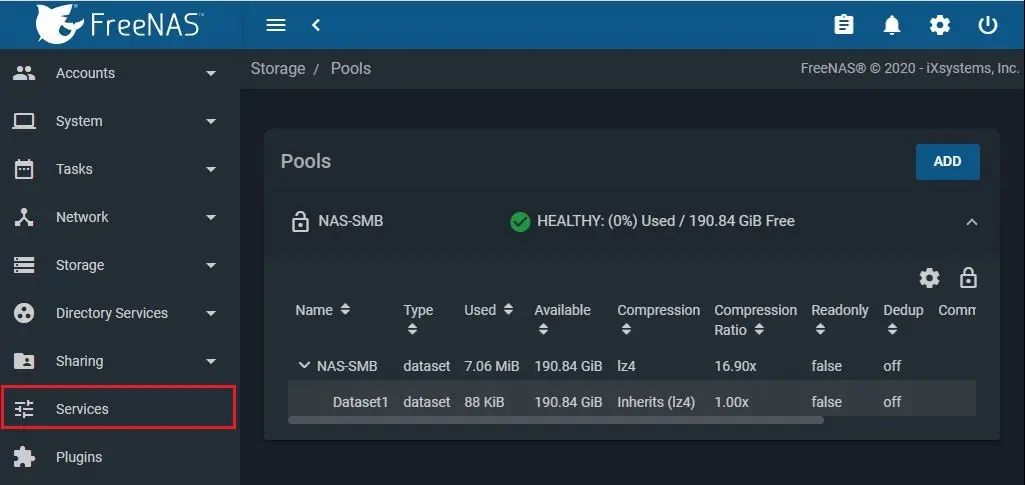
18- Select Services.
19- Enable SMB service.
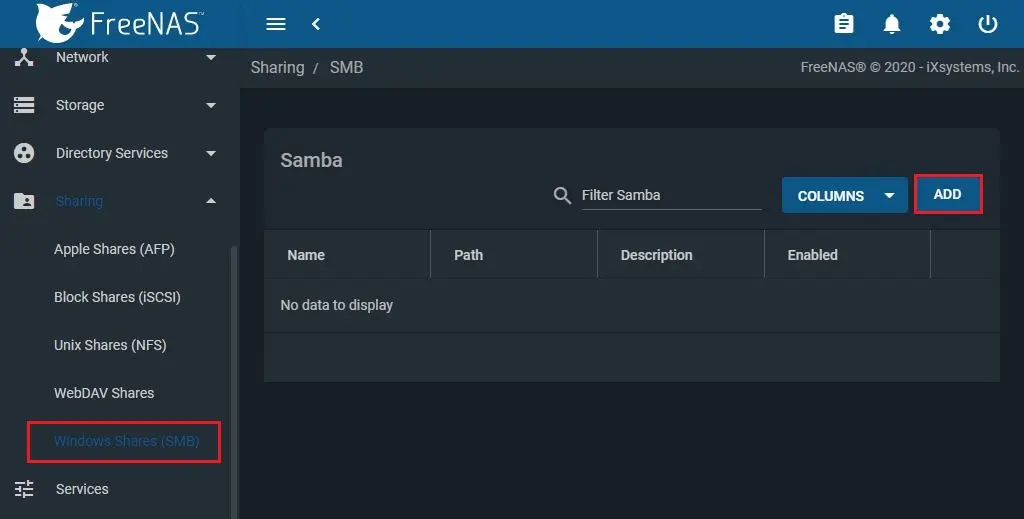
How to create shared folder in FreeNAS
20- Select Sharing from the left pane. Select Windows (SMB) Shares and click on Add button.
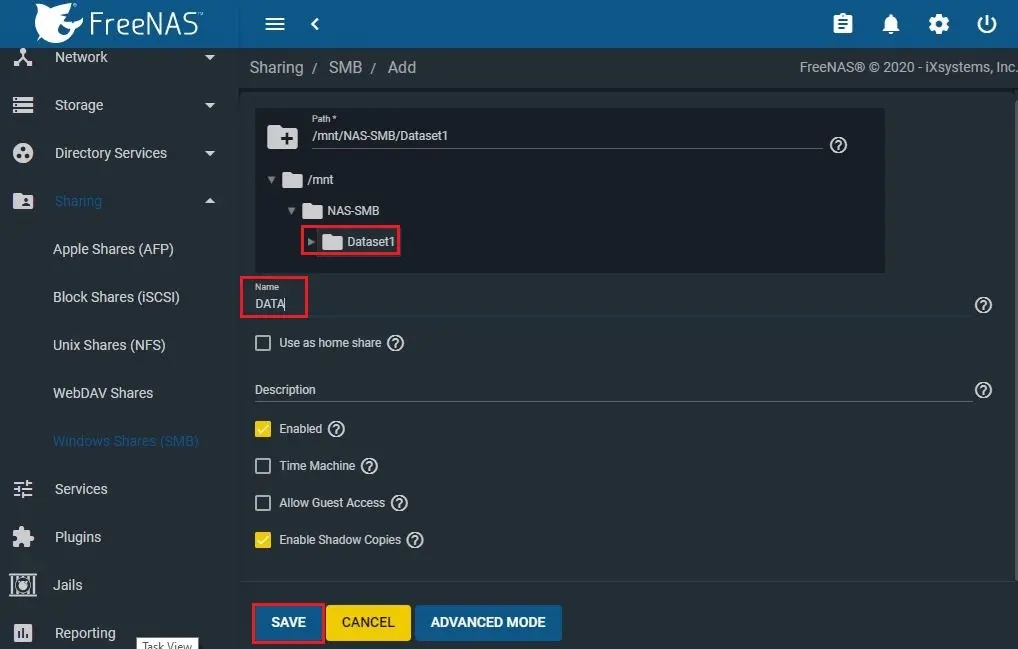
21- Expand the + folder and select the dataset you created earlier (Dataset1).
Under the Name, enter a name for the folder you are sharing.
Click the Enable Service button (if applicable) and then click the Save button.
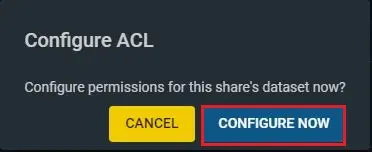
22- Select Configure Now twice.
Map FreeNAS shared folder in Windows 10
How to map a FreeNAS shared folder as a network drive in Windows 10.
23- Open Windows Explorer, click on This PC from the left pane.
Select Computer tab, click on the Map network drive and select.
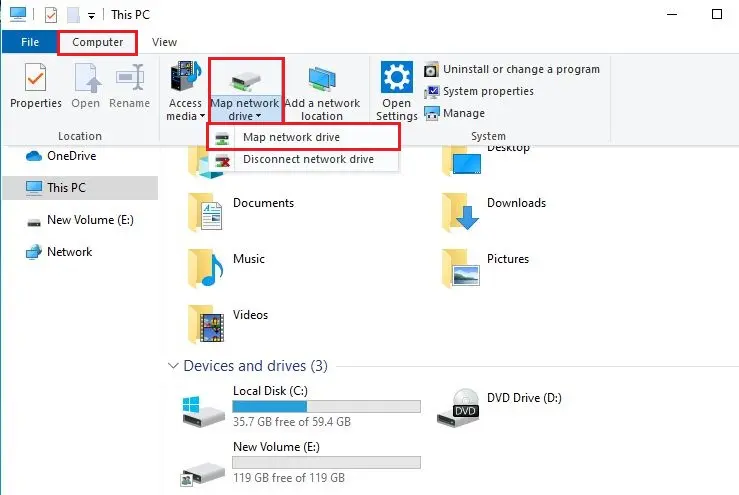
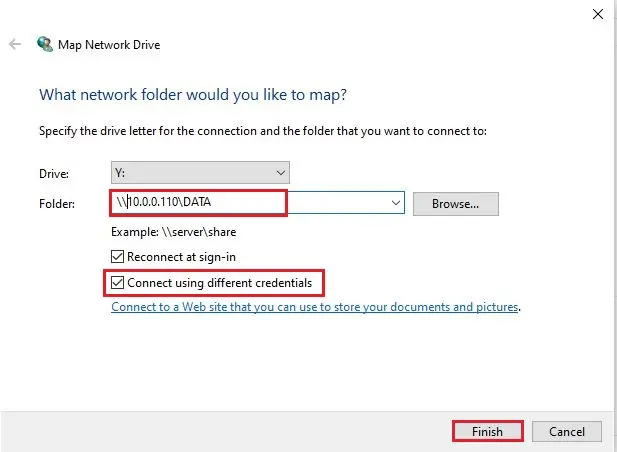
24- Choose a drive letter, In the Folder option, enter the path of network share on FreeNAS (for example, 10.0.0.110Data).
Select the Reconnect at the sign-in option
Select the Connect using different credentials checkbox and then click finish.
Map FreeNAS folder on Windows 10 File Explorer
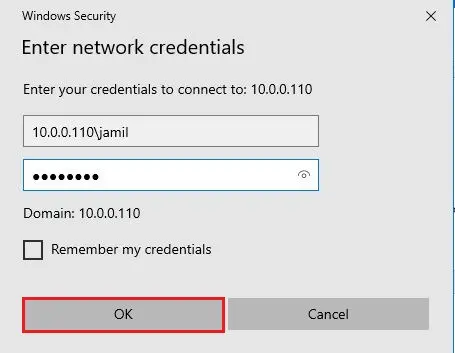
25- Sign-in with the FreeNAS user account credentials we have created earlier and click ok.
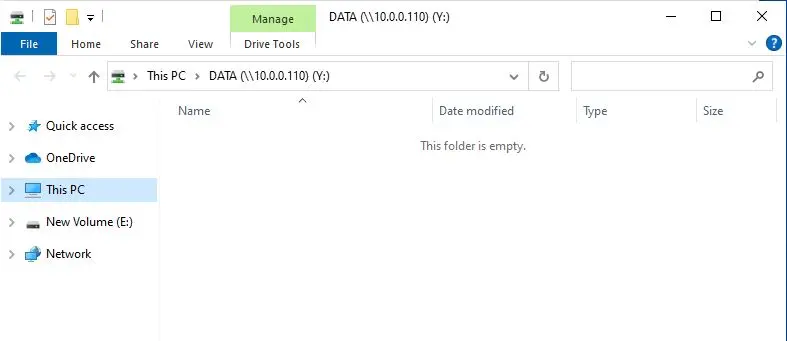
26- After completing the steps, select This PC to access the newly FreeNAS mapped drive.
For more details, please click here