In this article, we will see how to Migrate Active Directory Server 2019 to Server 2022. In the previous article, I configured an additional domain controller on Windows Server 2022. I will now upgrade the Active Directory to Windows Server 2022 and raise the functional level.
Overview of Windows Server upgrades
Virtual Machines Details
| Virtual Machine | OS | Role | IP Address |
| WS2019-DC (Root DC) | 2019 | Primary Domain Controller | 192.168.121.150 |
| WS2022-DC (new DC) | 2022 | Secondary Domain Controller | 192.168.121.152 |
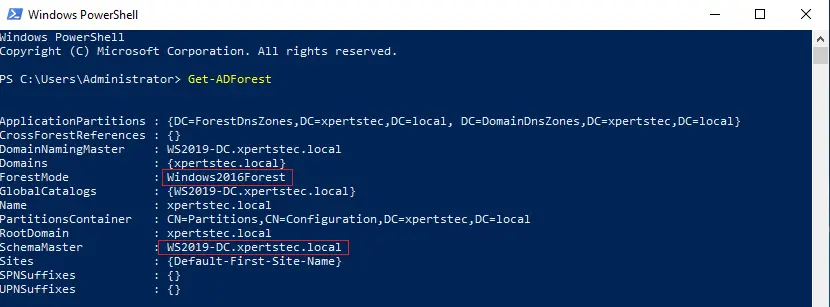
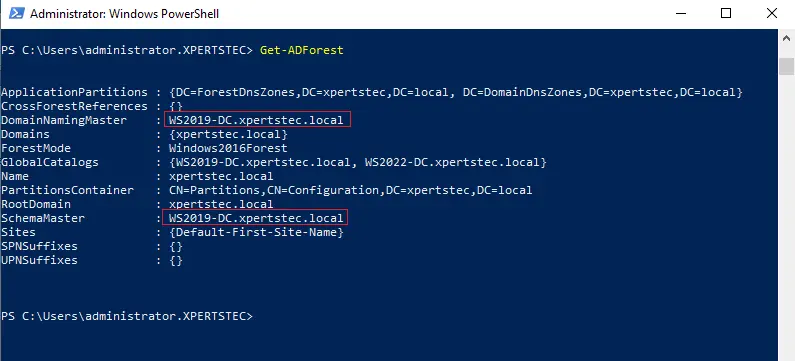
First, we need to check the Master Operation role by typing this command Get-ADForest
Now you can see the Schema Master is on WS2019-DC.xpertstec.local and the Forest Model level is still Windows2016.
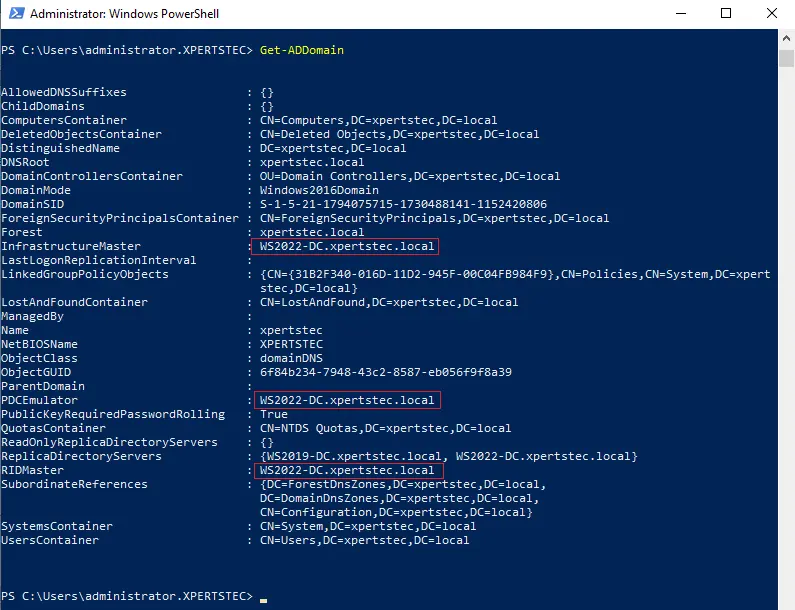
Now run this command Get-ADDomain to know about the following.
PDC Emulator
Infrastructure Master
RID Master
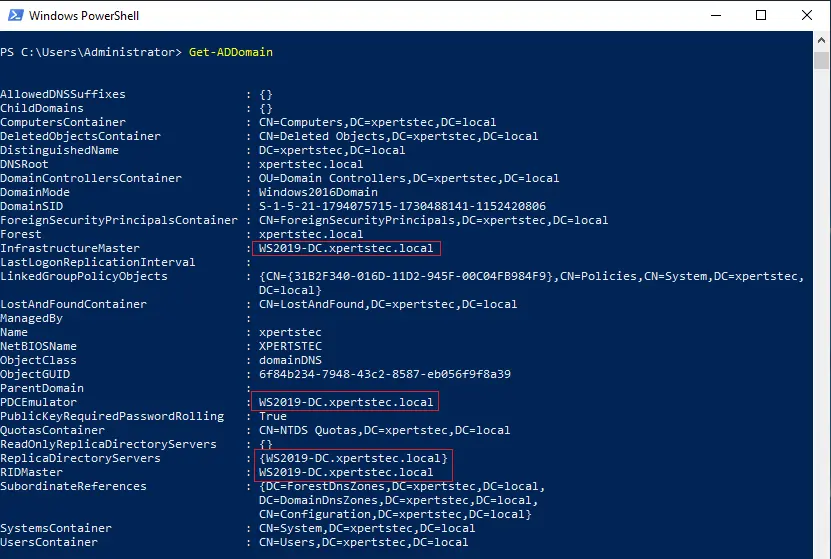
Table of Content
Join Windows Server 2022 to Domain
Configure Additional Domain Controller
Replication between the domain controllers
Migrating FSMO roles to Windows Server 2022
Change Active Directory Domain Controller
Raise Domain and Forest Function Level
Demote-active-directory-domain-service
Migrate Active Directory Server 2019 to 2022
One new virtual machine with Windows Server 2022 OS has been installed in order to make smooth migration. Once migration is completed, Windows Server 2019 domain controllers will be decommissioned.
The Domain Controller server is running on Windows Server 2019 OS and name called WS2019-DC. The domain name is xpertstec.local
Steps to Migrate Domain Controller Server 2019 to Server 2022
Prepare existing Active Directory to support Server 2022 as a domain controller.
Configure Window Server 2022 to an additional domain controller.
Verify the replication between Domain Controllers (Windows Server 2019 and Windows Server 2022).
Transfer Master Operation roles (FSMO) to Windows Server 2022.
Promote Server 2019 as an additional domain controller
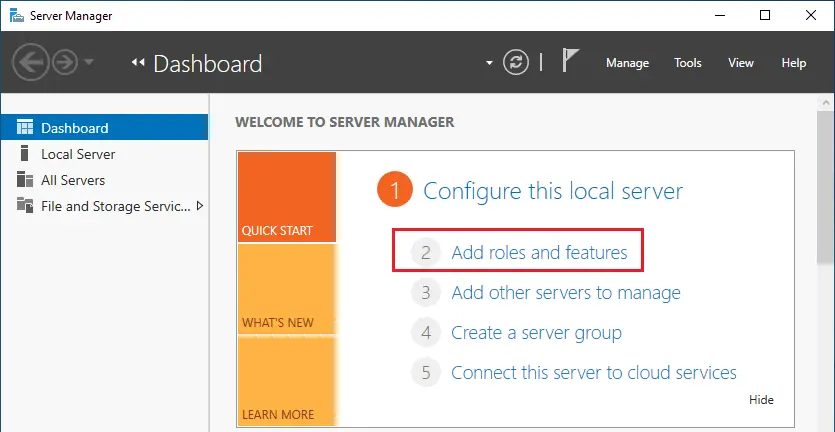
Login with the windows server 2022 system, Open Server Manager, and then click on add roles and features.
Click next
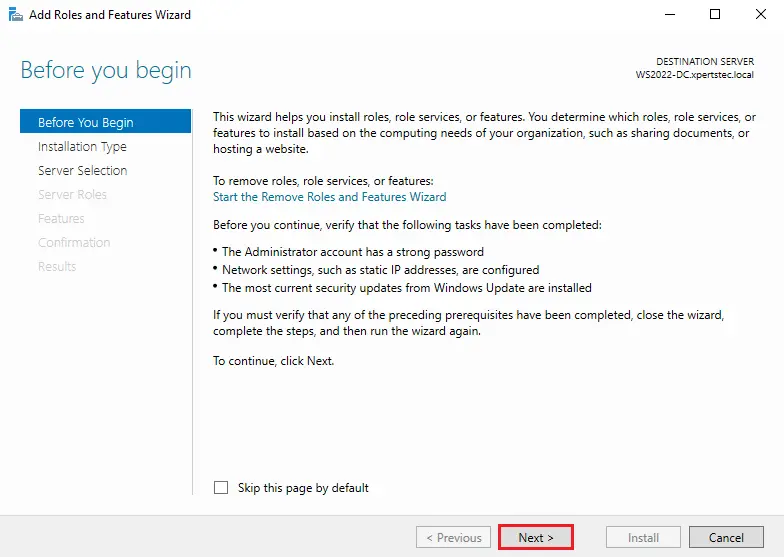
Click next
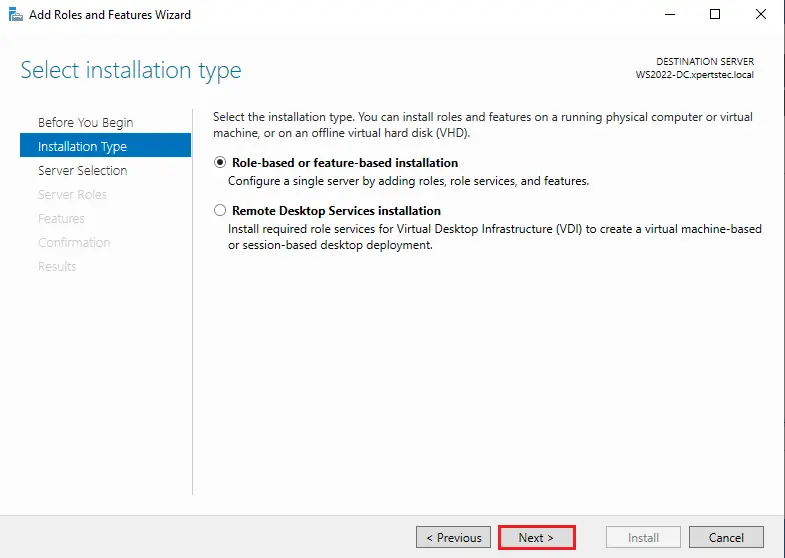
Click next
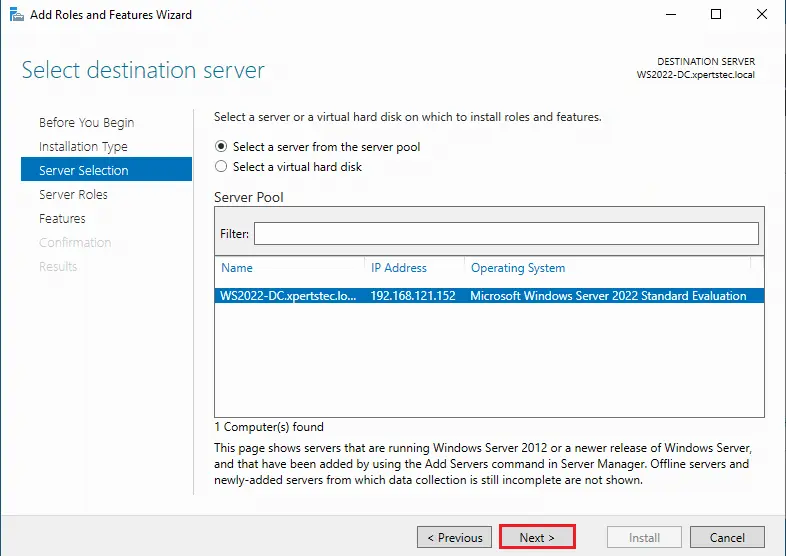
Tick the checkbox Active Directory Domain Services roles.
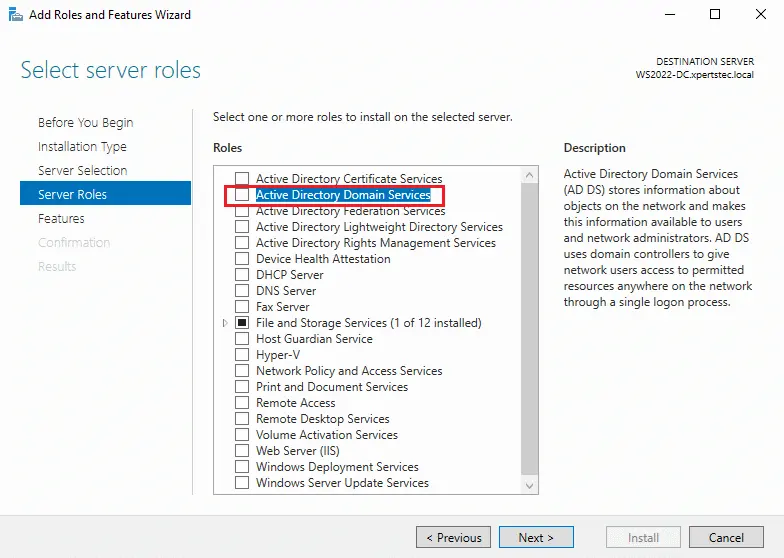
Click on Add Features.
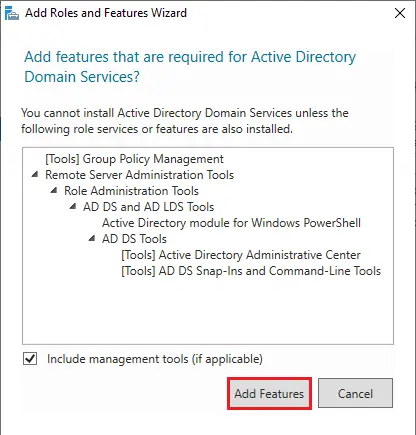
Click next
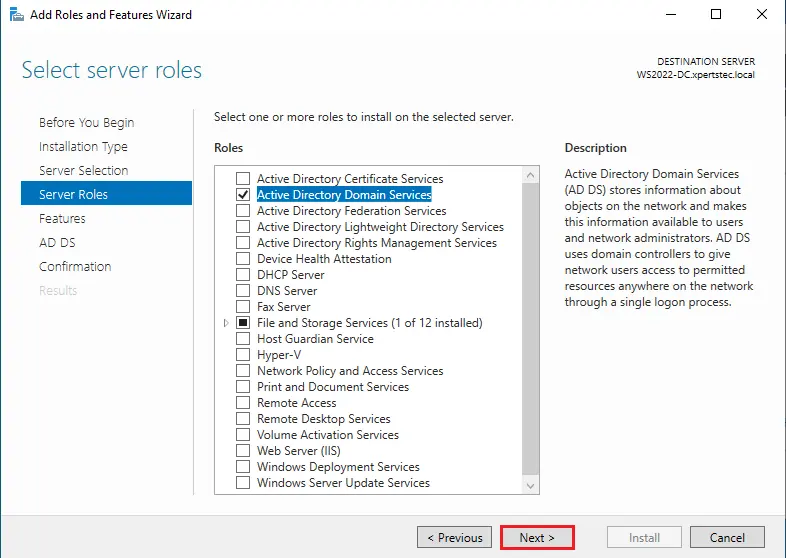
Default options, click next.
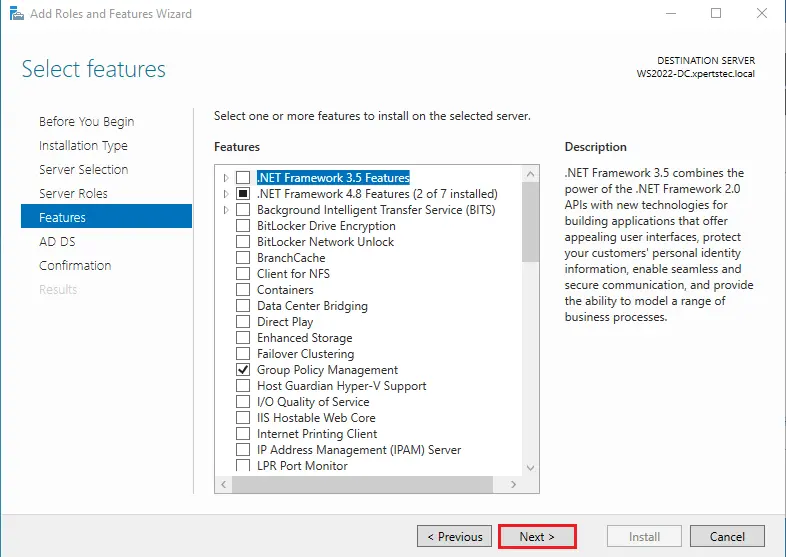
Click next
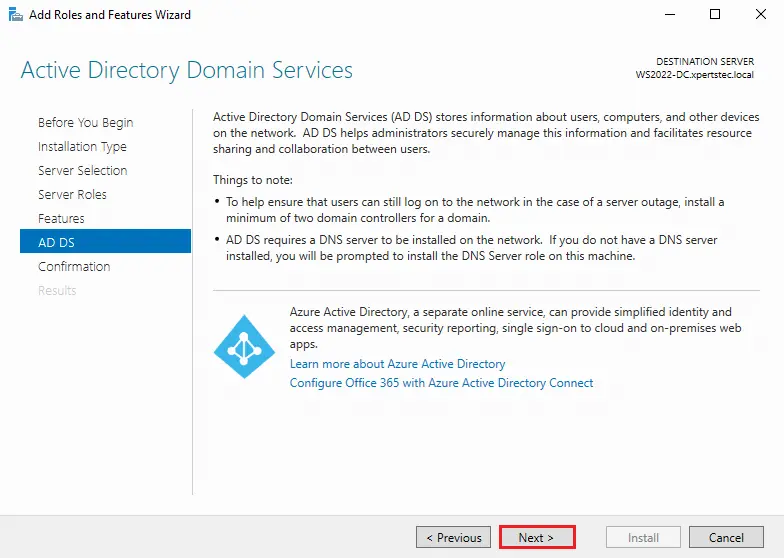
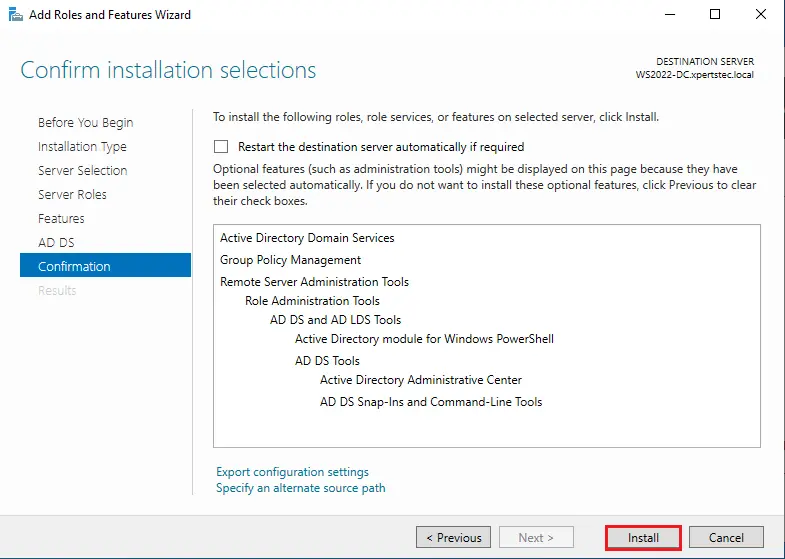
Click install
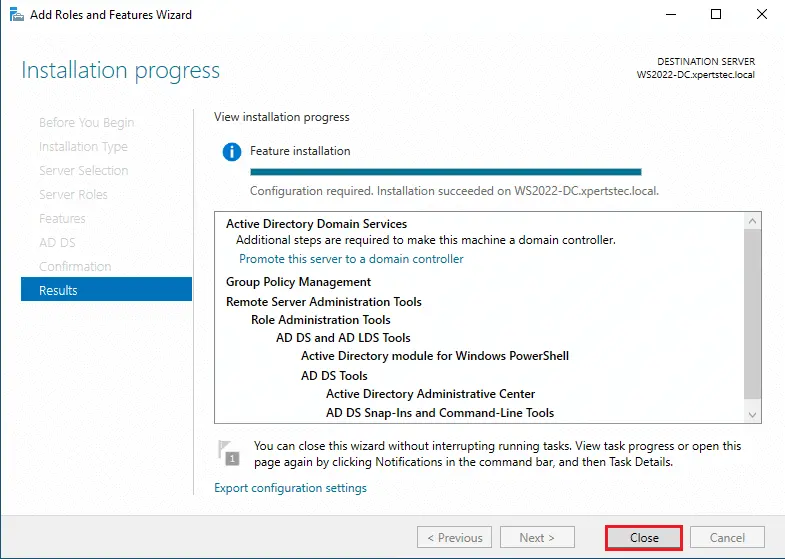
Click close
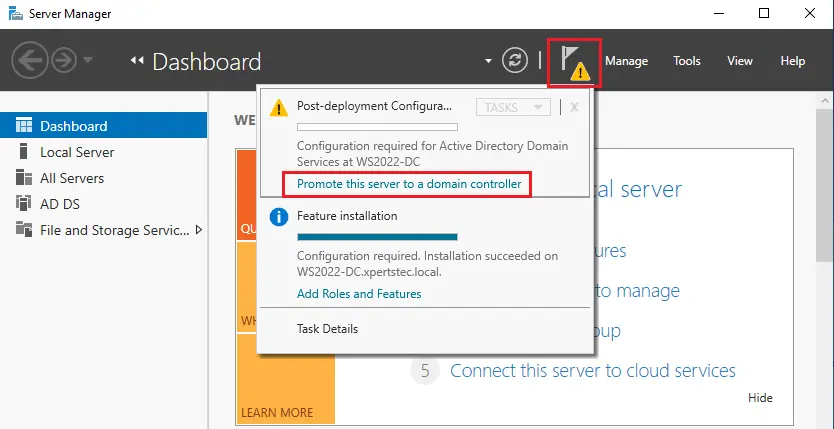
After installation, click on the notification button and then choose to promote this server to a domain controller option.
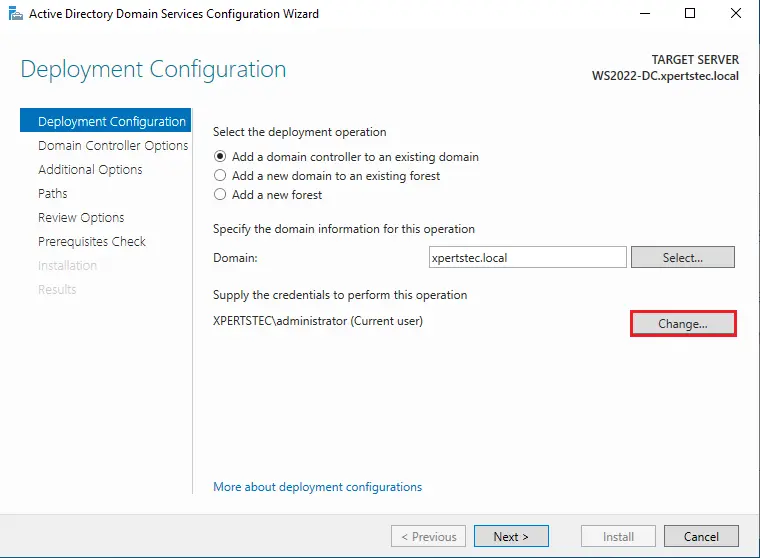
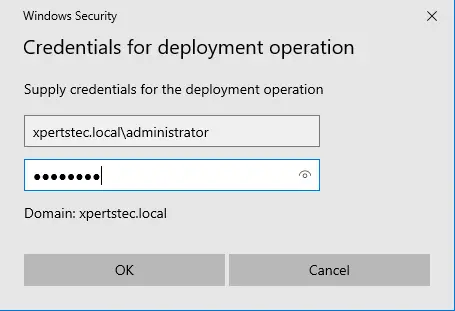
Click on the change button, to add existing domain controller (WS2019-DC.xpertstec.local) credentials.
Enter credentials and then click ok.
Click next
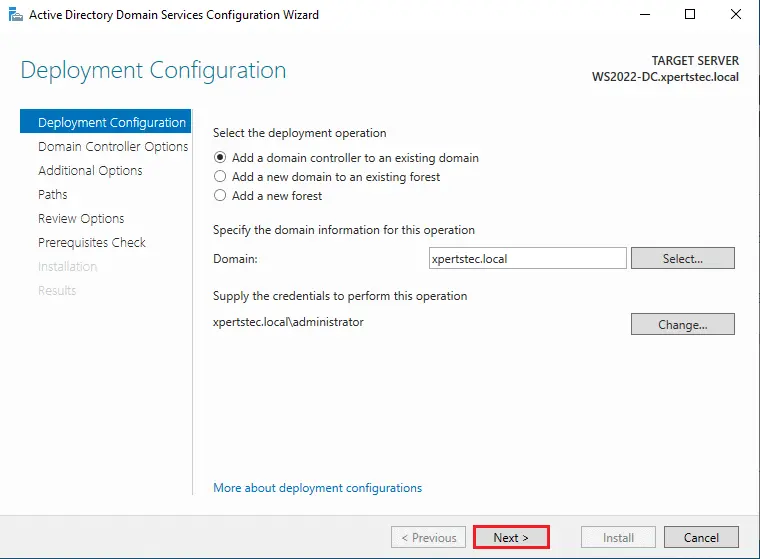
Type your domain controller credentials and then click next.
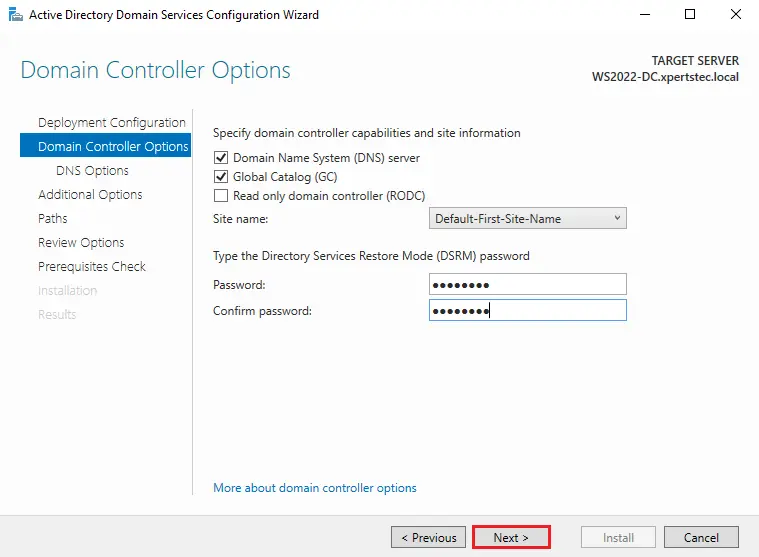
Click next
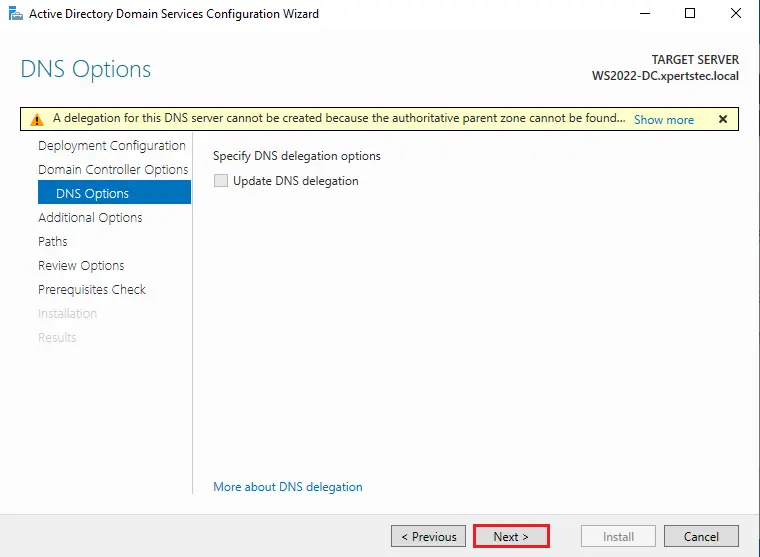
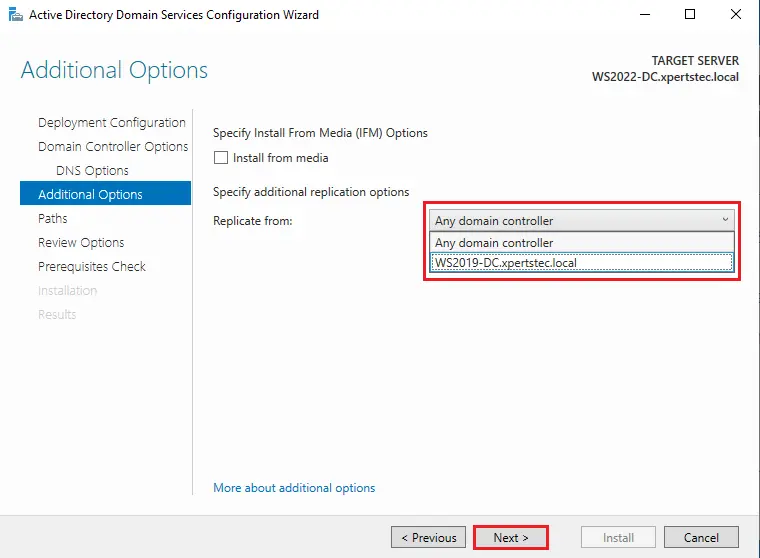
Under the Additional Options choose the existing domain controller and then click next.
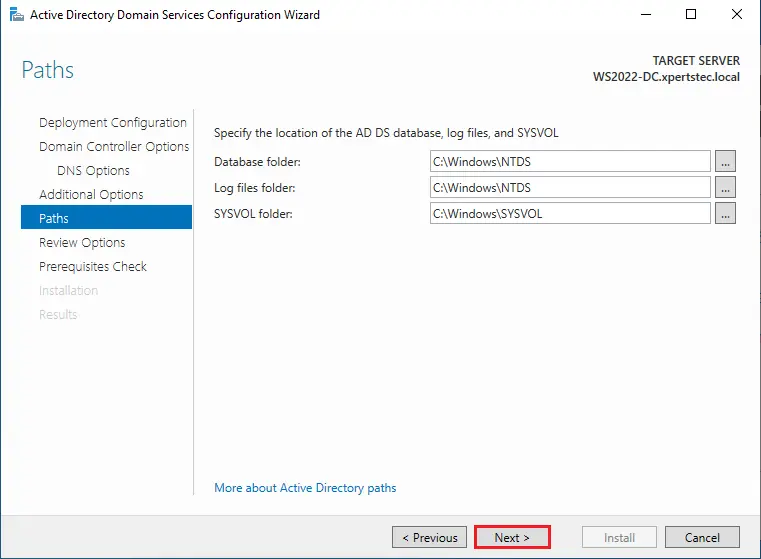
Select default options for Paths and then click next.
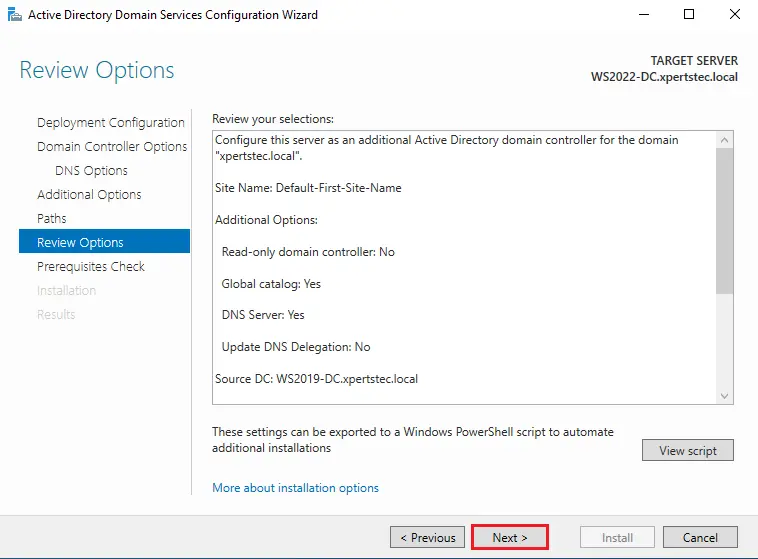
Review Options, click next.
Prerequisites Check, click install.
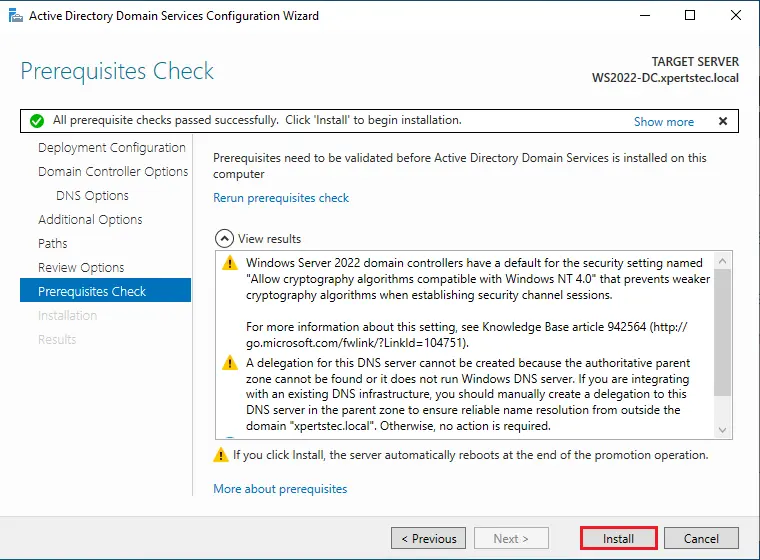
The system will reboot after the installation.
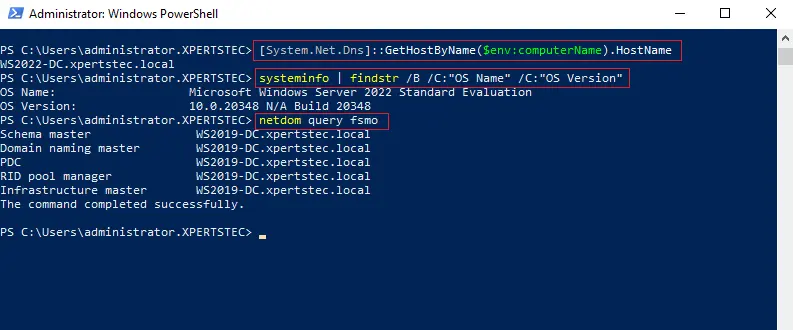
Login into the additional domain controller and check the status of the domain name by typing the following commands.
[System.Net.Dns]::GetHostByName($env:computerName).HostName
systeminfo | findstr /B /C:”OS Name” /C:”OS Version”
netdom query fsmo
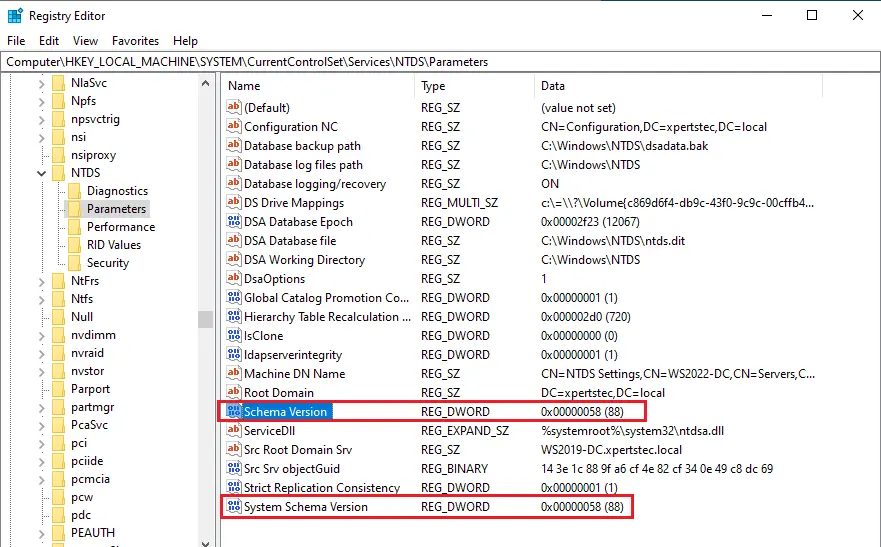
Check the registry settings
Check Replication between the domain controllers
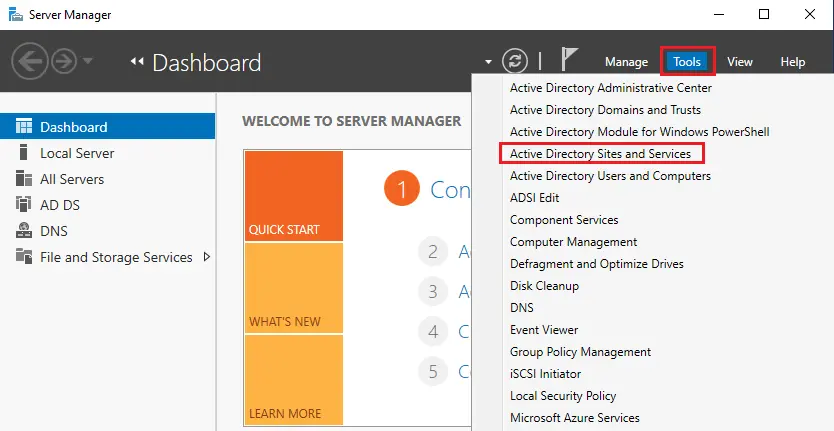
Open Server Manager, click on the Tools tab and then click on Active Directory Sites and Services.
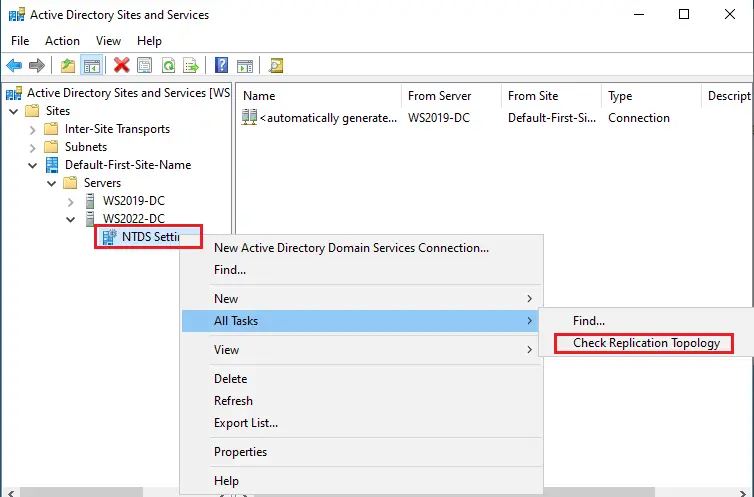
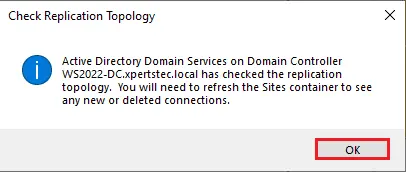
Expand default first site name, expand WS2022-DC machine, right click on NTDS settings, click on all tasks then click on check Replication Topology.
Click ok
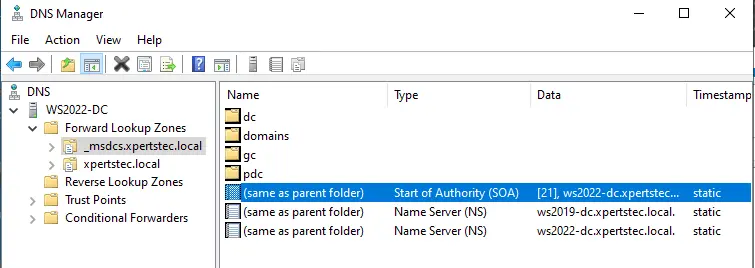
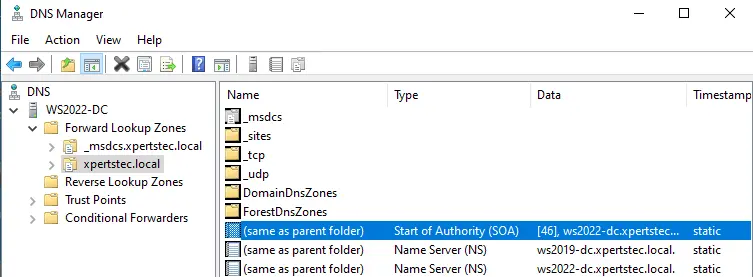
Now check the replication status opening DNS Manager. The authority number 21 is for both domain controllers for _msdcs.secure.com
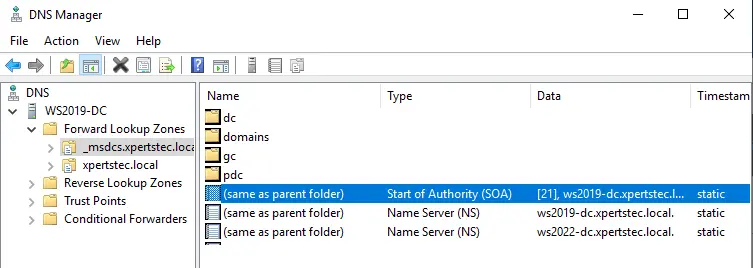
DNS Replication Status.
(Microsoft domain controller service) and 46 both domain controllers for xpertstec.local
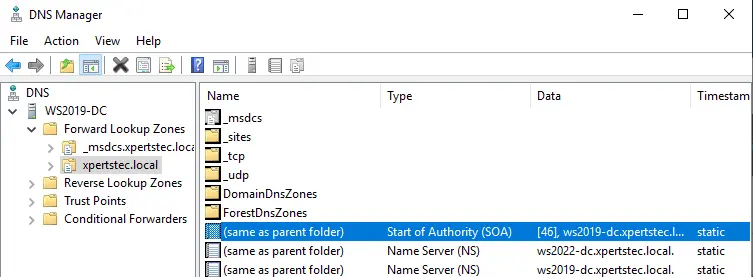
DNS Replication Status
Migrating FSMO roles to Windows Server 2022
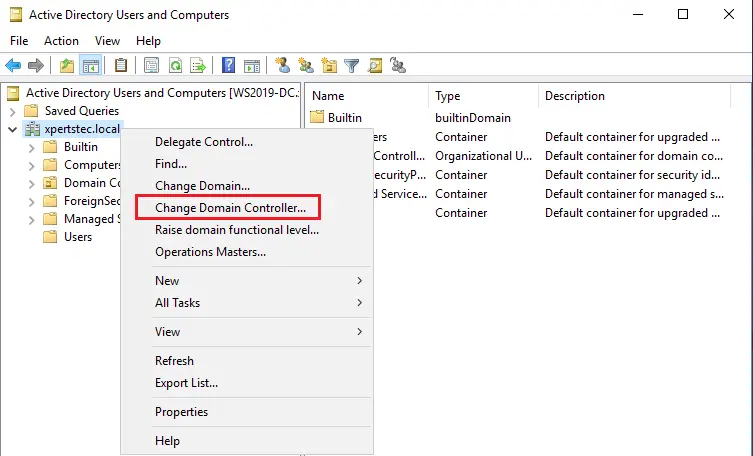
From WS2019-DC, open active directory users and computers console. Right-click on the local domain and then click on Change Domain Controller.
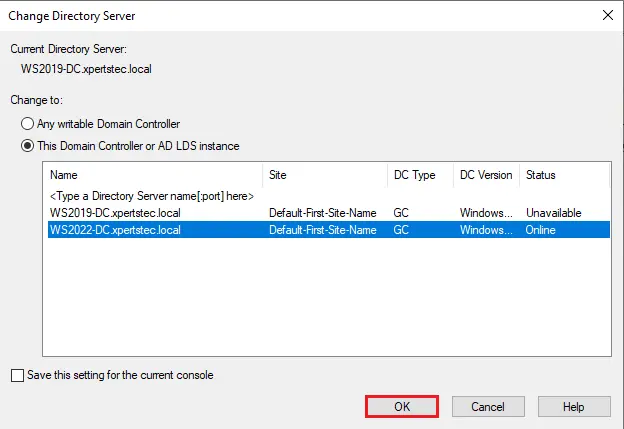
Change to WS2022-DC.local and then click ok.
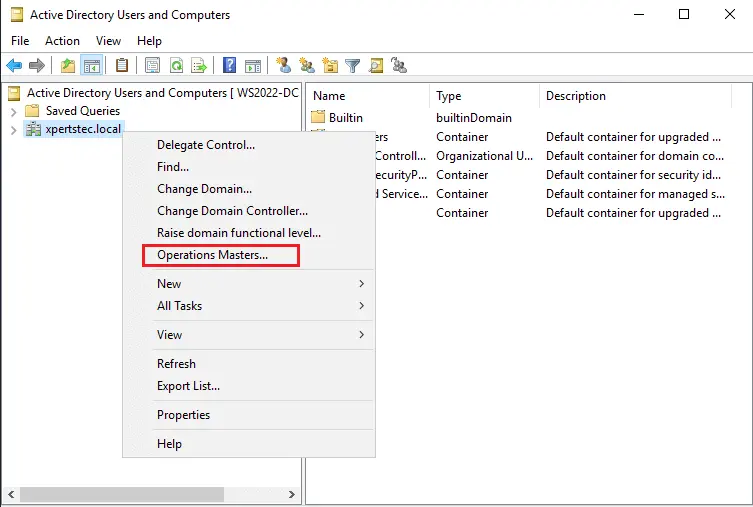
Right click on the local domain and then select operation masters.
Click on the RID tab and then select the Change button.
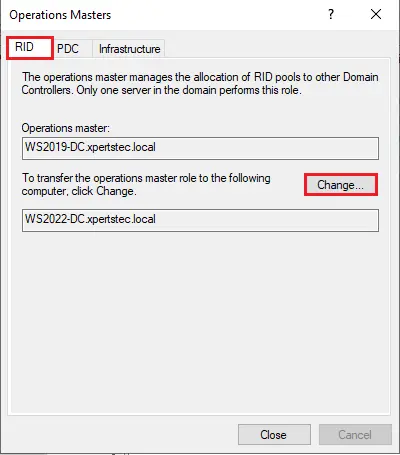
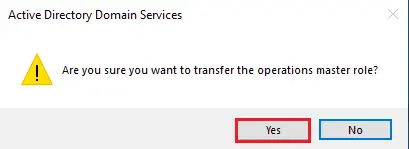
Click yes to transfer the role
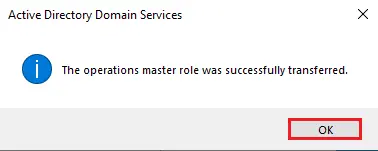
Select ok
Select the PDC tab and then select the Change button.
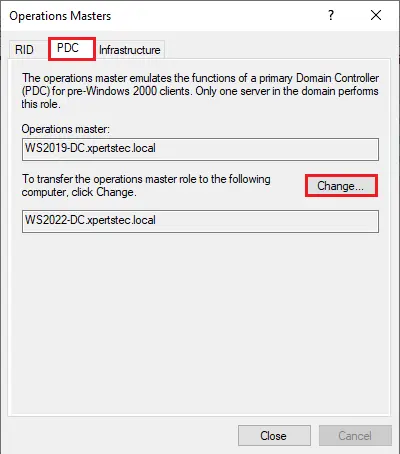
Click yes to transfer the role
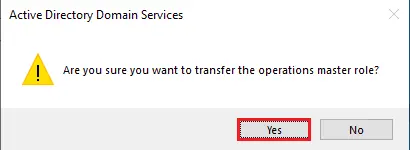
Select ok
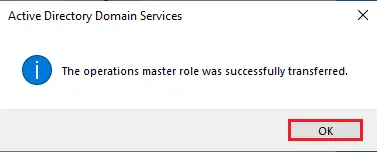
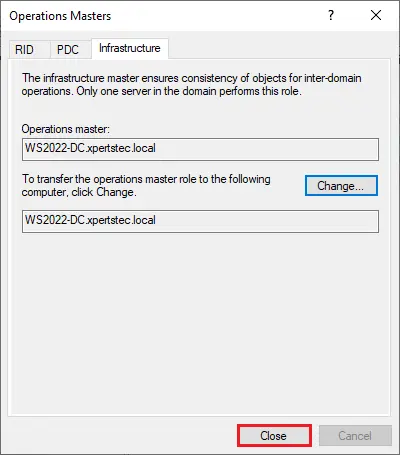
Select the Infrastructure tab and then select the Change button.
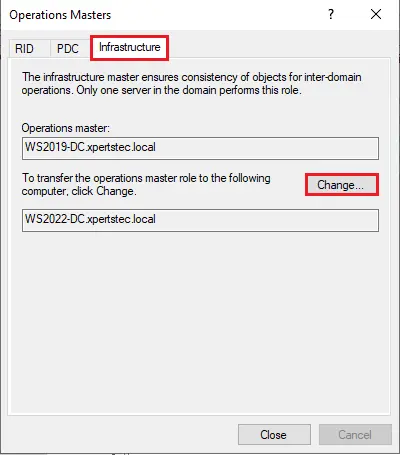
Click yes to transfer the role.
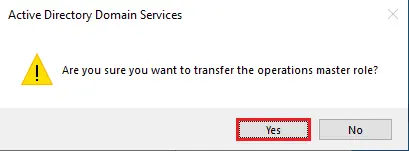
Select ok
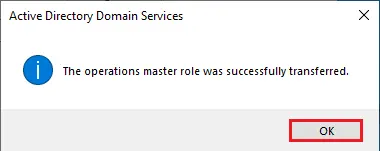
Now RID, PID, and Infrastructure roles switched to WS2022-DC.xpertstec.local
Now check the Master Operation role by typing the following command Get-Domain.
Check the Master Operation role by typing the following command Get-ADForest.
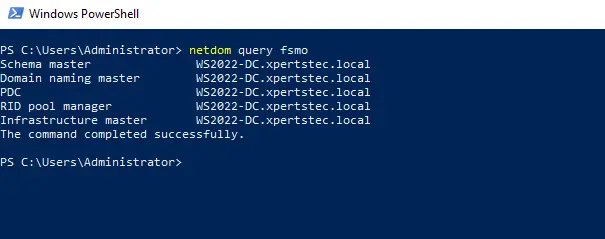
Use this command “netdom query fsmo” to get all outputs.
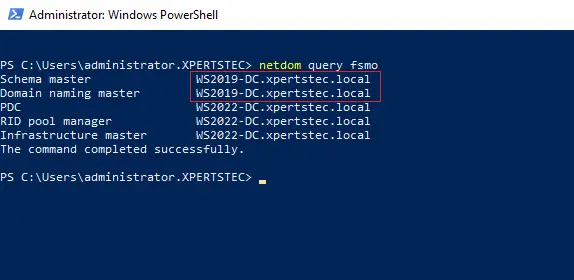
Change Active Directory Domain Controller
From xpertstec.local, open Active Directory Domain and Trusts console
Right-click Active Directory Domain and Trusts, and then select change Active Directory Domain Controller.
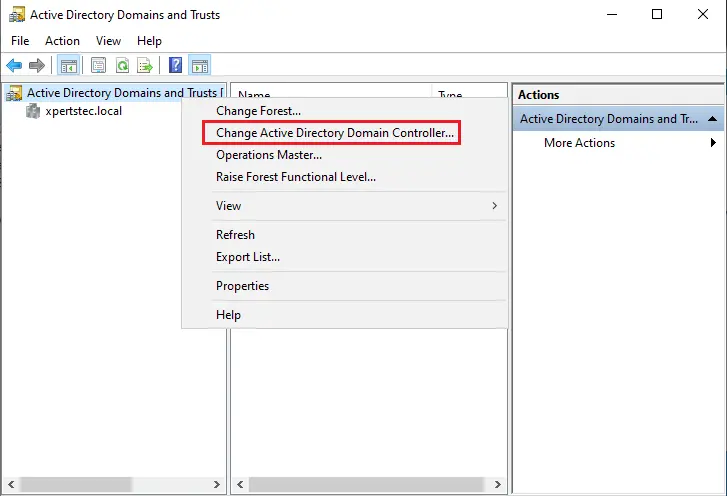
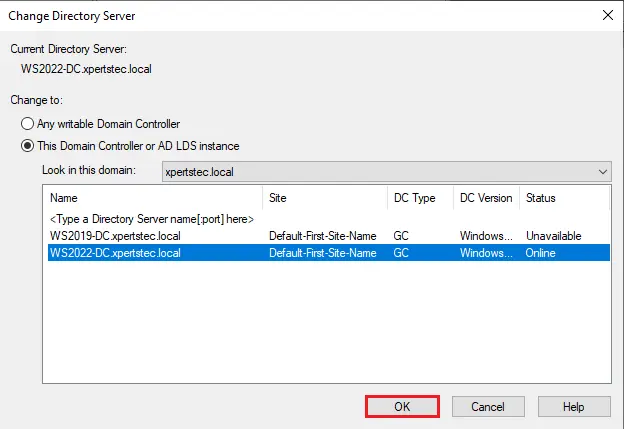
Select the directory server from WS2019-DC.xpertstec.local to WS2022-DC.xpertstec.local and then click ok.
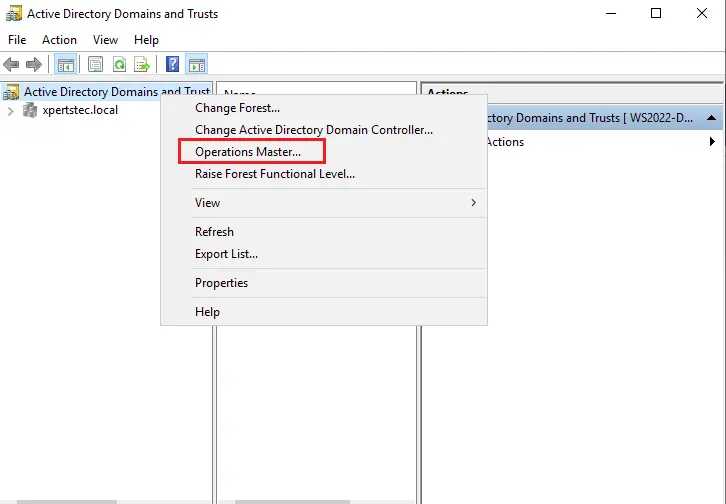
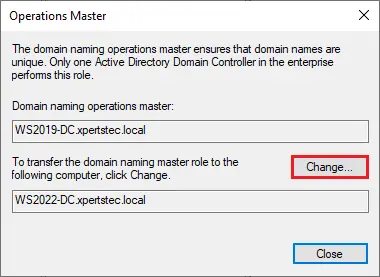
Now change the Operations Master. Right click on the top-level container and then choose Operations Master.
Click on the change button to transfer the domain naming master role to the WS2019-DC.xpertstec.local server.
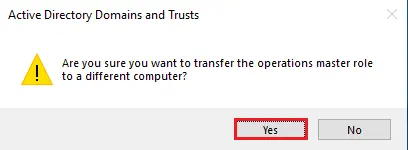
Click Yes
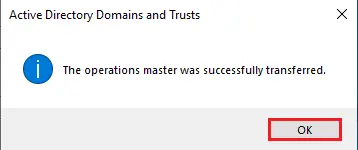
Select ok
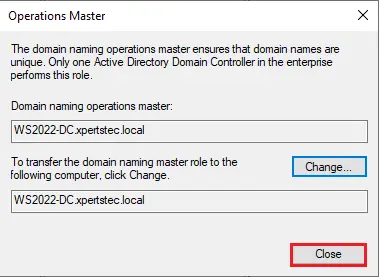
Verify the domain naming operations master in the Operation Master interface is now transferred.
In the WS2019-DC.xpertstec.local server, open the command prompt and then enter regsvr32 schmmgmt.dll to change the Schema Master.
Read this article: DllRegisterServer failed error code 0x80040201 schmmgmt.dll
Click ok
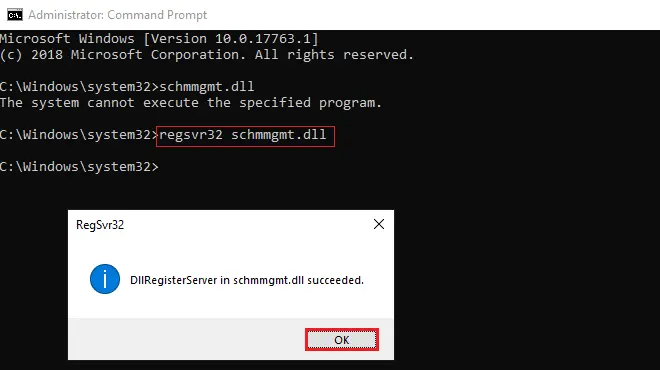
Change Schema Master Role
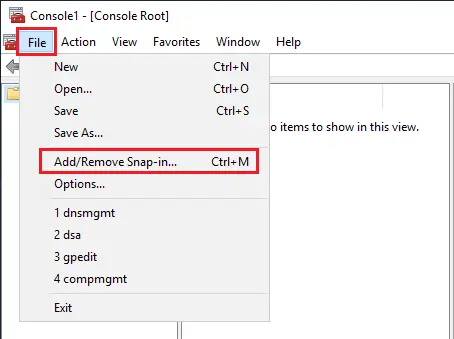
On the WS2019-DC.xpertstec.local server type mmc in the run command to launch console root.
Select the File tab and then click on Add/Remove Snap-in.
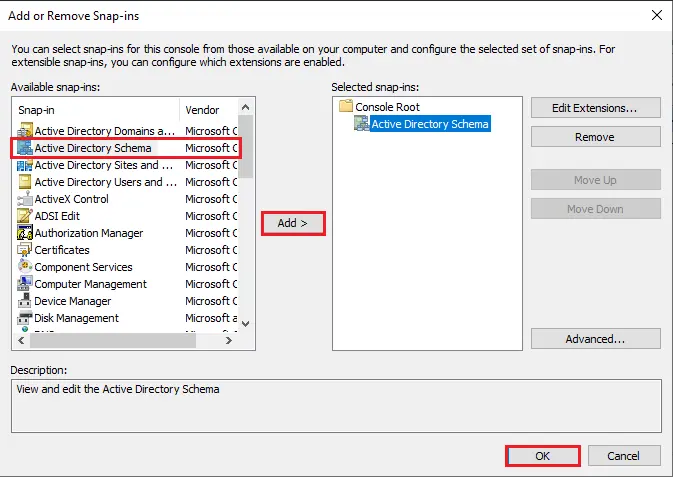
In the add or Remove Snap-ins interface, click on Active Directory Schema, click on Add and then click OK.
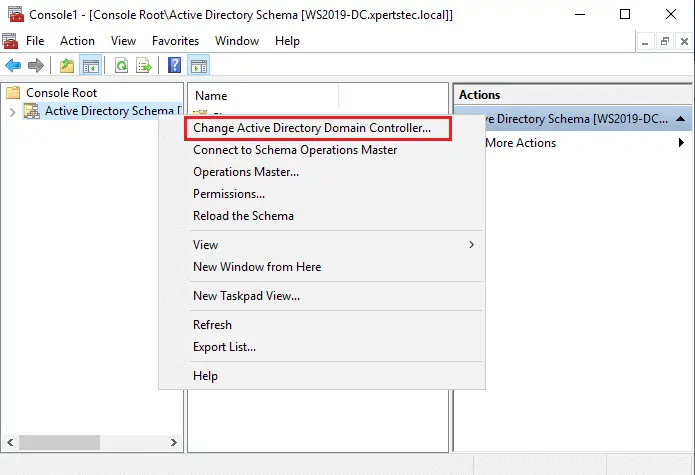
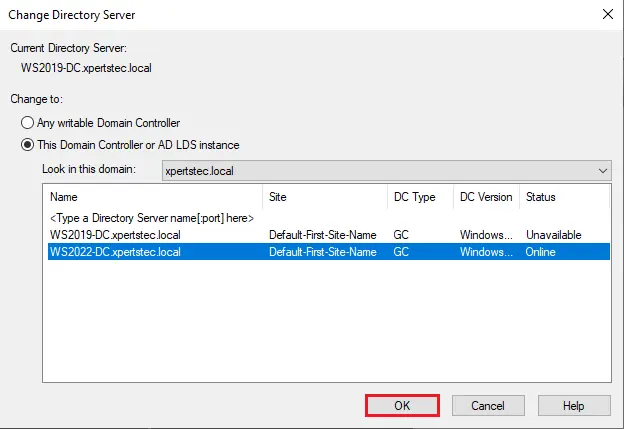
Now right-click Active Directory Schema and then select the Change Active Directory Domain Controller option.
Change the Directory Server window, select WS2022-DC.xpertstec.local, and then click ok.
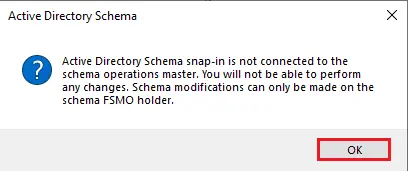
Click ok to proceed.
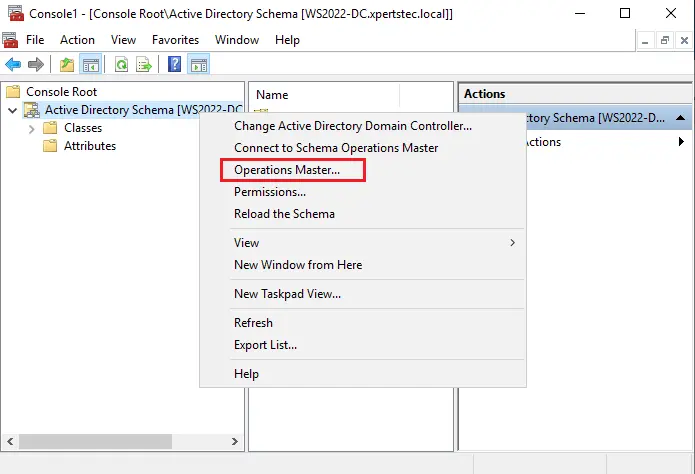
In the Console root, right-click on Active Directory Schema and then select Operations Master.
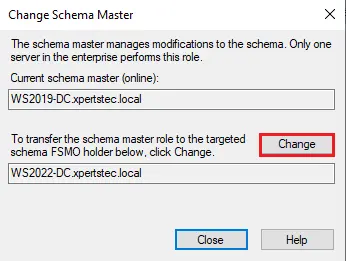
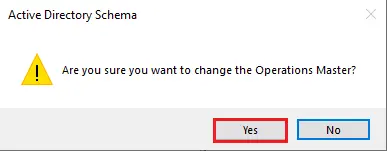
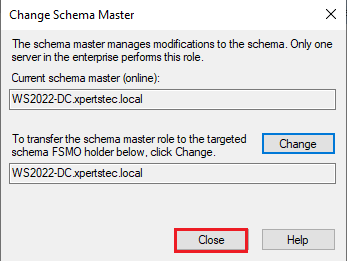
To Change the Schema Master interface, select the change button to transfer the schema master role to the WS2022.xpertstec.local server.
Click Yes
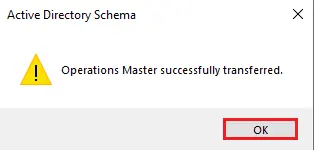
Select ok to proceed.
Now confirm schema master is WS2022-DC.xpertstec.local and then click close.
Type the following command netdom query fsmo to get all outputs and we can see all the roles have been changed to WS2022-DC.xpertstec.local
Change Global Catalog
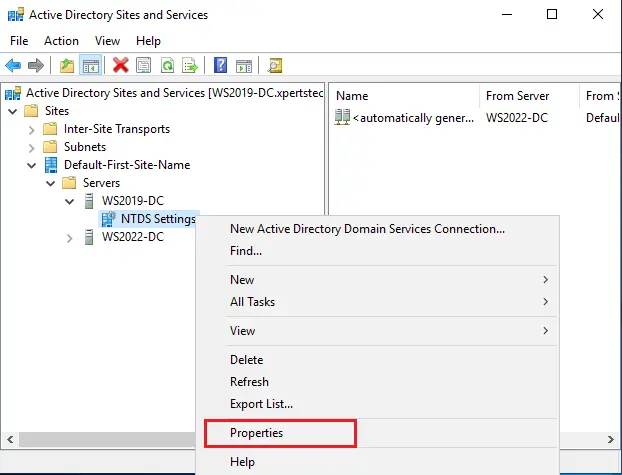
Launch Active Directory Sites and Services, expand Sites, then Default-first-site-name, right-click on NTDS Settings and click on properties.
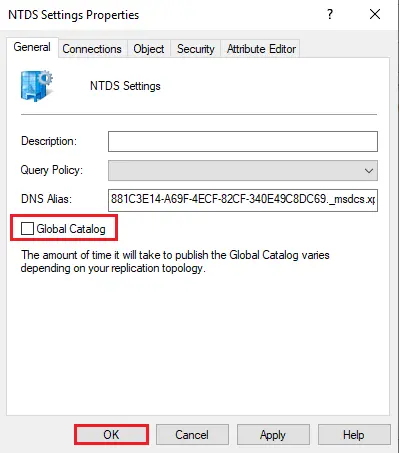
Untick Global Catalog and then click ok.
Raise Domain and Forest Function Level
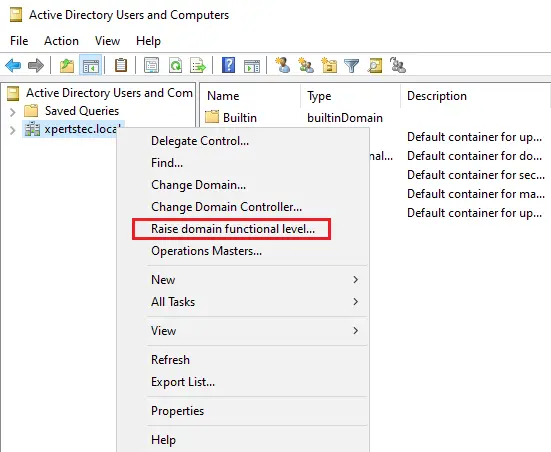
In the active directory user and computer, right-click on the domain and then choose Raise domain functional level.
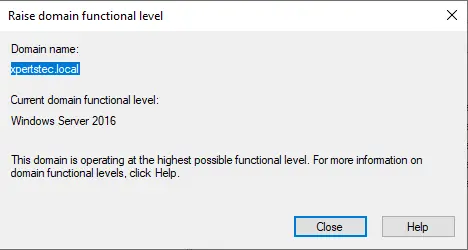
Here is the raised domain functional level.
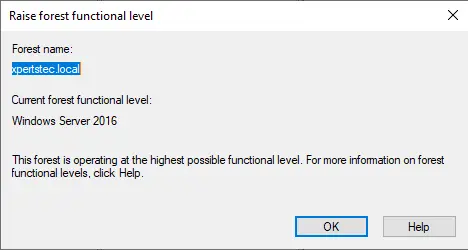
Launch domains and trusts, Right click on the active directory domain, and then click on raise forest functional level.
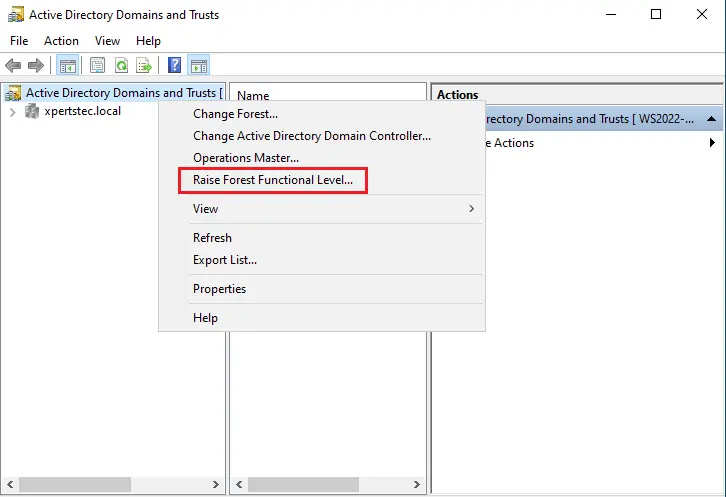
Here is the raised forest functional level.
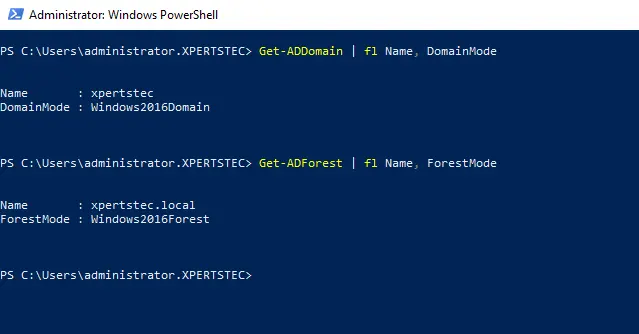
Confirm the domain and forest functional levels by using the below PowerShell command.
Get-ADDomain | fl Name, DomainMode
Get-ADForest | fl Name, ForestMode
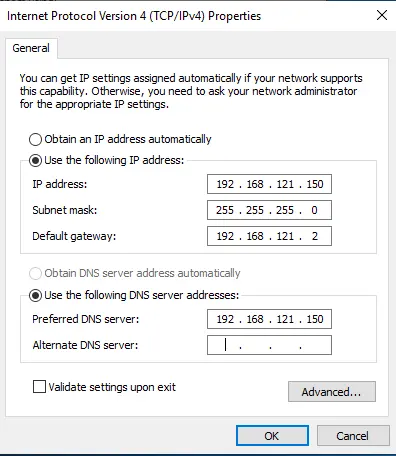
Now replace your DNS IP address.
How to demote active directory domain service in window server 2019
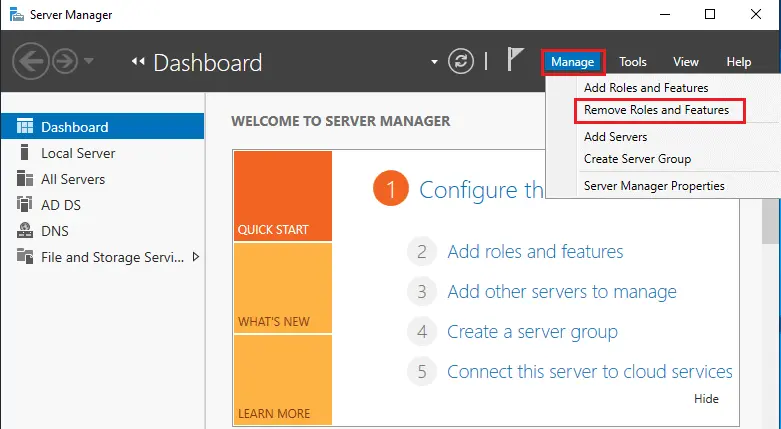
Open Server Manager, click on the Manage tab and then select Remove Roles and features.
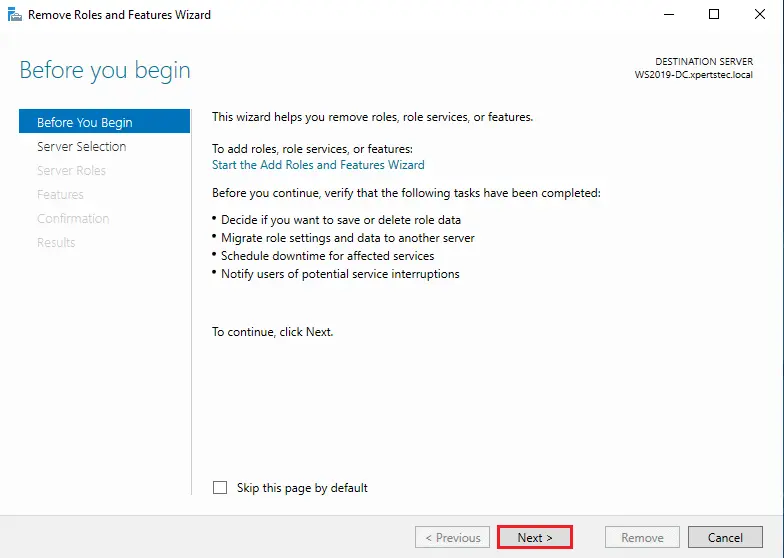
Click next
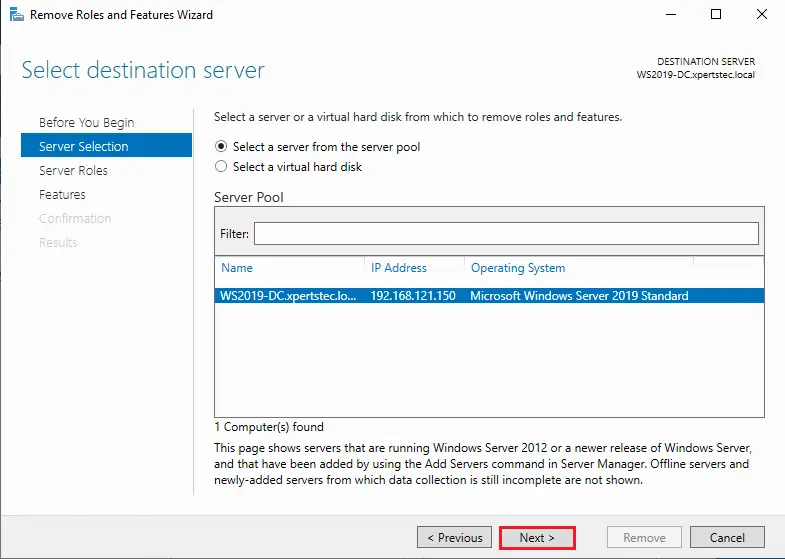
Click next
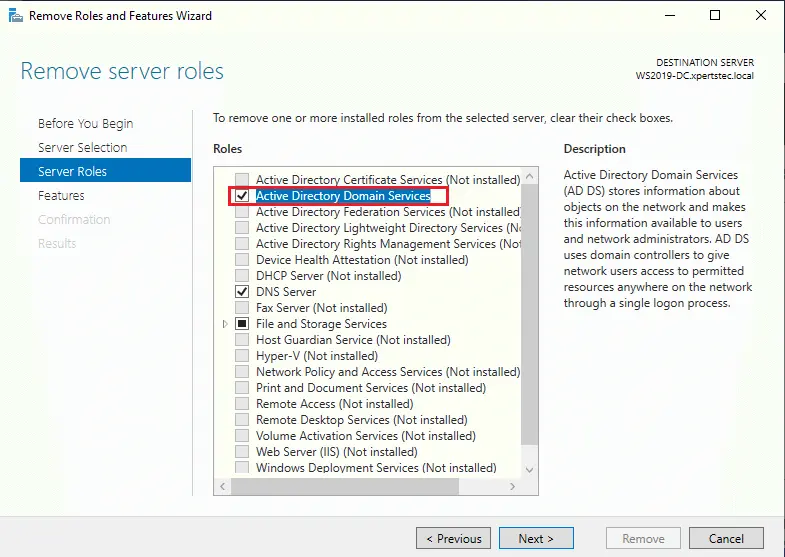
Uncheck Active Directory Domain Services checkbox.
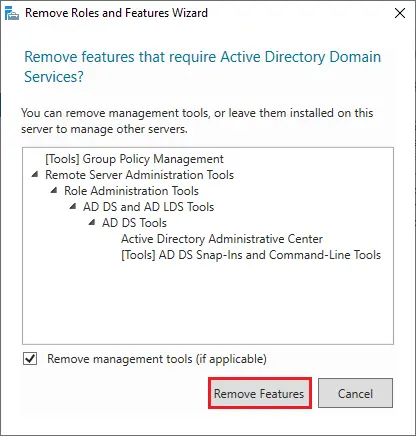
Select Remove Features.
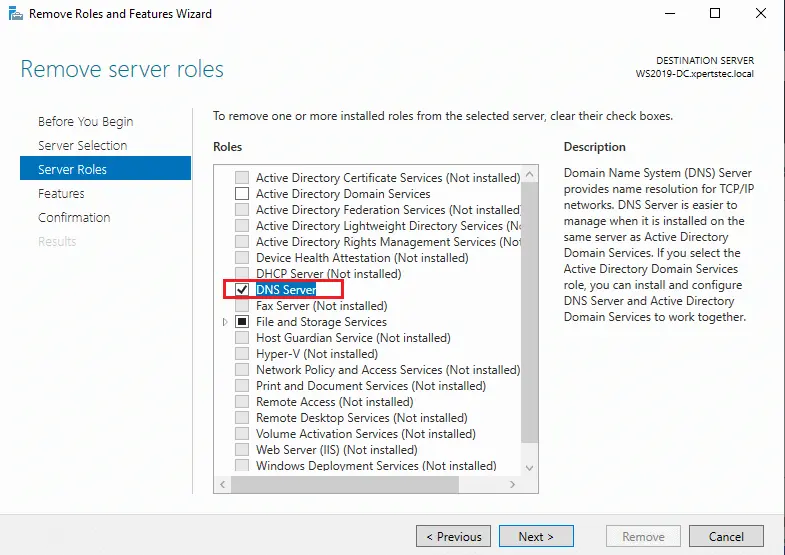
Now Untick the DNS Server role box.
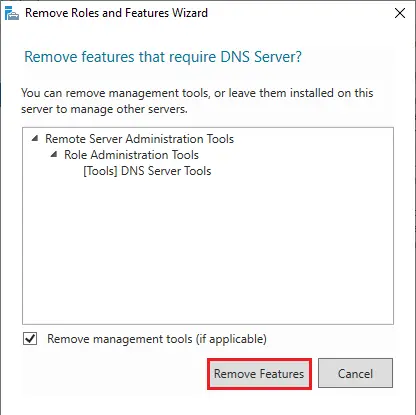
Click on Remove Features.
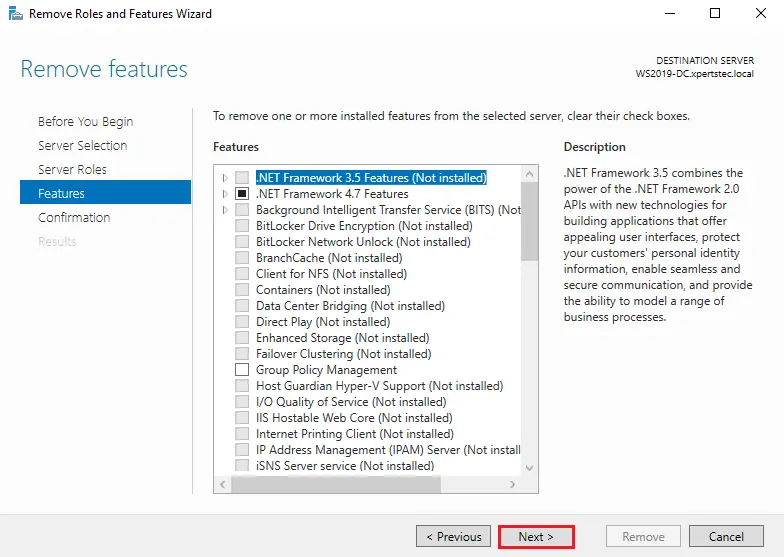
Click next
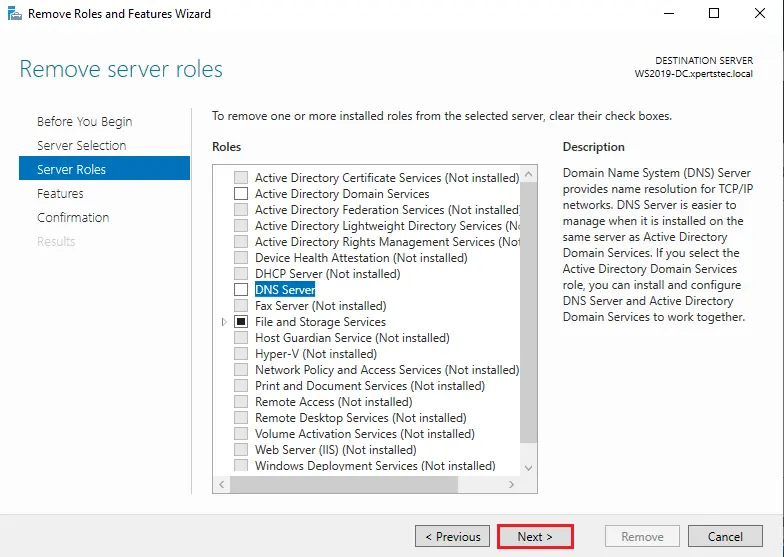
Click next
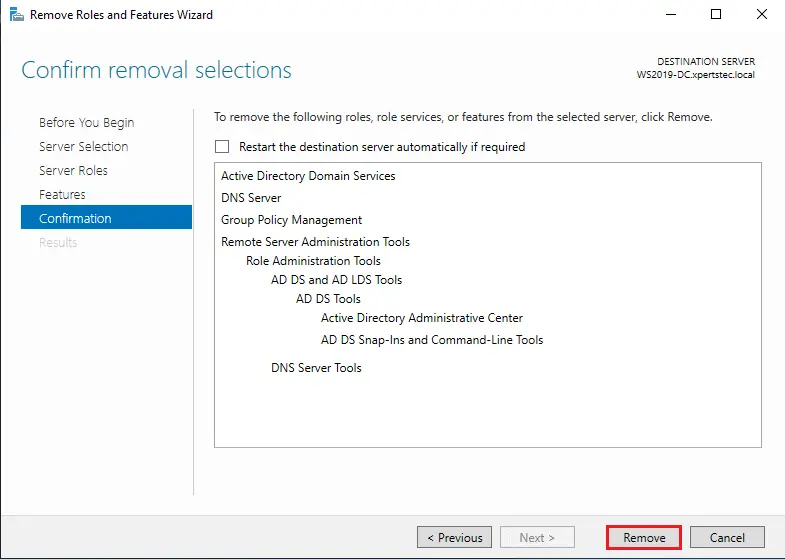
Confirm removal selections and then select the Remove button.
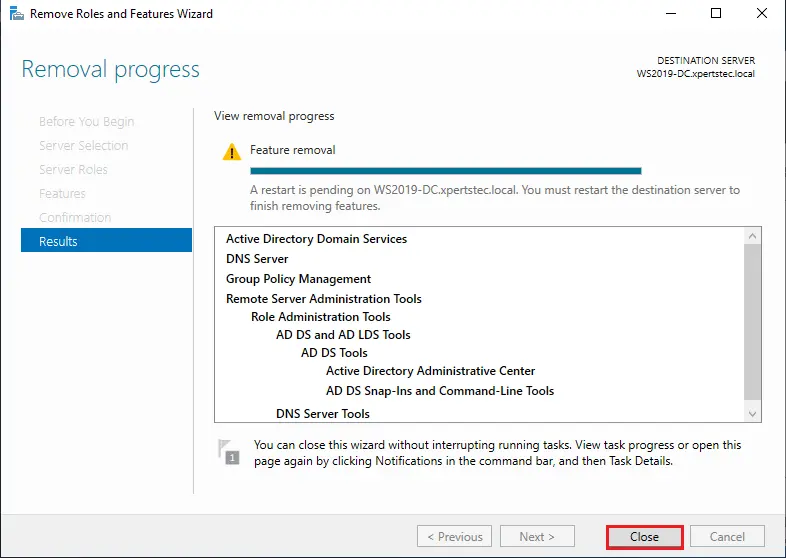
Click close
Read more about how to remove a domain controller server.
troller serveroot the server and then join it in the workgroup.
Also, read this article: Upgrade Windows Server 2019 to 2022,.


