Here, we have a look at how to install Active Directory in Windows Server 2022. We are going to show you the Domain controller installation and configuration of Active Directory domain services Role in Windows Server 2022 and promote Windows Server 2022 as a Domain Controller. First, I will show you how to install the ADDS binaries and then 2nd promote Windows Server 2022 to a Domain Controller.
The Windows Server 2022 operating system is the latest and often advanced Windows Server OS to date. Microsoft has constantly been making their Server operating system more cloud base with a lot of Azure features incorporated into the operating system natively. Using the new features and capabilities untied using Windows Admin Center, New Windows Server 2022 will have the most direct integration with Microsoft Azure of any server OS.
Microsoft is surely wanting to get everybody focused on Azure. The new combination with Azure makes Windows Server 2022 a simple way that customers get a powerful on-premises OS with all the Azure bells and whistles offered by Microsoft and unlocked potential with Windows Admin Center.
Table of Contents
- Change Computer Name
- Install Active Directory Services
- Domain Name System Server (AD & DNS)
- Promote Server to a Domain Controller
- How to configure DNS Server
Install Active Directory in Server 2022
Note:
Before you start, verify that the following things have been completed.
Change Computer Name
Change the computer name or server name, easy to an understandable format.
(In this Example: Server name: Server2022, Active Directory Server)
In the Network settings, use a static IP address is configuration is best practice.
How to Install Active Directory Domain Services
We are going to install an active directory & domain controller. It’s will be a physical computer or a virtual machine.
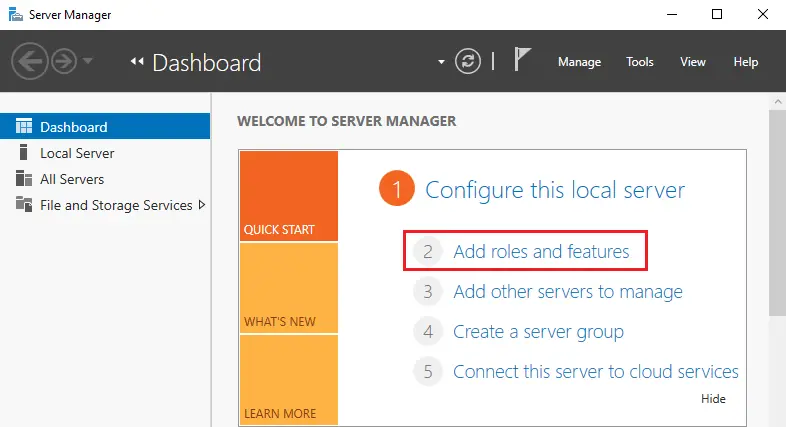
Once you changed the computer name and assign a static IP address to the server. Launch the Server Manager, click on Dashboard and then click on Add Roles and Features.
Add roles and features wizard, select next.

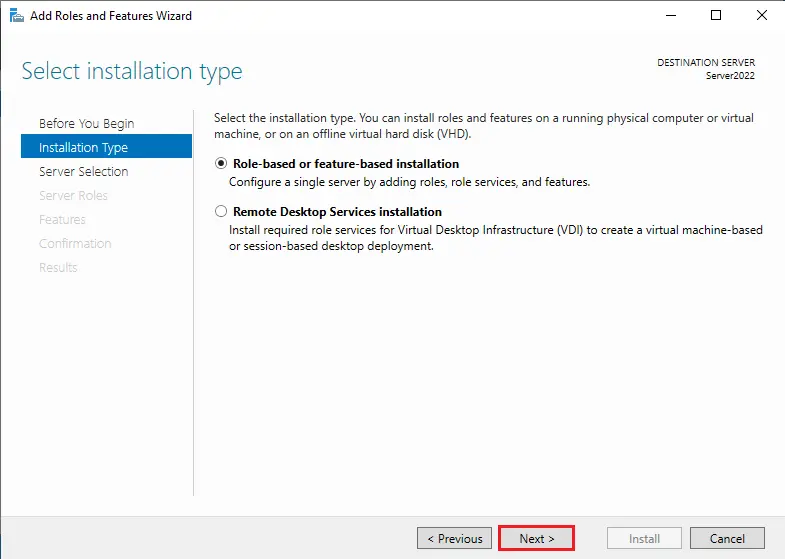
For the installation type, select the radio button. For role-based or feature-based installation, click on next.
In the Select destination server option, choose the option Select a server from the server pool and then click on next. In the image below you can see what servers are available, select the one you wish to install the active directory on.

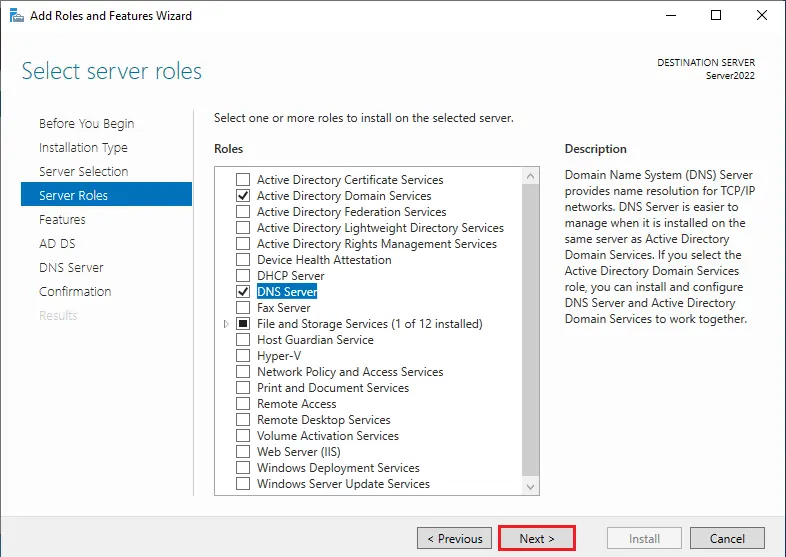
Choose server roles window, I am going to install Active Directory so I am selecting Active Directory Domain Services roles.
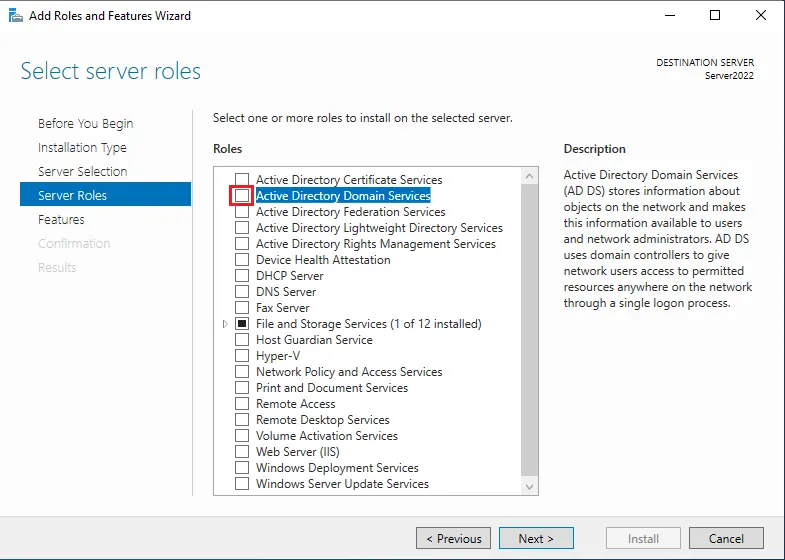
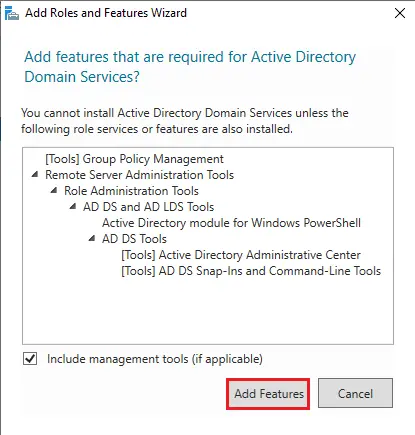
Click on the Add Features button to add features that are required for Active Directory Domain Services.
Domain Name Server (AD & DNS)
In the Select one more role to install wizard, select the DNS Server role name.
We need to install and configure Active Directory and DNS server roles to work together.
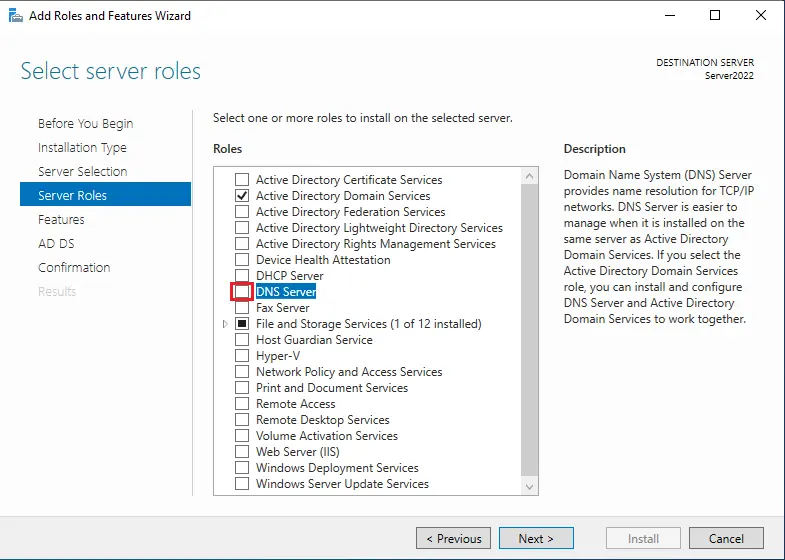
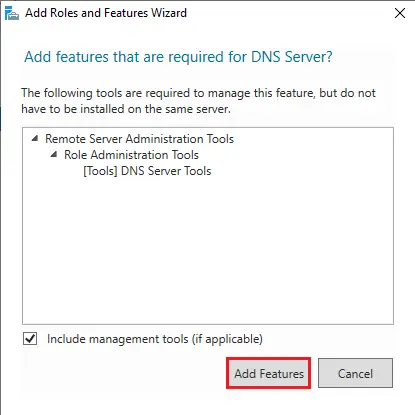
Click on Add Features button to add features that are required for the DNS server including management tools.
Please ensure the Active Directory Domain Services and DNS Server options are selected and then click on next.
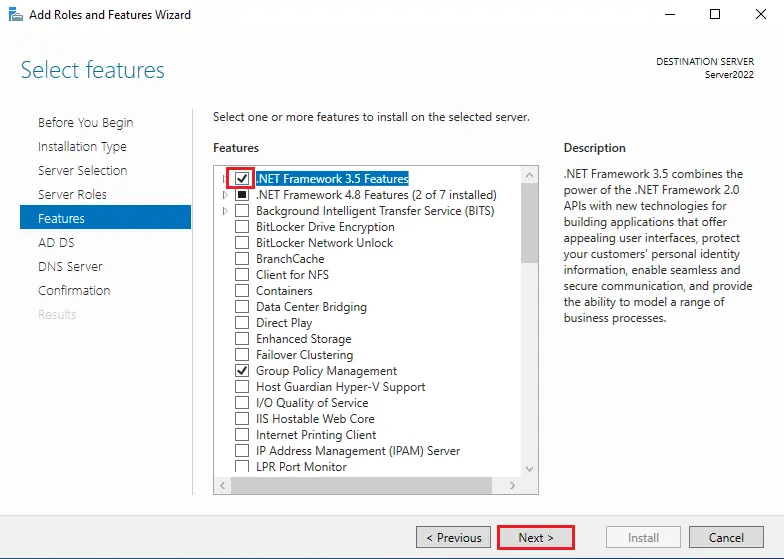
Choose the checkbox .NET Framework 3.5 Features and then click on the next option to continue.
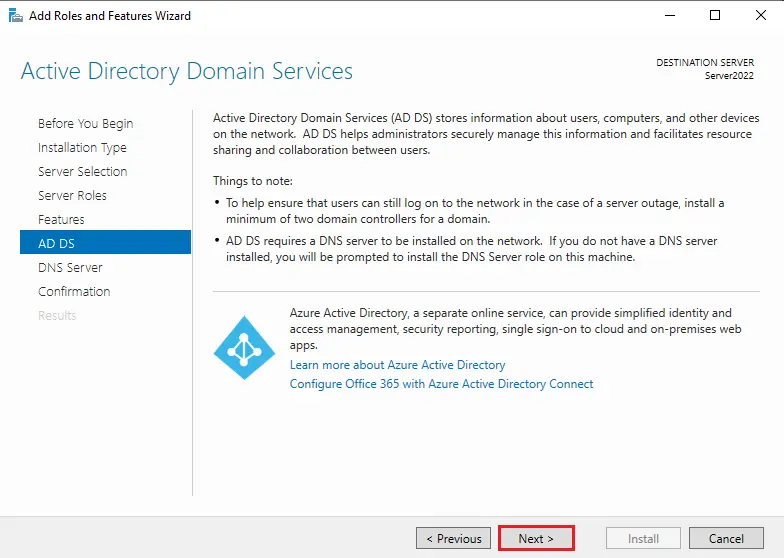
Active directory domain services, click next.
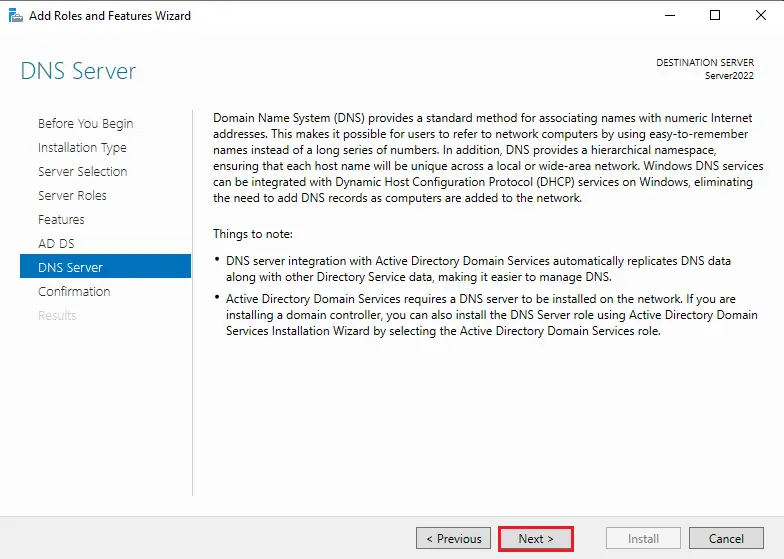
DNS Server option click next.
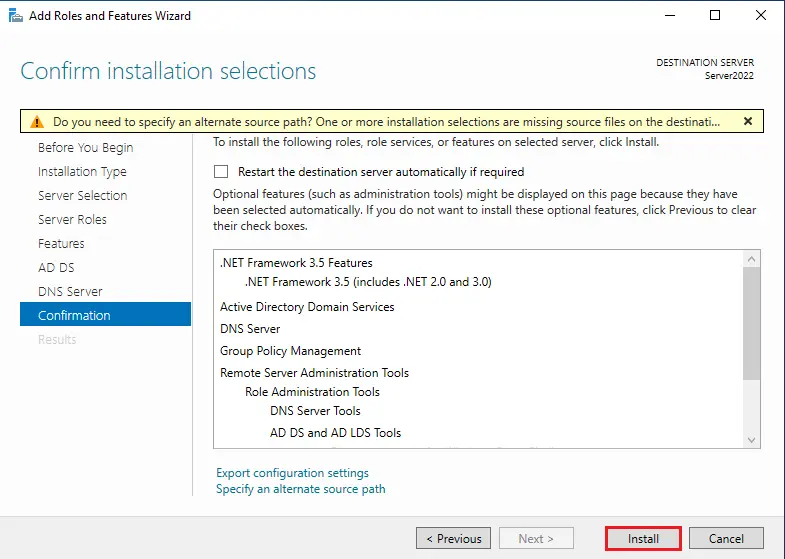
Click the next button to start the active directory and DNS server installation.

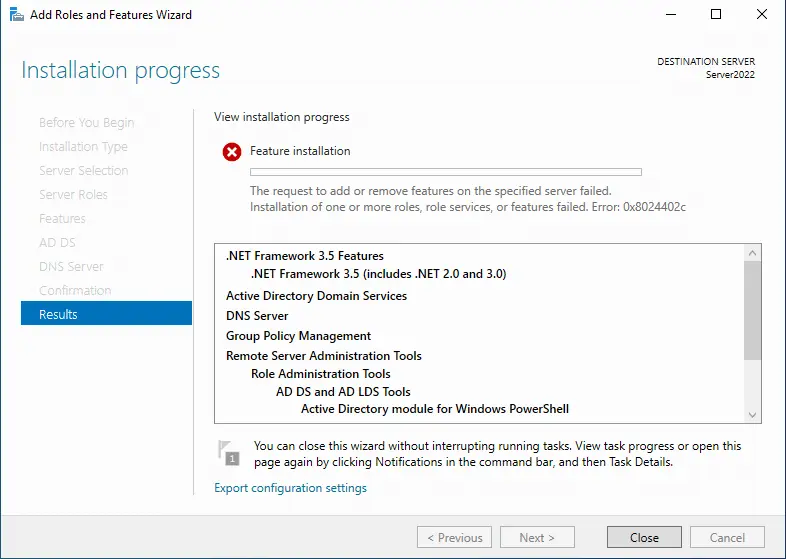
If you get the below error, its means we need to install .net framework 3.5
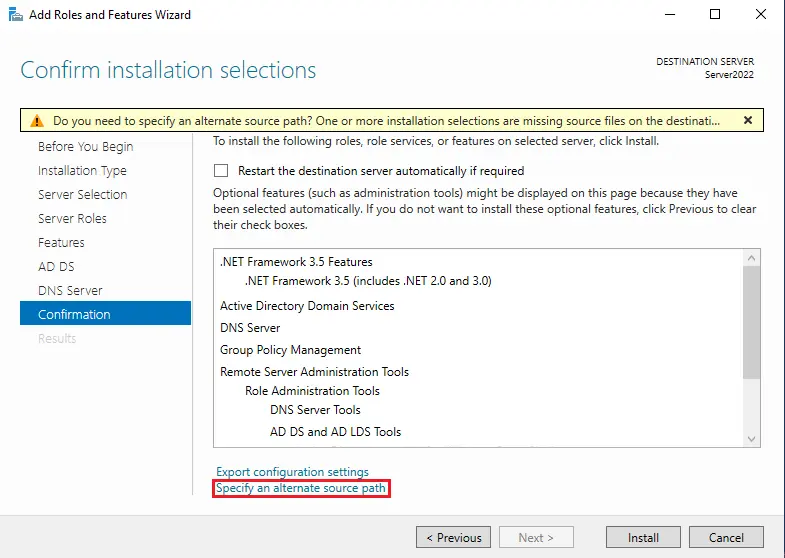
Follow the above steps to reach the confirmed installation selection window. Click on the Specify an alternate source path.
.Net Framework 3.5 Installation failed
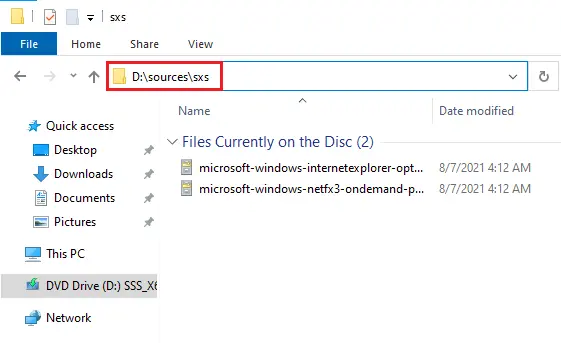
Insert the windows server 2022 installation media or mount the Server 2022 ISO file as a drive. Then go to the location of the source path drive lettersourcessxs. (My drive letter is D:sourcessxs). Copy the path D:sroucesxs
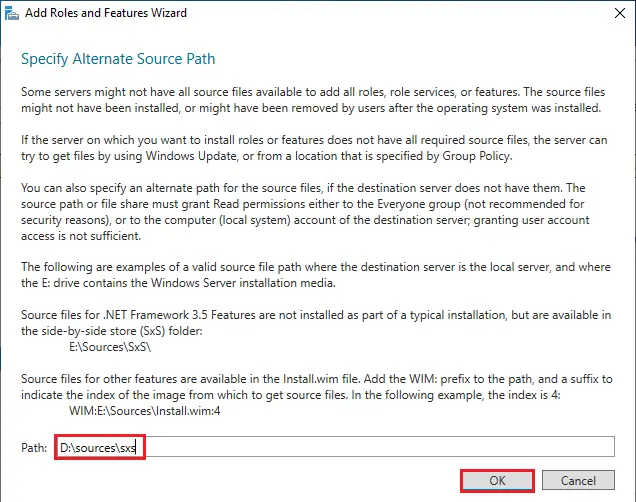
Then paste the copied path in the path option or type manually. Then click on the ok and select the Install button to continue.
Click Install.
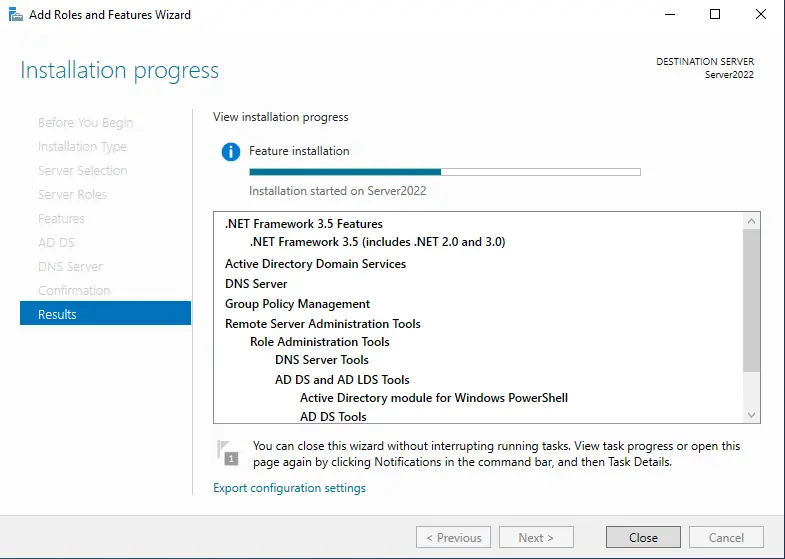
The installation of the active Directory and DNS server feature is in progress.
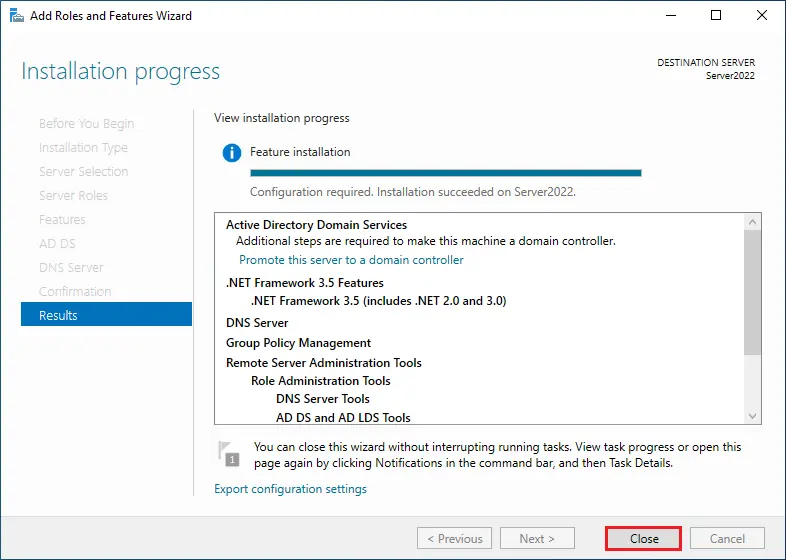
The Active Directory and DNS server installation process has been completed. Click close.
Promote Server to a Domain Controller
How to Configure DNS (Domain Name System)
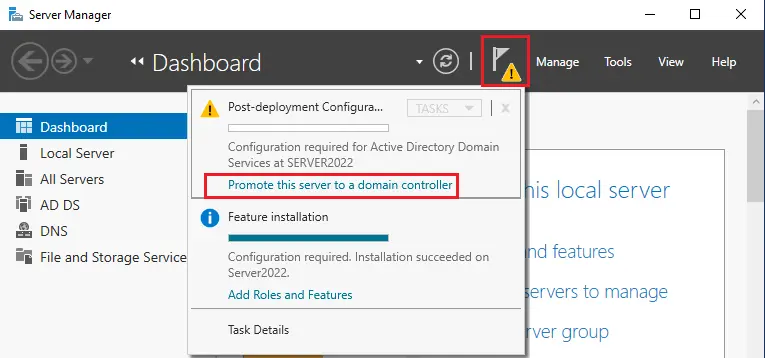
How to deploy and configure the Domain Controller 2022. In the Server Manager click on the notification button and then click on Promote this server to a domain controller.
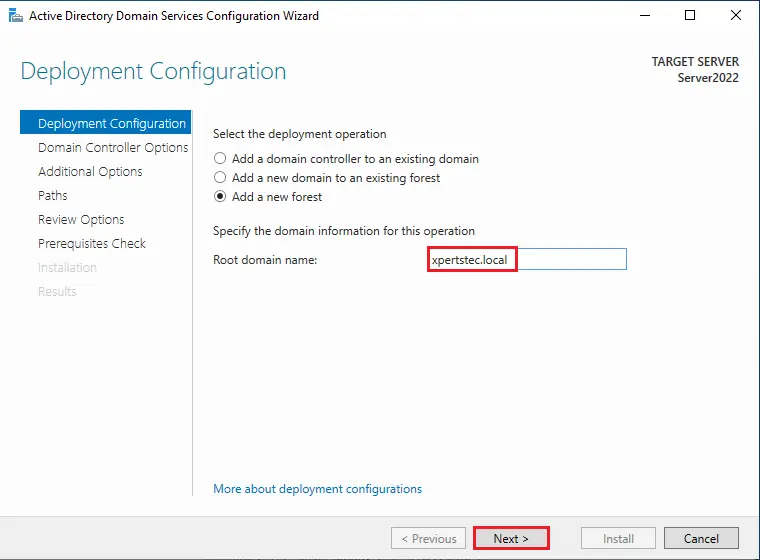
Active Directory Domain Services Configuration, deployment configuration. Now we are going to install new forest and new domain.
Select Add a new forest checkbox and then specify the domain information for this operation. Type your domain name next to the root domain name and then click on next.
(Example: xpertstec.local you can use xpertstec.com).
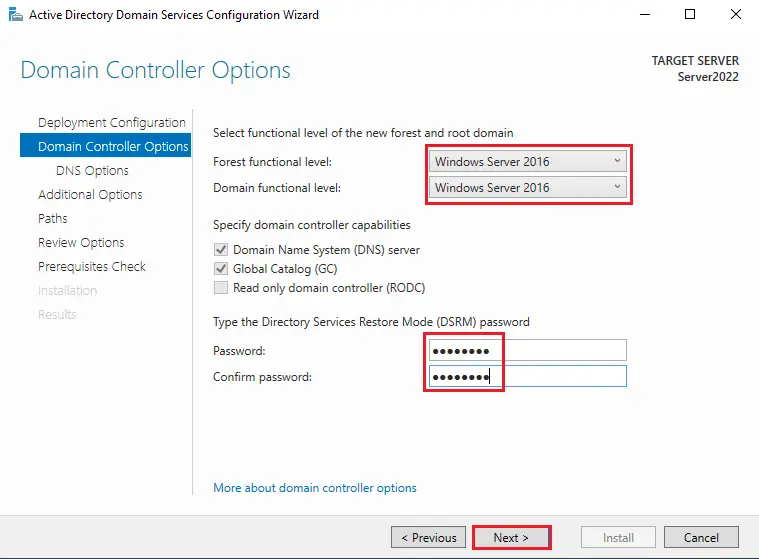
Domain controller options, select the forest functional level and domain functional level as per your requirement.
Specify domain controller capabilities.
Domain name system (DNS) server selected
Global Catalog (GC) selected
Type Directory Services Restore Mode (DSRM) password and then select Next.
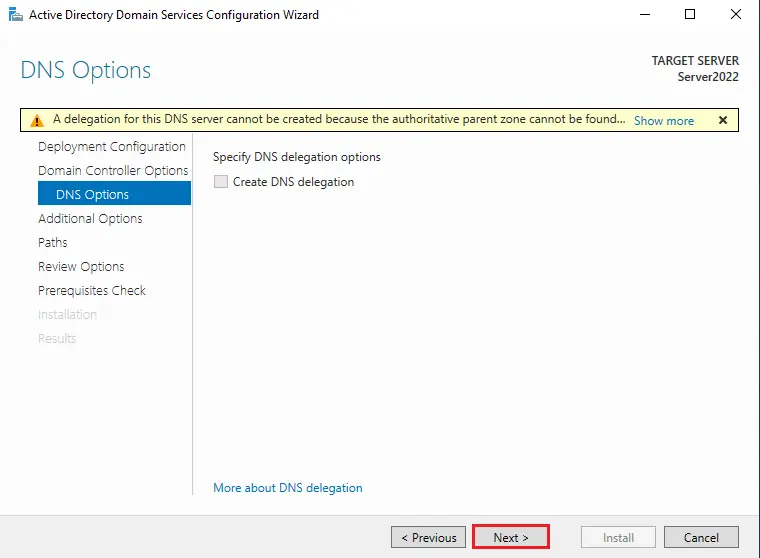
DNS Options windows, select next.
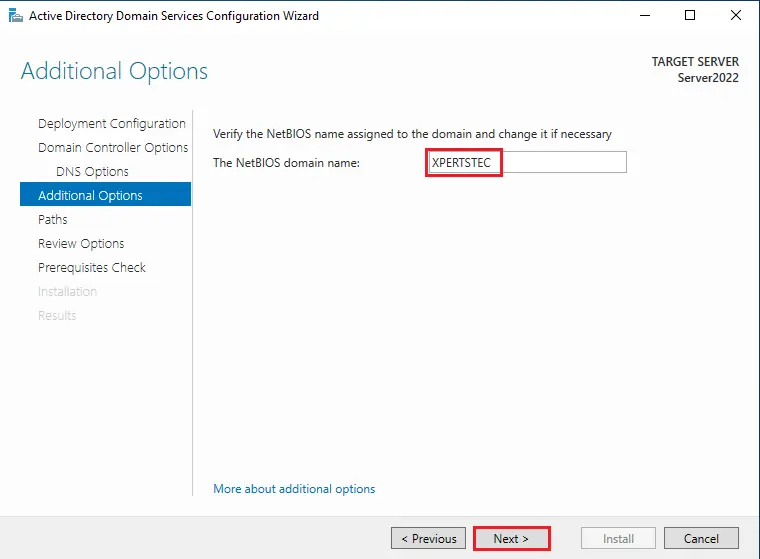
Verify the NetBIOS domain name. Mostly, it’s automatically picked from your domain name related. Then click next
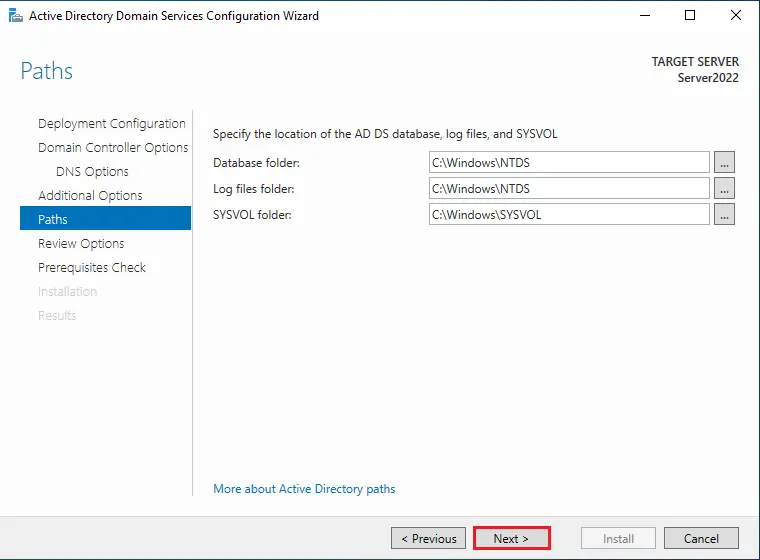
Specify the location of the AD DS database,
Database folder
Log files folder
SYSVOL folder
Keep it is as it is and click next.
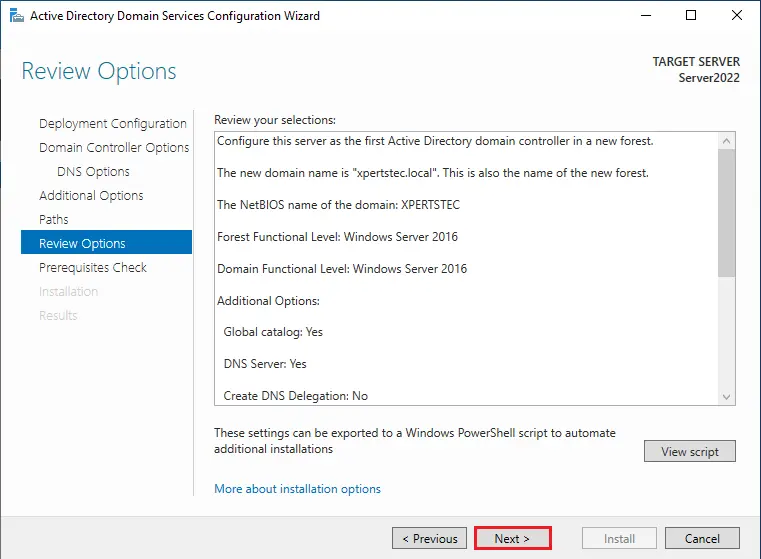
Verify all the settings with your requirements and then click on next to continue.
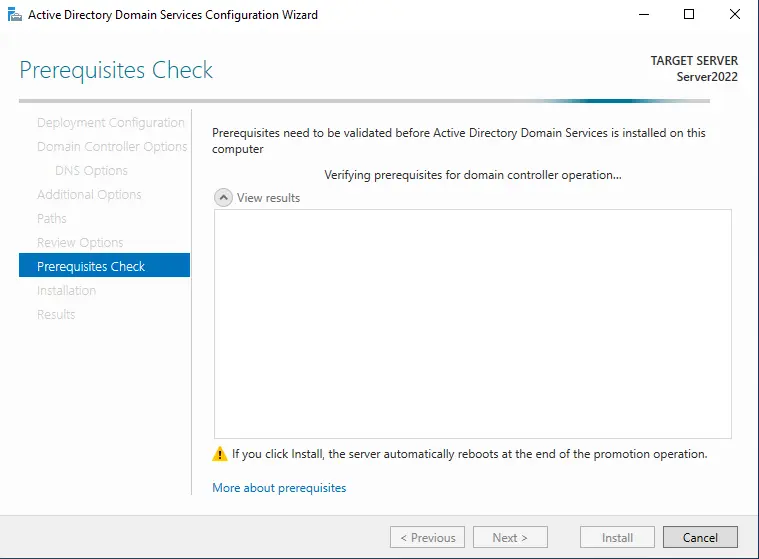
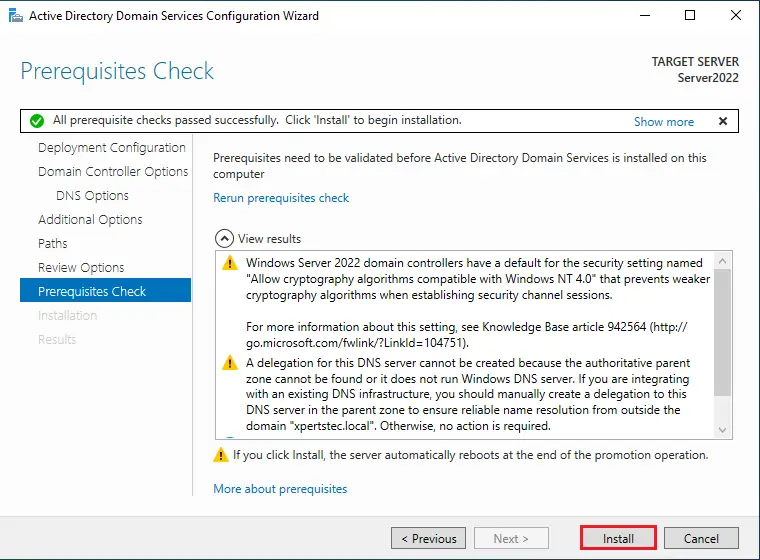
Prerequisites check done automatically
Click on the install button to start the Active Directory Domain Controller installation.
Domain Controller Installation is in Progress…
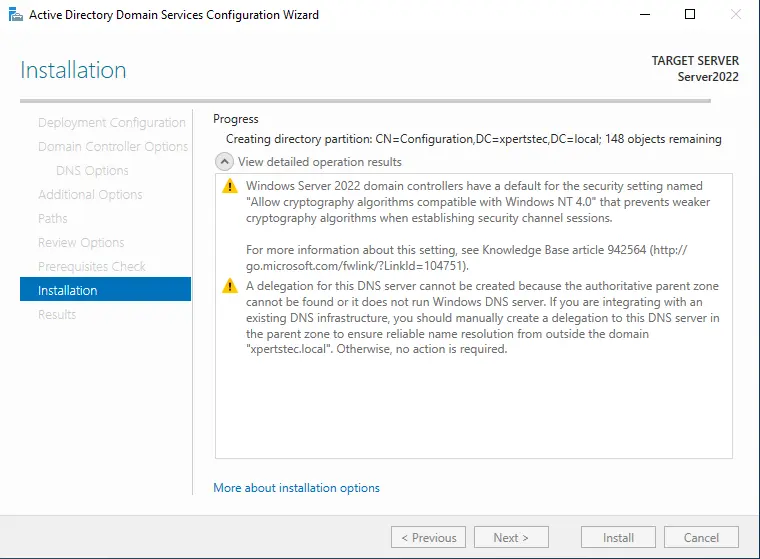
The domain controller server is successfully configured, then select close.
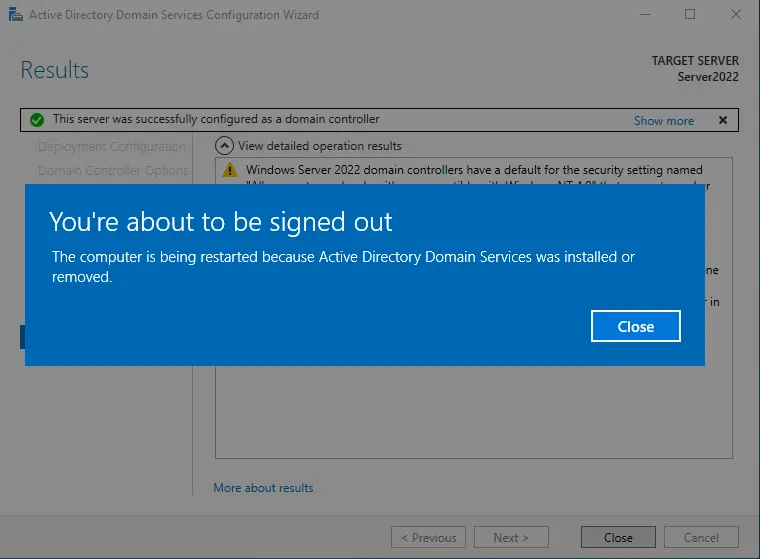
After configuration of the domain controller your server reboot automatically.
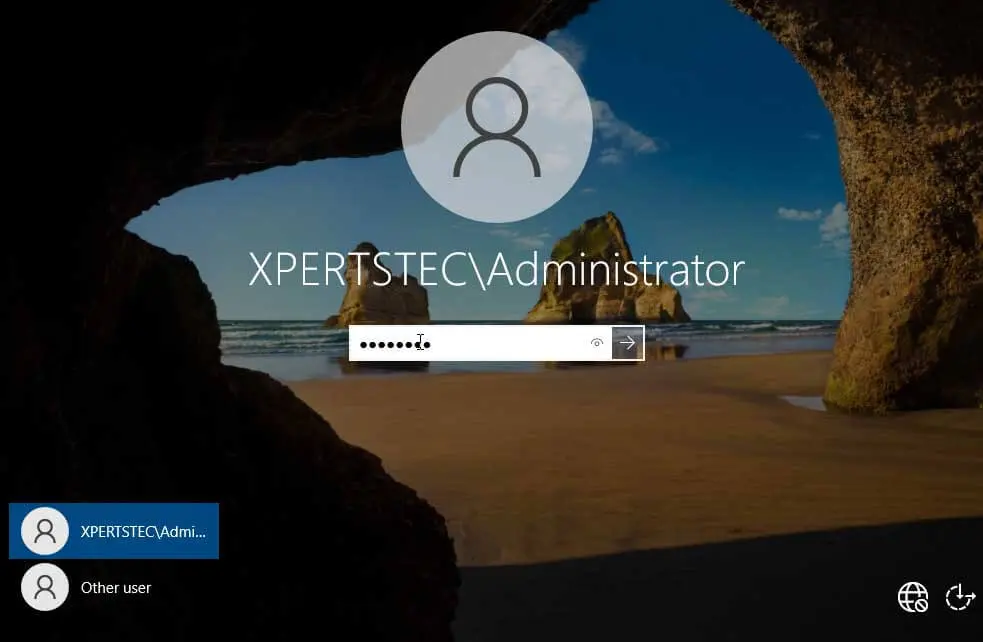
Domain Administrator Login screen windows, type your domain controller password.
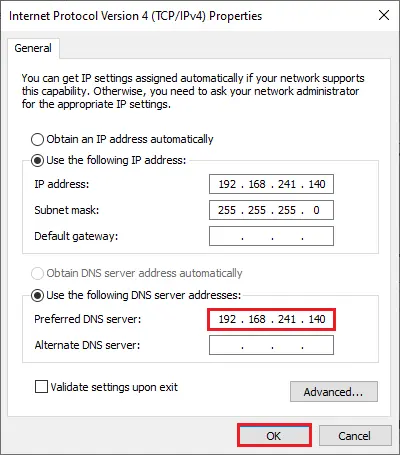
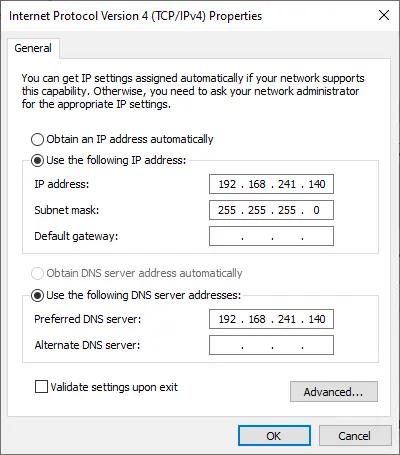
After login with your Active Directory Domain Controller, open your network connection TCP/IP properties. You can see the preferred DNS server IP Addresses.
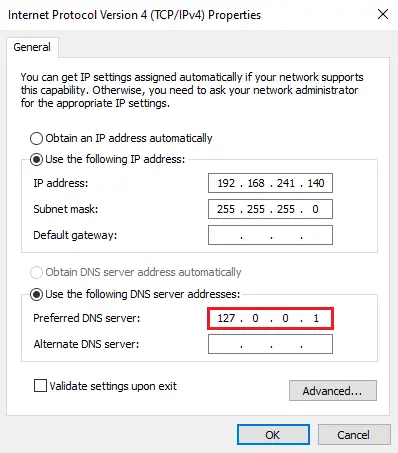
Change it to your DNS server IP address.