In this article, I will discuss How to set up FTP Server on Windows. I will be able to describe the method of putting in and configuring the FTP server in Windows Server 2019.
How to install FTP Server 2019 (IIS)
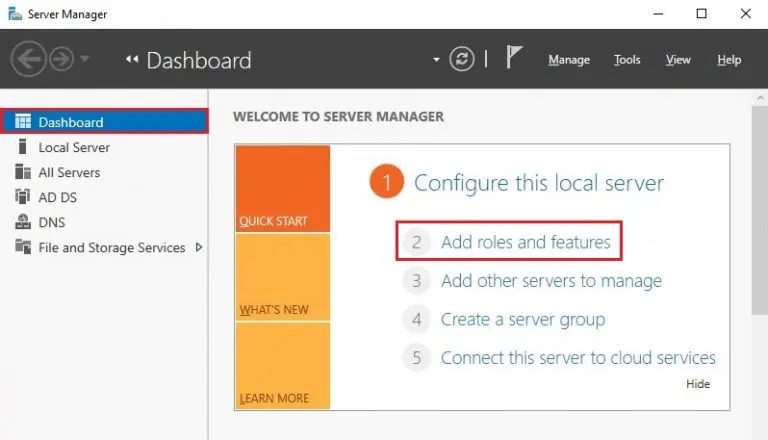
1- Open the Server Manager > Left side select Dashboard option and click on Add roles and features under welcome to server manager.
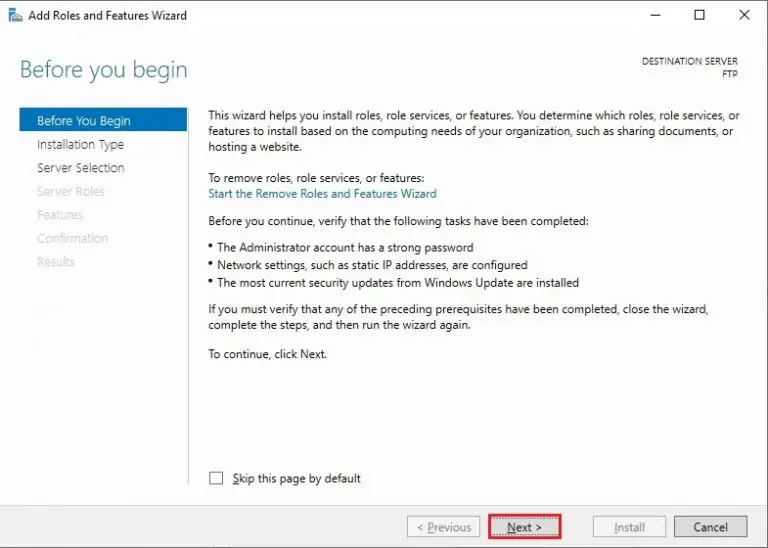
2- Click next.
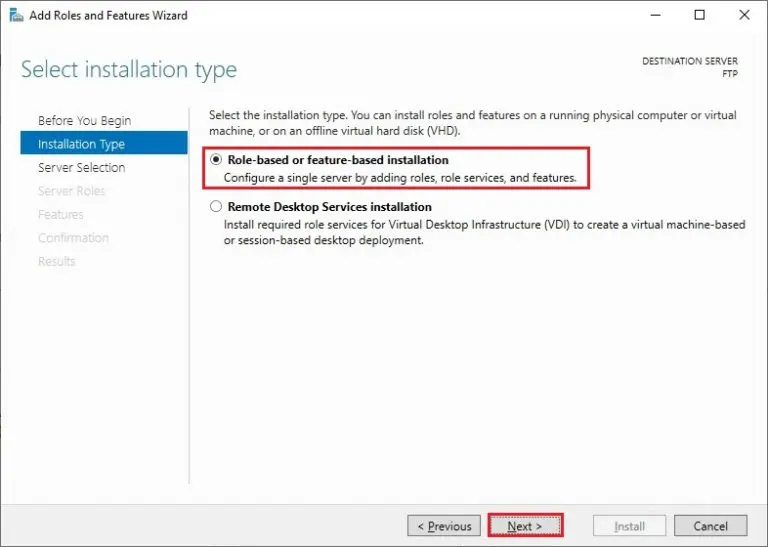
3- Select Role-based or feature-based installation and click on next because of the installation type.
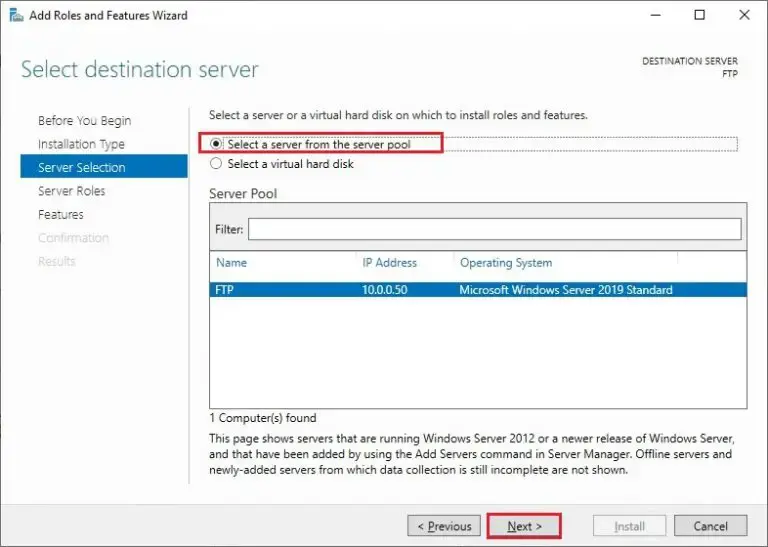
4- Select the server from the server pool and click on next.
5- In the server roles, check the IIS web server role.
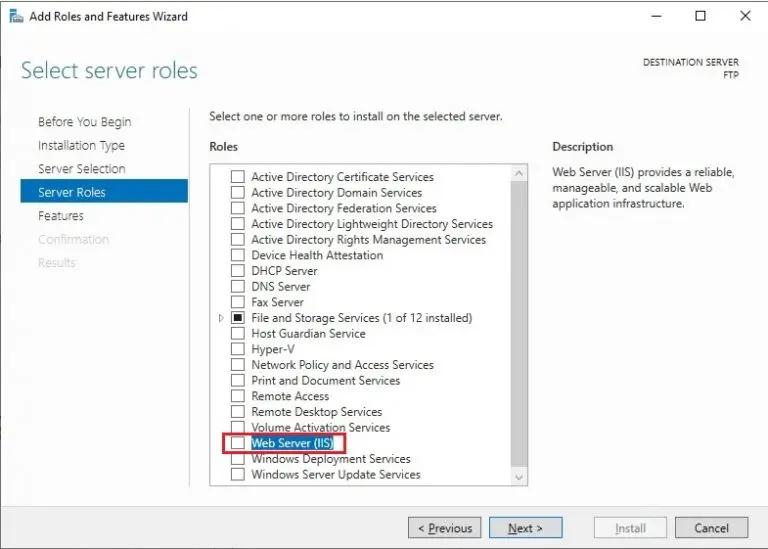
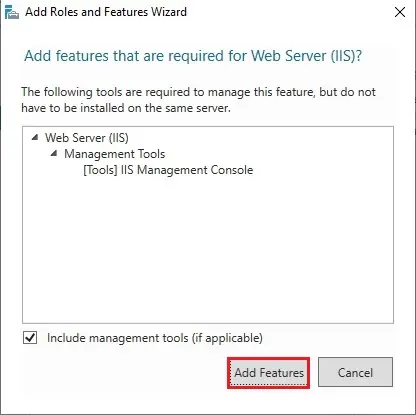
6- Click Add features required for Web Server (IIS).
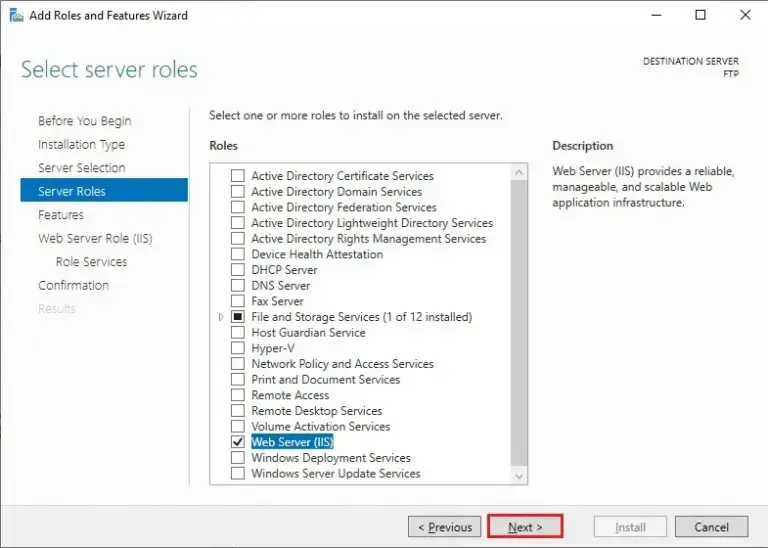
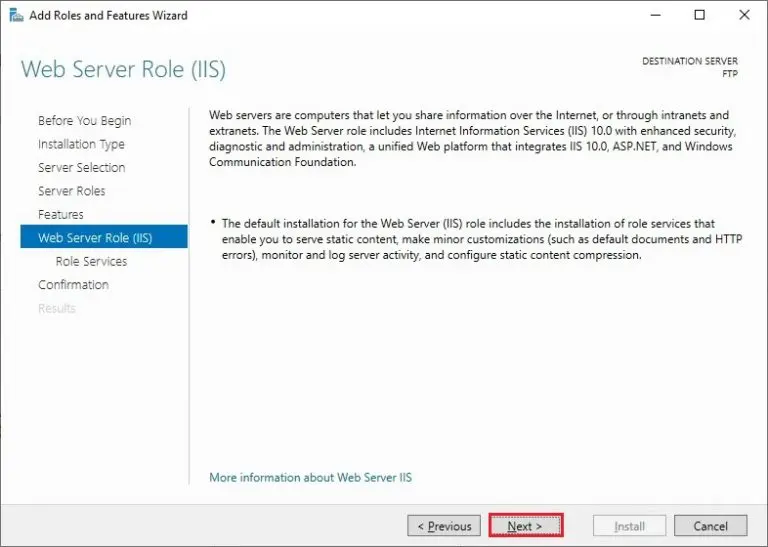
7- After selecting the Web Server (IIS) role, click next.
8- On the features option page, click next.
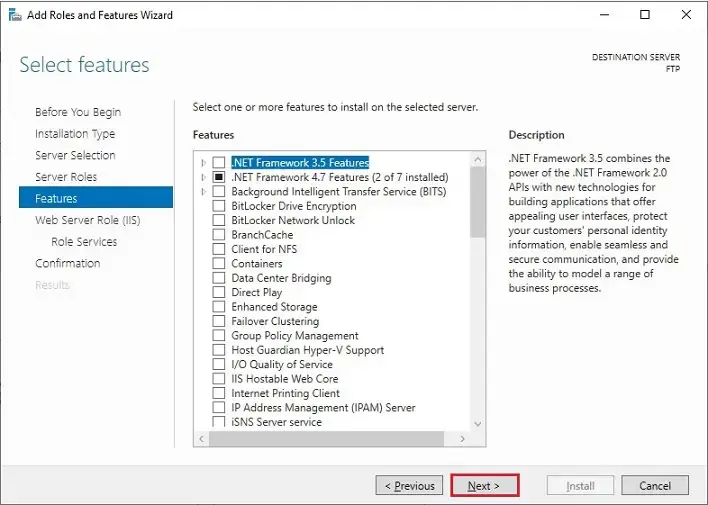
9- Click next.
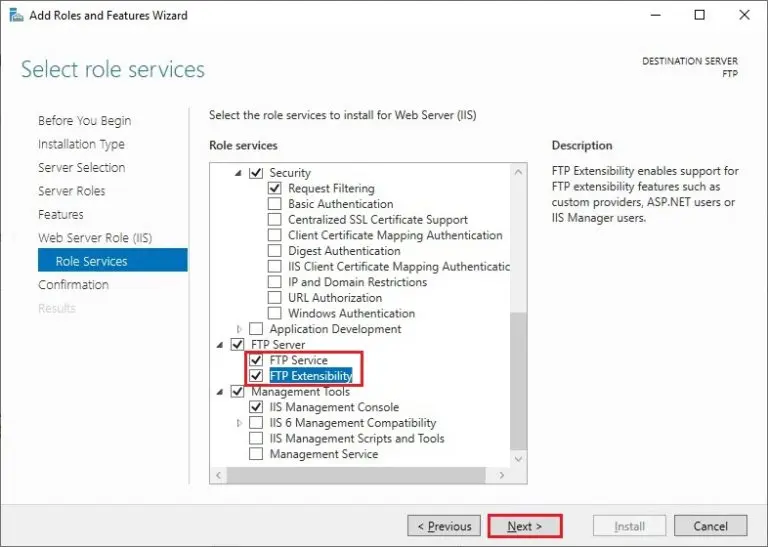
10- In the Role Services window, check the FTP server and FTP Extensibility and click next.
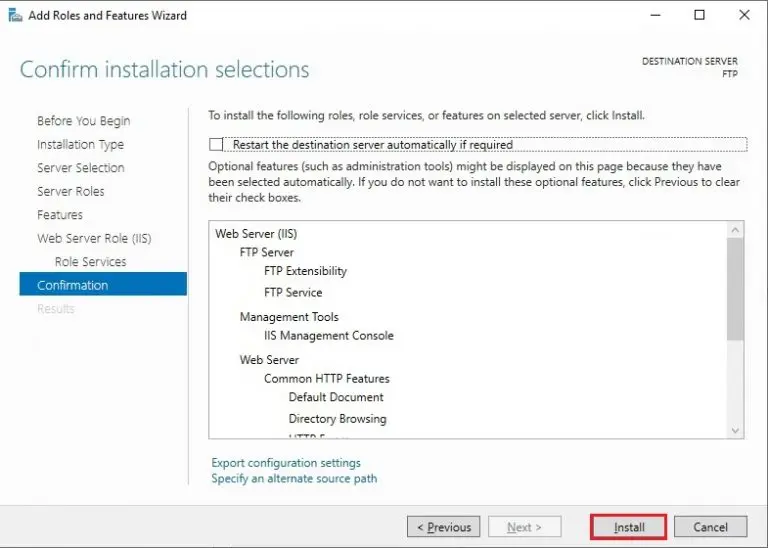
11- Review the confirm installation summary and click install.
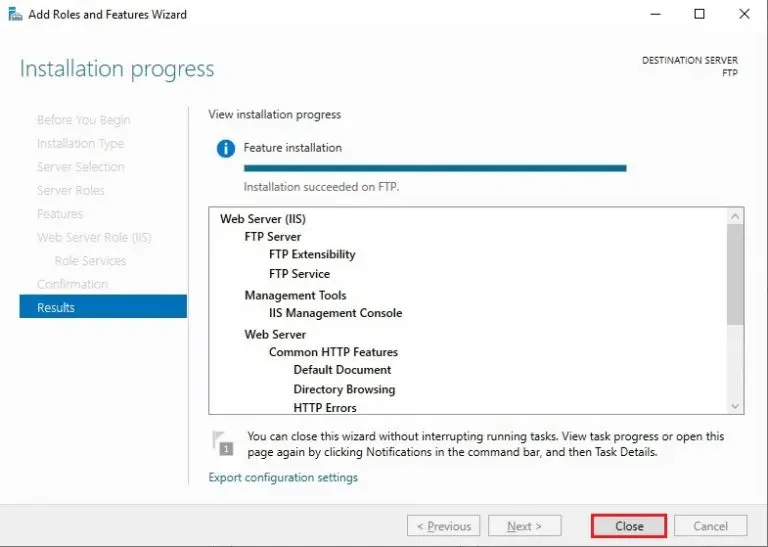
12- Server role installation installed successfully. Click close.
Step by step, create FTP users and groups to access an FTP server in 2019
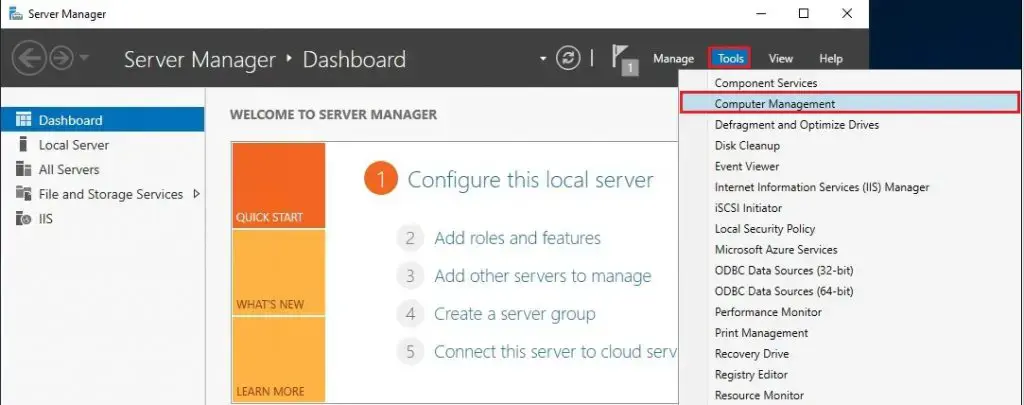
1- Create a replacement user to access the FTP server > open Server Manager > select tools and click on Computer Management.
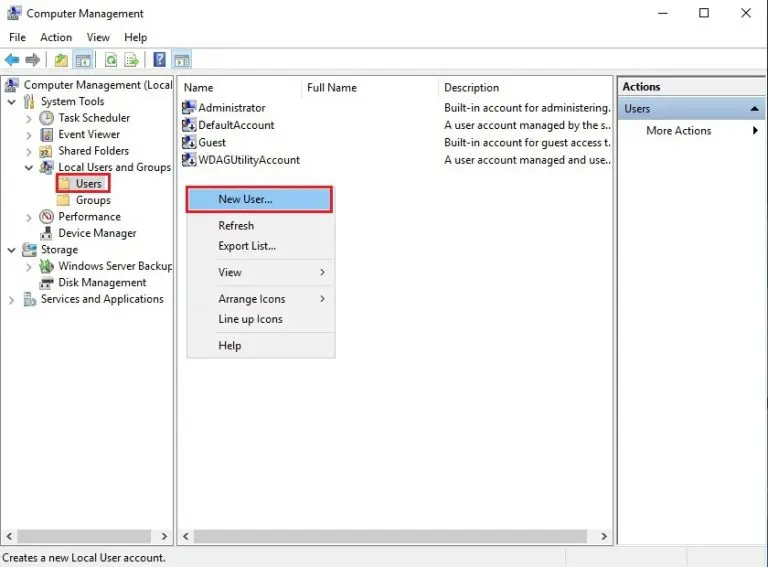
2- Under computer management > Expand Local Users and Groups > select Users > right-click and select New User.
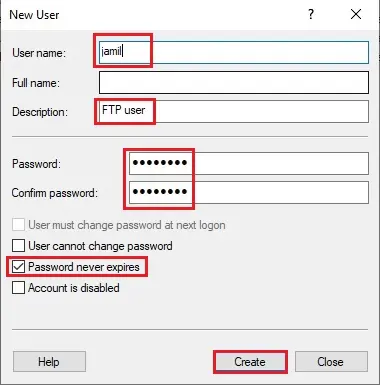
3- Type user name, Description, and Password, select Password never expires, and click create.
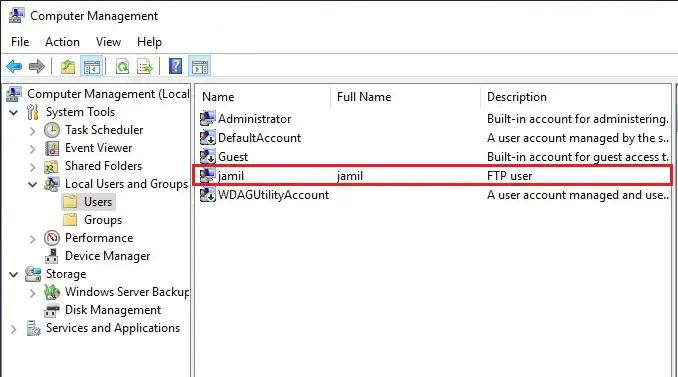
4- Now, a new user has been created.
How to Create a replacement Group for local users and computers.
1- After creating a user,> Now right-click on Groups under Users and Groups and click new group.
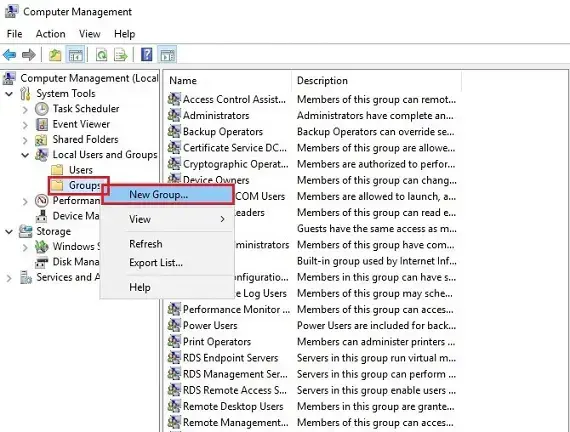
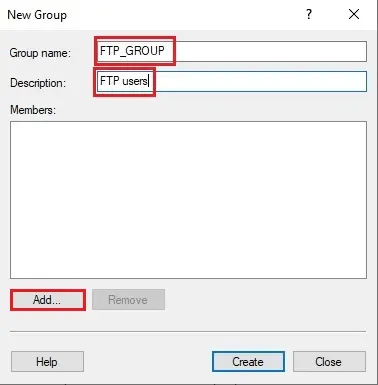
2- In the Group Name field, type the group’s name> a Description and click the Add button to add a user.
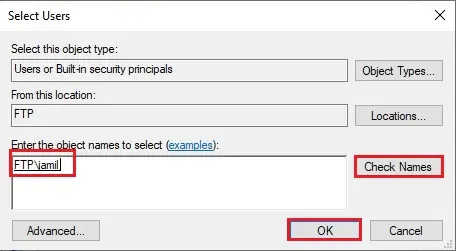
3- Enter a character under the object names to select field > click Check Names If Windows users exist > then click Ok.
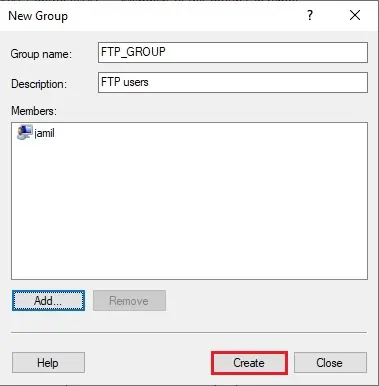
4- After the user is added > Select Create button to create a group.
Step by step Creates an FTP site in the IIS Manager server 2019.
1- Open IIS Manager > select Tools and Internet Information Service (IIS) Manager.
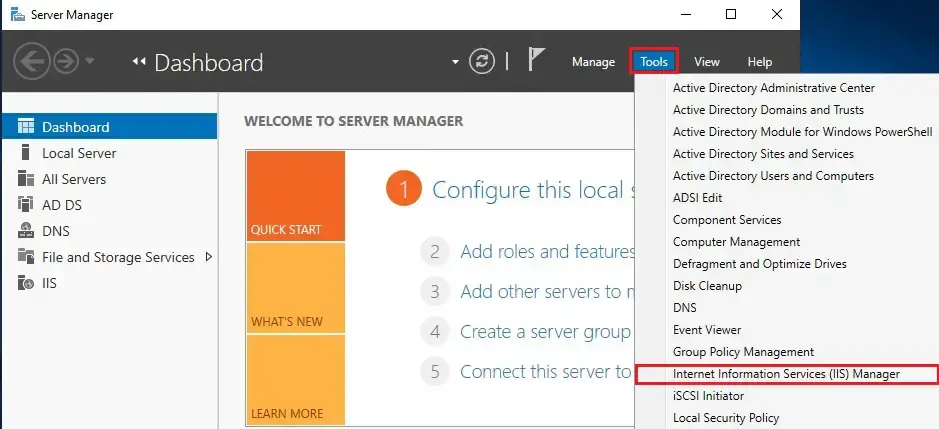
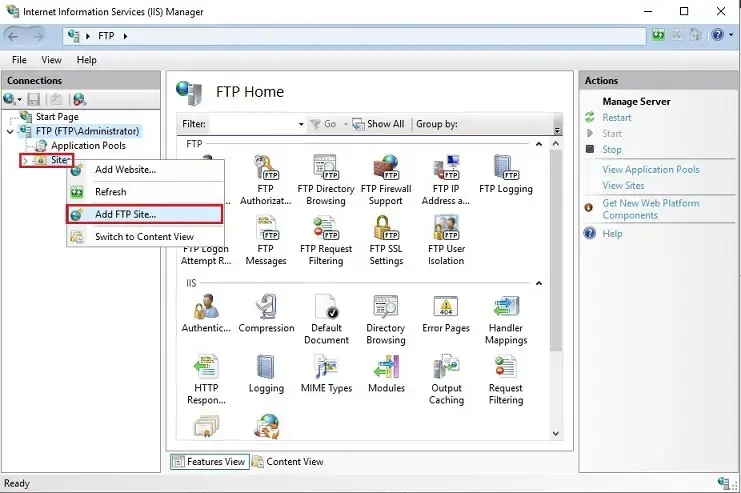
2- Expand your FTP server, right-click Sites, and Add FTP Site.
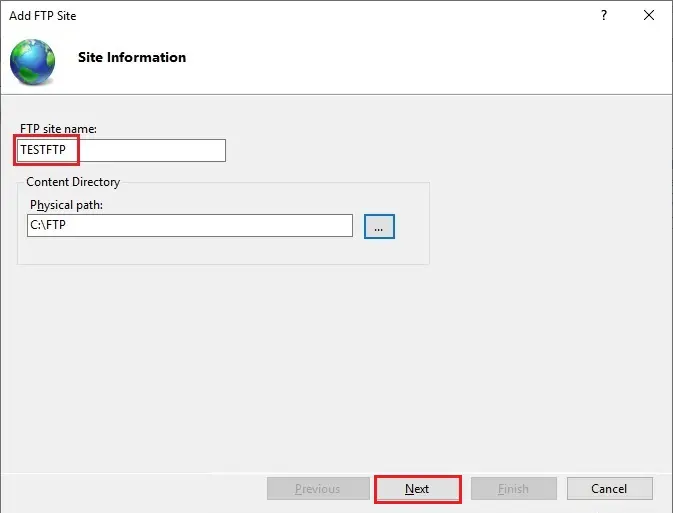
3- Enter the FTP site name and path to the directory and click next.
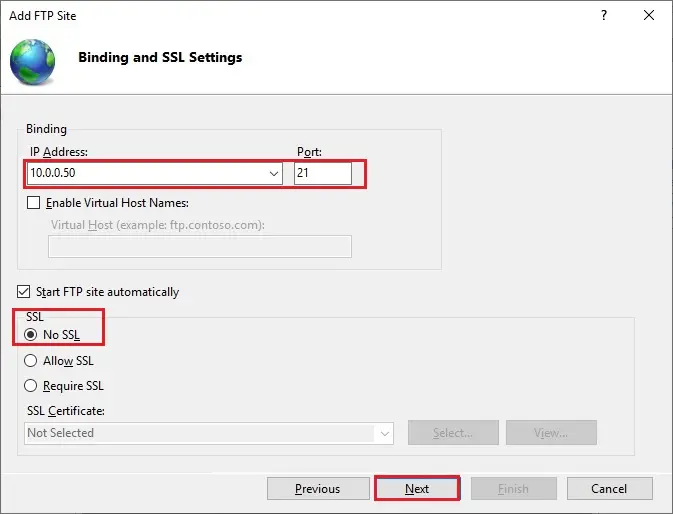
4- type your IP address in the IP Address field, Port, for encryption, select No SSL and click next.
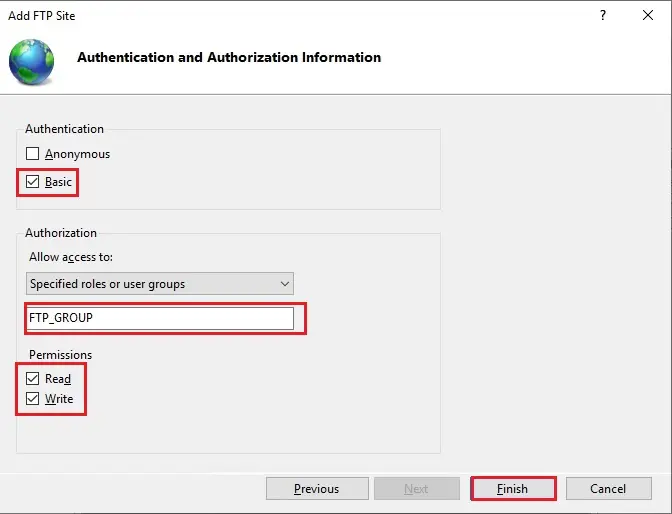
5- Under Authorization, select Basic > Specified roles or groups > type your FTP group name for users > choose read and write permissions and click Finish.
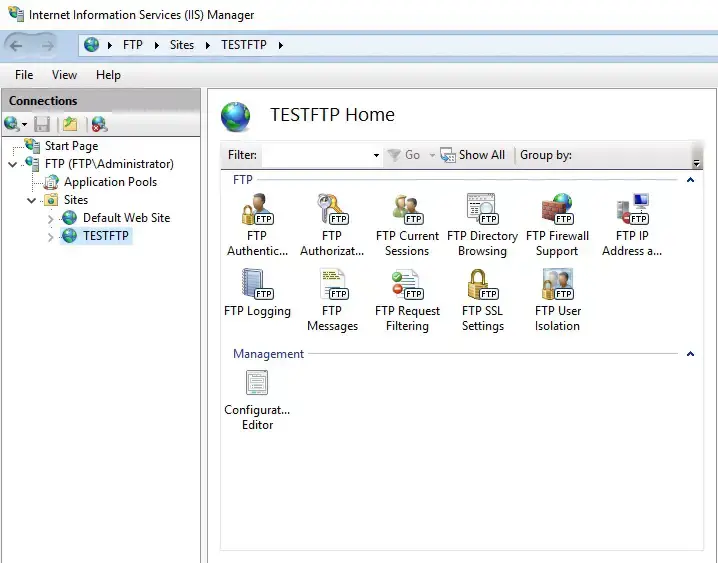
6- Now, my website is showing in the tree structure of the Windows web server.
How to add FTP virtual directory and add permission
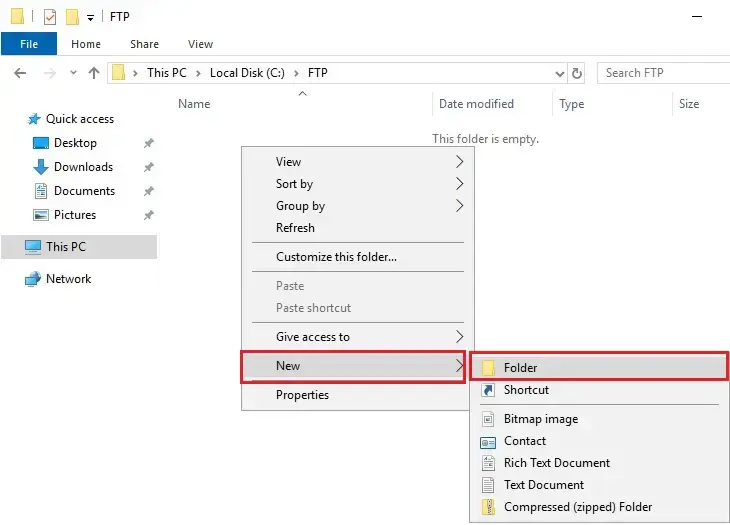
1- Open This PC > open Local Disk (C) > open FTP directory > right-click, select New and click Folder to create a subdirectory.
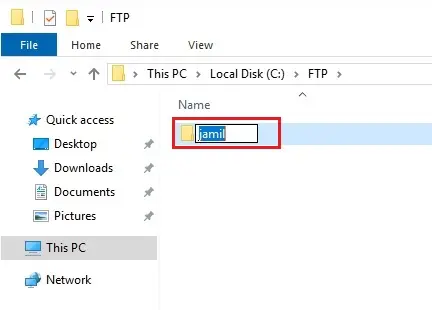
2- Type a subdirectory name and press enter.
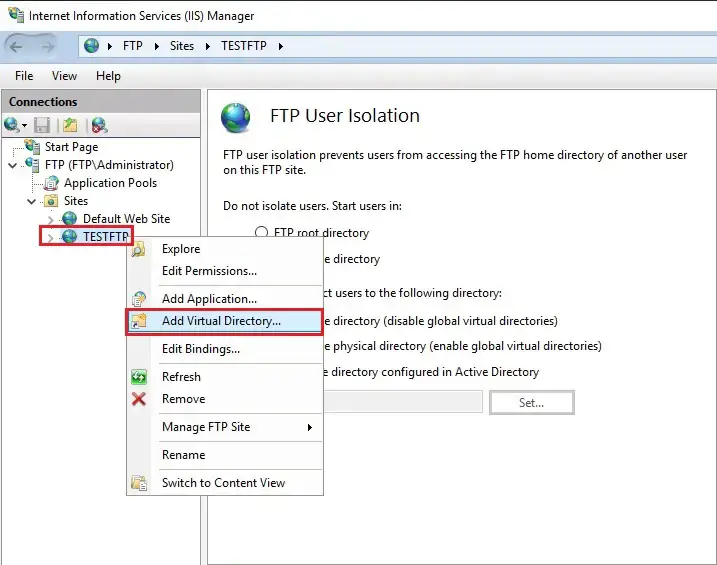
3- Right-click on your FTP site and select Add Virtual Directory.
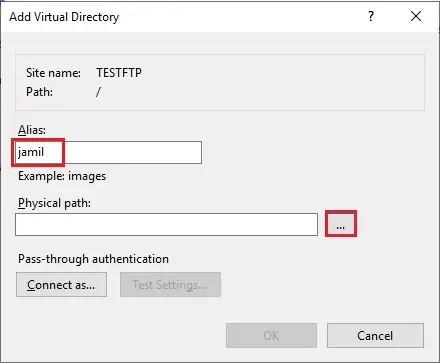
4- In the Alias field, type a name and select … to add the user directory path,
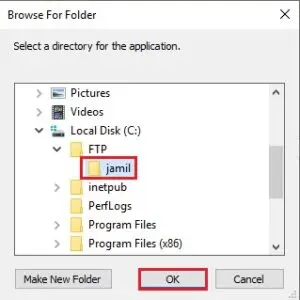
5- Expand Local Drive (C) > FTP directory > select the subdirectory the one you have created and click ok.
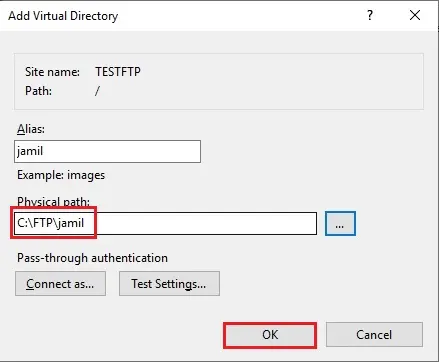
6- After adding a virtual directory path, click ok.
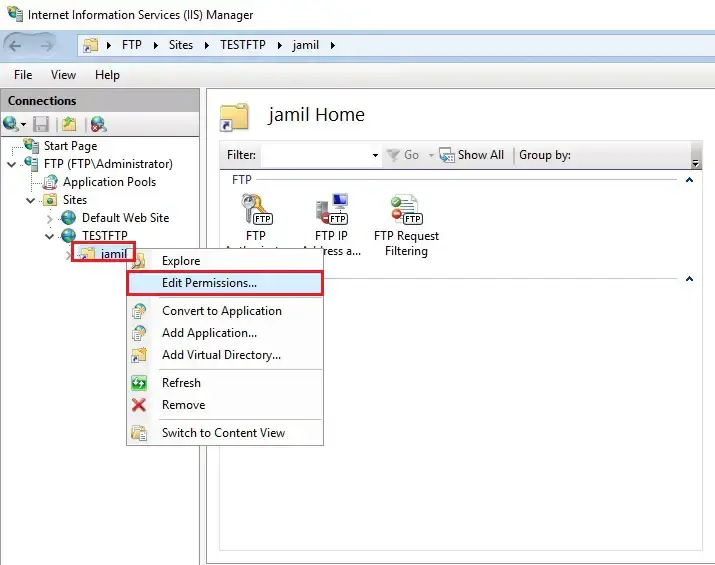
7- To configure permissions in IIS Manager > right-click on a subdirectory (for example, Jamil) and select edit Permission.
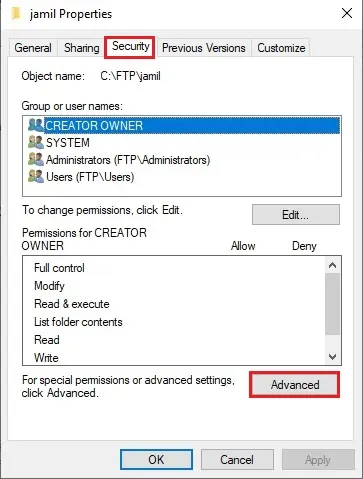
8- Click on the Security tab and click the Advanced button.
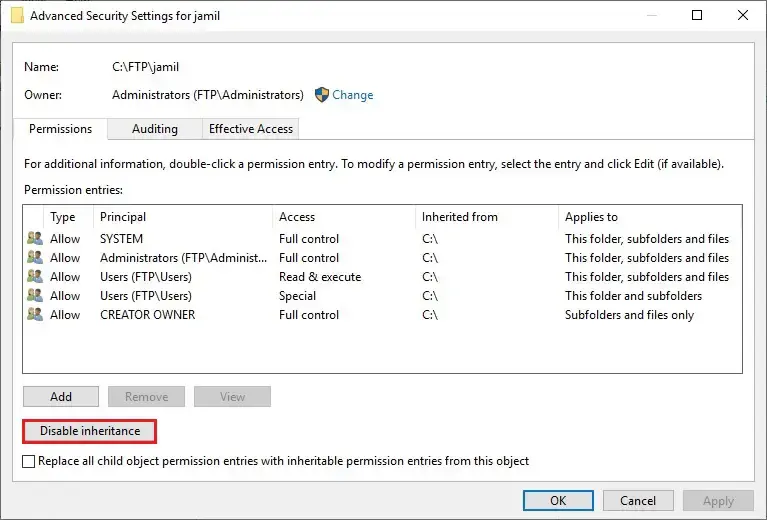
9- Under advanced security settings and click the Disable inheritance button.
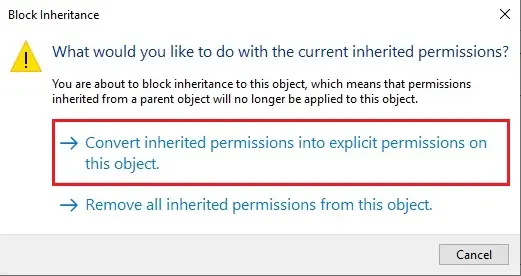
10- Select convert inherited permissions into explicit permission on the object.
11- After enabling inheritance, click ok.
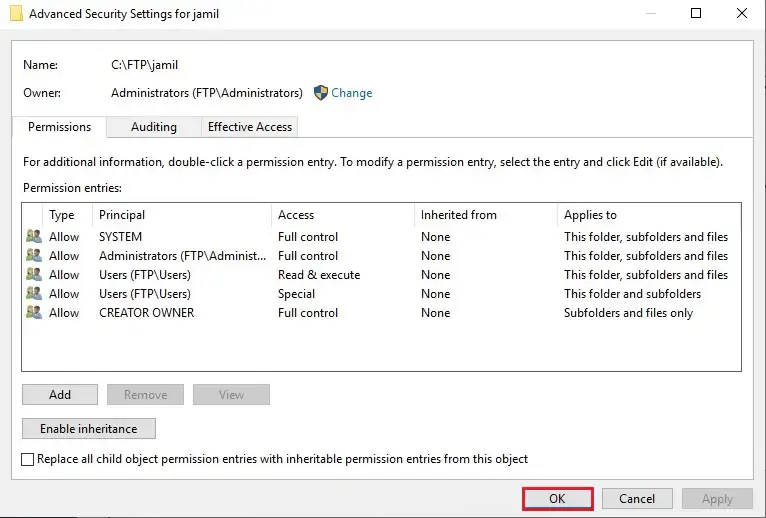
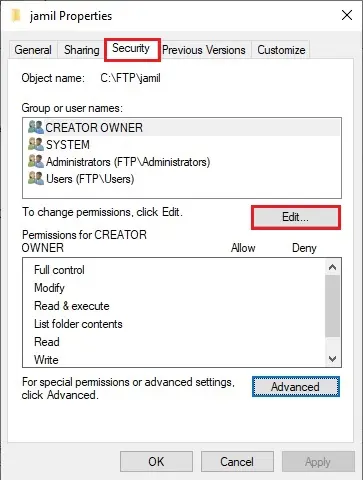
12- Go back to the Security tab and click on the Edit button.
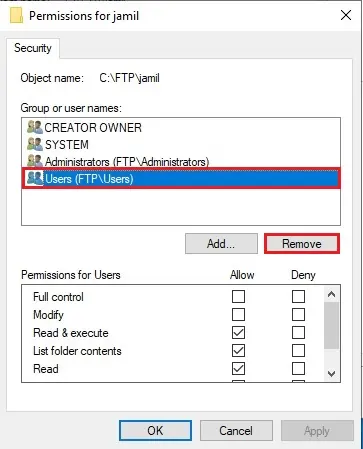
13- Select the Users group in which all users are located and click the Remove button. After removing all users, only the directory owner has access to it.
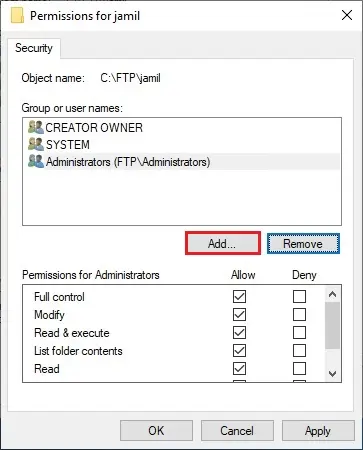
14- We need to add a Windows user with full access to the directory. Click the Add button.
15- Type the username of the virtual directory > click Check Names and click Ok.
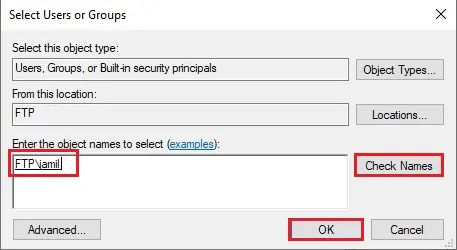
16- Next, we need to permit complete control of the guide> Select the created user, check all fields Allow (Permissions), and click ok.
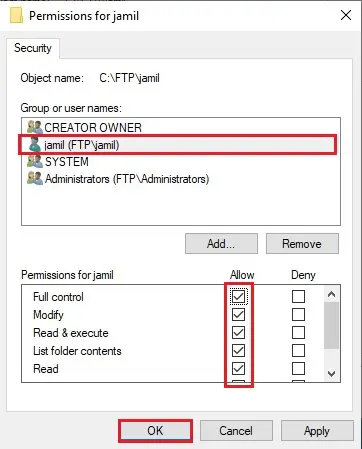
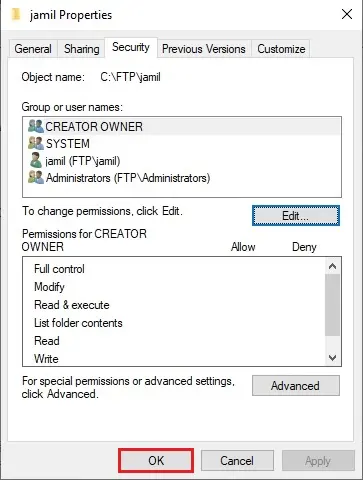
17- Click Ok.
How to set up FTP User Isolation
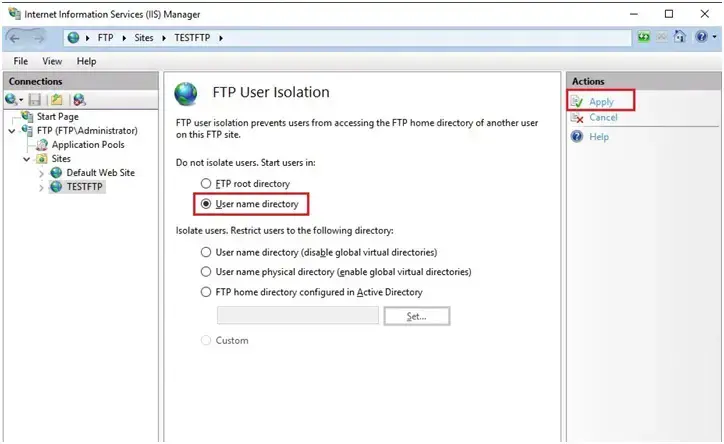
1- Now, we need to set up an isolation FTP For each user to get to their directory and not have access to other files after connecting to the server and selecting FTP User Isolation.
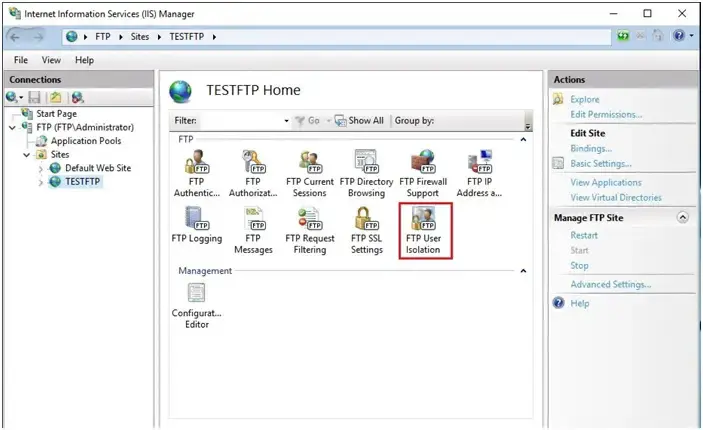
2- Select the user name directory and click Apply under the Action menu.
How to allow FTP port in windows firewall
You need to configure the firewall for an external connection to the FTP server.
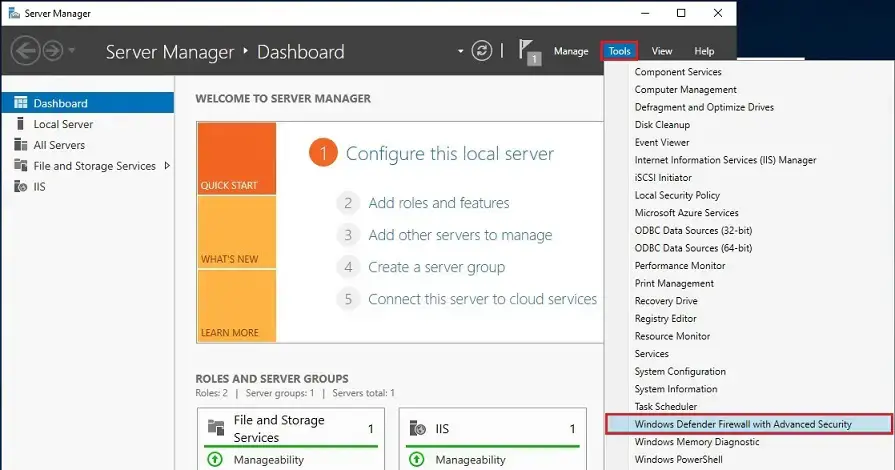
1- Open Server Manager > select Tools and Windows Defender Firewall with Advanced Security.
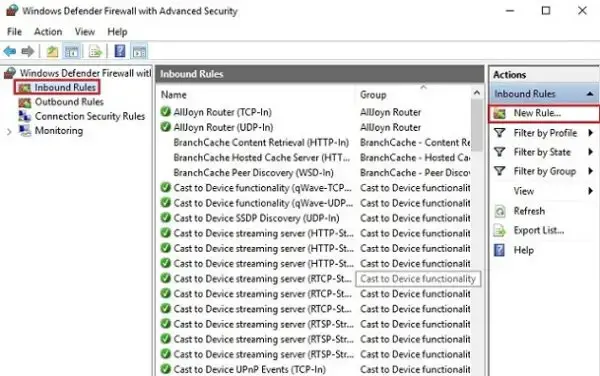
2- Select Inbound Rules and a particular New Rule under the Action menu.
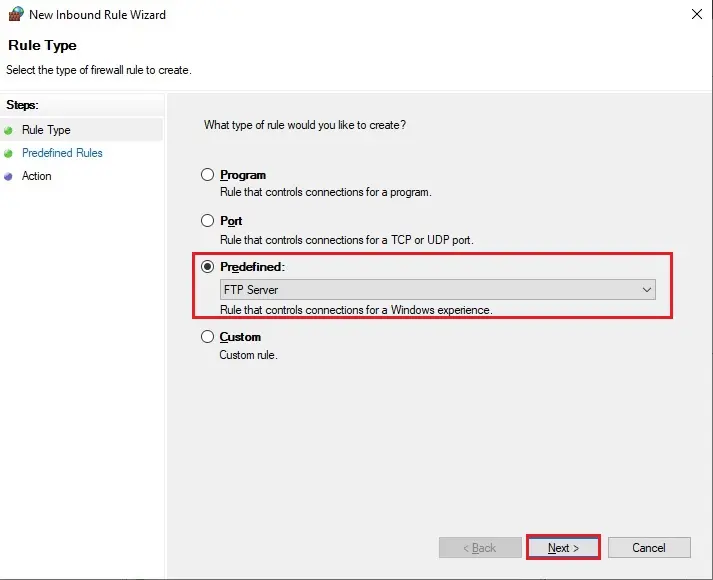
3- Select Predefined, select FTP Server from the drop-down list and click next.
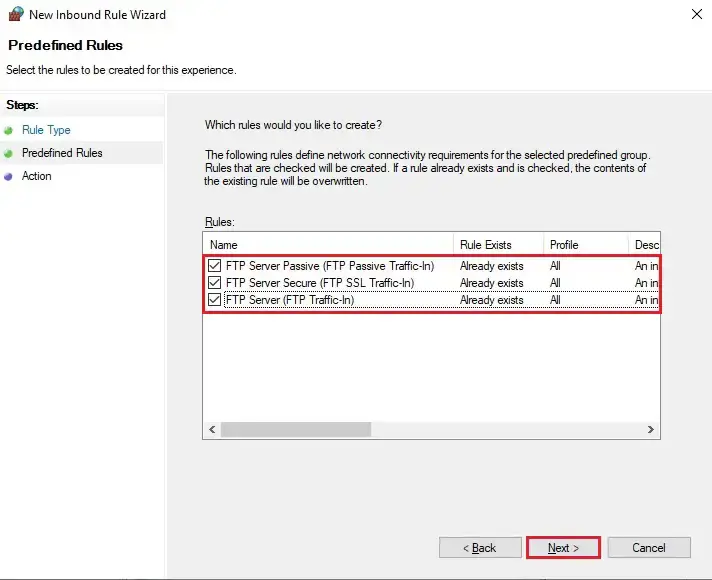
4- Check all the predefined rules and click next.
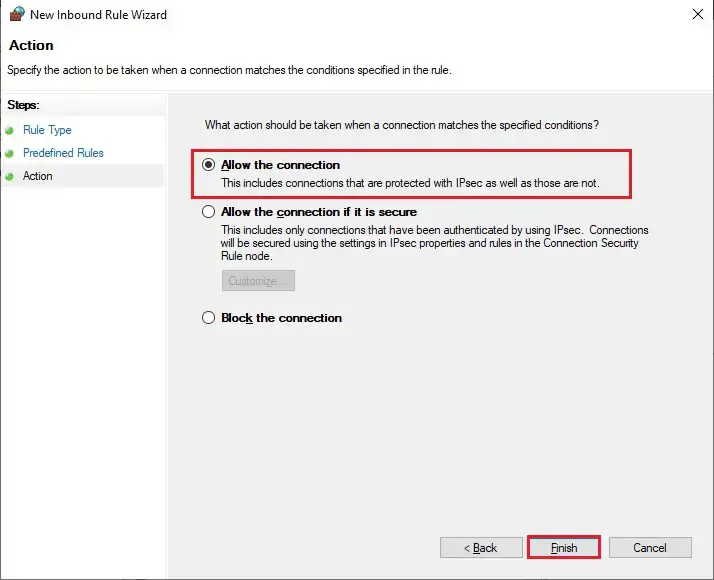
5- Select Allow the connection, and click Finish. For these rules to take effect and restart the server.
How to Access an FTP Server in Windows Explorer and Internet Explorer
You can set up an FTP server in many ways, for example, through the standard Windows utility, Explorer, or the FileZilla program.
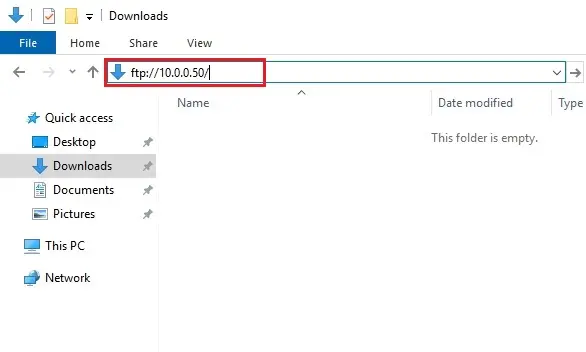
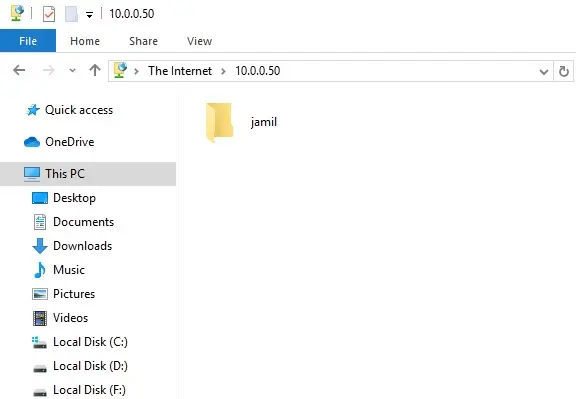
1- I am connecting through Windows Explorer. Type FTP address in the address bar and press enter: For example, (my FTP server address is – ftp://10.0.0.50)
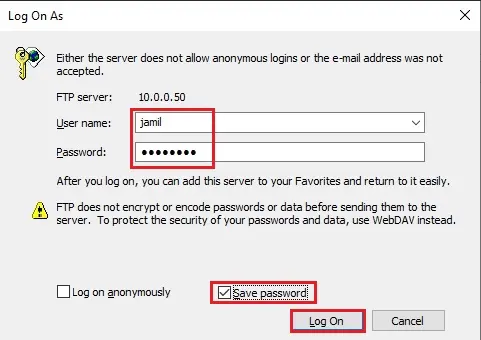
2- Type user name, Password, check the save password box, and click Log On.
3- You will see the contents of the FTP server folder.
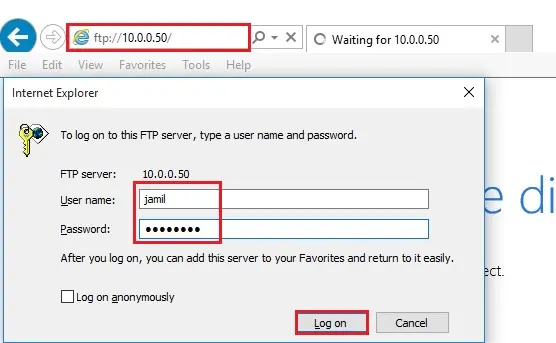
4- Now, I am connecting through Internet Explorer. Type FTP address in the address bar and press enter: For example, (my FTP server address is – ftp://10.0.0.50).
Type a user name, Password and click Log On.
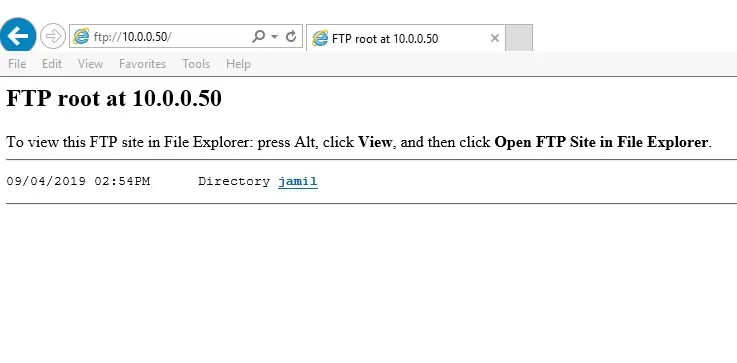
5- You will see the contents of the FTP server folder.
How to map an FTP network location or a web share location in File Explorer.
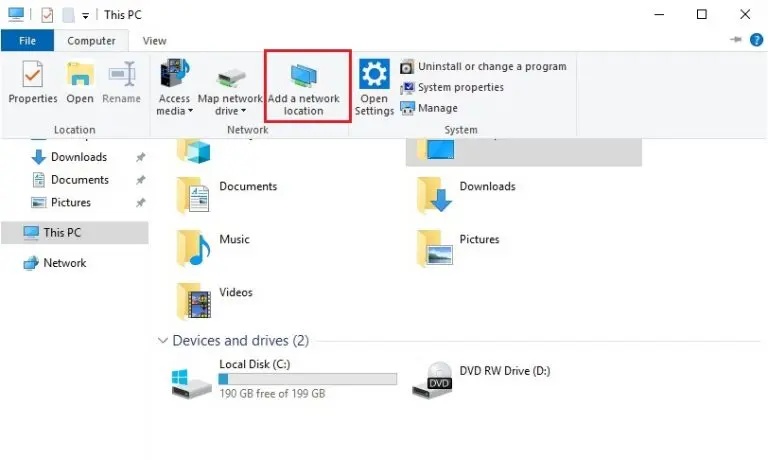
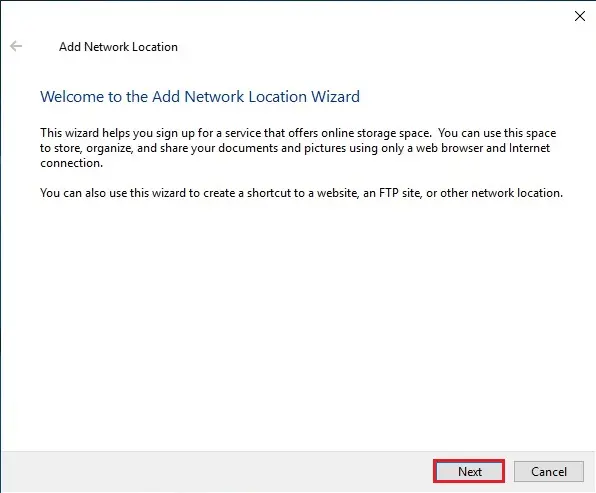
1- Open This PC in Windows Explorer, and select Add a network location to open the Add Network Location Wizard.
2- Click Next.
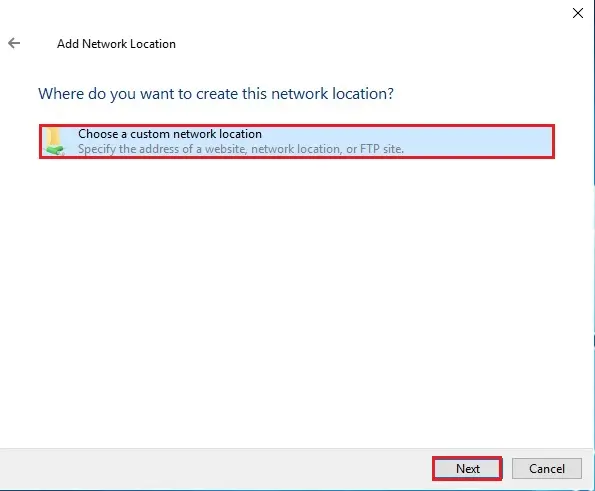
3- Select Choose a custom network location and click on Next.
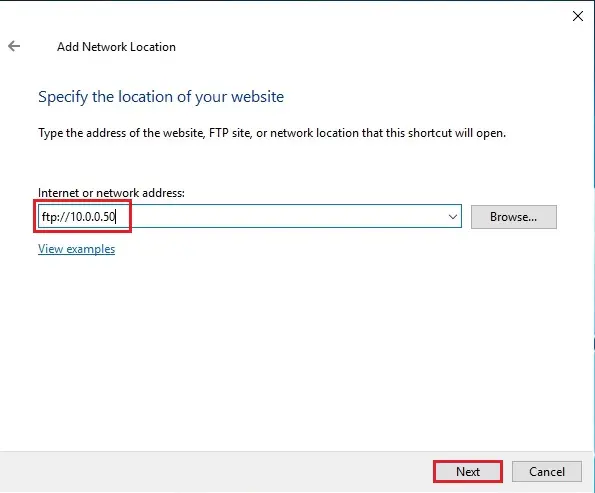
4- Type your FTP address (Ex. ftp://10.0.0.50) and click next.
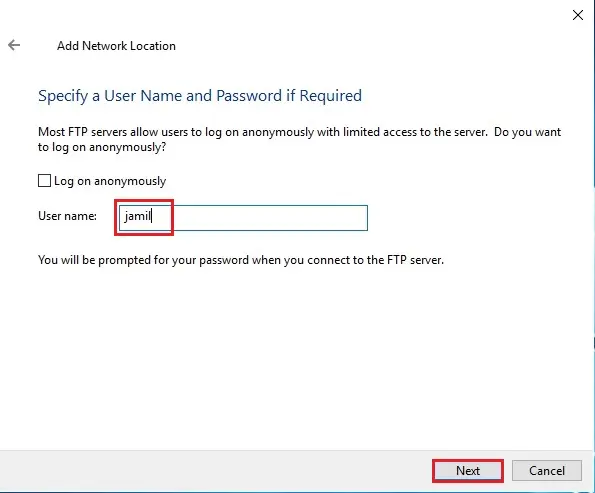
5- Uncheck Log on anonymously, type your user name provided as your FTP login credentials, and then click next.
6- Type a name for the Network location and click Finish.
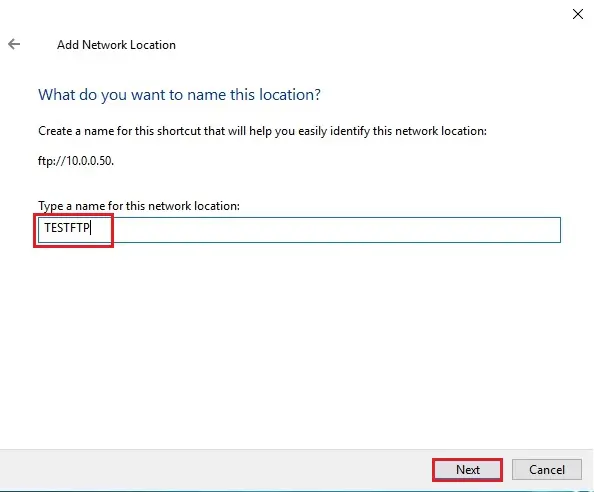
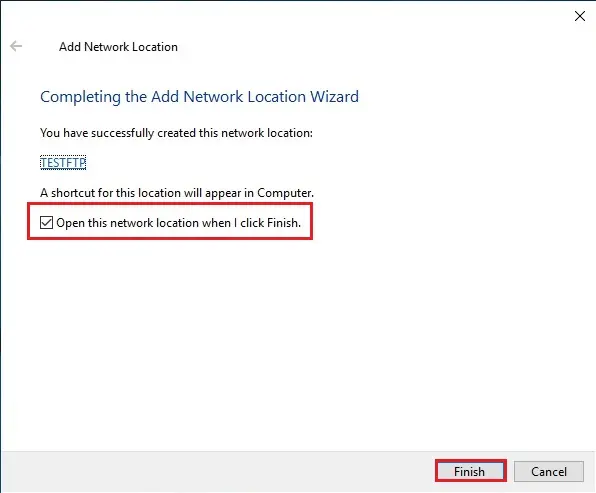
7- Check the box Open this network location when I click Finish.
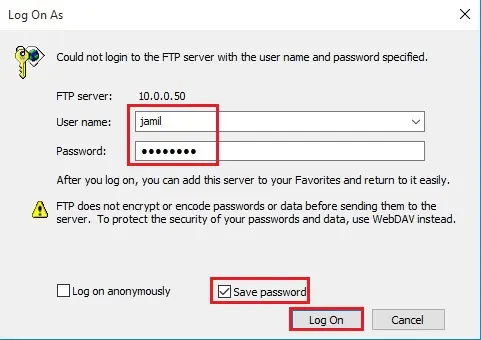
8- Type your Password in the password field, click on Save Password and click Log On to test your connection. This is the second last step in FTP setup.
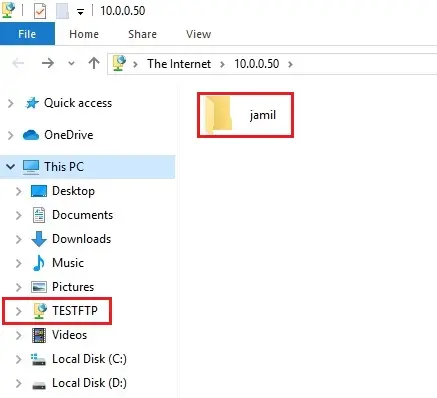
9- After setting up FTP Server, you can see the FTP folder.
I think I did my best to Provide valuable information to you about How to set up FTP Server on Windows Server. I assure you that if you read this article entirely, You will be able to set up FTP on Windows Server.
For more information, click here


No Comments
I like reading through an article that can make men and women think. Also, thanks for allowing me to comment!
Thank you
Quite intriguing subject, appreciate it for posting.
Thank you
I really like and appreciate your article post. Much thanks again. Really Cool.
Dear Tugrow, thank you for your feedback
These are actually great ideas in on the topic of blogging.
You have touched some fastidious things here. Any way keep up writing.
Keep up the great work, I read a few contents on this site and I believe that your site is very interesting and contains sets of fantastic information.
Thank you
I have read so many articles or reviews regarding the blogger lovers however this
piece of writing is truly a good paragraph, keep it up.
Thank you
I am so grateful for your blog. Really looking forward to read more. Much obliged.
Thank you
I’m amazed, I must say. Rarely do I come across a blog that’s both equally educative and amusing, and let me tell you, you’ve hit the nail on the head. The problem is something not enough men and women are speaking intelligently about. I am very happy I stumbled across this in my search for something regarding this.
Thank you for your feedback
Heya, I’m for the first time here. I came across this board and I in finding It truly useful & it helped me out much. I hope to present something back and aid others such as you helped me.
Dear Nestor, thank you for your feedback
I just want to tell you that I am just newbie to weblog and honestly savored you’re blog site. Very likely I’m planning to bookmark your blog . You amazingly come with very good articles. Regards for sharing with us your website.
Thank you