Install Active Directory in Microsoft Windows Server 2016.
Install Active Directory Server 2016
Requirements.
Administrator account has a strong password
Static IP is configured
Latest windows updates are installed
A firewall is turned off
Rename Computer (optional)
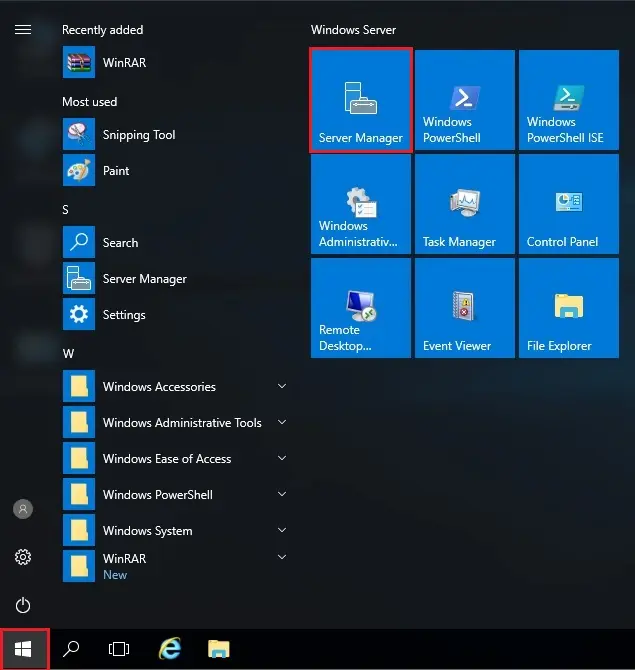
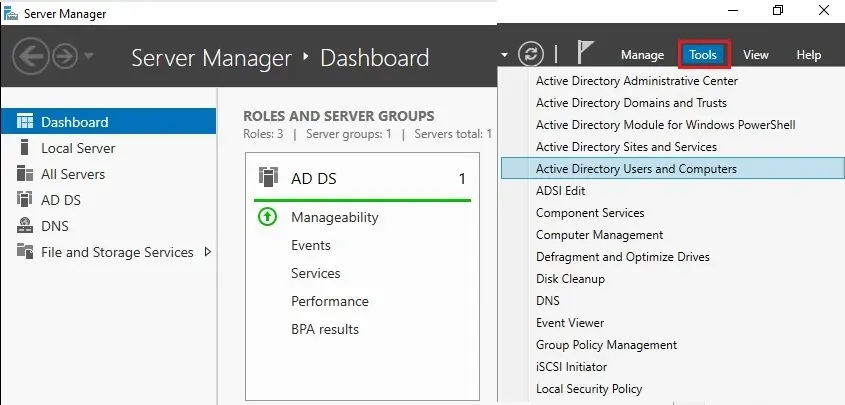
1- Click Start Button and choose the Server Manager.
![server menu](https://xpertstec.com/wp-content/uploads/2019/06/server-menu.webp)
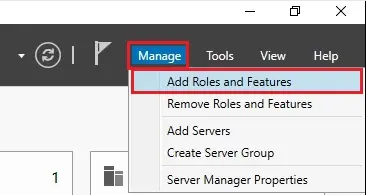
2- From the Server Manager Dashboard, Select Manage and choose Add Roles and Features.
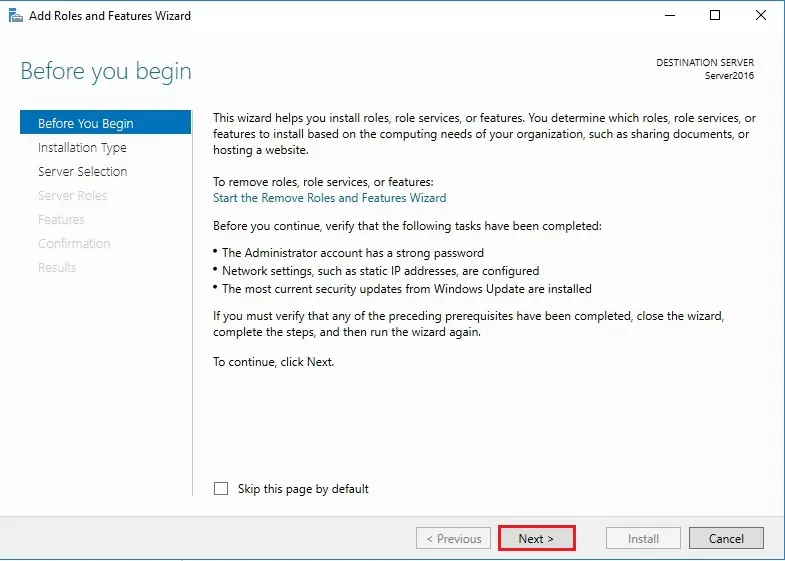
![windows server 2016 dashboard tools](https://xpertstec.com/wp-content/uploads/2019/06/windows-server-2016-dashboard-tools-2.webp)
3- Click Next.
![add roles and features wizard](https://xpertstec.com/wp-content/uploads/2019/06/add-roles-and-features-wizard-2.webp)
4- Select the Role-based or feature-based installation and click on next.
![add role based and feature based](https://xpertstec.com/wp-content/uploads/2019/06/add-role-based-and-feature-based.webp)
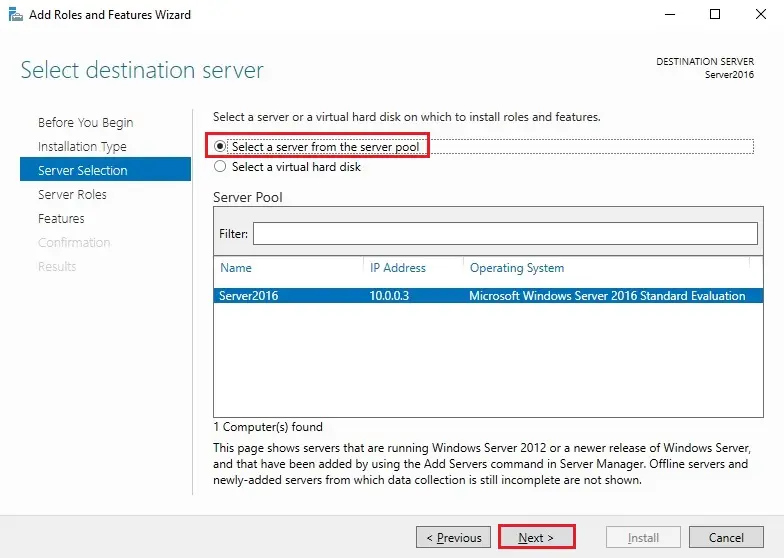
5- Select a server from the server pool on which you would like to configure active directory and click on next.
![server 2016 server selections](https://xpertstec.com/wp-content/uploads/2019/06/server-2016-server-selections.webp)
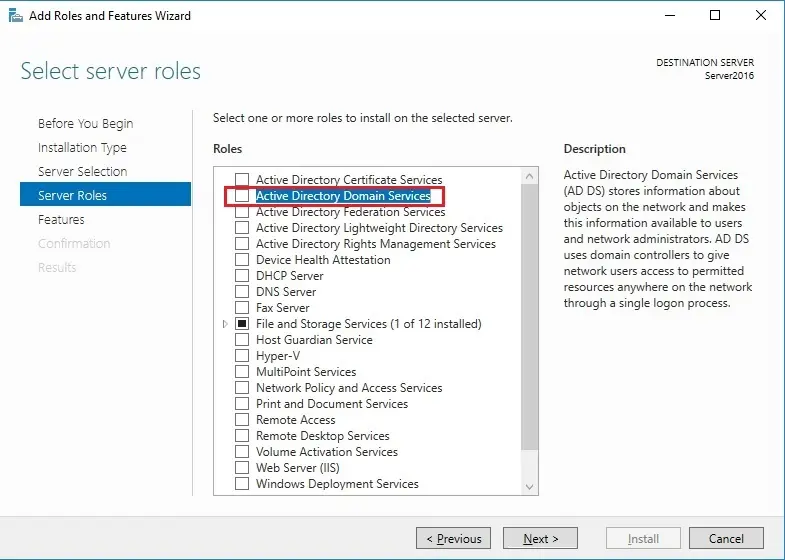
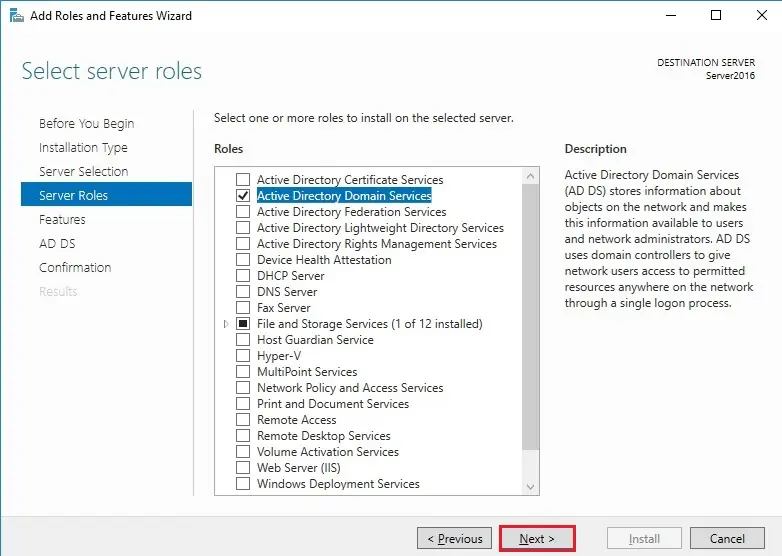
6- Select the Active Directory Domain Services from the server roles page.
![server 2016 role active directory domain services](https://xpertstec.com/wp-content/uploads/2019/06/server-2016-role-active-directory-domain-services-1.webp)
7- A Windows will popup be showing additional require features and click on Add Features.
![add required features](https://xpertstec.com/wp-content/uploads/2019/06/add-required-features.webp)
8- After adding the active directory domain services features, click next.
![role active directory domain services](https://xpertstec.com/wp-content/uploads/2019/06/role-active-directory-domain-services.webp)
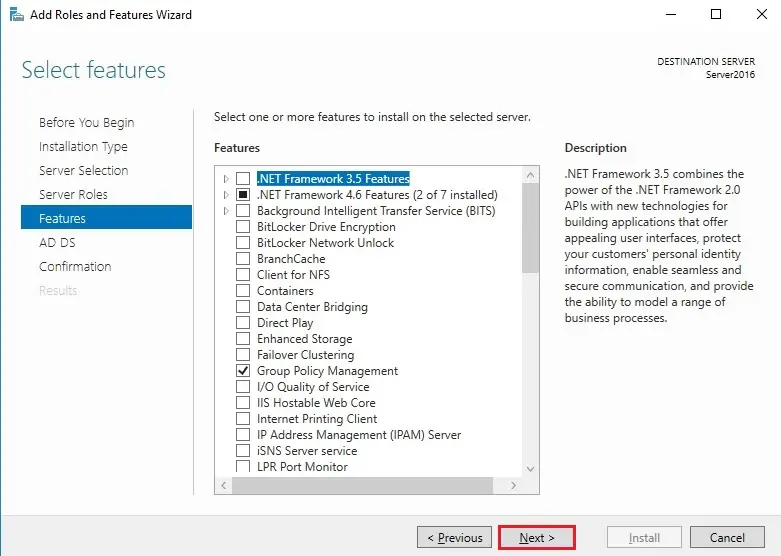
9- Default settings, click next.
![server features](https://xpertstec.com/wp-content/uploads/2019/06/server-features.webp)
10- Review about Active Directory Domain Services details and click on next.
![server 2016 wizard ad ds](https://xpertstec.com/wp-content/uploads/2019/06/server-2016-wizard-ad-ds-1.webp)
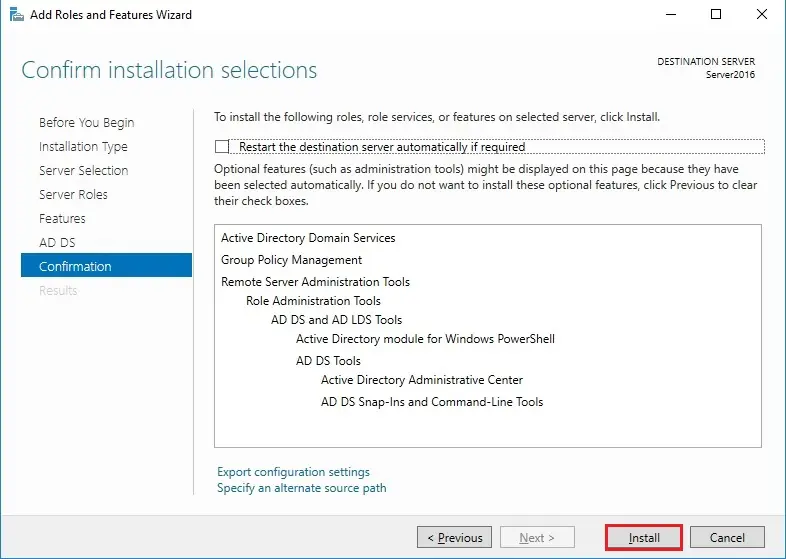
11- Review the active directory installation and click on Install.
![server 2016 confirm installation](https://xpertstec.com/wp-content/uploads/2019/06/server-2016-confirm-installation-1.webp)
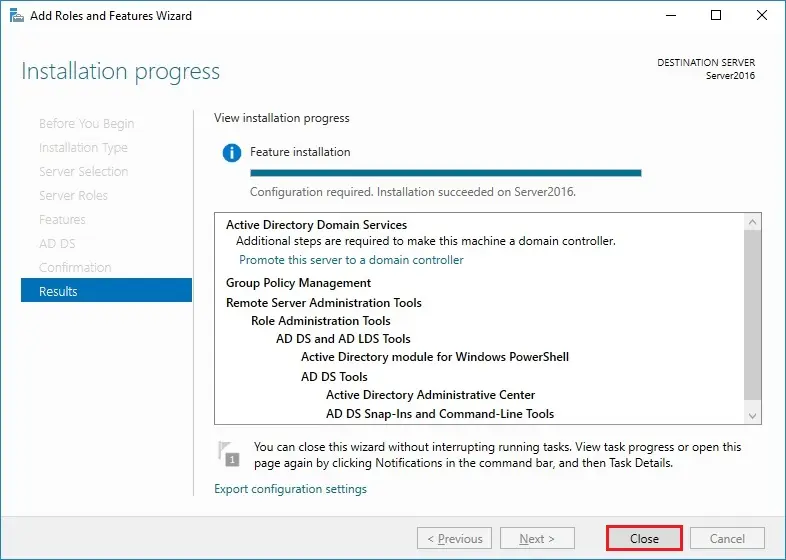
12- Active directory Windows Server 2016 installation completed, then click close.
![server 2016 installation selections](https://xpertstec.com/wp-content/uploads/2019/06/server-2016-installation-selections-1.webp)
Configure Active Directory windows server 2016
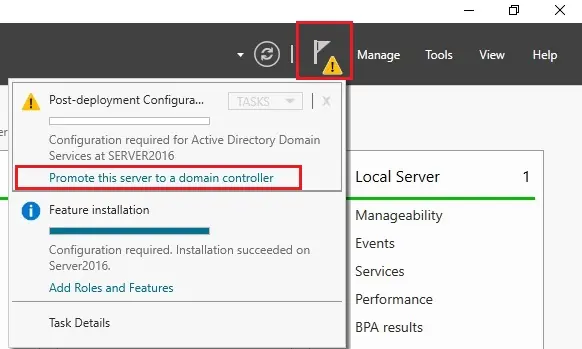
13- From Server Manager click on Notifications, so click Promote this server to a website controller.
![server 2016 promote this server](https://xpertstec.com/wp-content/uploads/2019/06/server-2016-promote-this-server-1.webp)
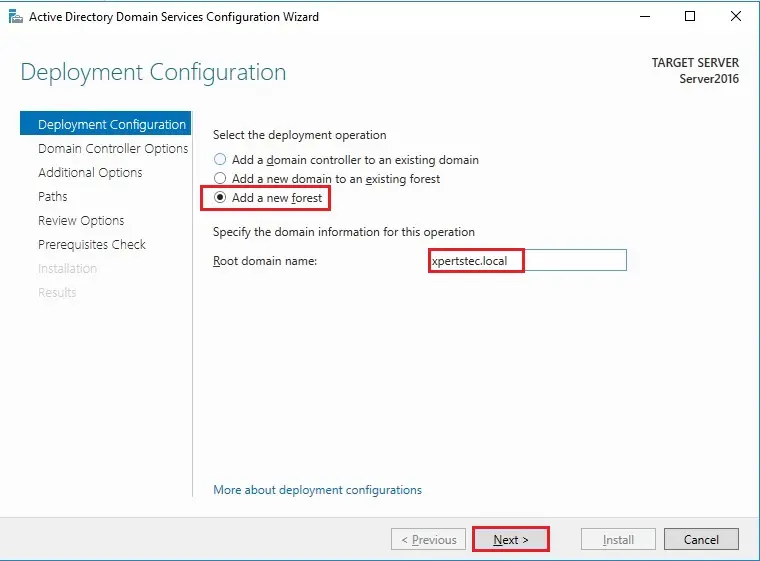
14- Under the deployment operation Select Add a replacement forest enter Root name and then click on next.
![server 2016 deployment configuration](https://xpertstec.com/wp-content/uploads/2019/06/server-2016-deployment-configuration-1.webp)
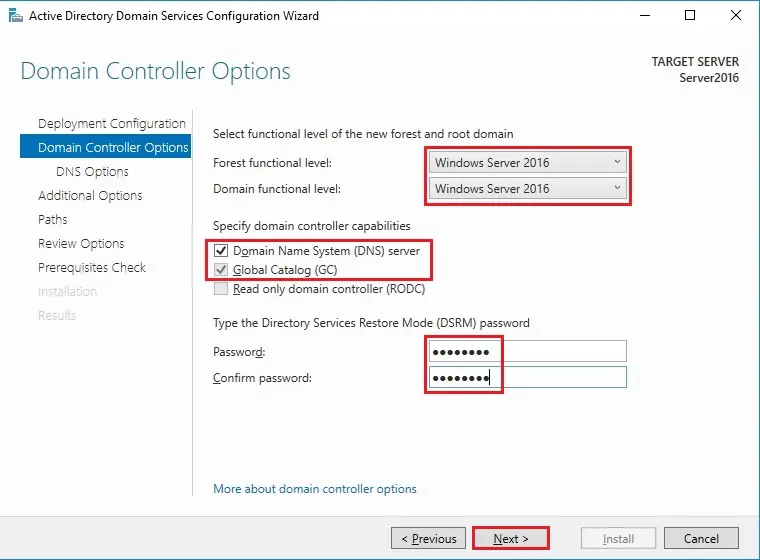
15- Selection forest and domain functional level Windows Server 2016 because of the default level.
Keep the name System (DNS) server and Global Catalog (GC) checked and sort the directory services restore mode (DSRM) password and then click on next.
![server 2016 domain controller options](https://xpertstec.com/wp-content/uploads/2019/06/server-2016-domain-controller-options-1.webp)
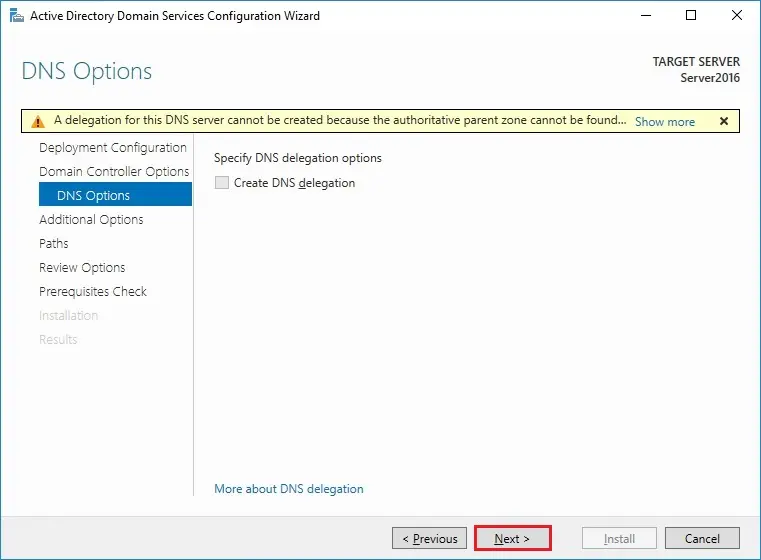
16- Ignore warnings within the DNS options window and then click on next.
![server 2016 dns options](https://xpertstec.com/wp-content/uploads/2019/06/server-2016-dns-options-1.webp)
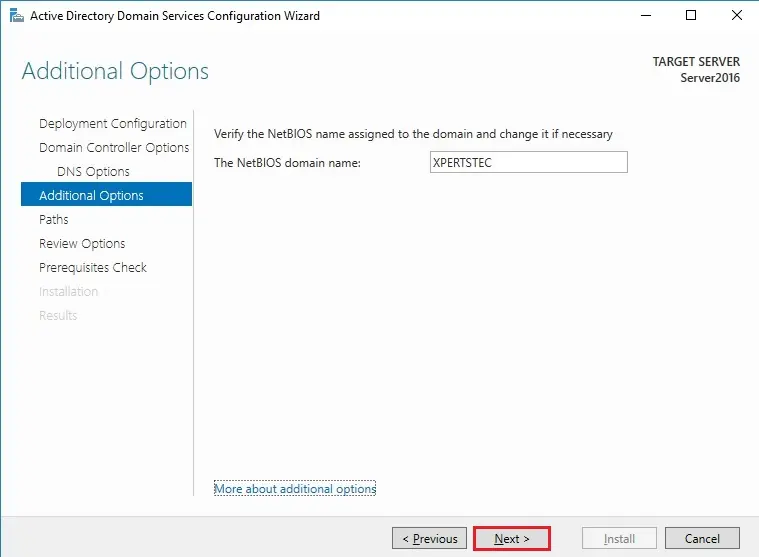
17- within the additional options window, verify the NetBIOS name and then click on next.
![server 2016 additional options](https://xpertstec.com/wp-content/uploads/2019/06/server-2016-additional-options-1.webp)
18- Specify the situation of the AD DS database, log files, and SYSVOL folders and then click on next.
![server 2016 ad ds databases](https://xpertstec.com/wp-content/uploads/2019/06/server-2016-ad-ds-databases-1.webp)
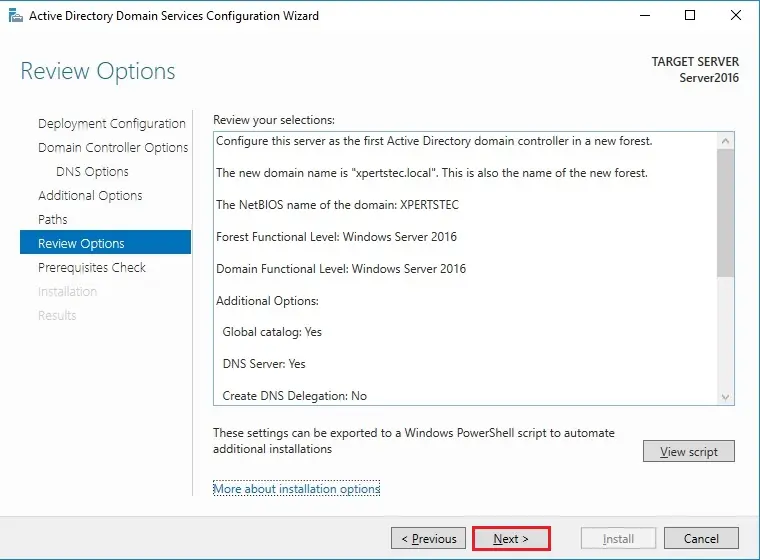
19- Within the review options window, review name, NetBIOS name, and Global catalog, etc. and then click on next.
![server 2016 review options](https://xpertstec.com/wp-content/uploads/2019/06/server-2016-review-options-1.webp)
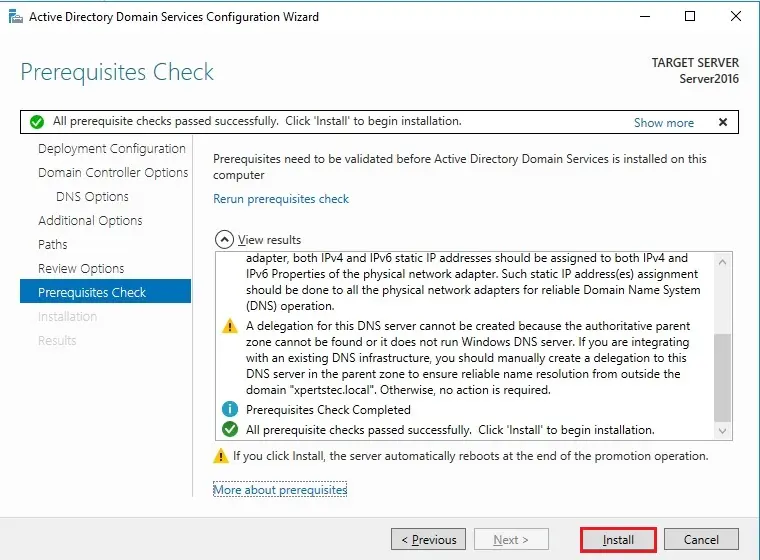
20- When all prerequisite is successfully passed, so click the Install button to start out active directory installation.
![server 2016 prerequisites check](https://xpertstec.com/wp-content/uploads/2019/06/server-2016-prerequisites-check.webp)
21- When the installation completes, you’ll be prompte that your machine successfully configures as a website controller and so can be rebooted automatically.
![server manager tools](https://xpertstec.com/wp-content/uploads/2019/06/server-manager-tools-1.webp)
For more details click here