
The public folder is a feature of Exchange Server you can share information with others. Configuring Public folders exchange 2013, Outlook offer you an excellent place to gather, organize, and share information about particular topics or projects within a corporation.
Configuring Public Folder Exchange 2013
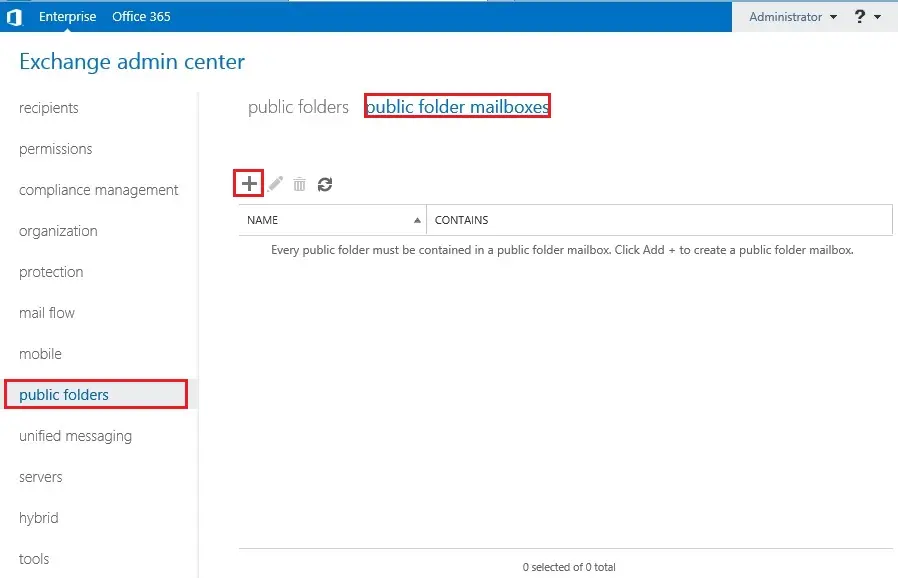
1- Login in Exchange admin center > left side select public folders > select Public Folder Mailboxes and then select the + add
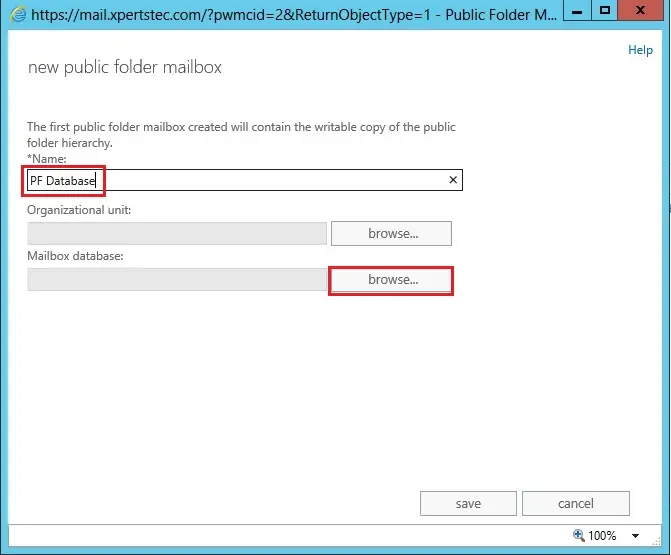
2- In the Name box you can type a name of your choice (PF Database) > under Mailbox Database click the browse button.
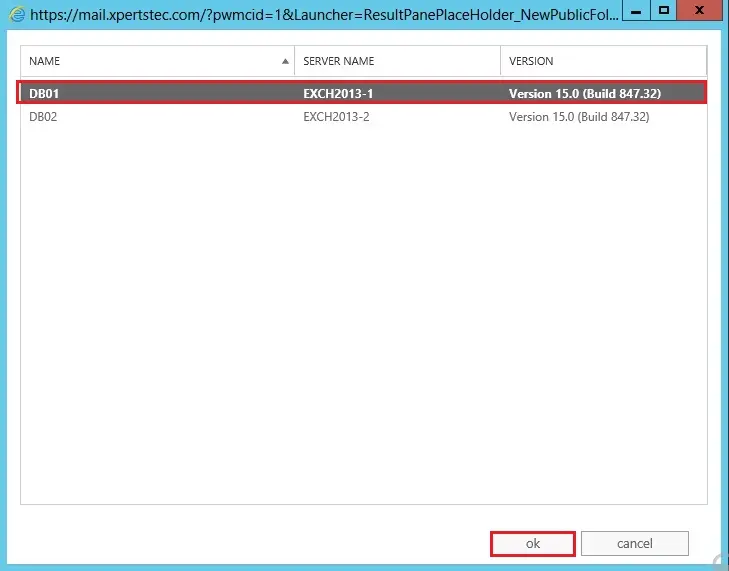
3- Select the database (I am selecting DB01) and then click on ok.
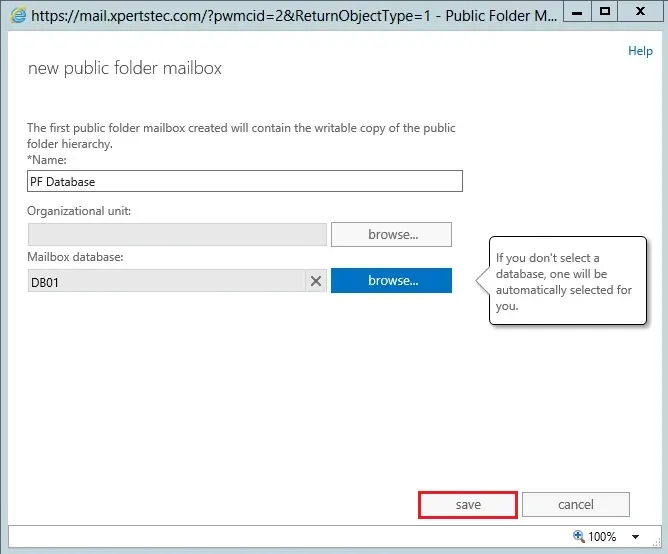
4- So, click Save.
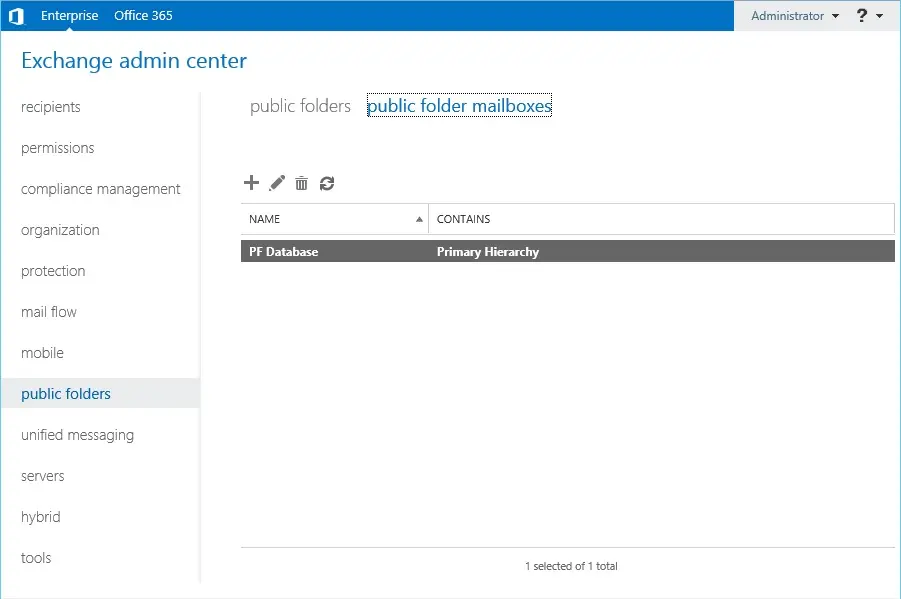
5- Public folder mailbox “PF Database” created successfully.
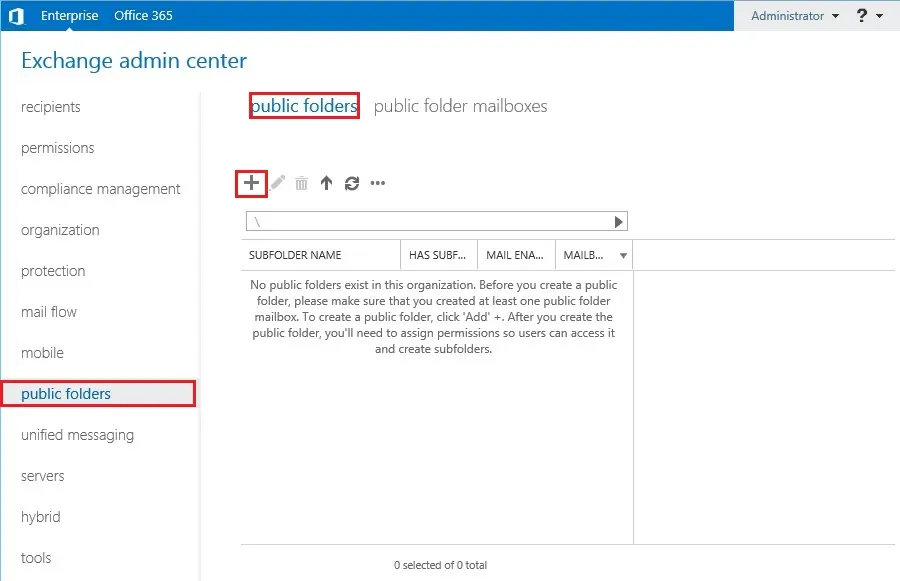
6- Select the public folder and then click + add.
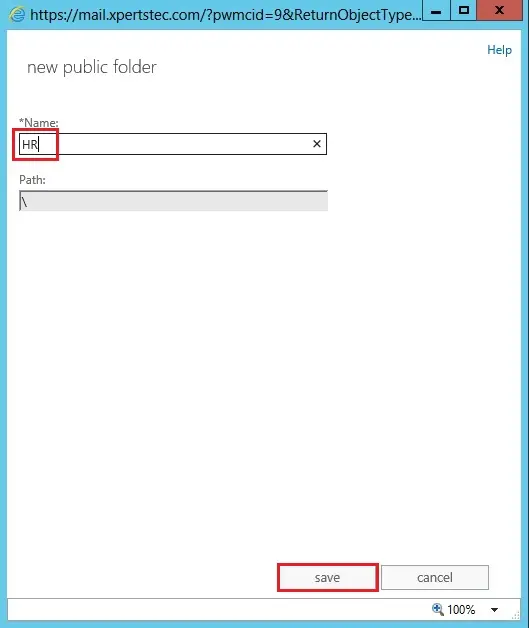
7- Type a public folder name and then click Save.
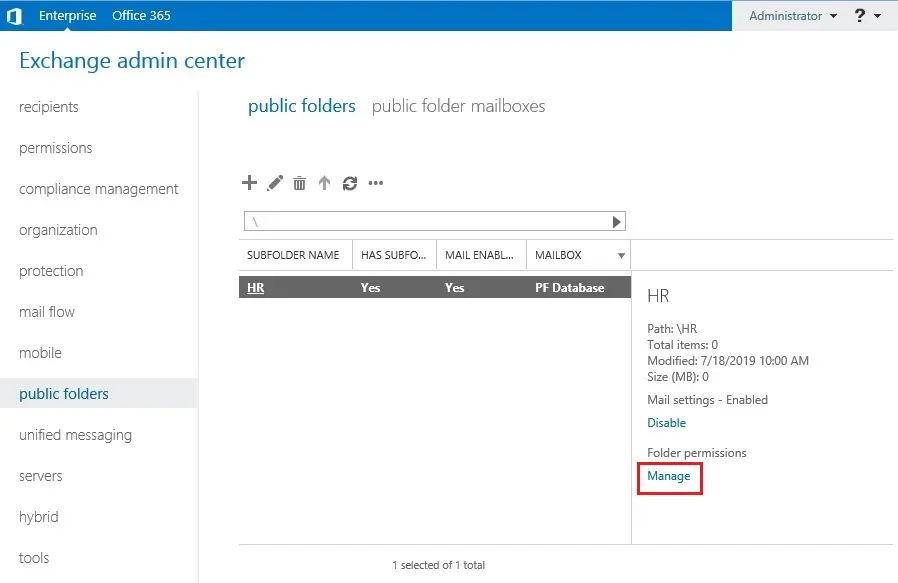
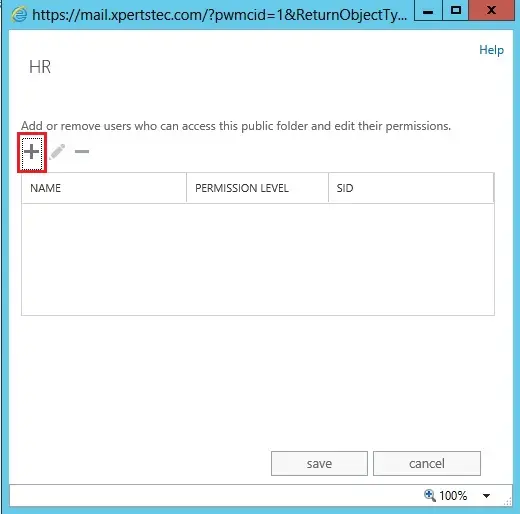
8- Public Folder successfully created and then click manage.
9- Select + add.
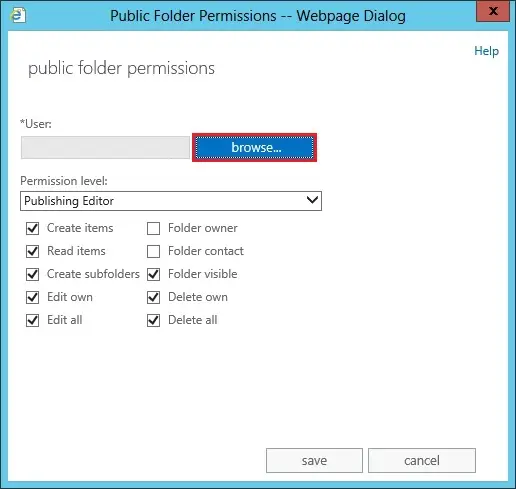
10- Click the Browse button.
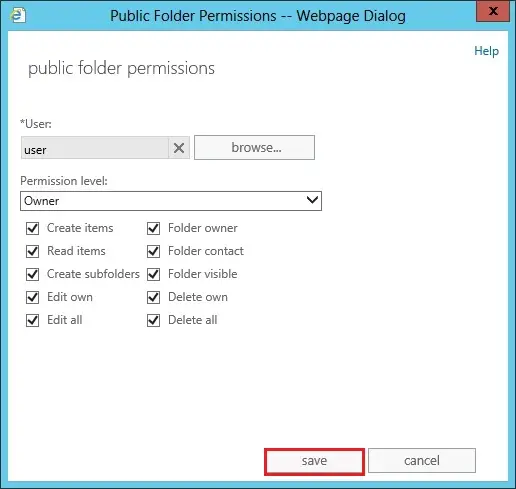
11- Select user you want to allow permission and click ok.

12- Select permission level and click save.
13- Click Save.
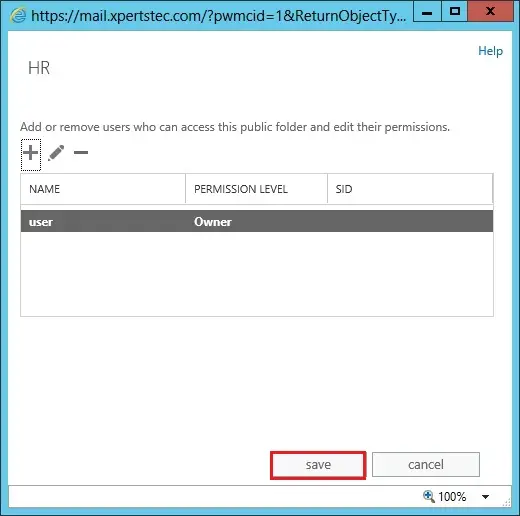
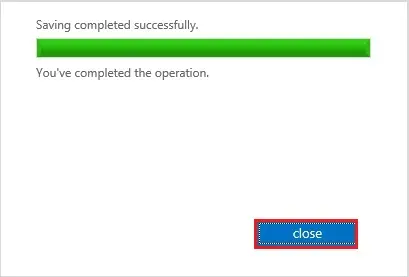
14- Permission added successfully and click close.
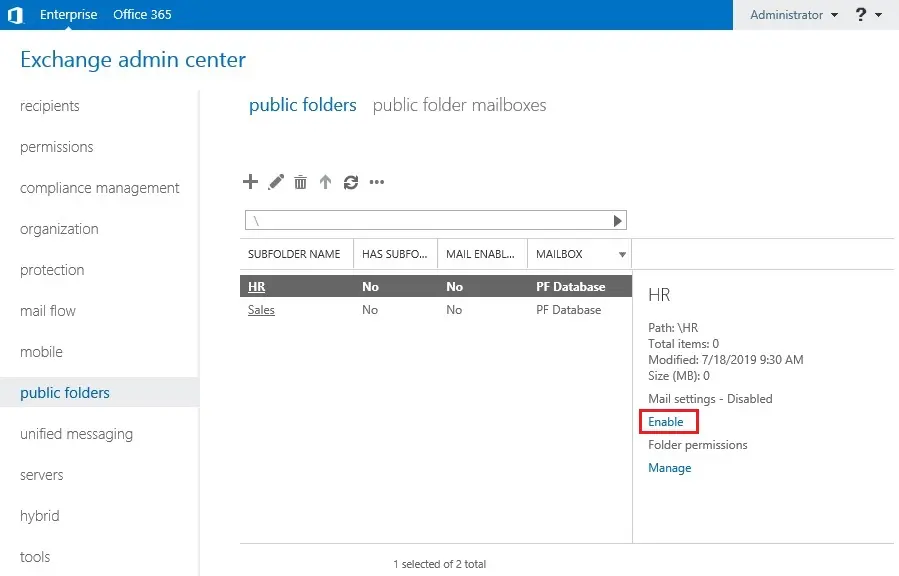
15- Under public folder mail settings select Enable.
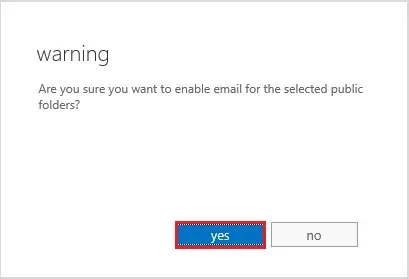
16- Warning message while selecting Enable and click yes.
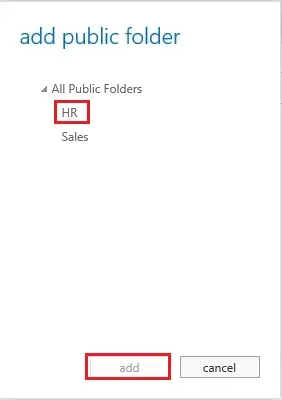
17- Login your outlook web app > left side right click Favorite and click add public folder.
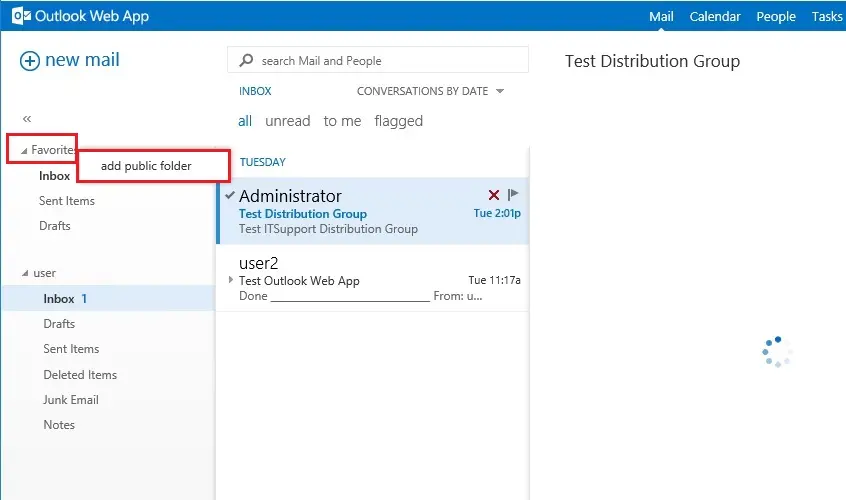
18- Select the public folder you want to add and click the add button.
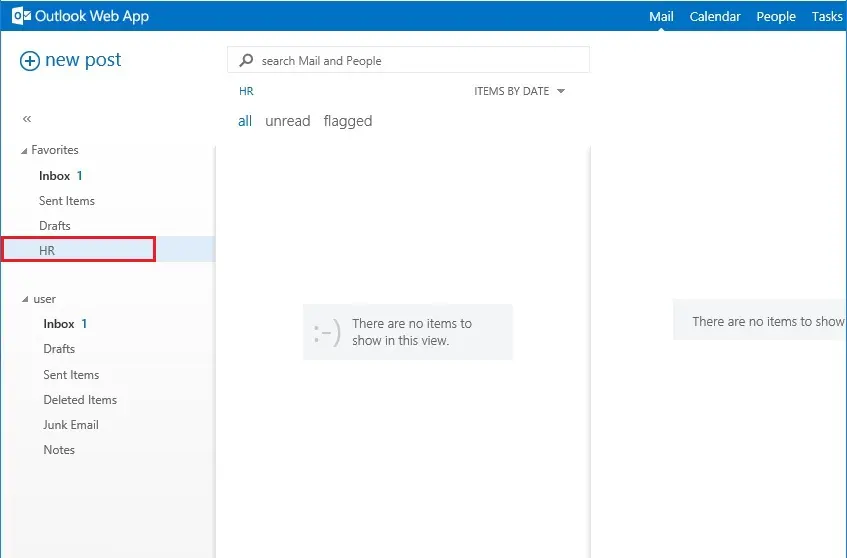
19- Public folder successfully added in the outlook web app
For more information click here
No Comments
I truly appreciate this post. I¦ve been looking everywhere for this! Thank goodness I found it on Bing. You’ve made my day! Thx again
Dear Barth,
I appreciate