How to create a send connector in Exchange 2013.

Send Connector Exchange 2013, By default once you install Exchange 2013 it doesn’t have a send connector, only receive connectors. To be ready to send outbound emails to other domains you would like a send connector.
Send Connector Exchange 2013
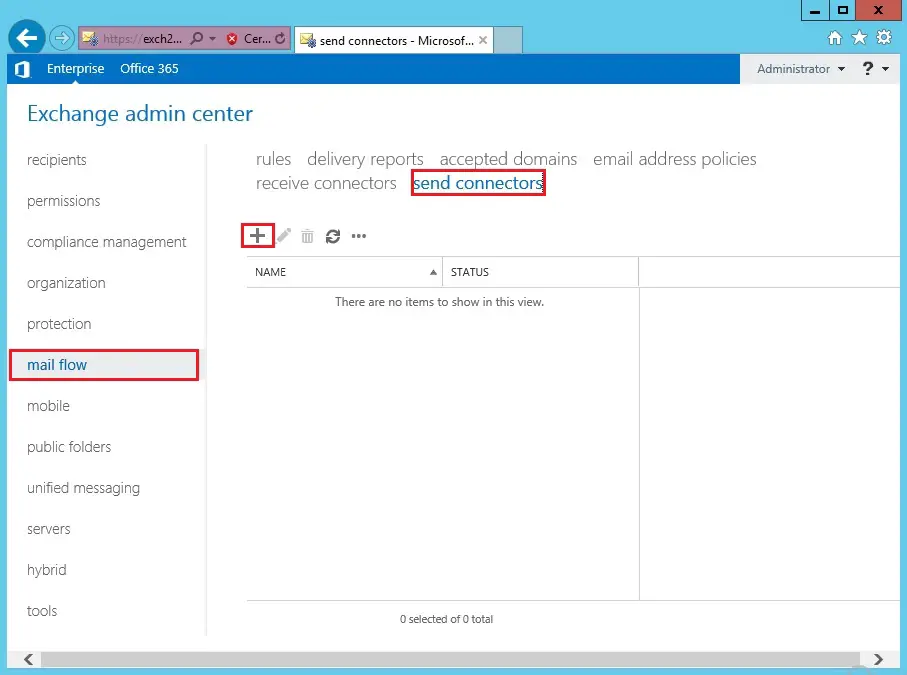
1- Login into Exchange admin center > click mail flow > click send connectors to click the + icon to feature a replacement send connector.
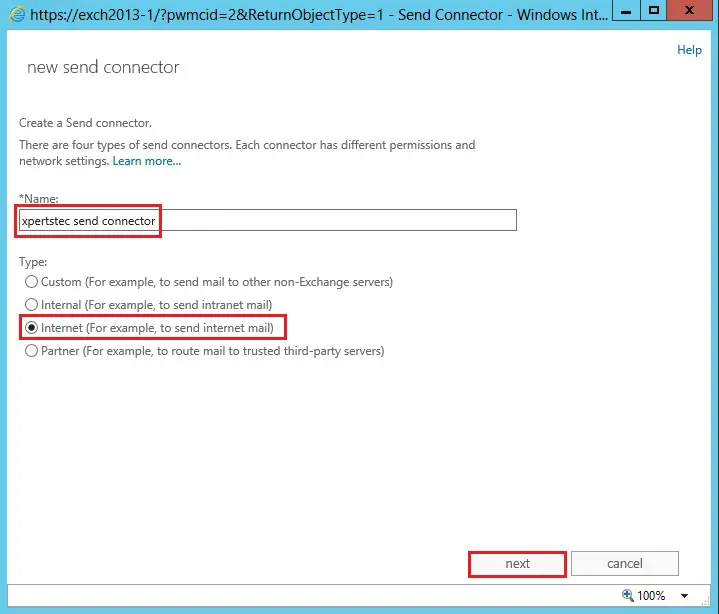
2- Type a name for the connector and select the Internet as the Type and click next.
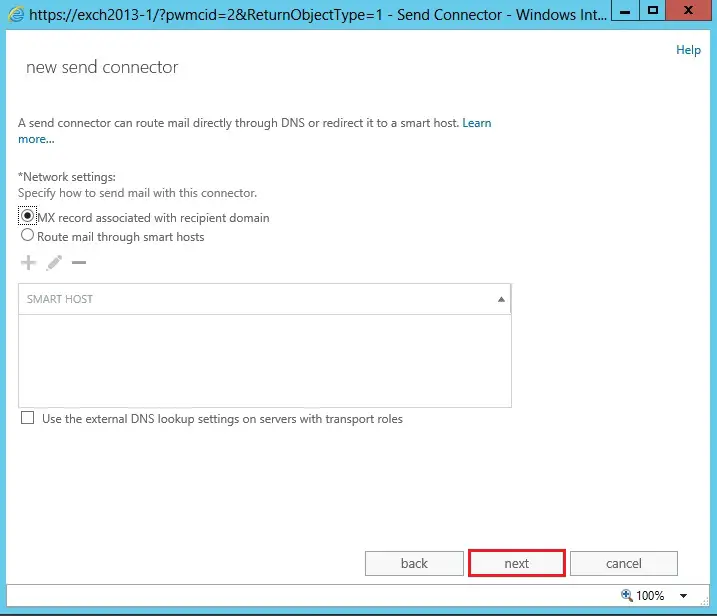
3- Leave the default options on the network settings page and click next.
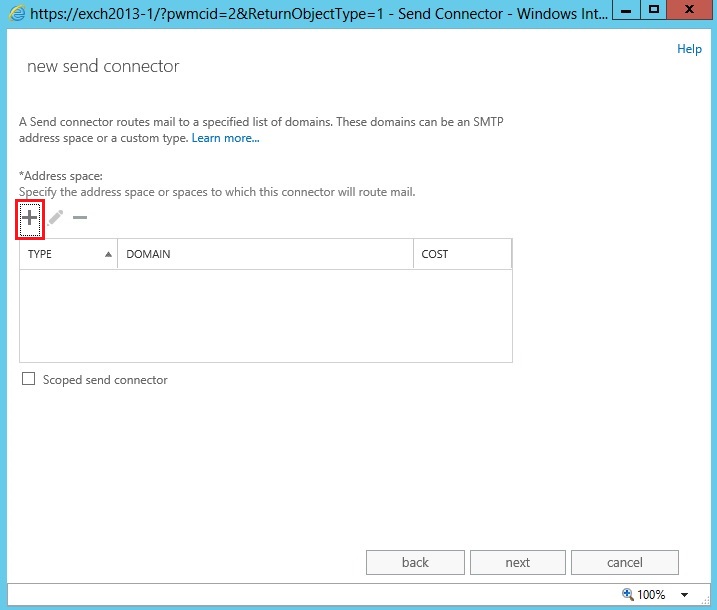
4- Under Address space click the + icon
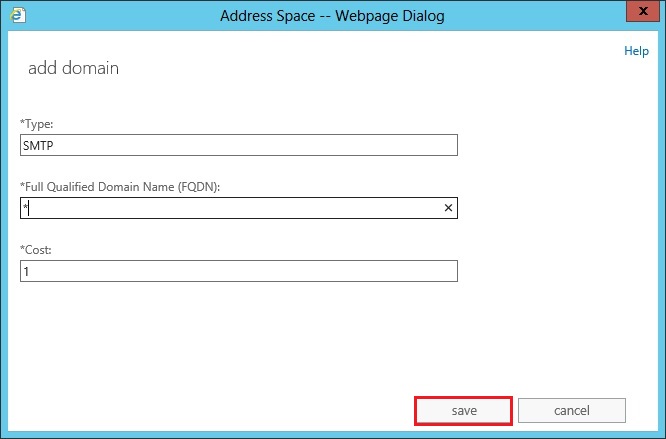
5- In the Full Qualified Domain Name dialogue box type * and click save.
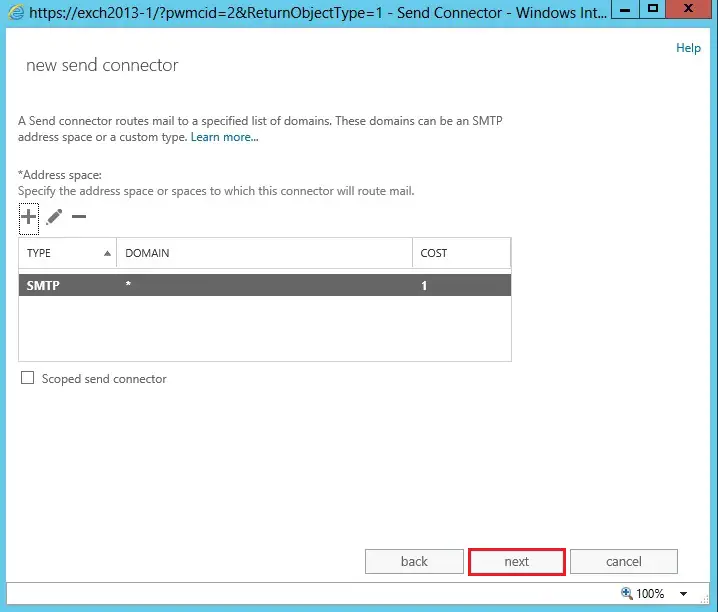
6- Create a new send connector, so click next.
7- Under the Source server then click the + icon.

8- Highlight your Exchange server, click the add button and then then click ok.

9- Click finish.

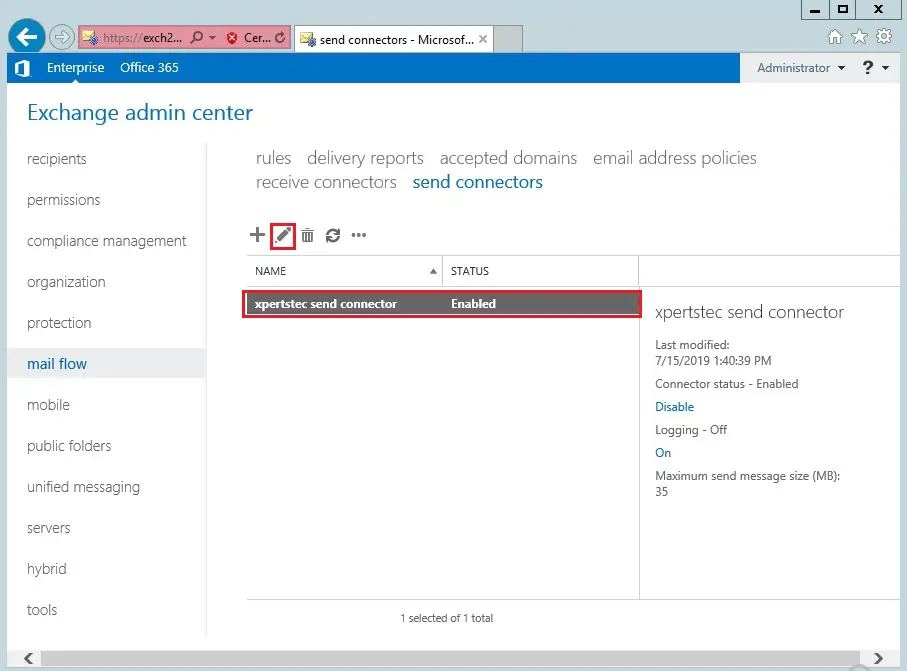
10- Now you can see a new Default Internet Connector created under send connectors. One final configuration change we need to make is to add the FQDN for the connector. Highlight the connector and then click the edit icon.
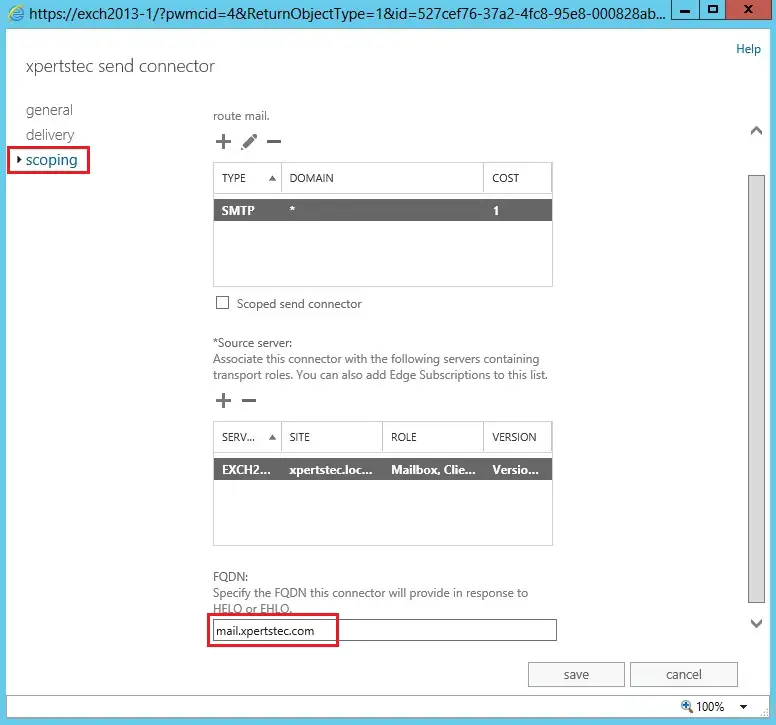
11- From the left side menu click scoping, scroll to the bottom, enter the FQDN for your mail server and then save.
For more details click here