
You can use EMS (Exchange Management Shell) to configure email forwarding in Exchange 2019.
Forward e-mail sent to [email protected] mailbox to [email protected] e-mail address.
Email Forwarding EMS
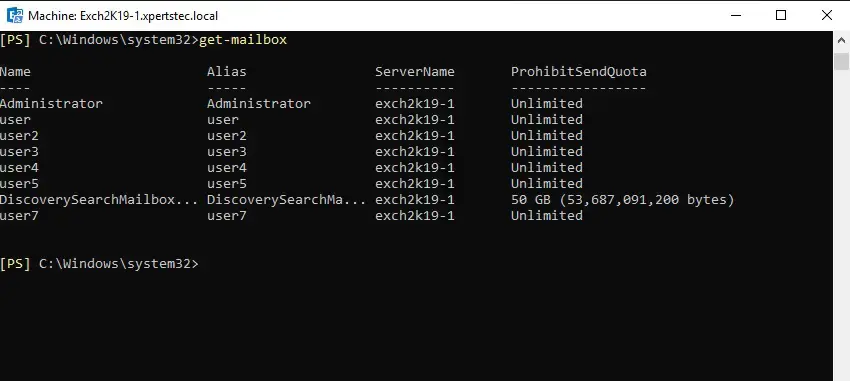
1- To view the list of mailboxes in our Exchange server so type the below command.
get-mailbox
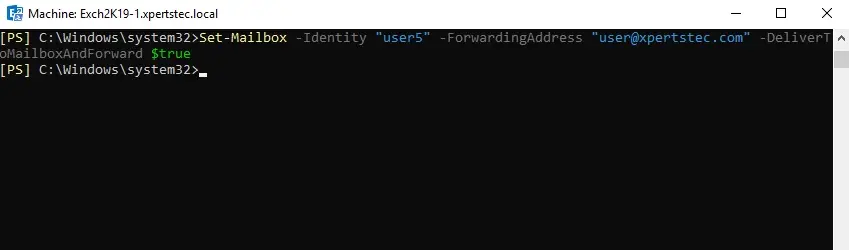
2- Now type.
Set-Mailbox -Identity “user5” -ForwardingAddress “user@xpertstec.
com” -DeliverToMailboxAndForward $true.
The cmdlet below will forward all messages for user5 to [email protected] and also retain e-mails in the mailbox of [email protected].
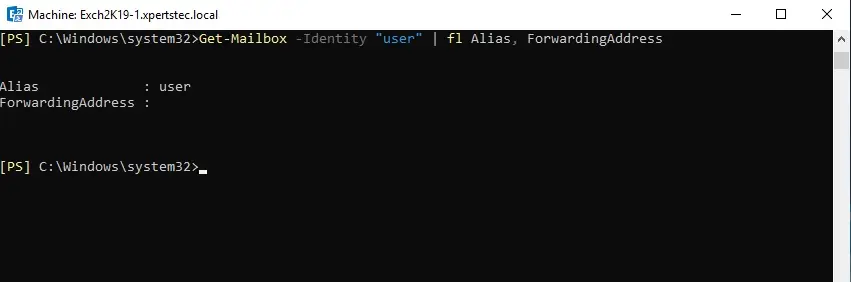
3- Now we need to view the forwarding configuration so type the below.
Get-Mailbox -Identity “user” | fl Alias, ForwardingAddress
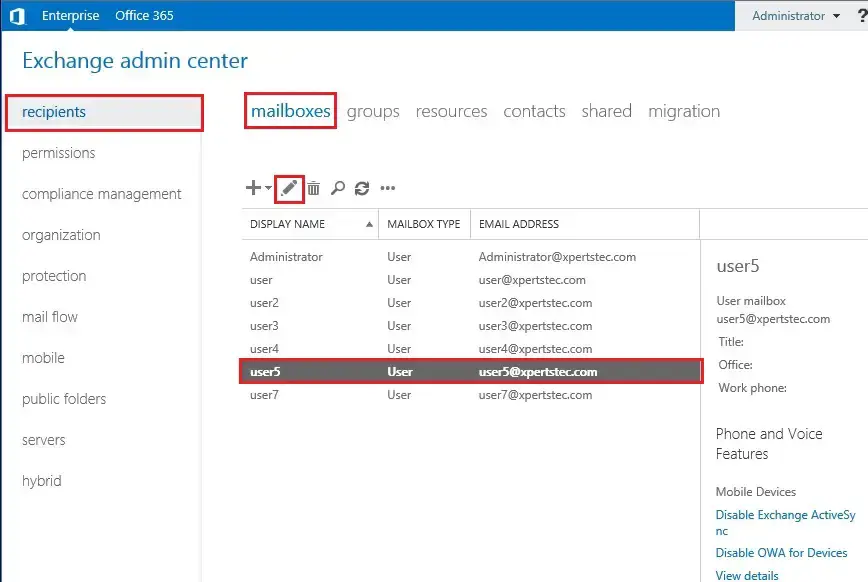
4- Now we want to verify the configuration.
Open Exchange admin center and select the recipient’s tab and select mailboxes and select user5 so click the edit icon.
5- So, your left side selects mailbox features and under Mail Flow, and then select view details.
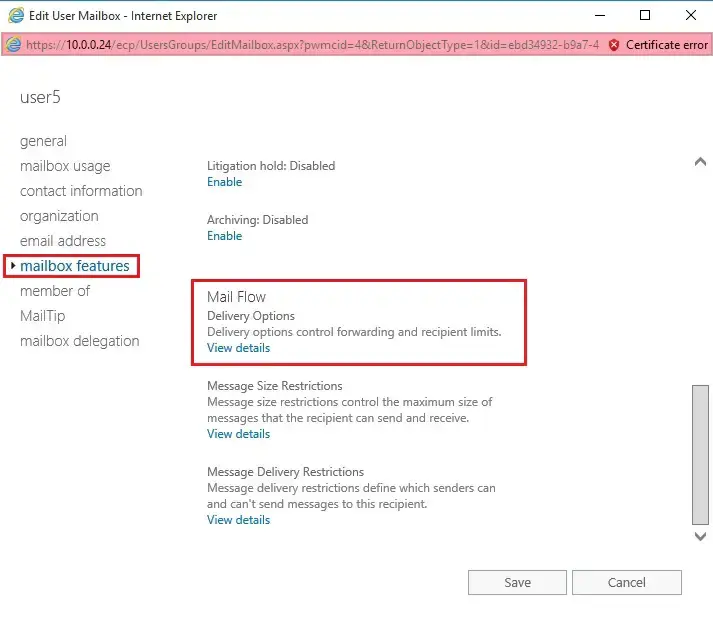
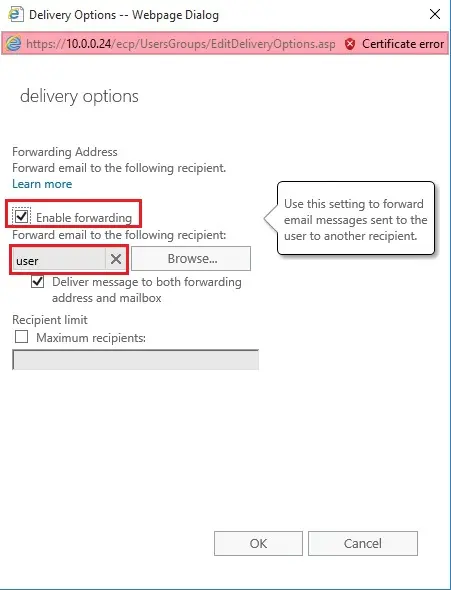
6- Here you can find the enable forwarding recipient.
For more details click here