
In this blog, we’ll go through the installation of Exchange 2019 Database Availability Group with two-node members. The DAG will have a Primary network as well as one replication network. The file share witness is another member server in the domain that has no Exchange 2019 server roles installed. I am using my domain controller as a file share witness server.
In my environment
SRV2019-DC (File share witness server)
10.0.0.20
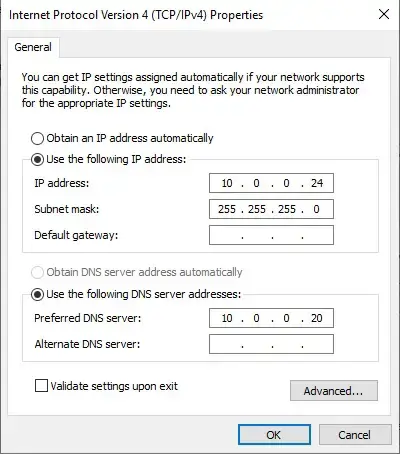
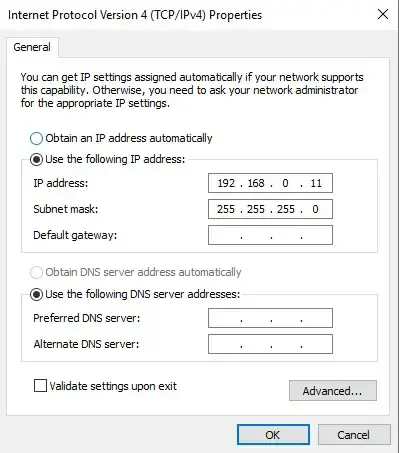
Exch2K19-1 (Node 1)
10.0.0.24
192.168.0.11
Exch2K19-2 (Node 2)
10.0.0.25
192.168.0.12
Database Availability Group Configuration Exchange 2019
First, we need to prepare the Environment for the DAG
1- I have two networks one Primary and one Replication for my DAG replication for all the nodes which I am planning to add in DAG.

2- Make sure these networks are in a Different Class of IP Address.
Primary Network
3- Replication Network.
Replication IP Address should ping with other replication IP Address – So that Database Availability Group replication will happen through these Networks.
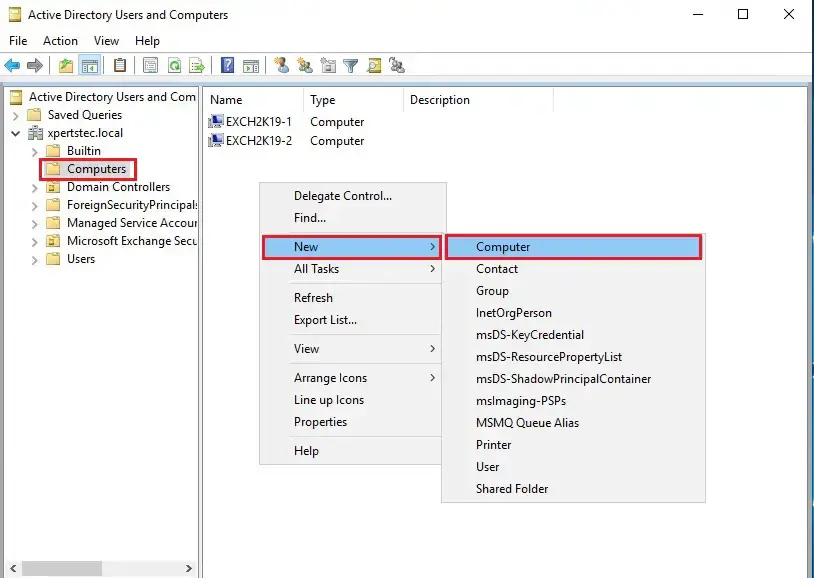
How to Create a Computer Account
We need to create a computer account to pre-stage the Cluster Cluster Name Object.
4- Open active directory users and computers > expand your local domain > select computers > right side under descriptions right-click > click New and click Computer Account.
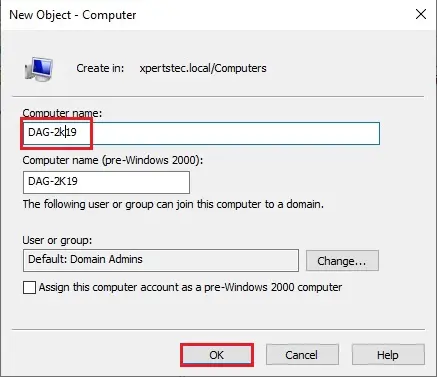
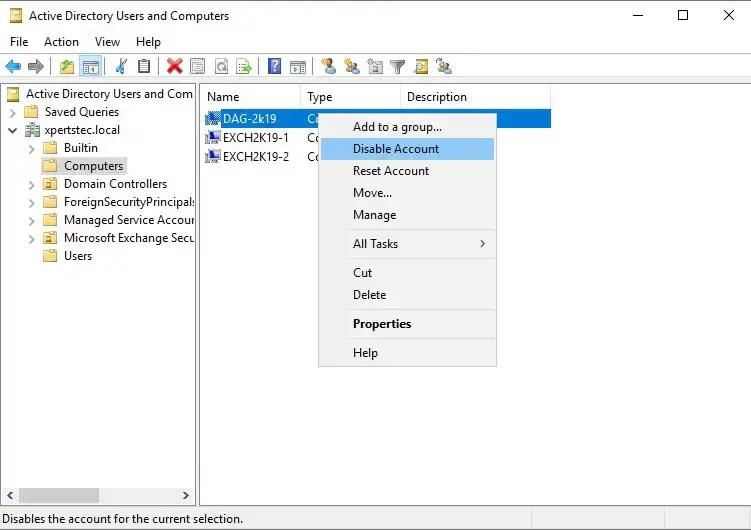
5- Type a DAG Name and click ok.
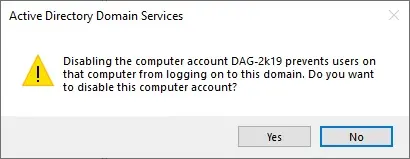
6- Right-click on dag computer name and select Disable Account.
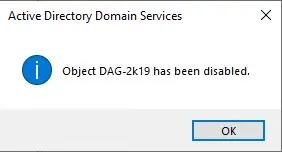
7- Click Yes.
8- Click OK.
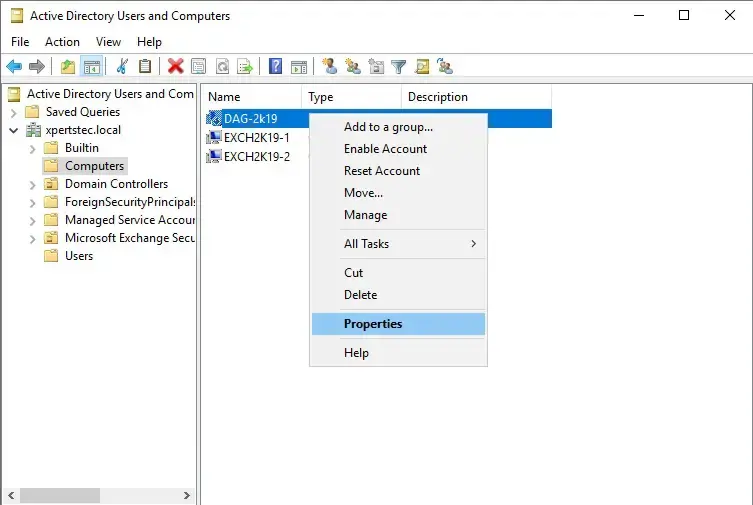
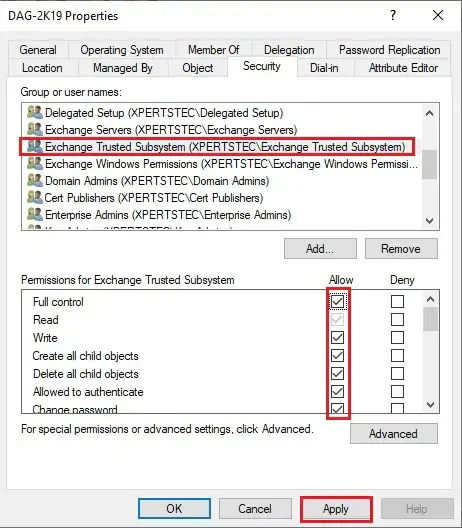
9- Give Full Control for Exchange Trusted Subsystems.
Right-click on DAG computer name and select properties.
10- Select security tab > Select Exchange Trusted Subsystem > select full control and click apply.
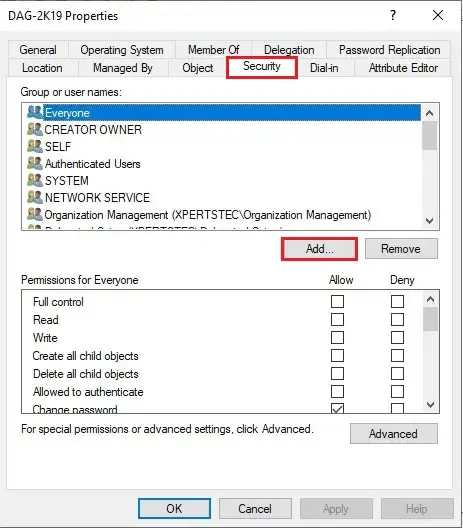
11- Now under security click the Add button.
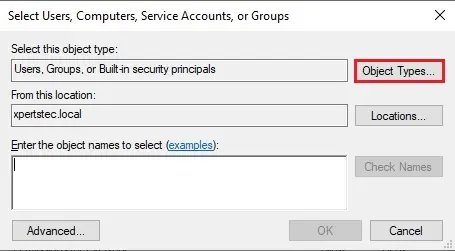
12- Select Object Types.
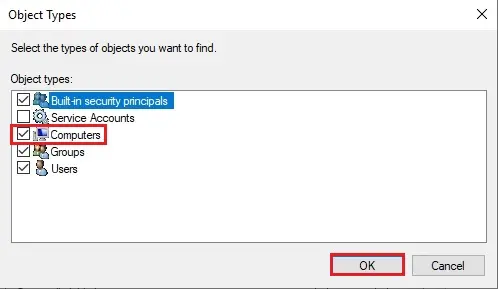
13- Select Computers and click ok.
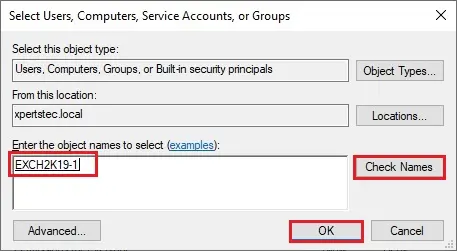
14- Type your First node name > click check names and click ok.
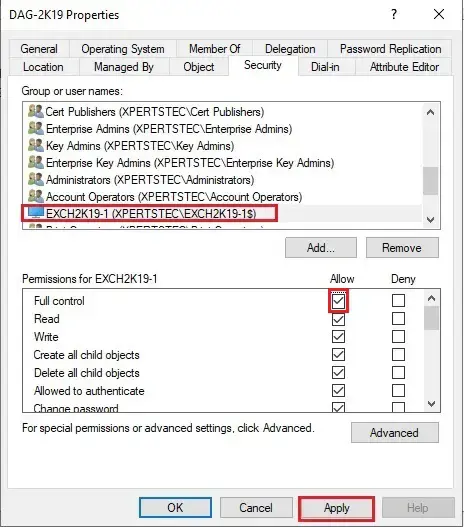
15- First Node Computer account has been added > select full control box to give permission and click apply.
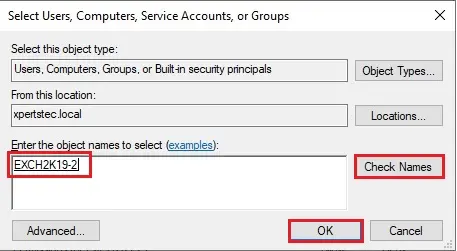
16- Under the security tab, click the add button again and Type second node computer name > click check names and click ok.
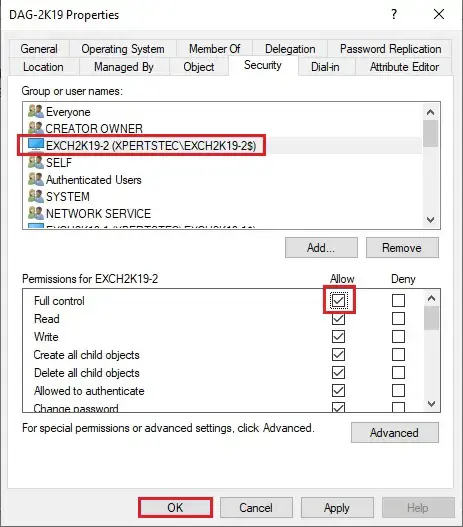
17- Give full control > click Apply for the Permissions and click ok.
Now we are creating a DAG in Exchange Server 2019.
The Exchange Trusted Subsystem should be a member of the local Administrator group on the specified witness server.
I am using my active directory server as a witness server.
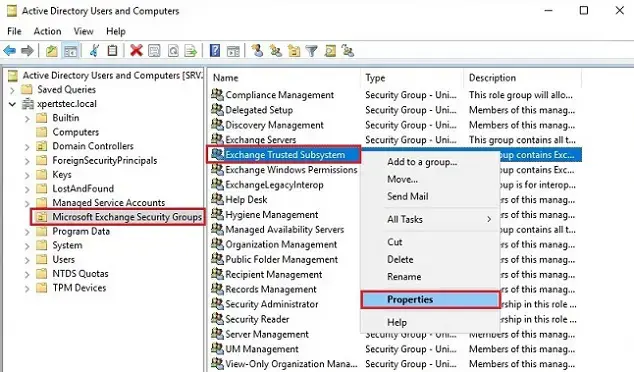
18- Open active directory users and computers > expand domain controller > select Microsoft Exchange Security Group and then right Exchange Trusted Subsystem and select properties.
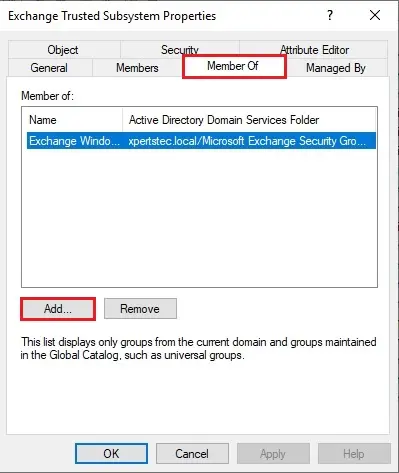
19- Select Member of and click the add button.
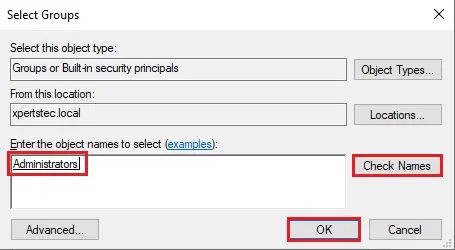
20- Type administrator > click check names and click ok.
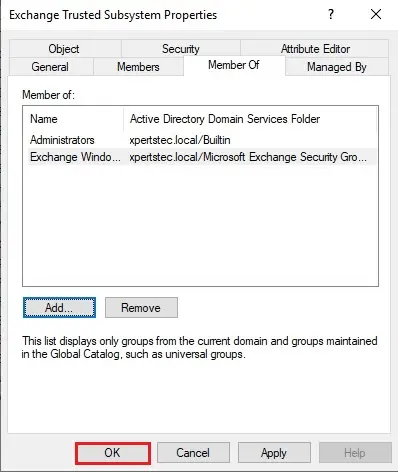
21- Click OK.
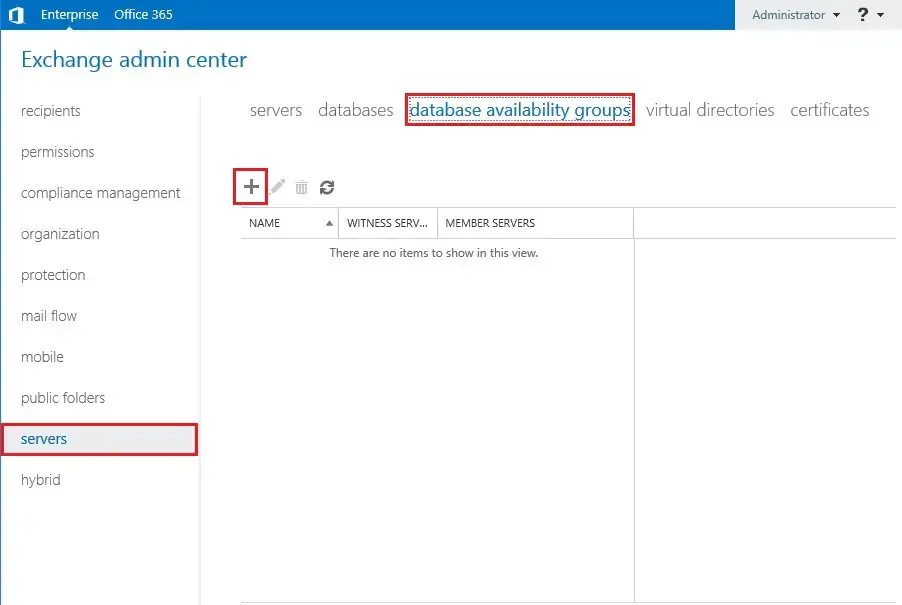
Create Database Availability Group
22- Login to Exchange Admin Center > select Servers > select Database Availability Groups and select + add button.
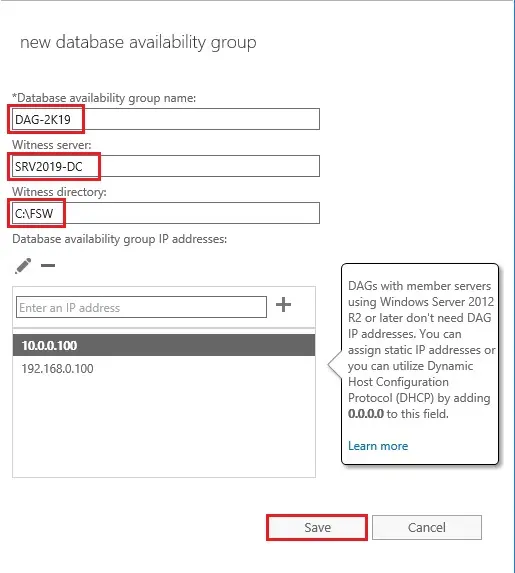
23- Type DAG name > Witness Server Name > Witness Location > Add Two DAG IP Address (Static IP for the DAG)
1 for Primary Site and 1 for DR site
If you have different subnet or different classes of IP Addresses on either Sites.
Have Two IP addresses for the DAG so that DAG resource can be online while failover on either site If you have only one Subnet then you can have only one IP Address for the DAG.
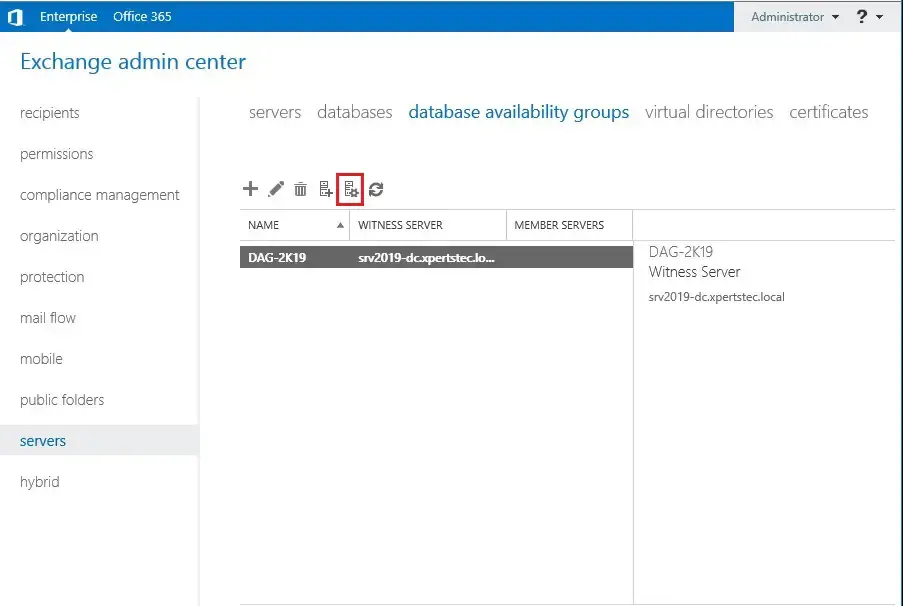
Database Availability Groupe Membership
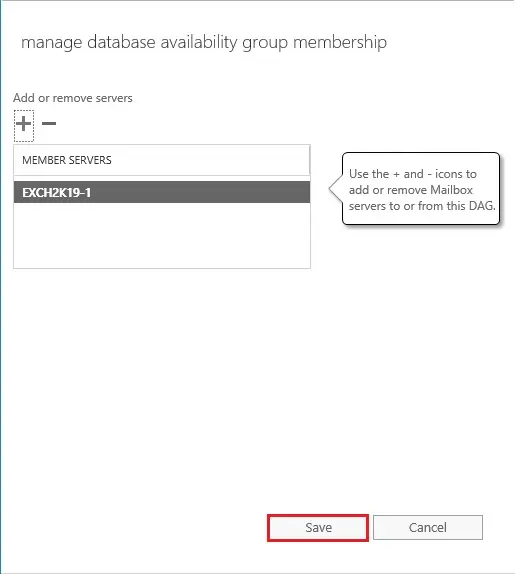
24- Now my DAG Configuration is Ready and Add a member to it > Select Manage DAG Membership.
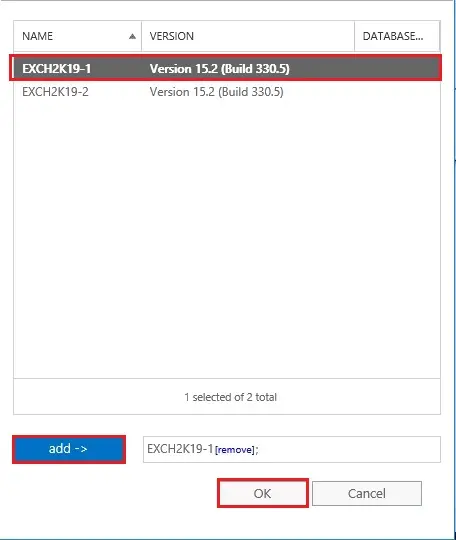
25- Select the + add icon.
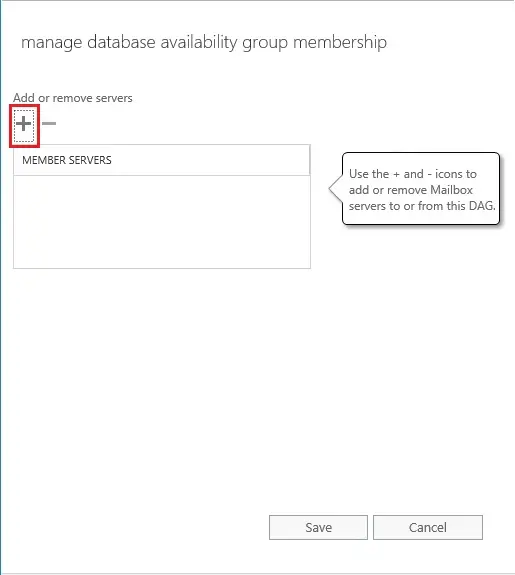
26- Select first node > click add and click ok.
27- Select Save.
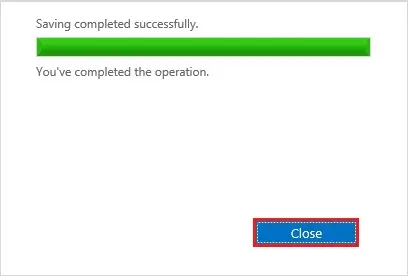
28- First node member completed successfully and click close.
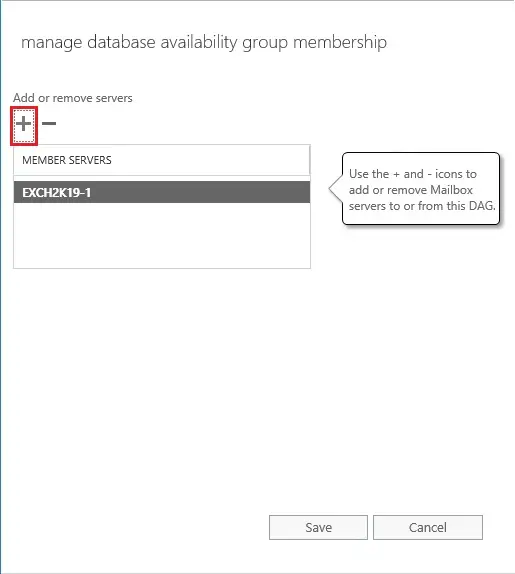
29- Now you can add the 2nd DAG member > again Select Manage DAG Membership.
30- Select the + Add icon.
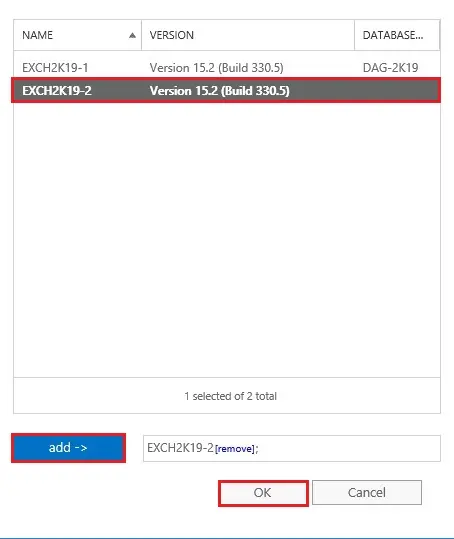
31- Select 2nd node > click the add button and click ok.
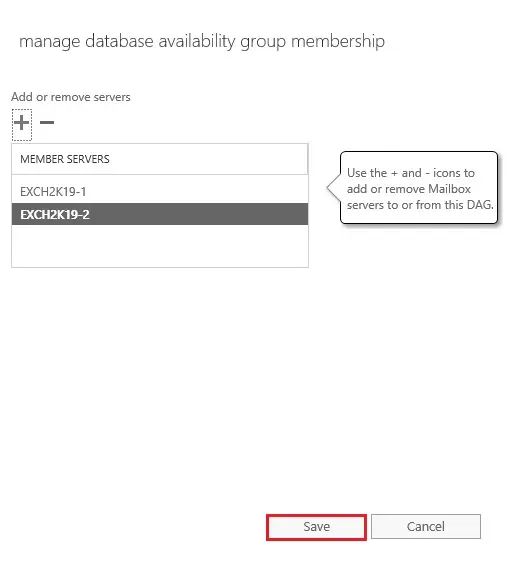
32- Click Save.
33- 2nd node completed successfully and click close.
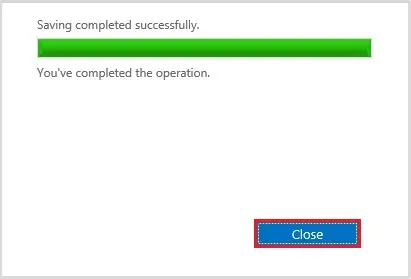
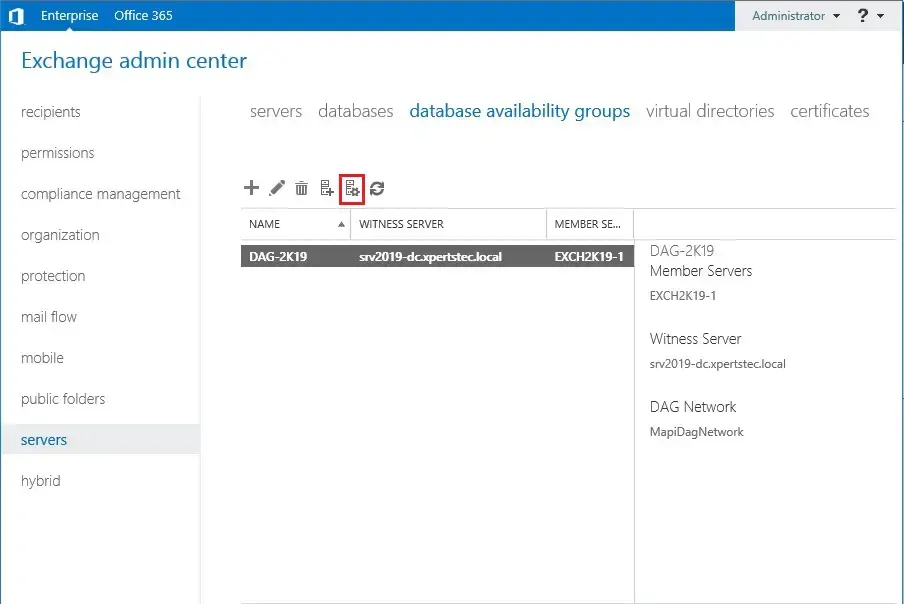
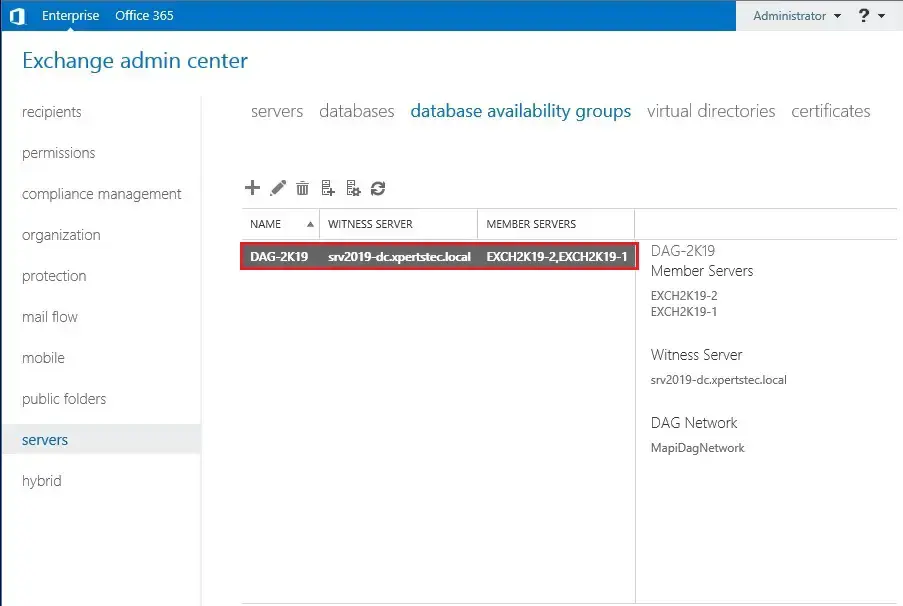
34- Now both the nodes successfully added.
Like and subscribe our YouTube channel to watch updated videos.
For more details click here