In this blog, we will learn how to enable navigation pane in Word 365. The Navigation pane is easy to access in a document from one place to the next. You can quickly move between headings, pages, or search results. The Navigation Pane is the most efficient and fastest way to move around a document. It is available in Word for Windows (Microsoft 365 and Office), while the Word for Mac version is similar but lacks variety.
The navigation pane is easy to locate from one location to the next in a document. You can quickly move between headings, pages, or search results. If you have already created section breaks in your Word document, you know that using the go-to command to navigate your long documents by section is a great feature and time-saving shortcut in Word.
Enable Navigation Pane in Word 365
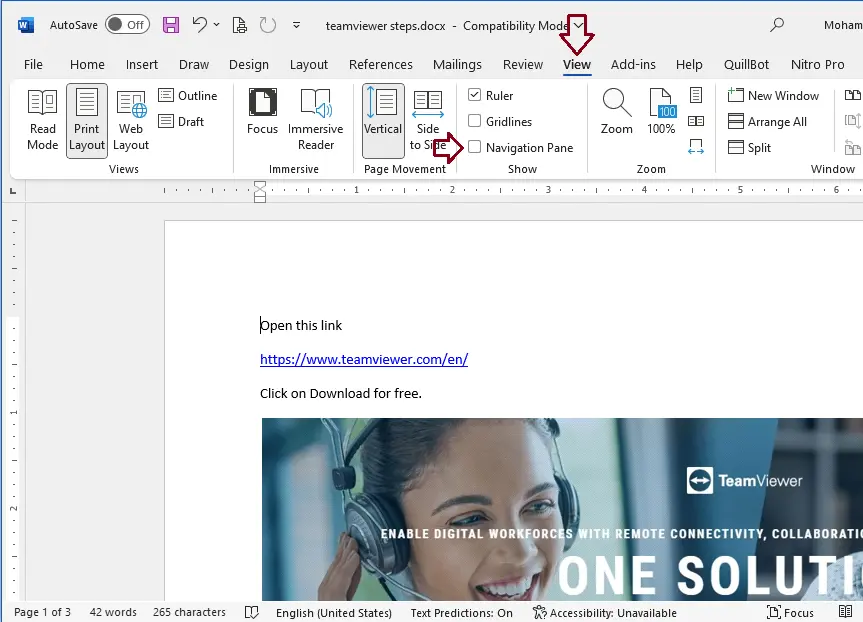
Open a document in Word and click the view tab.
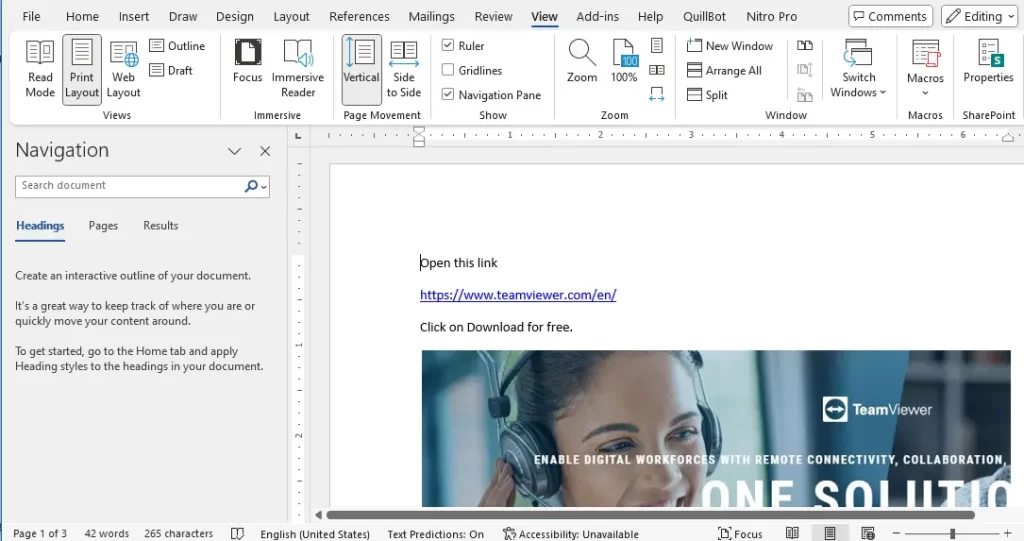
Tick the Navigation Pane box.

The pane appears on the left. It includes a search field to locate text in your document and three methods to browse: by heading page or search result.
Press the Ctrl + F key from the keyboard.
Use the Navigation Pane
Navigating your document by page or heading allows you to navigate it quickly.
Click on the Headings tab.
The Navigation pane is now displaying all the headings in the document.
Select a heading in the Navigation menu.
Word moves directly to that heading.

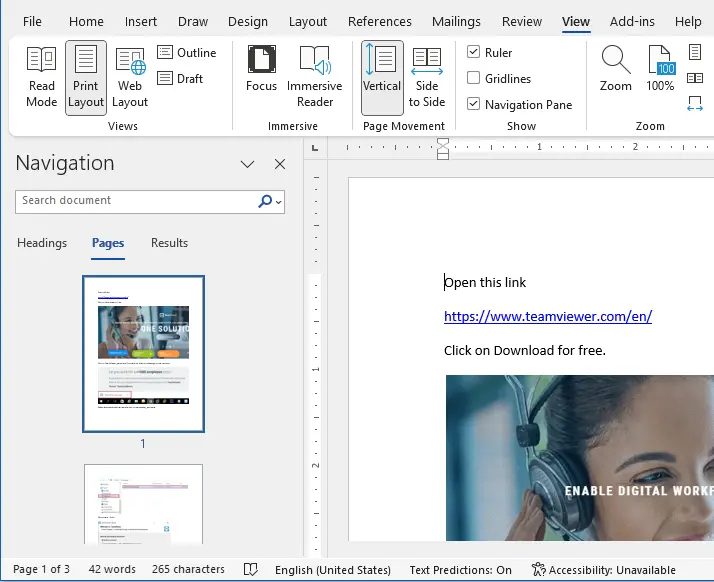
Click the Pages tab on the Navigation page.
A thumbnail displays each page in the document. You can scroll through this list for a quick overview of the document’s structure.
Select a page in the list. The word sends you directly to the selected page.

You can collapse a section by clicking the arrow next to a section that contains subheadings. You can modify sections in a document by clicking and dragging a heading up or down.
Read more: How To Change Page Orientation in Word 365


