
Create Highly Available Virtual Machine; Hyper-V has a number of tools & mechanisms to provide virtual machines in a highly available shape in a Windows Server Failover Cluster that is hosting the Hyper-V role.
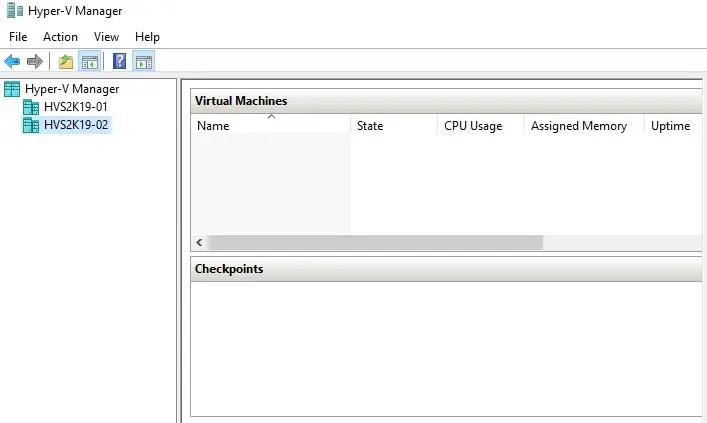
Hyper-V Manager
1- When we install the Hyper-V Role, we generally install the Hyper-V Manager along with the role. Hyper-V manager Create High Availability Hyper-V Virtual Machine.
Using the Hyper-V Manager How to create hyper-v virtual machine
2- After going through the new wizard to create the virtual machine, we can see the new VM listed in Hyper-V Manager.

We want to apply another tool to ensure the newly created Hyper-V virtual machine is highly available and is a cluster resource.
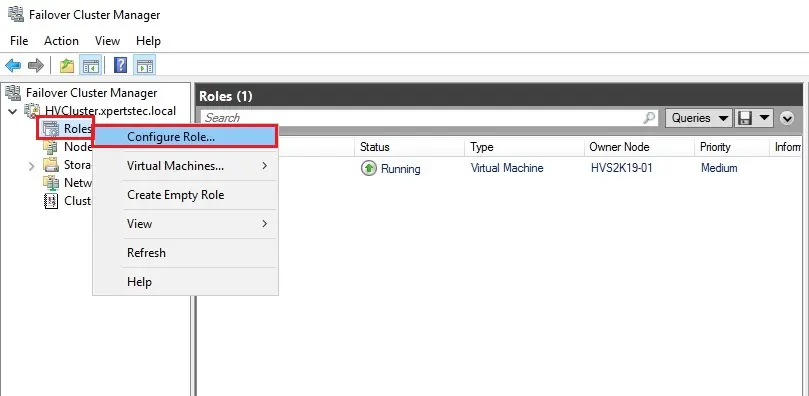
Highly Available Virtual Machine
3- Failover Cluster Manager, right click on roles and then click configure role.
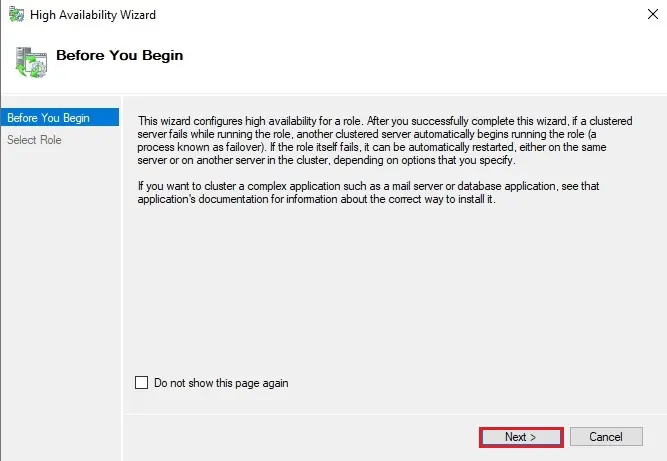
4- High Availability wizard click next.
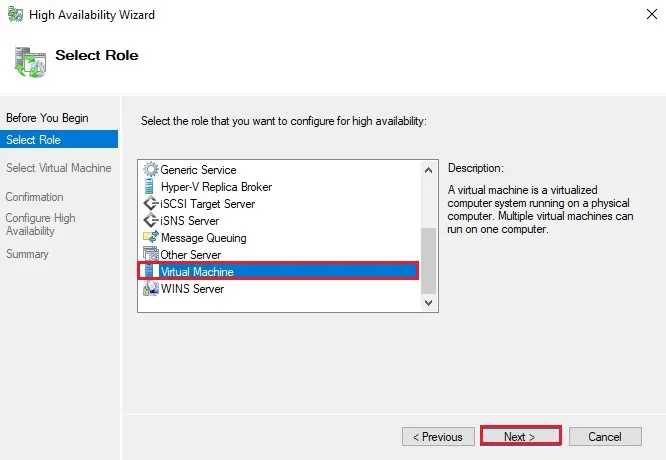
5- Select the virtual machine role and then click next.
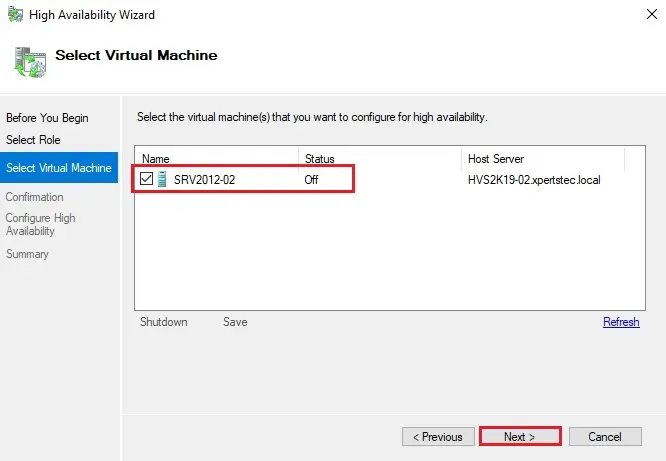
6- Select virtual machine and click next.
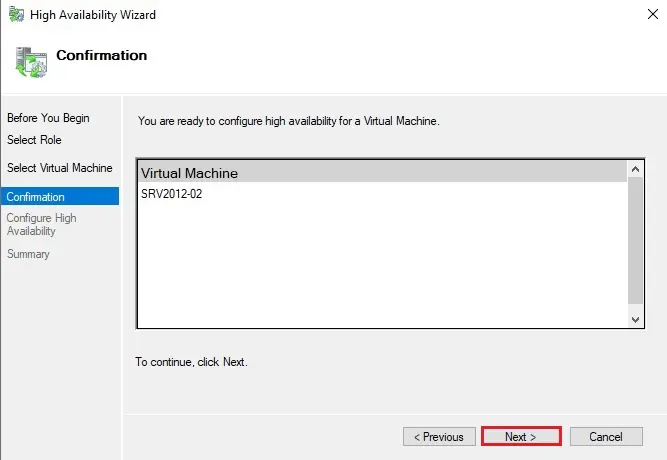
7- High availability wizard confirmation click next.
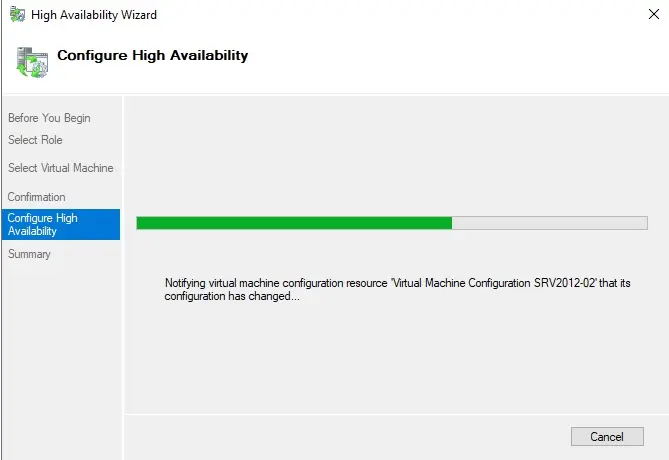
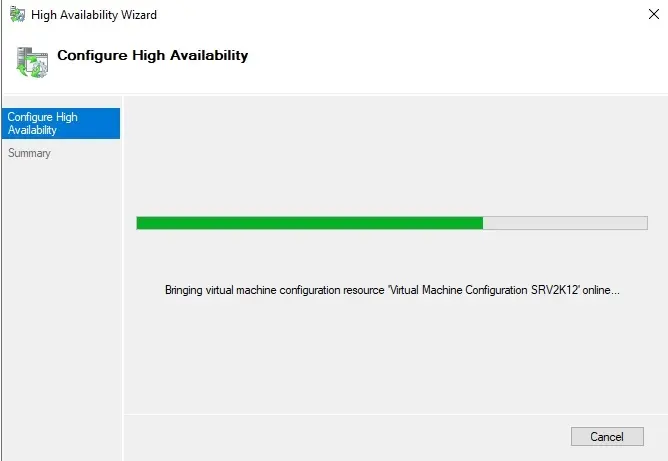
8- Configure high availability in progress.
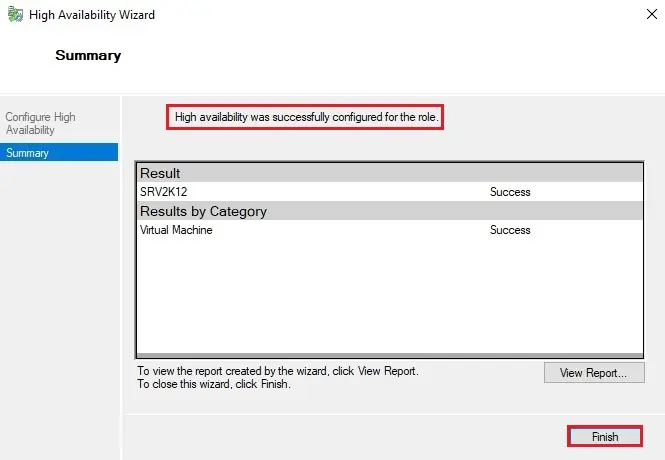
9- Review the summary and click finish.

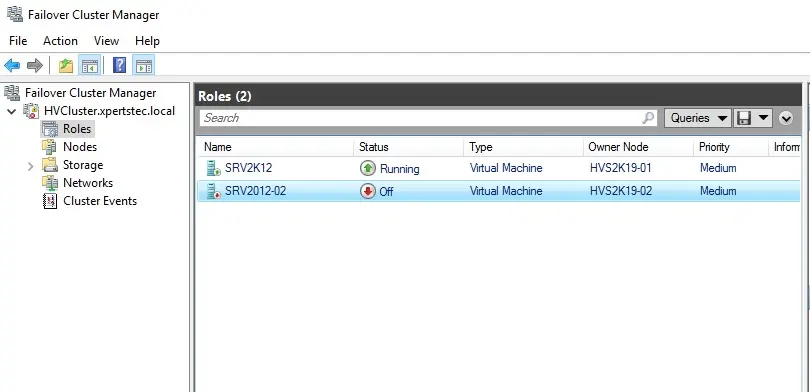
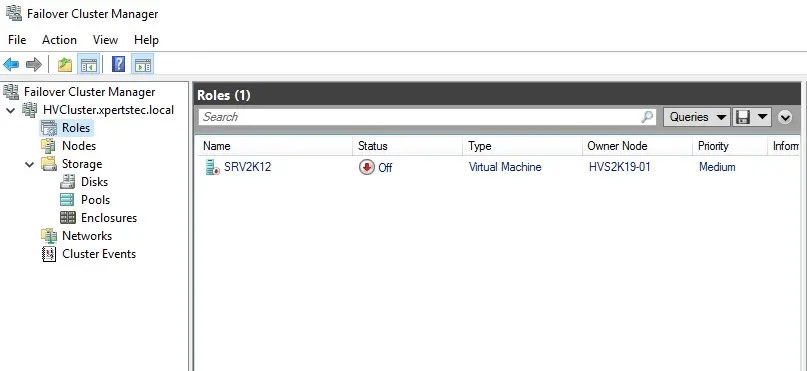
10- Now you can see the virtual machine.
Create virtual machine high availability Hyper-V using a failover cluster manager
We have our storage set-up and location configurations set to our clustered shared volume.
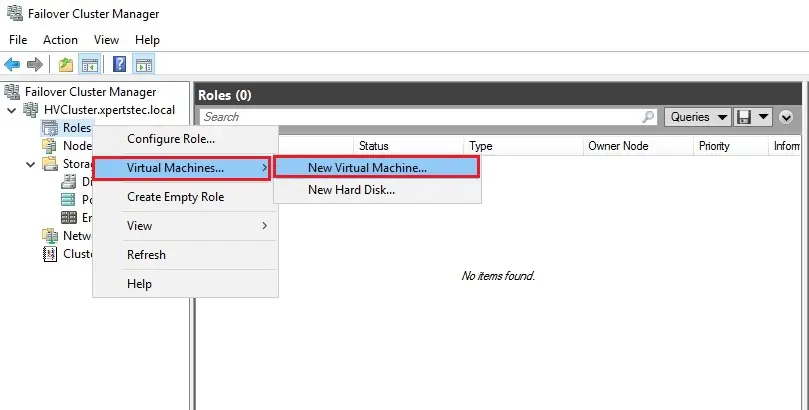
11- Create high availability Virtual Machine. Right-click on Roles, select Virtual Machines, and then New Virtual Machine.
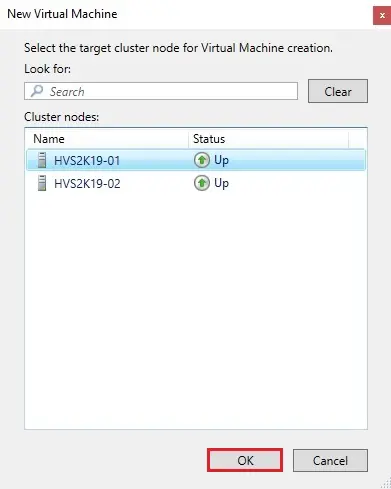
12- Now we can select the node we initially want to setup the virtual machine on and click next.
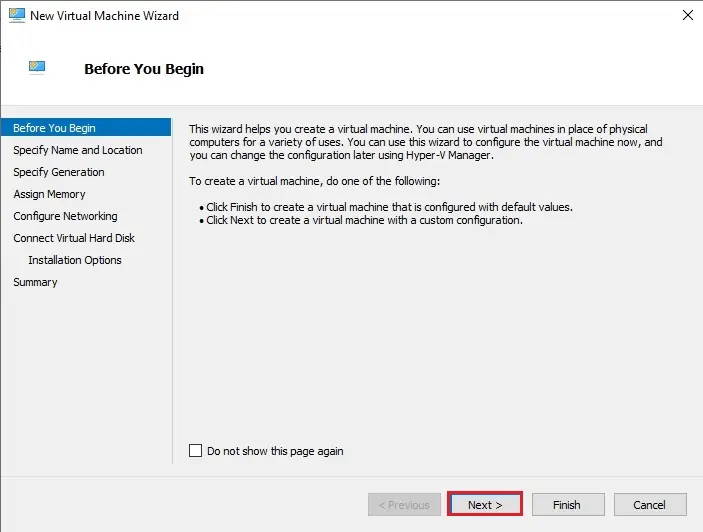
13- New Virtual Machine Wizard clicks next.
14- Enter a virtual machine name and either leave our default storage location (CSV) or choose a different one. We want to take advantage of the CSV benefits, so leave default and then click next.

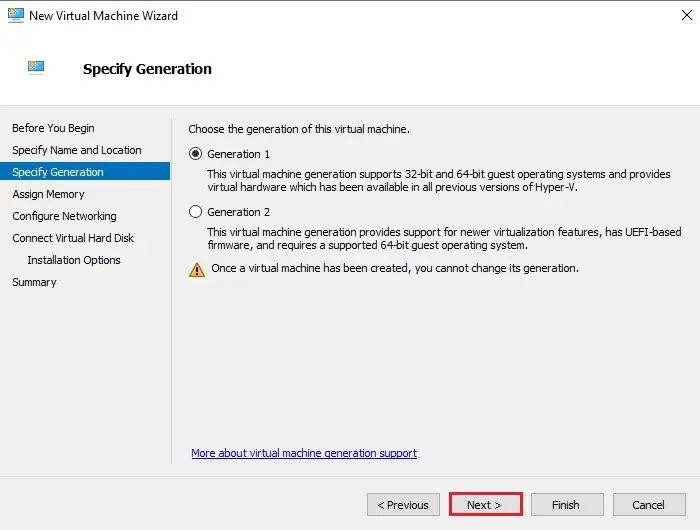
15- Select the Generation of the virtual machine and then click next.
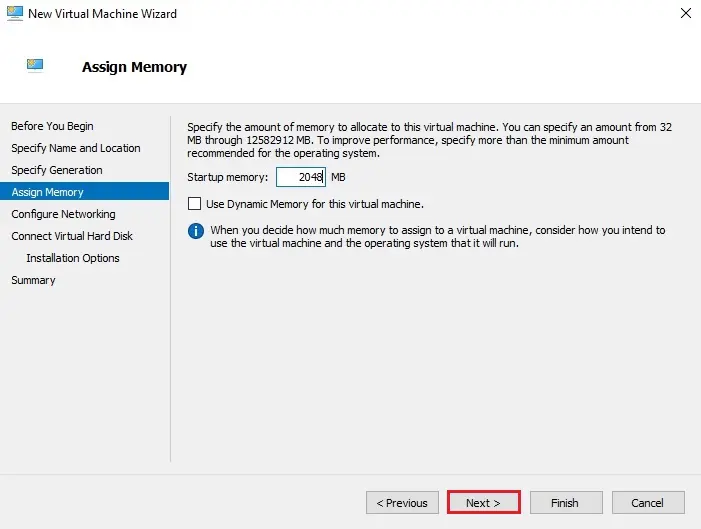
16- Assign memory for the virtual machine and then click next.
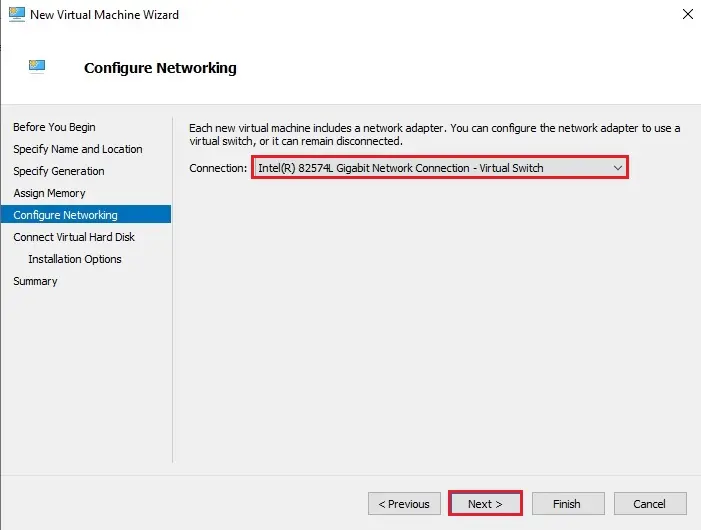
17- Select the virtual network and click next.
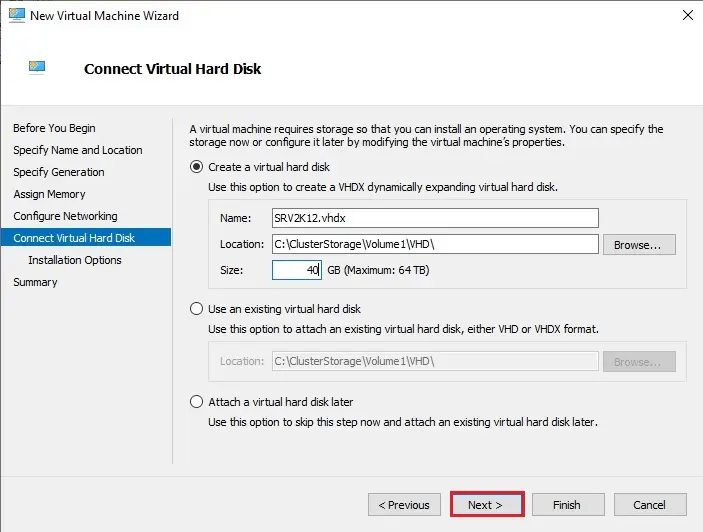
18- Virtual Hard Disk configuration, select disk size and then click OK.
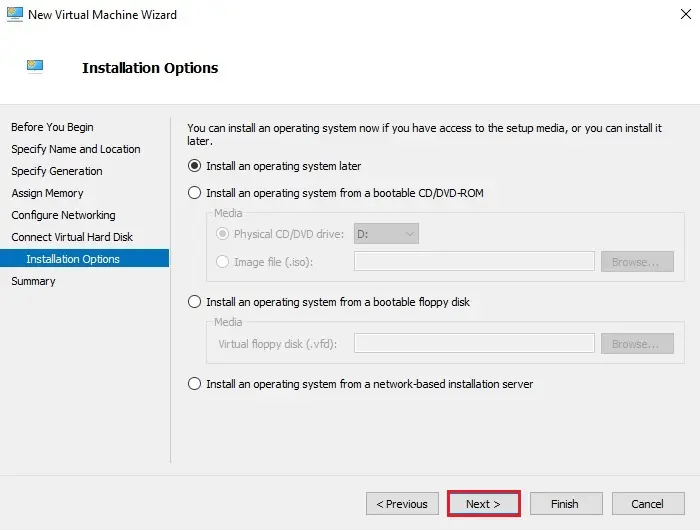
19- Select how you want to load the operating system and click next.
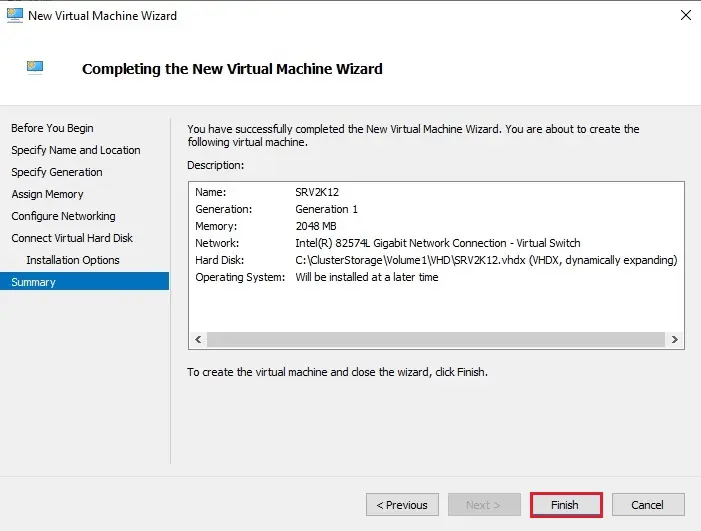
20- Review the new virtual machine Summary and then click finish.
21- After clicking Finish, the High Availability Wizard will launch.
22- It will display the results of creating the virtual machine’s high availability. Click Finish
23- Virtual machine created.
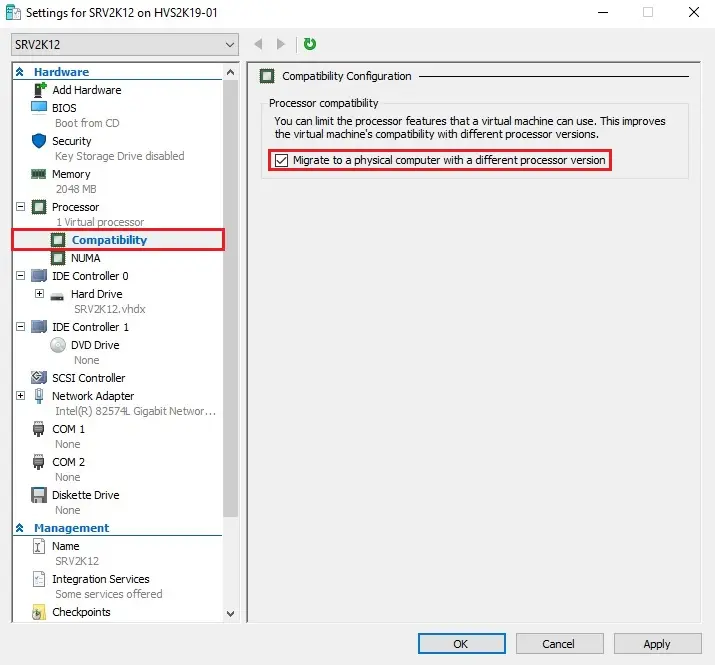
If the two-node machines run different CPU models, processor compatibility is enabled.
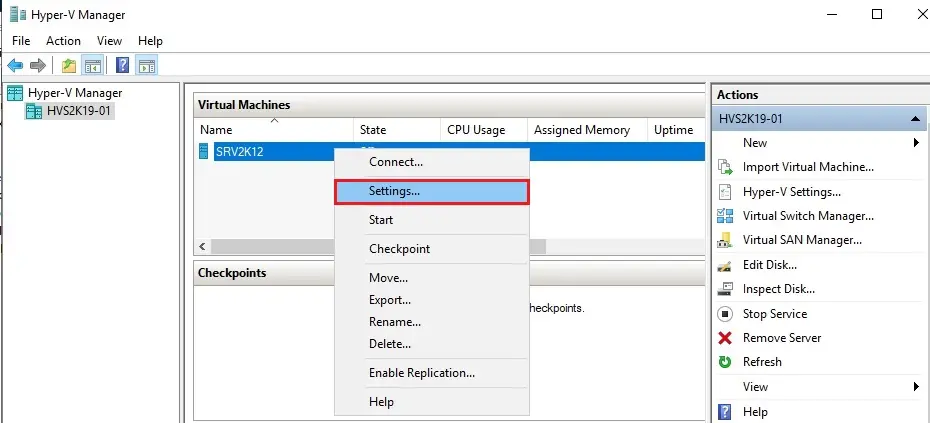
24—With the virtual machine turned off, right-click the machine in Hyper-V Manager and select settings.
25- Expand Processor, and then click Compatibility. Select the checkbox Migrate to a physical computer with a different processor and then click OK.
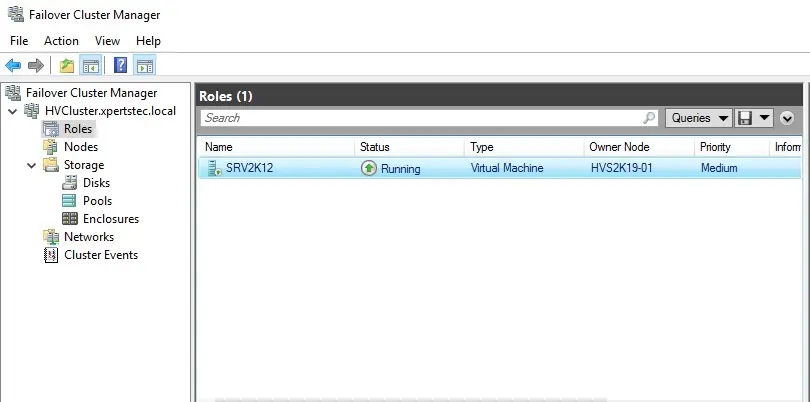
26- Double-click your virtual machine.
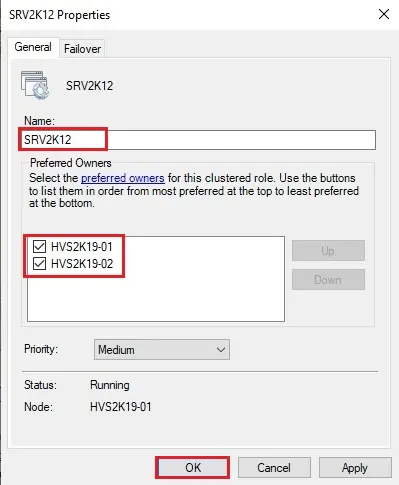
27- In the General tab, under preferred owners, select the nodes that you want to manage your virtual machine in the event of a failure. Click OK
For more details click here