
This article provides steps on how to upgrade Veeam backup & replication 10 (build 10.0.1.4854) to Veeam B&R 11 (build 11.0.0.887 (veeam backup and replication v11 upgrade). A few days ago Veeam has released the new version of Veeam Backup & Replication 11. In this article, we will take a look at how to upgrade Veeam Backup and Replication to v11.
What’s new in Veeam Backup & Replication v11
The first thing is to understand a configuration backup of veeam server configuration backup menu and SQL database backup. If the veeam backup server is deployed on a virtual machine execute a backup of this VM with veeam backup and replication or a snapshot.
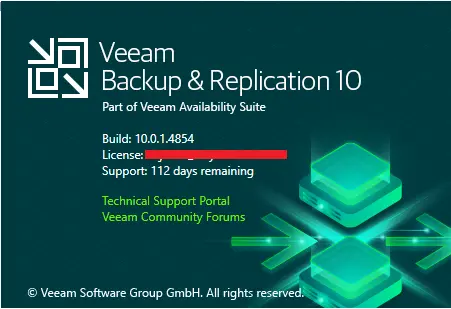
My Veeam Backup Server version
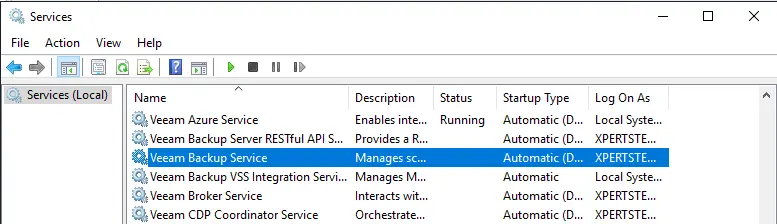
First the need to complete the backup jobs, then you can close veeam software. I recommend you to stop the veeam services before upgrading).
Upgrade to Veeam Backup and Replication v11
In the first step, you will want to download the new Veeam Backup & Replication v11 ISO file. Download Veeam products here: Download Veeam Software
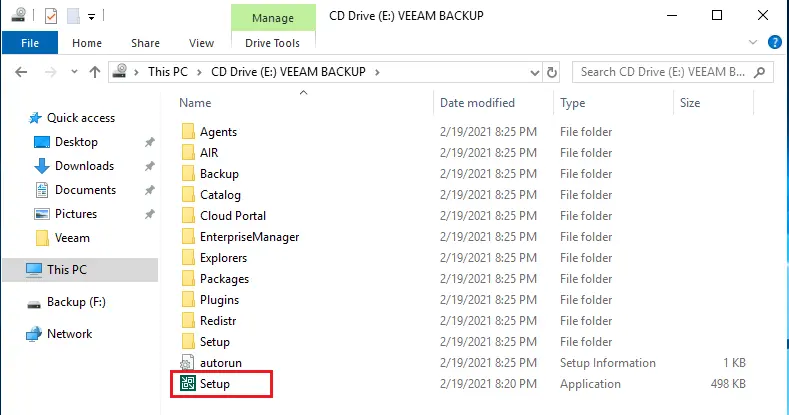
1- After downloading the v11 IOS file, mount the ISO and then run the setup.exe file as an administrator.
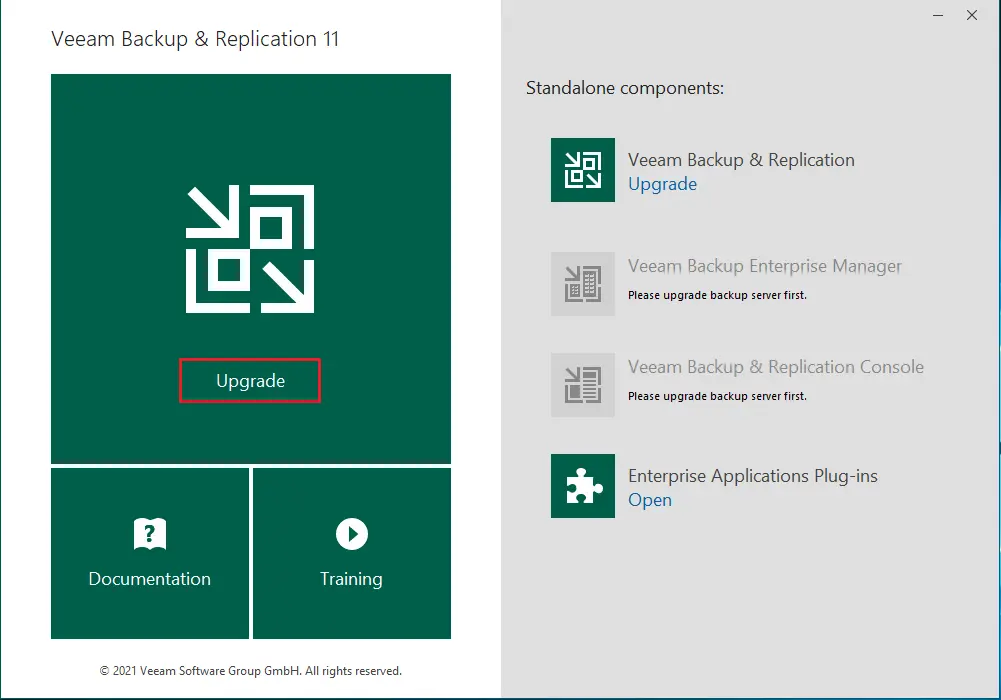
2- The installer file will recognize you already have Veeam installed and then select the upgrade button.
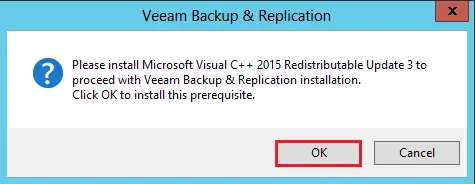
3- Select ok to install Microsoft Visual C + +
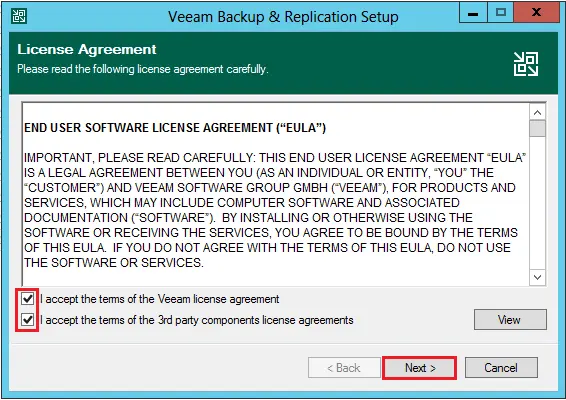
4- Next, accept the EULA and then click next.
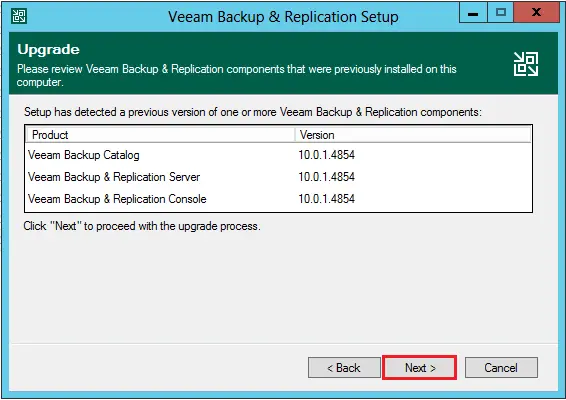
5- The window will display the currently installed product versions, Click next.
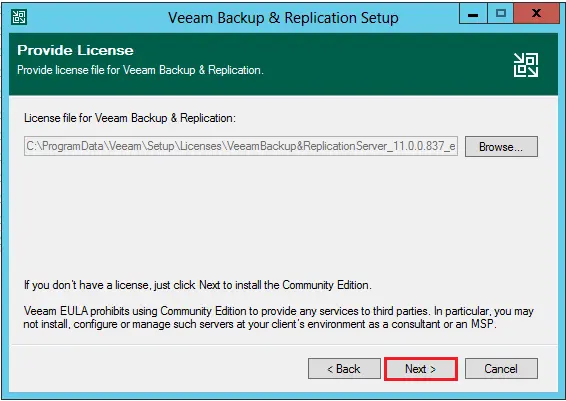
6- Provide a Veeam license file if you have a paid license. Otherwise, it will proceed with the community edition. Click next.
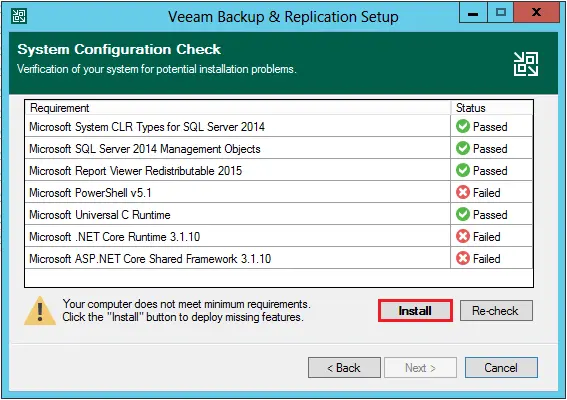
7- The system configuration check will show the prerequisites for installing Veeam v11. The new prerequisites include:
Microsoft PowerShell v5.1
Microsoft .NET Core Runtime 3.1.10
Microsoft ASP .NET Core Shared Framework 3.1.10
Select the Install button to install the components.
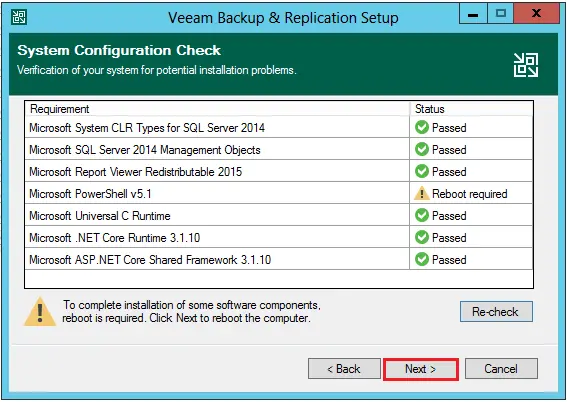
8- After the components are installed, click next (reboot is required).
9- Select the Yes button to reboot the server to complete prerequisites installation.
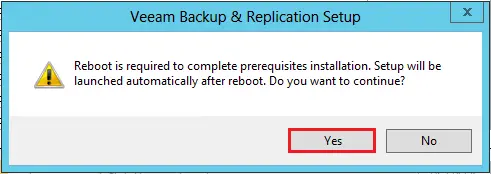
After restarting follow the above steps from 1 to 9
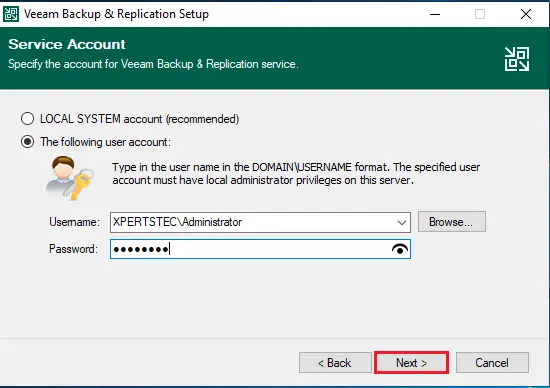
10- Select your service account for the Veeam Backup & Replication service and then click Next.
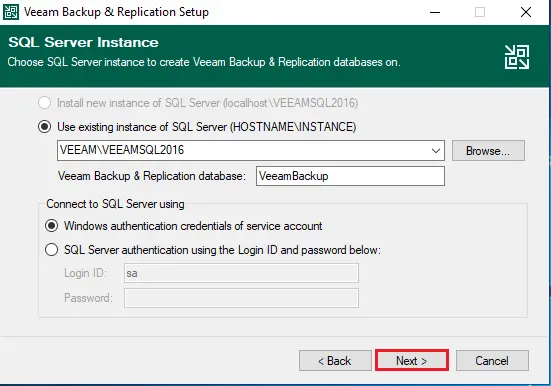
11- Select your SQL Server instance and database. Click next.
12- Click Yes to confirm the database informational message.

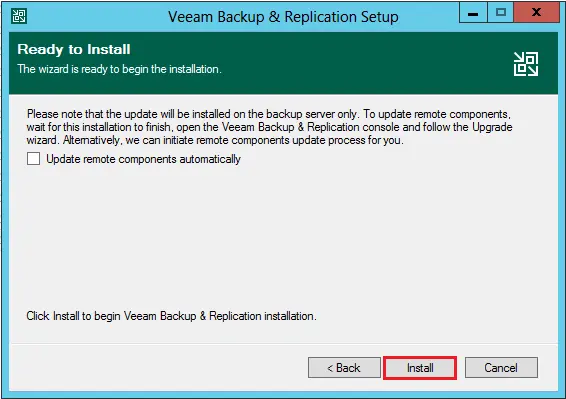
13- Select the checkbox whether you want to update remote components automatically. Click Install.
14- Installing Veeam Backup & Replication Server.

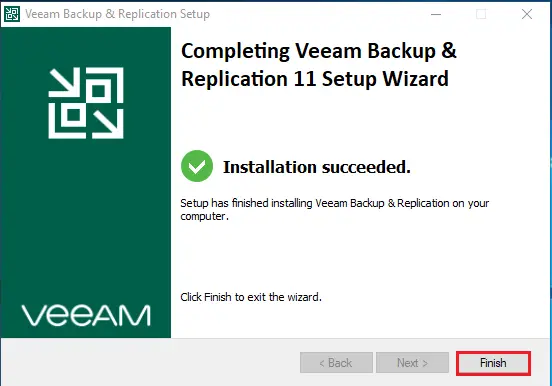
15- After several minutes, you will get installation succeeded. Click finish
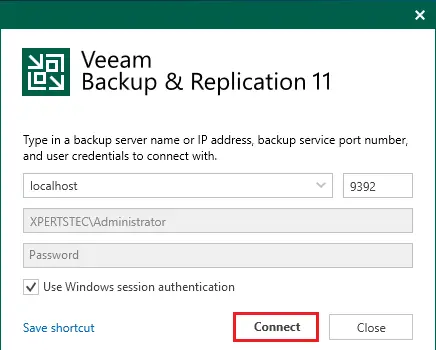
16- Run Veeam Backup and then click connect.
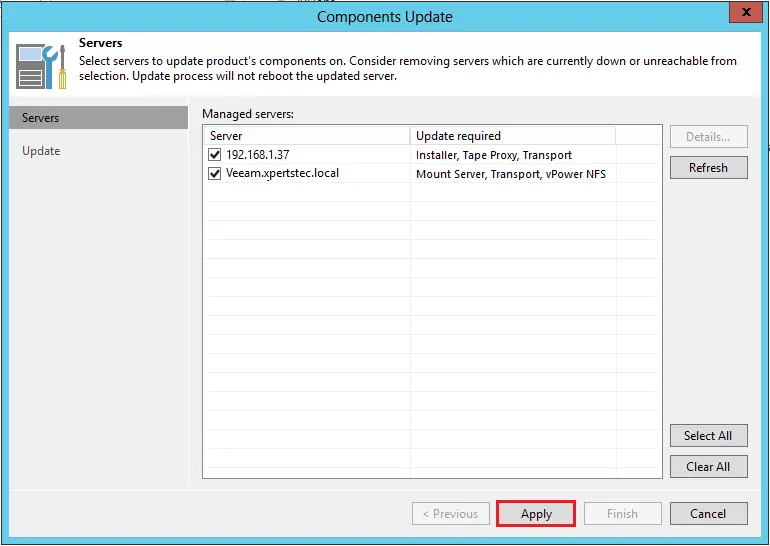
17- Veeam components update window, select your managed server and then click apply.
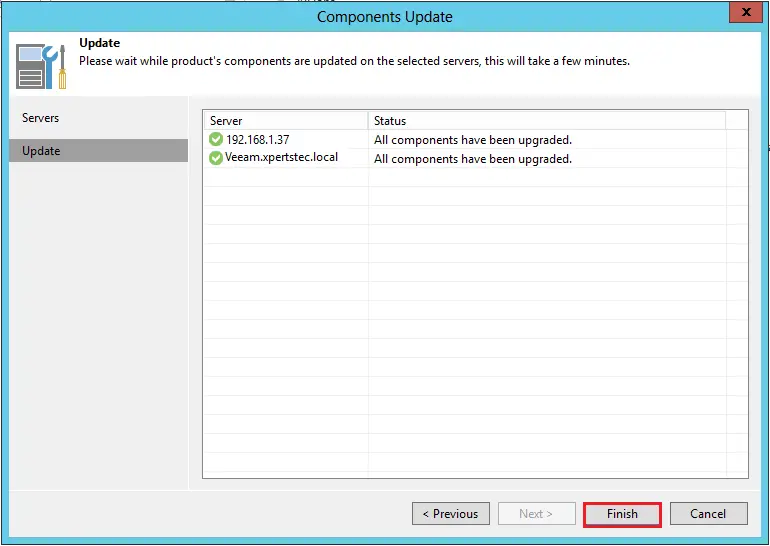
18- Components successfully updates, click finish.
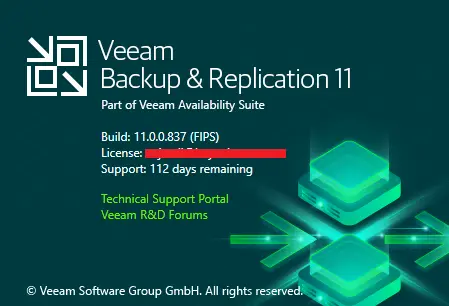
19- Subsequently, you must be able to check the version of the Veeam server in the VBR console and make sure everything has been upgraded successfully.
Watch this video on XpertsTec YouTube.