
In this article, I will show you how to configure iSCSI share in TrueNAS CORE to use as a datastore in VMware 7.0. ISCSI share is a method to set up block level storage access between 2 different computers. In this setup, I will use this protocol to store the virtual machines that I create in VMWare in our TrueNAS box.
The TrueNAS CORE web GUI (interface) makes it simple to enable iSCSI and setup a storage volume as an iSCSI target, and then we can connect it using the ESXi web GUI using software iSCSI.
Configure iSCSI share in TrueNAS CORE
Enabling the iSCSI service in TrueNAS
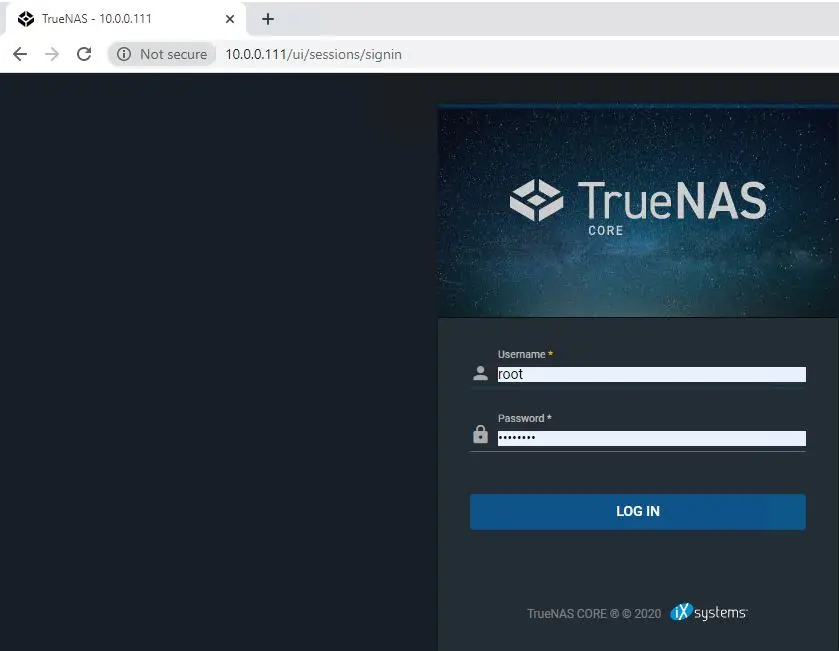
Open a web browser, type TrueNAS IP address, and press enter. Type TrueNAS credentials and then click login.
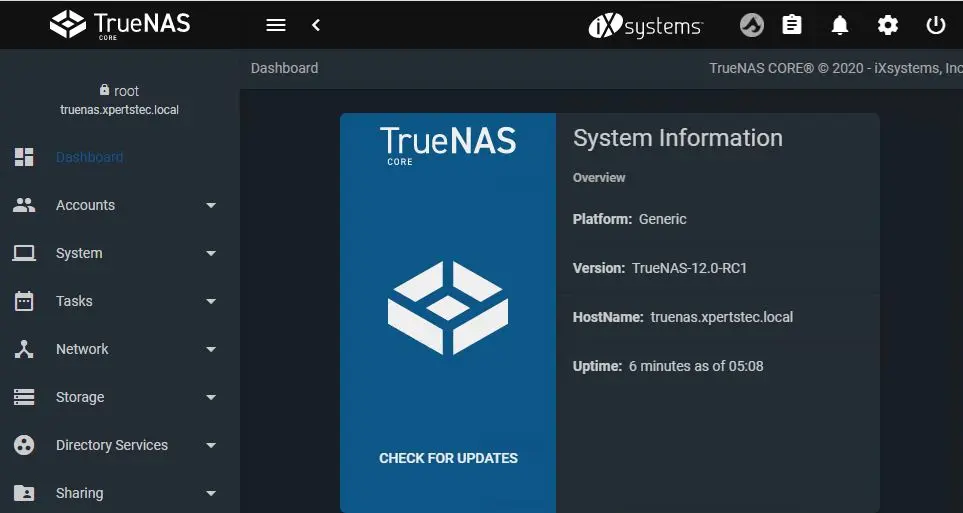
TrueNAS Dashboard.
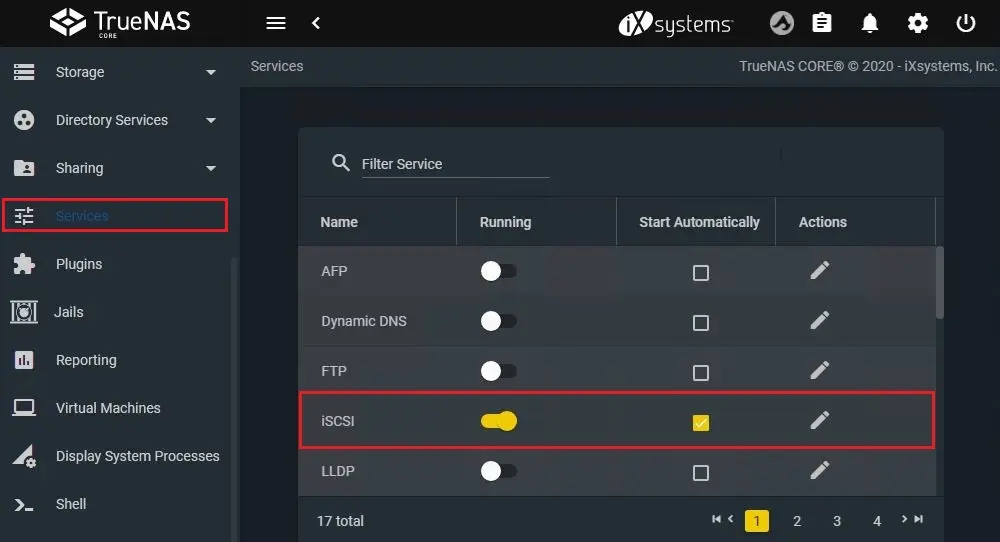
How to enable iSCSI Service
Select the Services tab, and then enable iSCSI, Start Automatically.
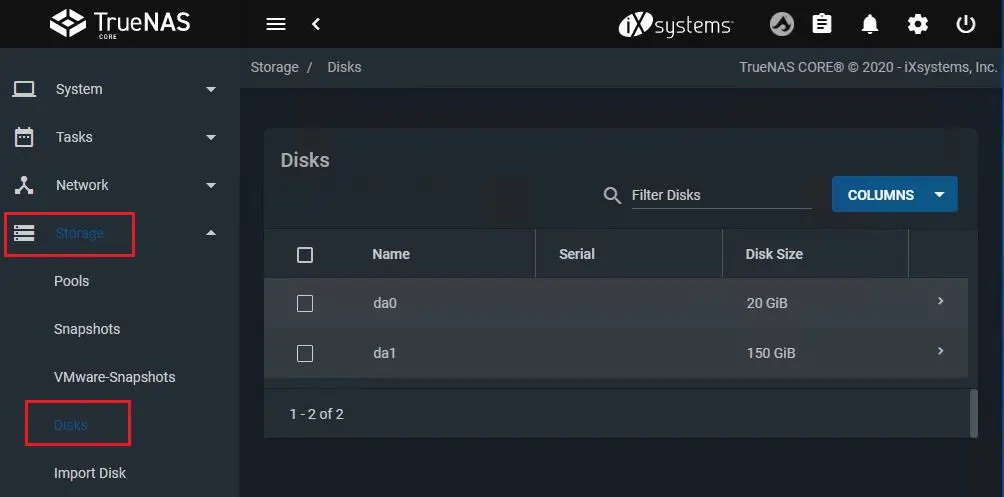
Select Storage tab, click on disks to see which one you want to use.
How to create storage volume to share in TrueNAS CORE
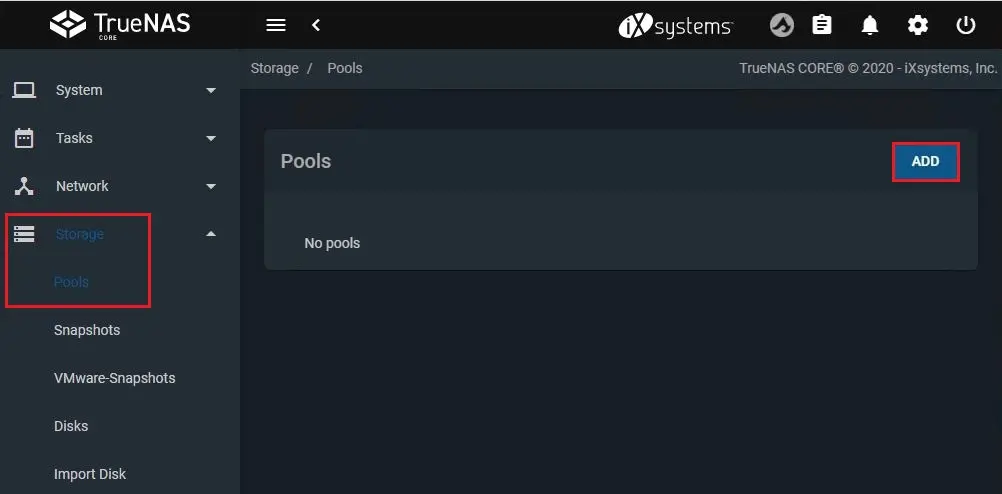
Select Storage, select Pools, and then click ADD.
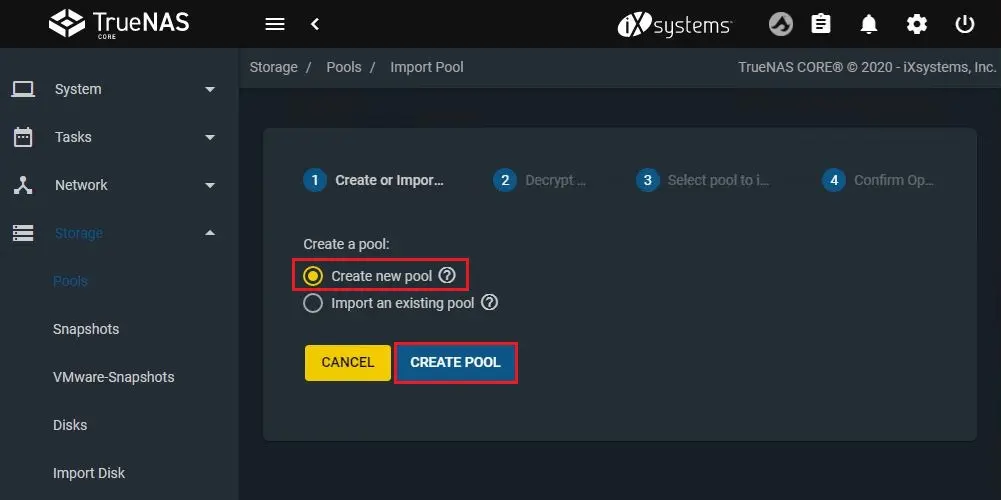
Select create new pool option, and then choose create a pool.
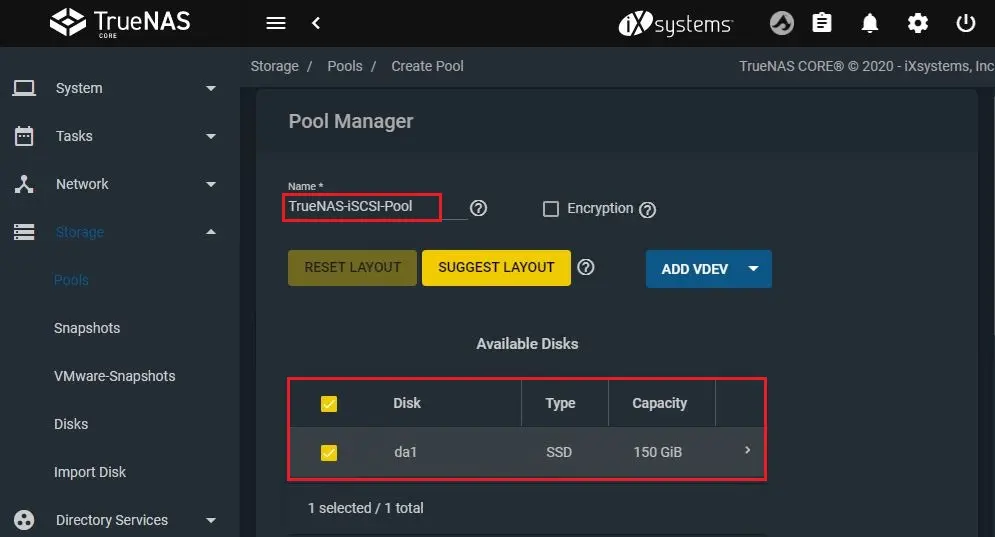
Enter a name and then choose the disk you need to share as iSCSI share.
Choose the error key to choose the disk and then click Create.
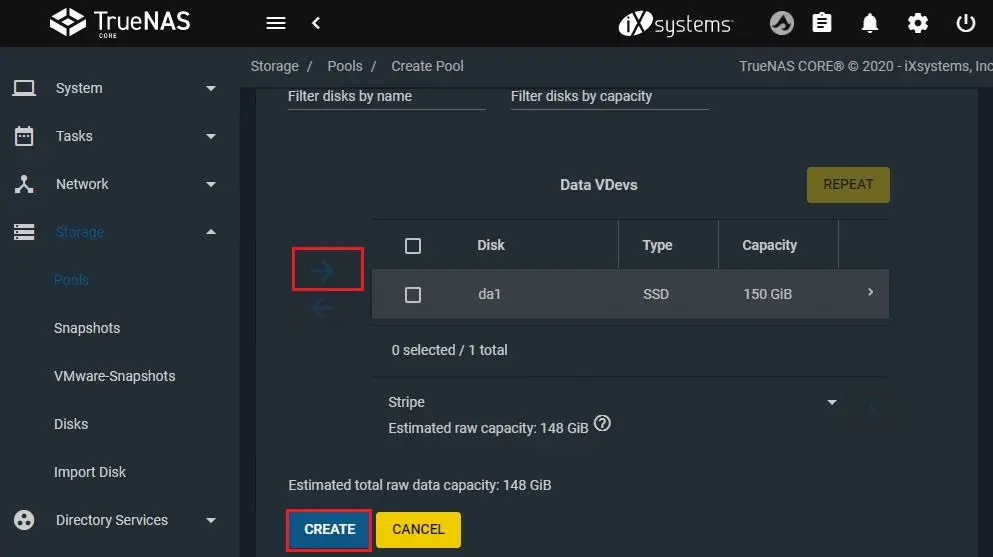
Choose the confirm checkbox and then choose create a pool.

In the pool window, we want to create the storage volume. Take a note that how much space we have available, then select three dots button and select Add Zvol.
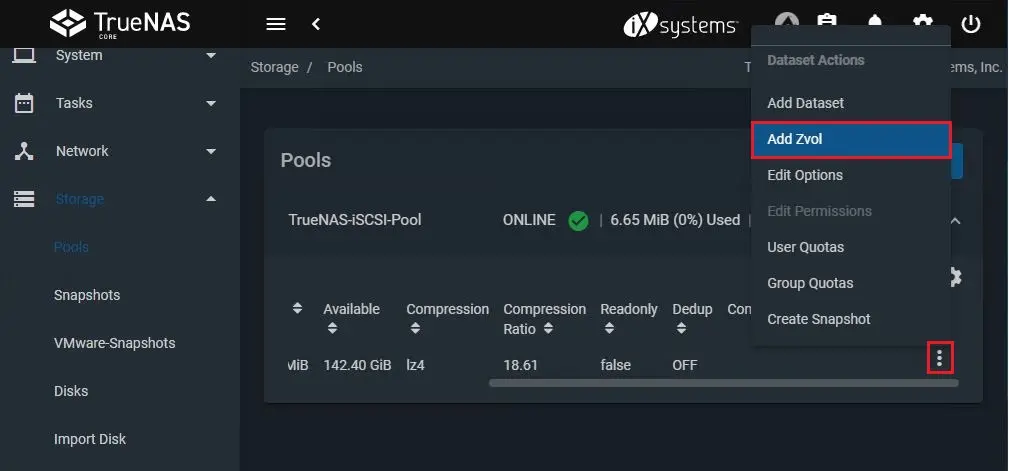
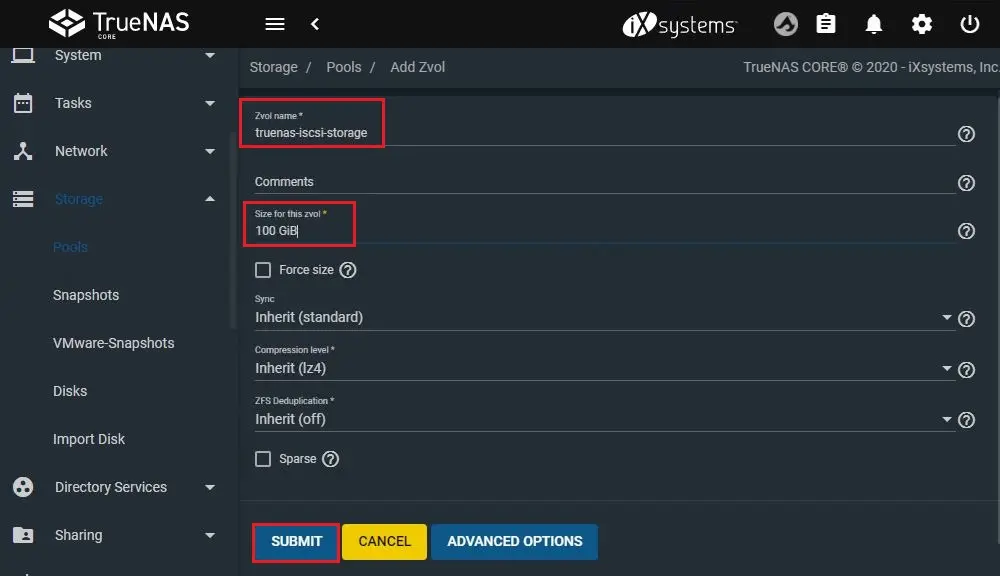
zvol name – type a name.
Comments – a description
Size for this zvol – select the volume size.
Now click SUBMIT to create the new Zvol.
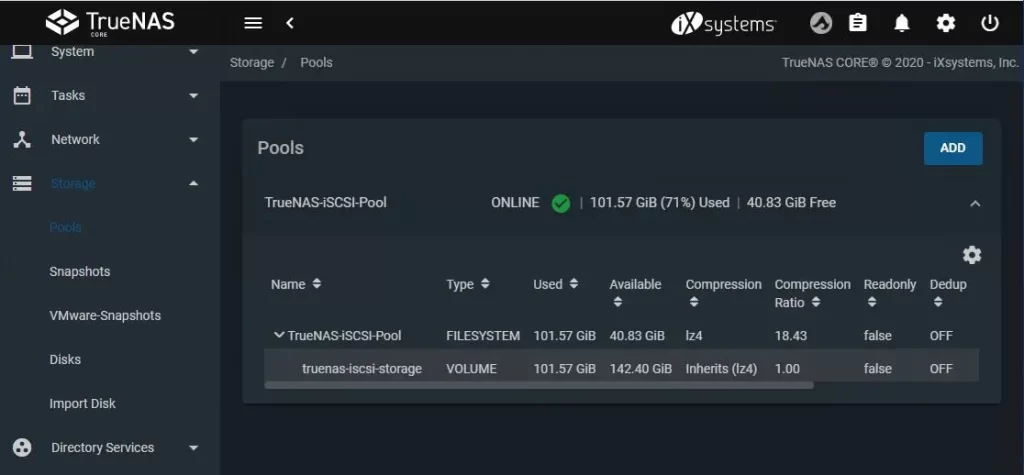
A new Zvol has been created.
How to configure iSCSI to share the new volume
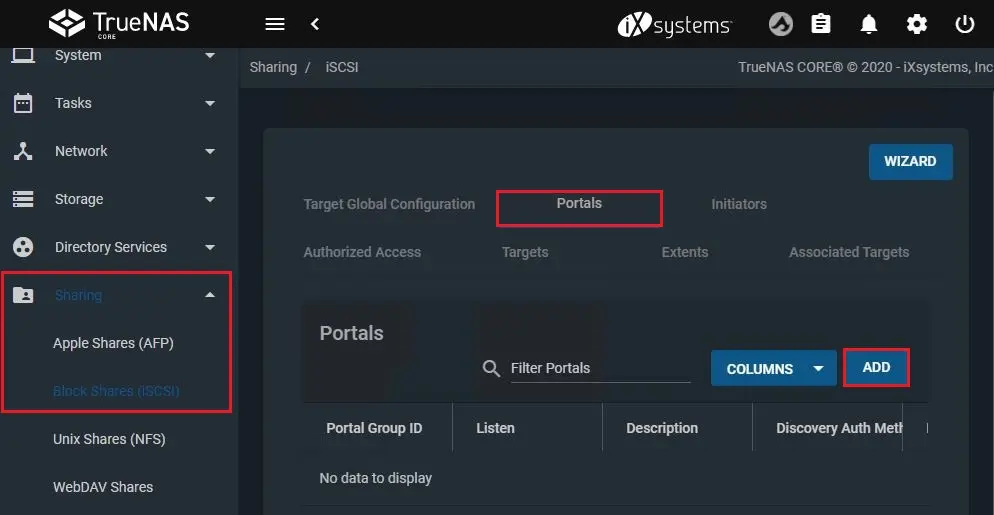
Select the Sharing tab and then Block Shares (iSCSI)
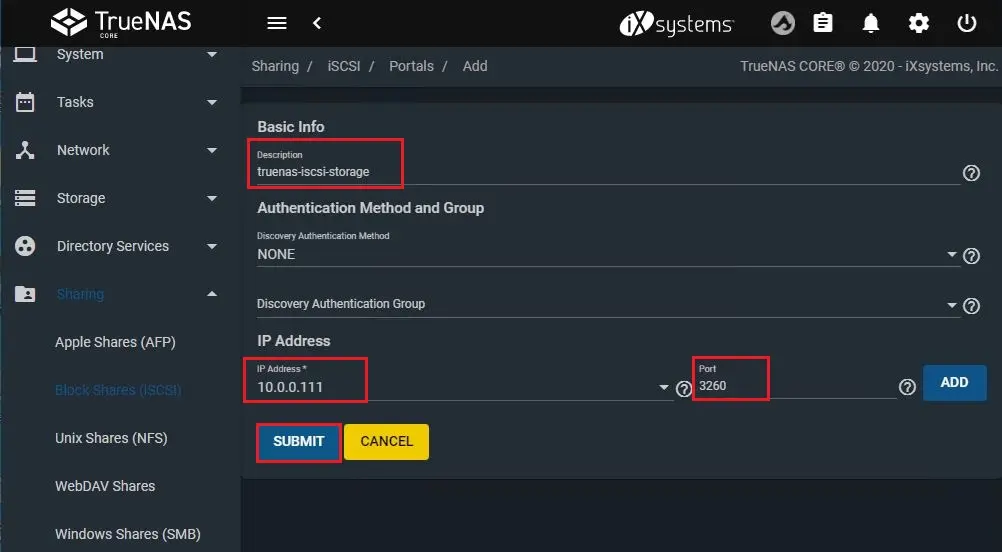
Click on the Portals tab and then click on the ADD button.
Description – type a description
IP Address – type the IP address of an existing network interface that we need the portal to existing on. If we choose the box it must expand to show you the presently available IPs.
Port – Default TCP port is 3260.
Click SUBMIT to create the portal.
How to create an Initiator to attach to the portal
It will initiate requests to & receive responses from iSCSI target(s). Choose the Initiators tab and then select ADD.
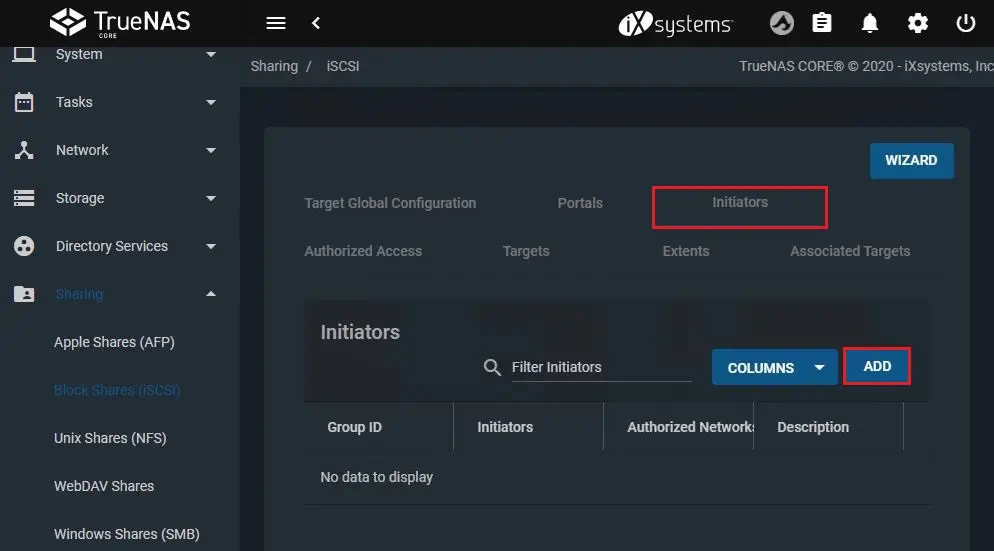
Select Allow All initiators and then the save button.

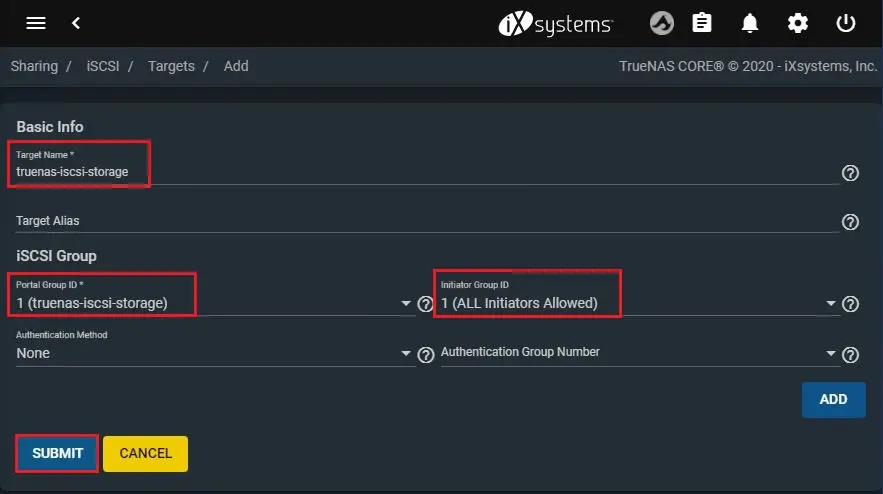
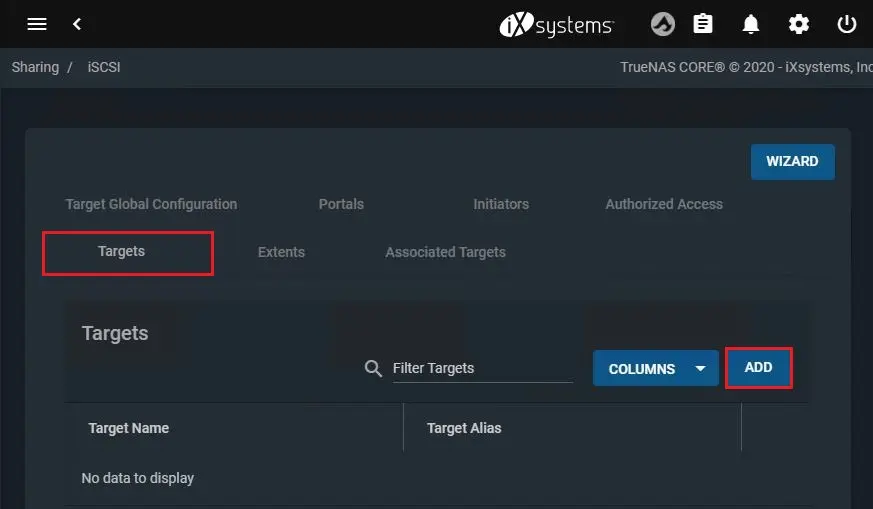
Select targets and then click ADD.
Target Name – choose a name for the target.
Portal Group ID – choose the ID of the portal group we have created earlier.
Initiator Group ID – choose the ID of the initiator group we have created earlier.
Click SUBMIT to create the target.
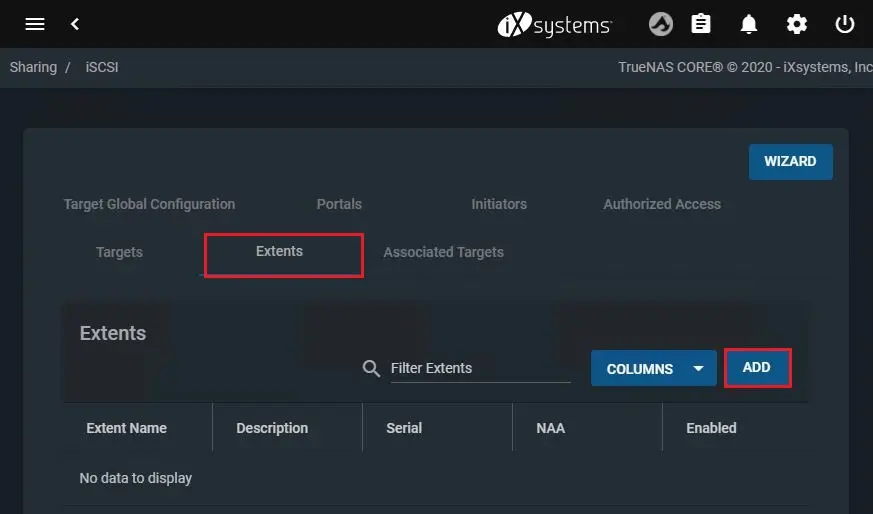
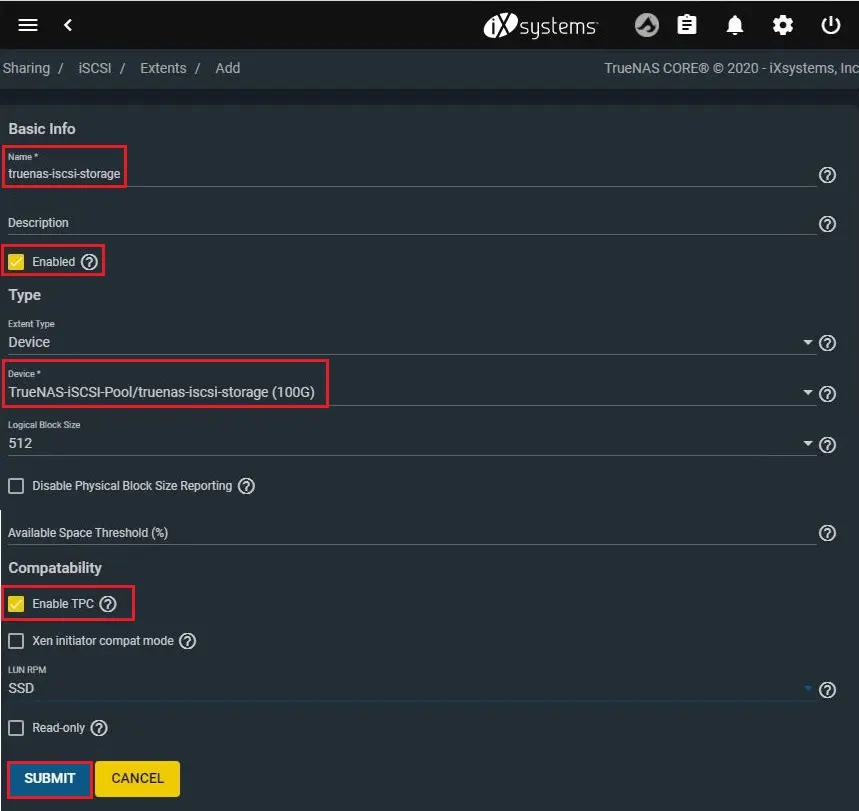
Create the Extents tab and then click on ADD.
Name – The name of the extent.
Select Enabled
Extent type – Select Device.
Device – Click here to choose the Zvol we have created earlier.
Under compatibility – select enable TPC
Click SUBMIT to create the extent.
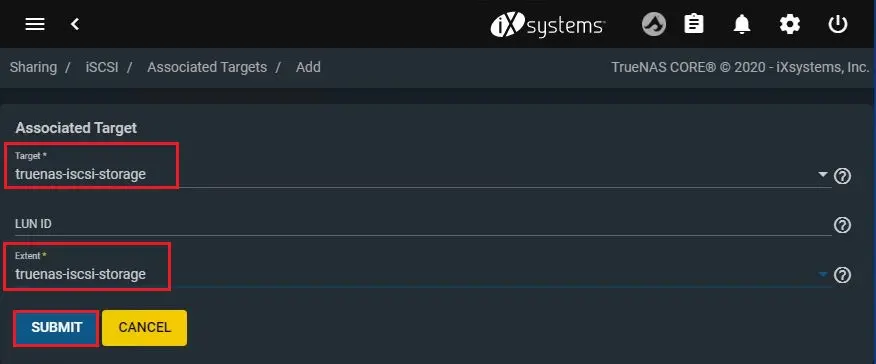
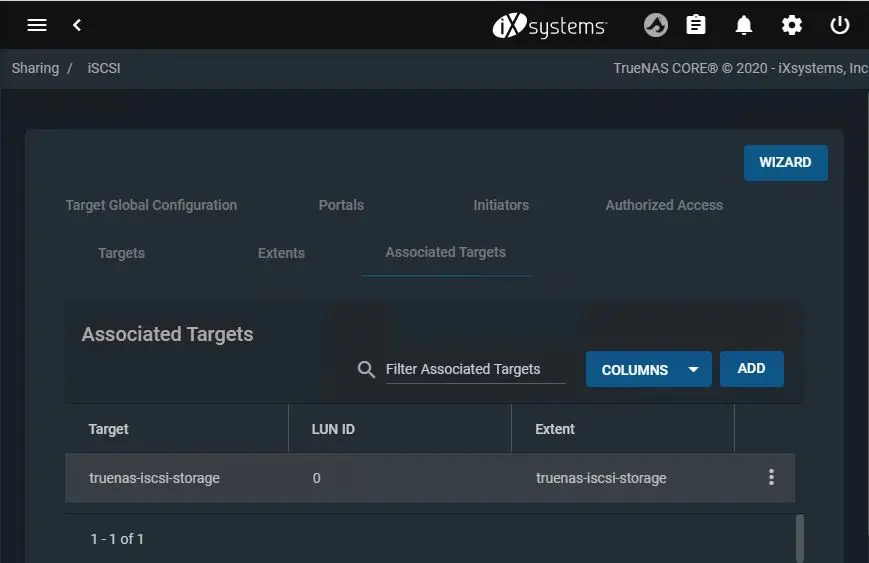
Choose the Associated Targets tab & then click on ADD.
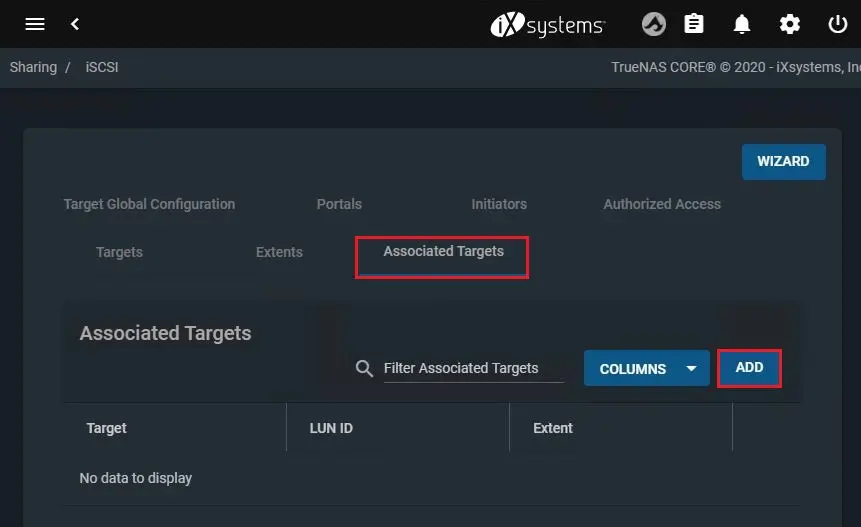
Target –select the target we have created earlier.
LUN ID – type a number between 0 and 1023.
Extent – choose the extent we just created.
Click SUBMIT to associate the extent with the target.
It will returned to the Associated the Targets tab and then you will see the newly available target.
To add iSCSI TrueNAS to VMware ESXi Host.
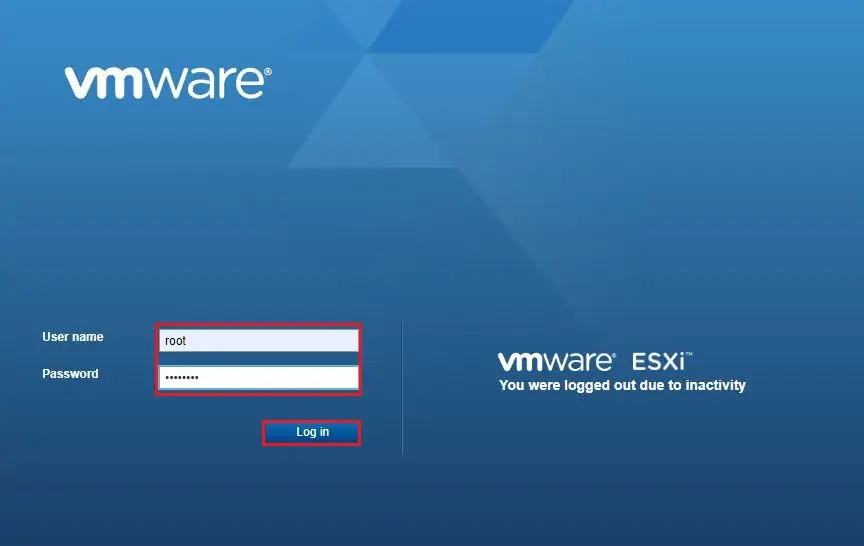
Login to VMware ESXI Host
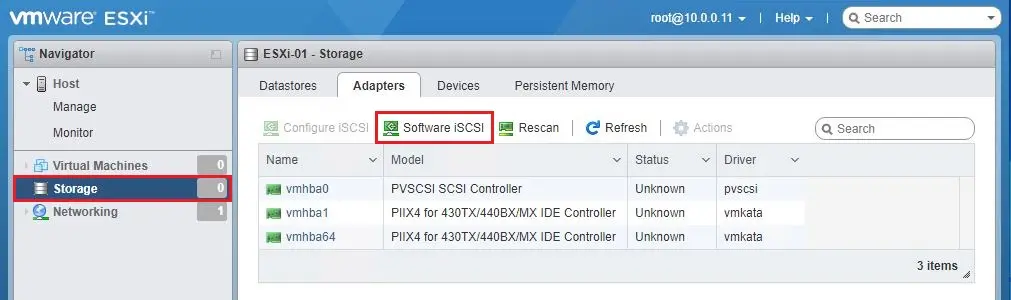
Select storage, Select Adapters tab and then select Software iSCSI.
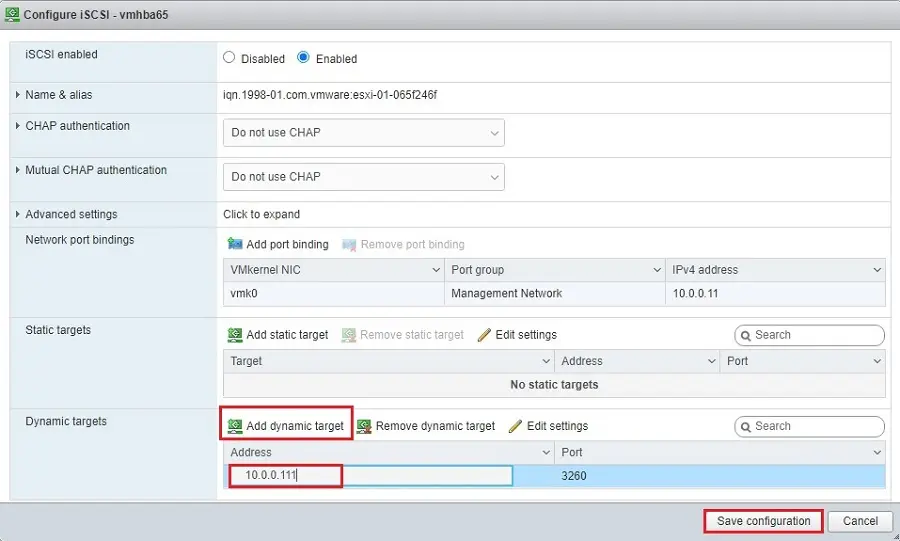
iSCSI enabled tab, choose Enabled.
Network port binding – select add port binding.
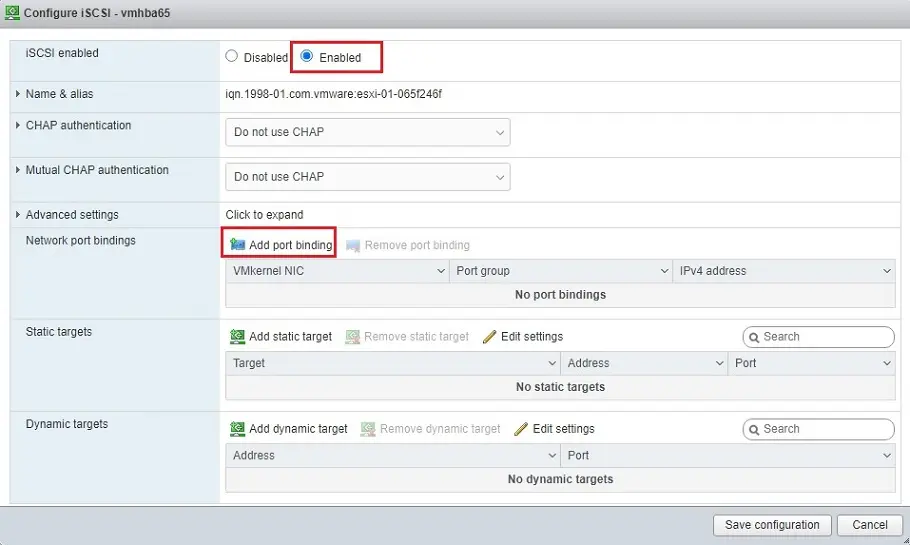
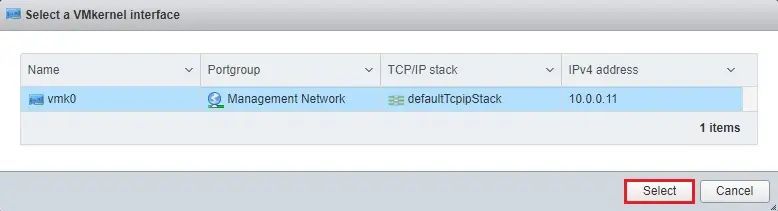
Select a VMkernel interface and then click select.
Dynamic targets tab – select add dynamic targets
Enter the IP address of the TrueNAS ISCSI Server and then click save configuration.
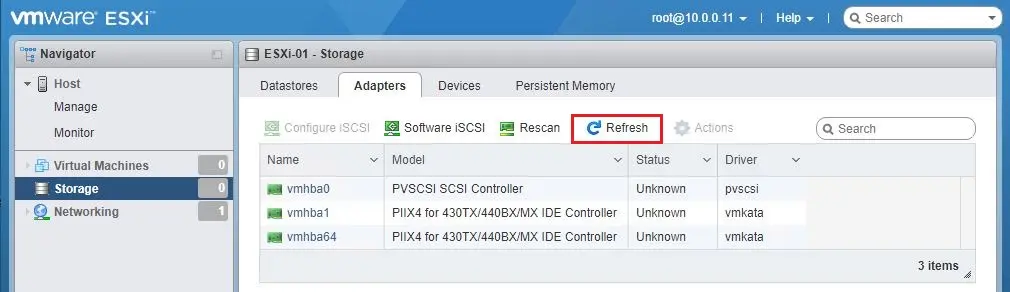
Select Refress
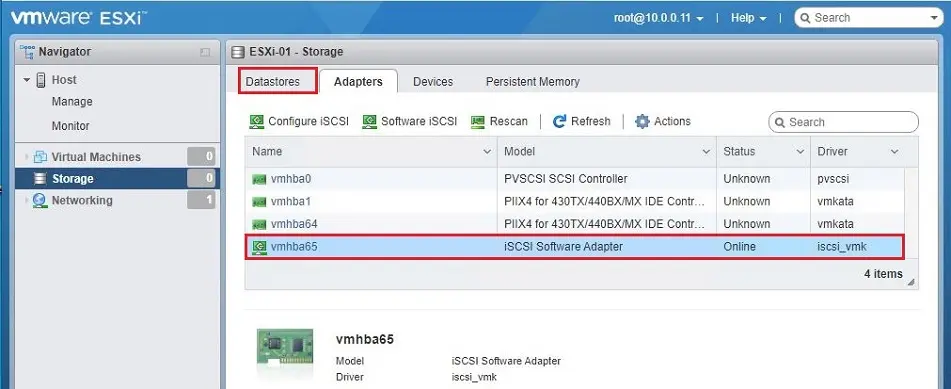
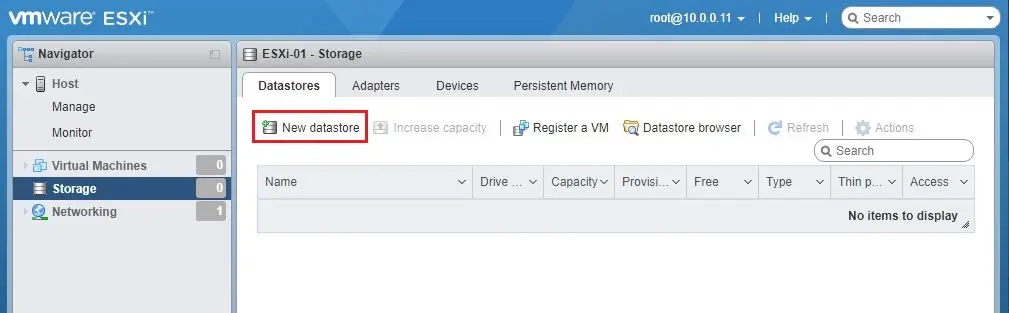
Now you can see Iscsi software adapter and then Datastore.
Select New datastore.
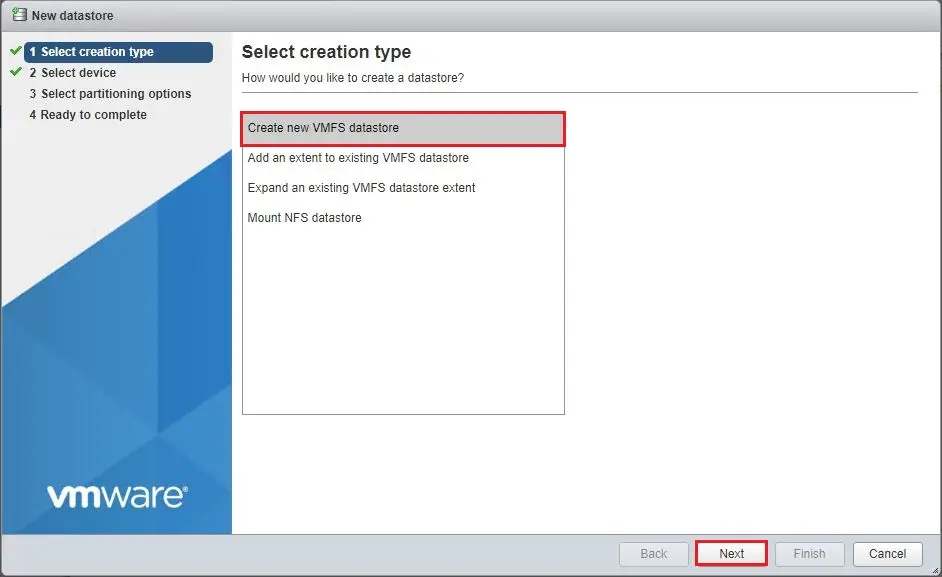
Choose create new VMFS datastore type and then click Next.
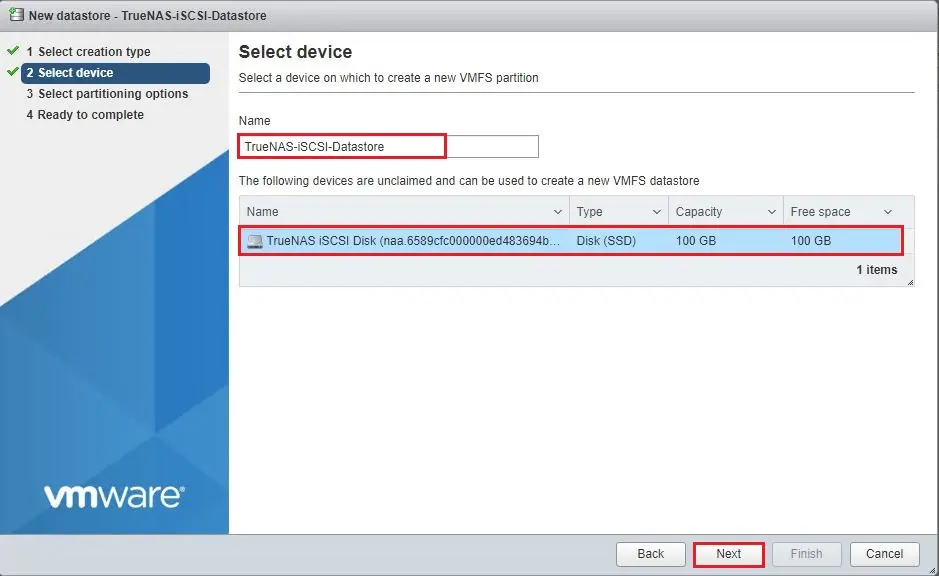
Enter the Datastore name, select TrueNAS Iscsi datastore, and then click next.
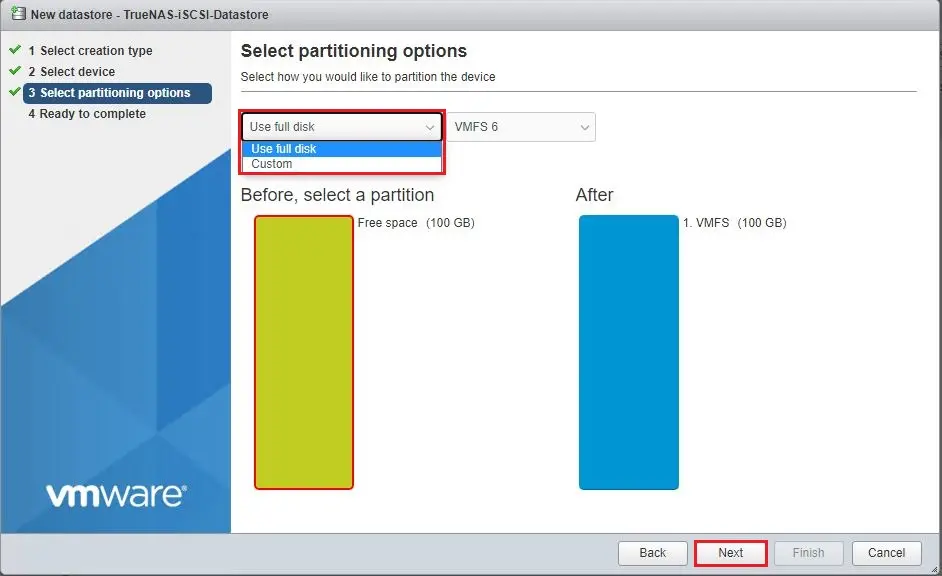
Choose full disk or custom size, and then click next.
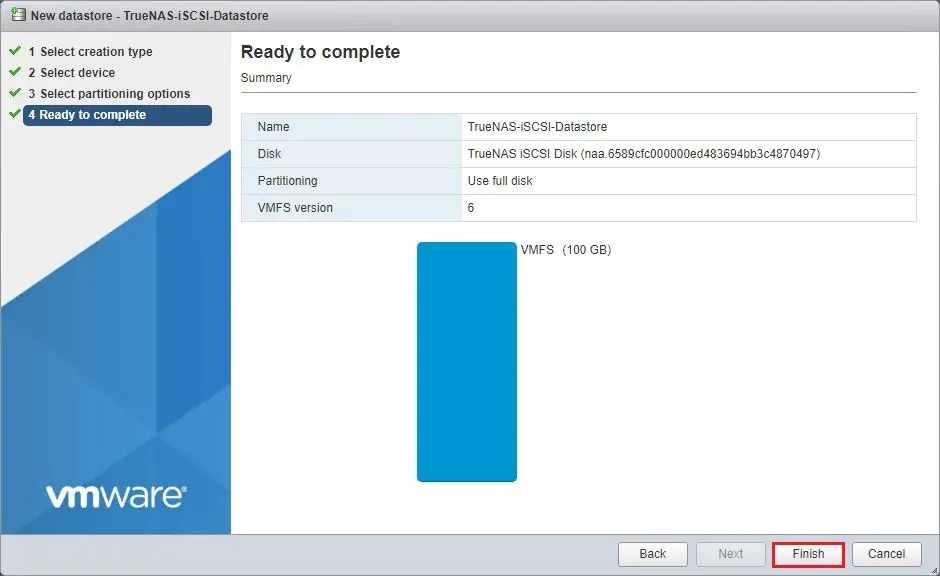
Review the summary and then click finish.
Read the warnings and then click Yes.

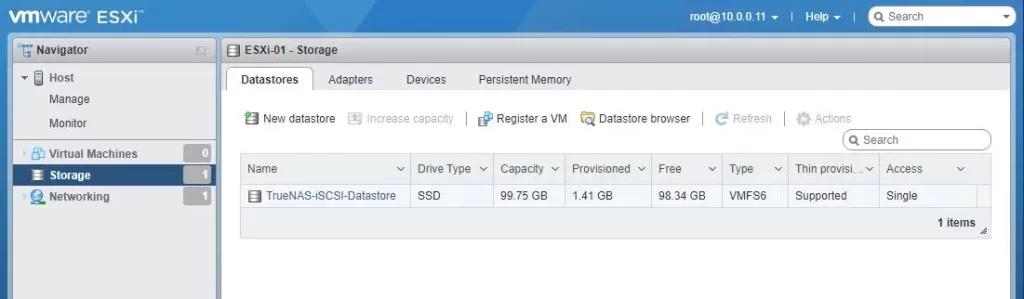
Now you can see the iSCSI-based datastore listed.
For more details, please visit TrueNas