I will show you how to mount an image in Macrium Reflect as a Windows drive. By mounting the file in Windows Explorer, we can explore or browse a backup or an image. The Macrium backed-up image is mapped to a temporary drive letter that we can access just like any other drive.
Download Macrium Reflect from their website.
Mount an Image in Macrium Reflect
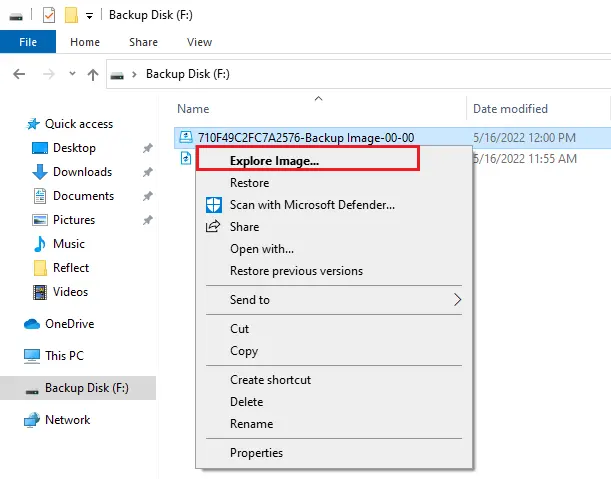
Go to the location of the image you want to mount.
Right-click the image file and then choose Explore Image.
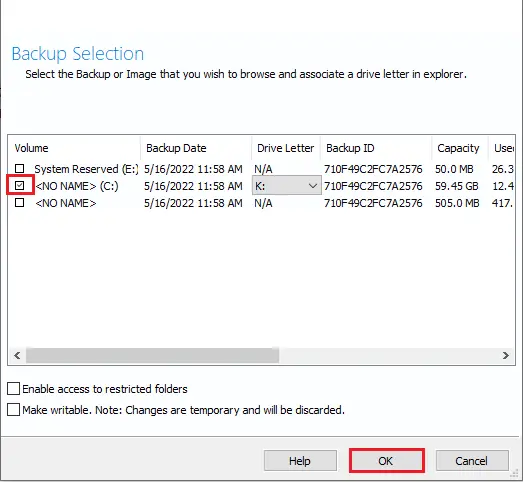
Select the partition checkbox you want to mount and then click ok.
In this instance, the image only shows one partition.
We can also choose which Drive Letter we would like to be assigned.
Click ok
To enable access to restricted folders, the option mounts the image with full NTFS permissions to all folders in the image. This means we can browse Macrium images created on another system without having to grant NTFS access.
To make the writable, make the option the mounted folder system for the movement writable. This is useful when accessing folders in the image where the opening software is required to write to the file.
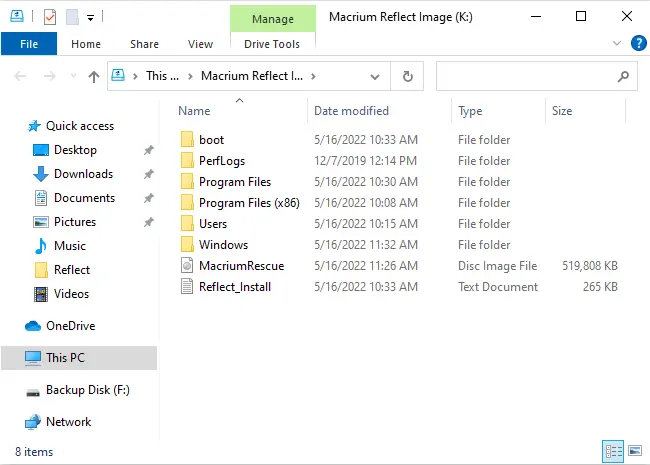
Now we can navigate through the image in Windows Explorer.
Using Macrium to Mount an Image
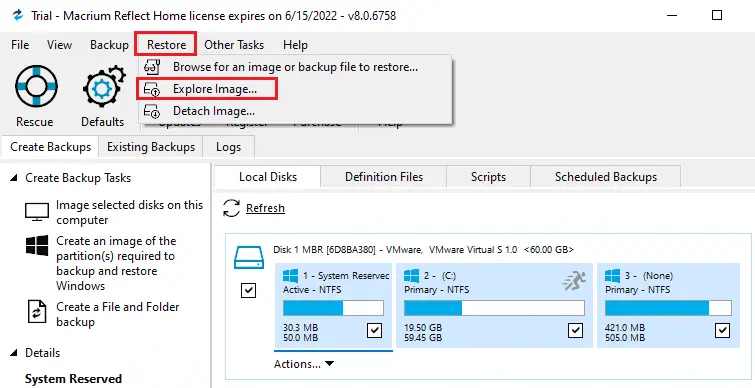
In the Macrium Reflect window, click on the Restore tab and then select explore the image.
How to Unmount Temporary Mounted Drive
In Windows Explorer
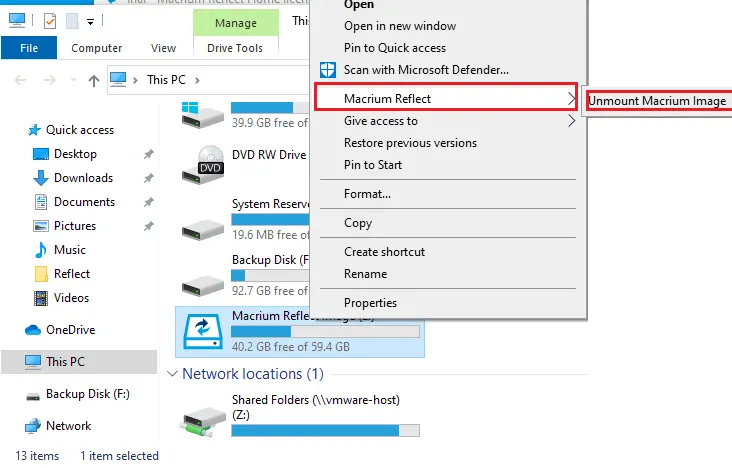
To detach a temporarily mounted drive in Windows Explorer, right-click on the drive you want to unmount.
Click on Macrium Reflect, and then click Unmount Macrium Image.
Detach Image Using Macrium Reflect
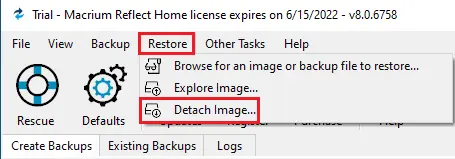
In the Macrium Reflect interface, select the Restore tab in the top menu and then choose Image Detach.
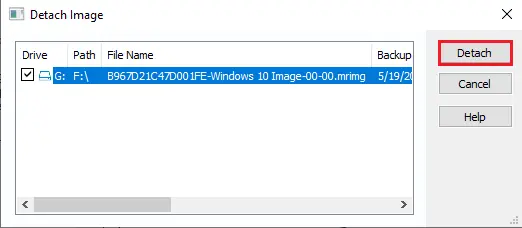
Choose the drive letter you want to unmount and click detach.
Problems mounting images in Macrium
If you face any problem mounting Macrium backup images, it is possible that the backup image mounting system driver has failed to load correctly. To fix this issue, you are recommended to reinstall Macrium Reflect software.


