
Let’s have a look at how to create Phoenix OS bootable USB drive. There are several ways to Install Phoenix OS on a computer, but its installer isn’t usually intuitive out there, and making it work on a USB drive is not an easy task in the world. Because that is what I am going to teach you here, how to create a USB bootable for Android computers on a pin drive that we can use on any computer and we will not touch the hard drive.
There are many applications are available to create bootable USB drives. But, for creating a Phoenix OS bootable drive, Rufus is the best.
Download Phoenix OS
So first download the latest version of Phoenix OS ISO, you need to burn it onto a USB bootable drive using Rufus. Alternatively, you can visit my blog to create a Bootable USB using different tools.
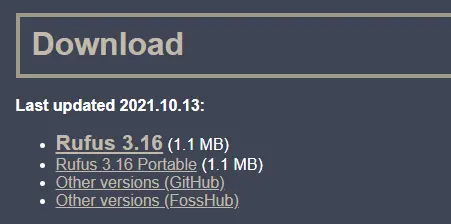
Download Rufus Portable
Download Rufus, next, install Rufus to image the downloaded replicate of Phoenix OS to a USB disk. The USB drive must offer at least 16 GB of storage.
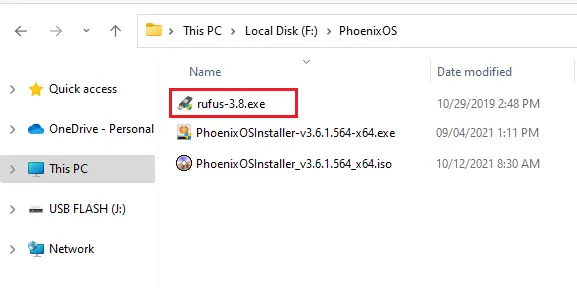
Open Rufus App
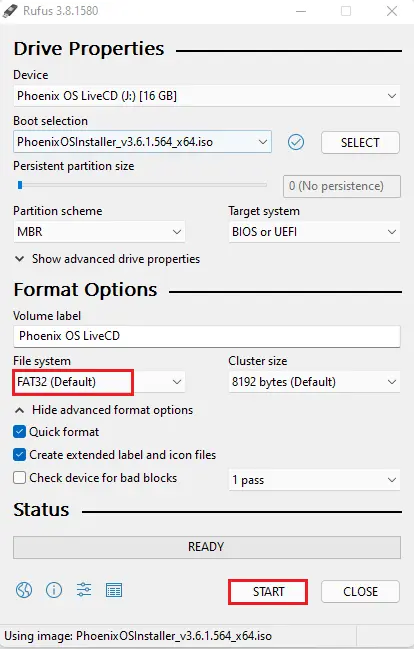
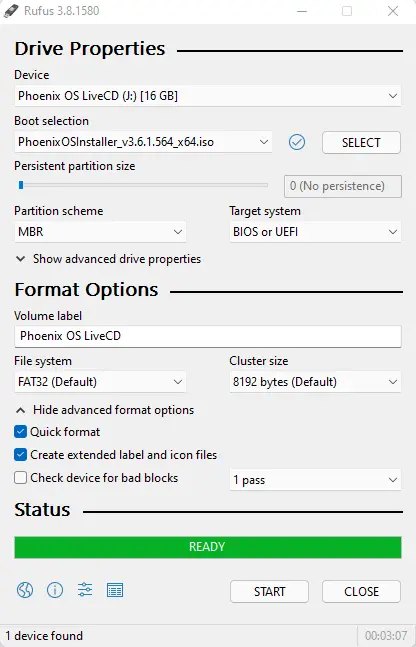
Now, connect your empty USB pen drive to your pc and make sure there is no important data in it. Click on the select button.
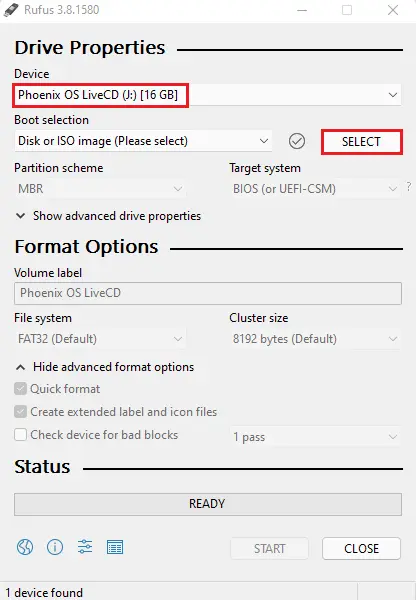
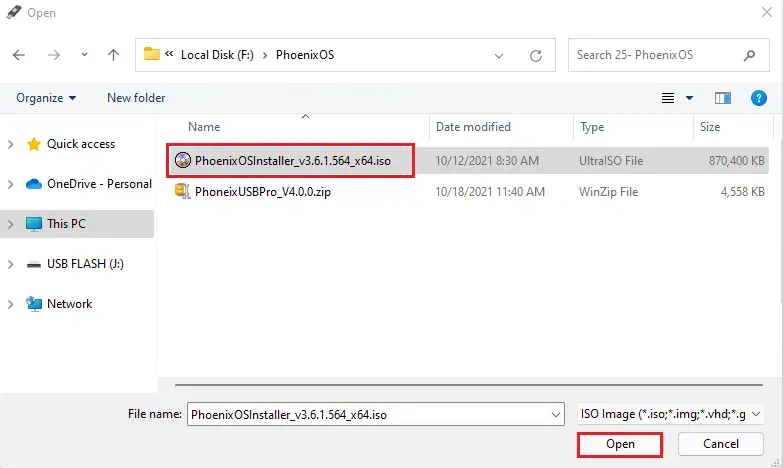
Click on the Phoenix OS ISO file that you have downloaded and then click open.
Under the Partition scheme choose MBR.
Select the checkboxes for Quick format
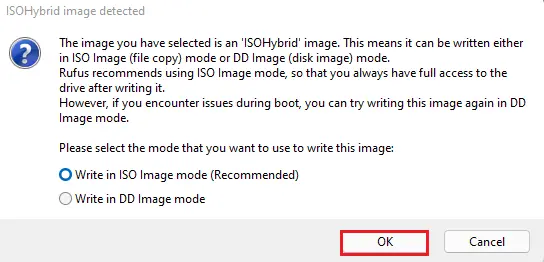
The other defaults should work fine. Click on start.
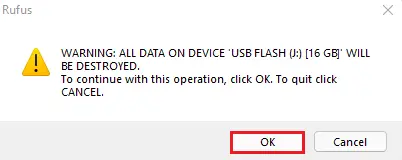
Click yes
Data warning, click ok.
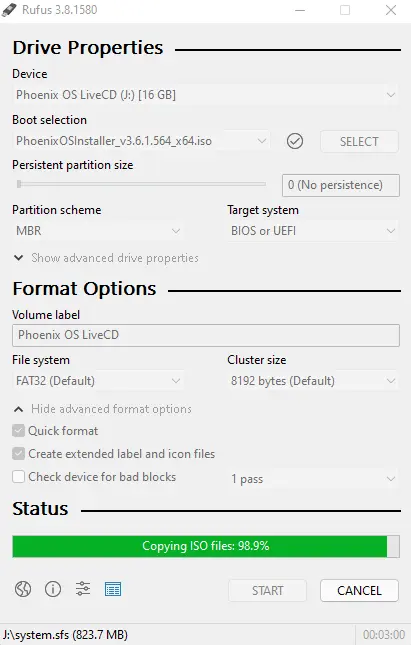
Creating bootable USB drive.
Successfully created Phoenix OS bootable USB drive.
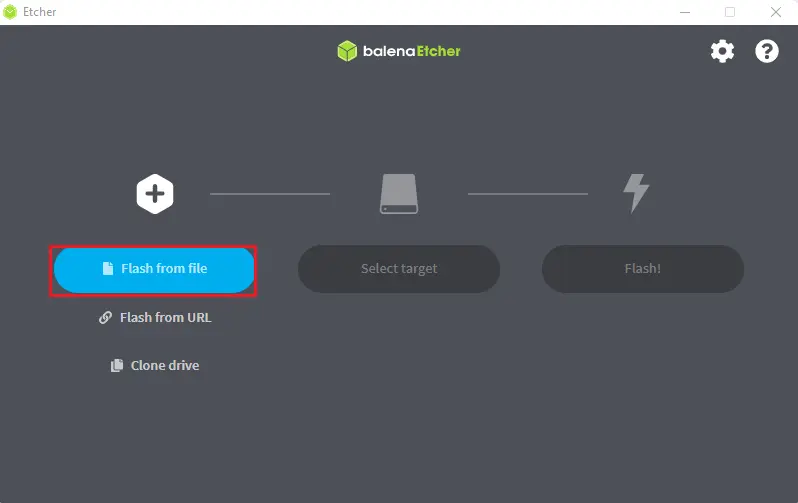
Create Phoenix OS USB bootable using BalenaEtcher
You can download the BalenaEtcher software.
Install BalenaEtcher
Double click on balenaEcher to run setup.
Select I Agree
Click on the Flash form file.
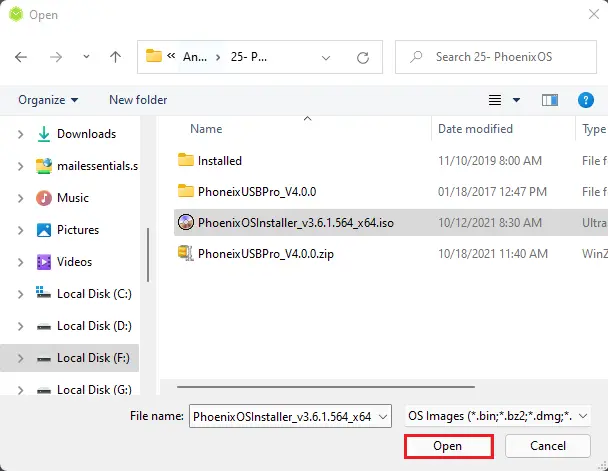
Browse the PhoenixOSInstaller ISO file, select it and then click open.
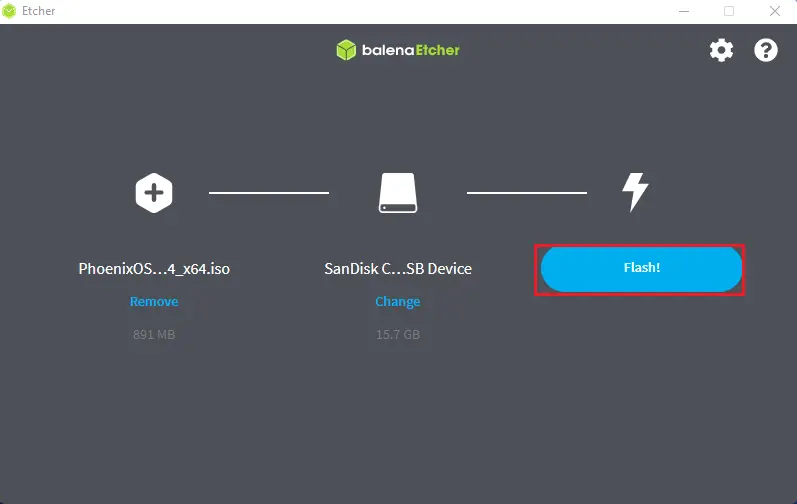
Select target USB disk
Click on the Flash button to start the Phoenix OS bootable USB drive process.
After completing the Phoenix OS bootable USB, you can unplug the USB drive and plugin it into the PC where you need to install Phoenix OS. Restart the system, and then select boot from USB in system bios. Install Phoenix OS and you can enjoy the new browsing experience brought by Phoenix OS.
Related: How to Create Phoenix OS U-Disk USB Bootable.