Veeam Backup for AWS Free Edition offers limitless restores from any Veeam Backup for AWS backup, & allows backups of up to 10 AWS EC2 Instances.
Veeam free edition will allow us to do backups of our EC2 (instances) & send them to the S3 bucket for long term storage. Restorations are possible as full workloads or we can restore individual files. Restores can be either a cross-account or cross-region.
AWS Marketplace
First, we need to log into your AWS Marketplace account.
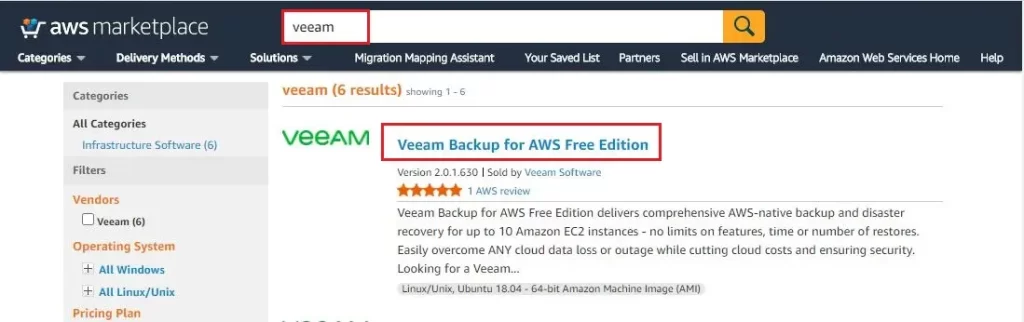
1- Type Veeam backup in the AWS search box and then select the Veeam Backup for the AWS Free Edition option.
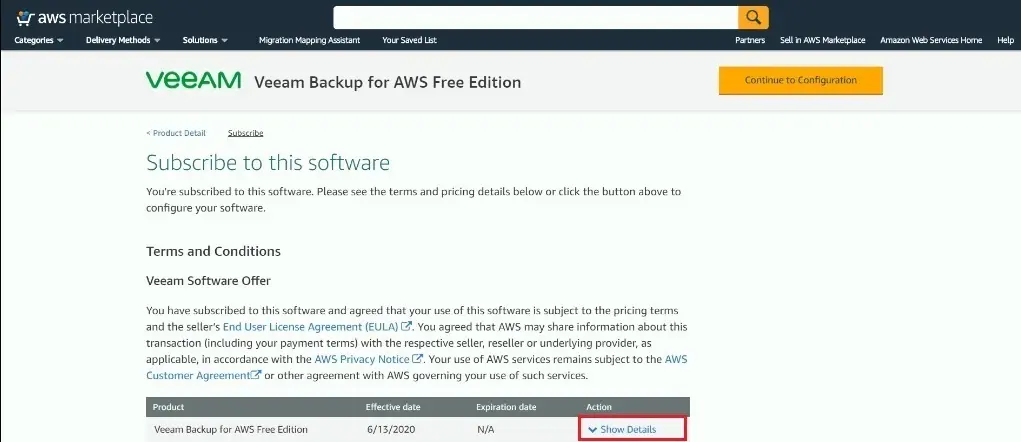
2- Select show details.
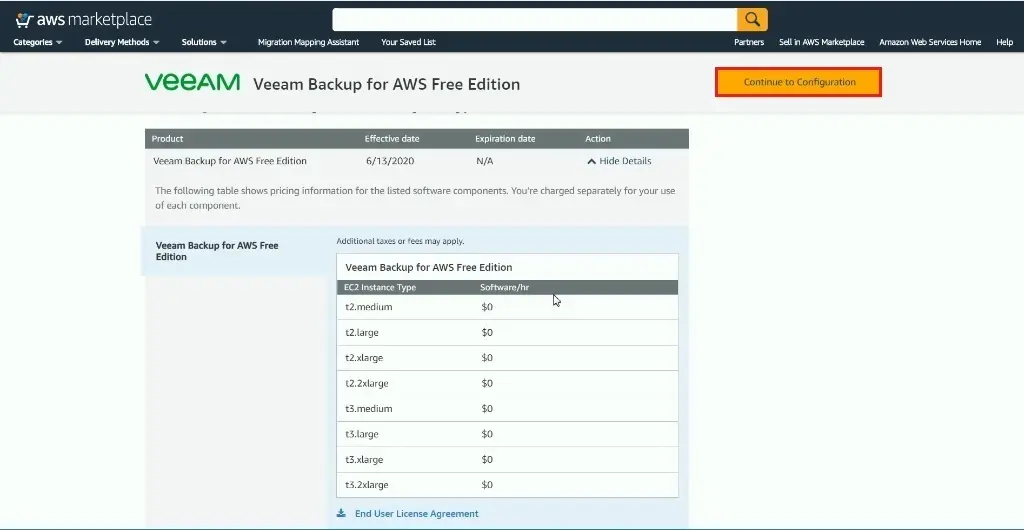
3- Click on continue to configuration.
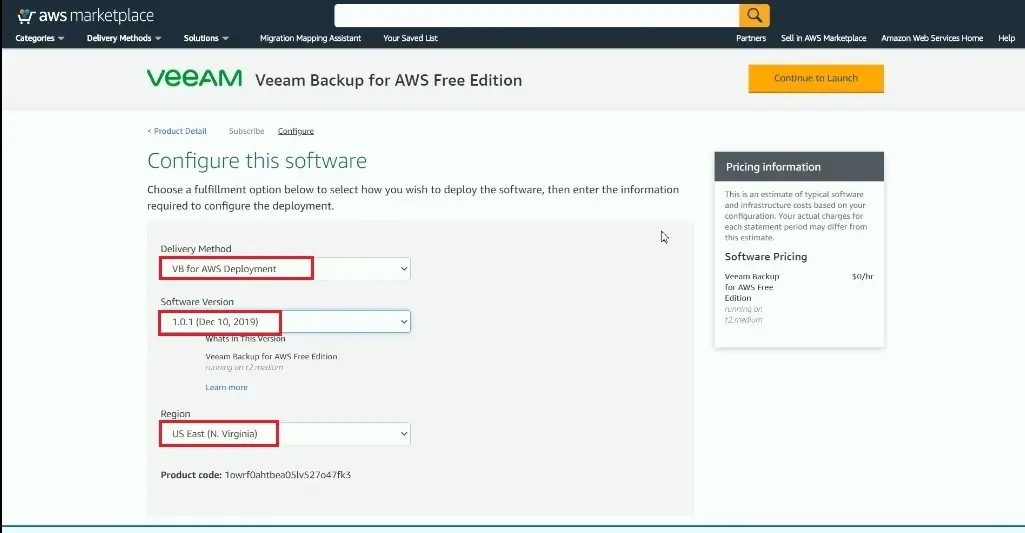
4- Delivery Method – VM for AWS Deployment
Software version – select
Region – select you region
5- Choose Action – Launch Cloud information click launch.
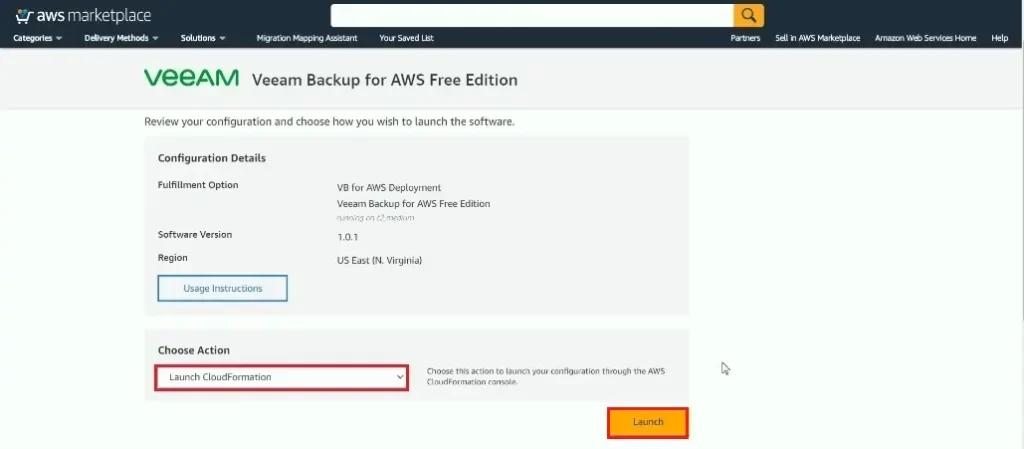
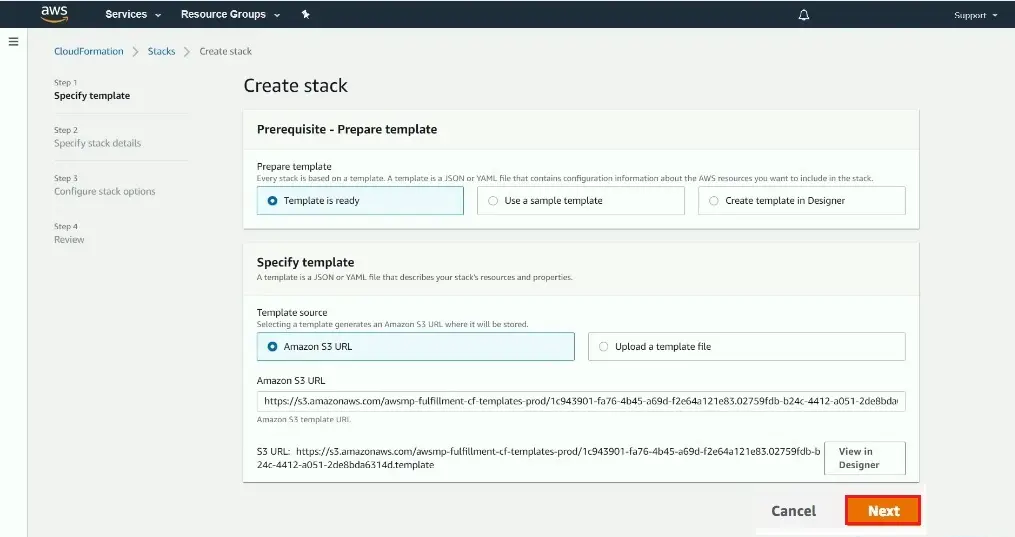
6- Click Next.
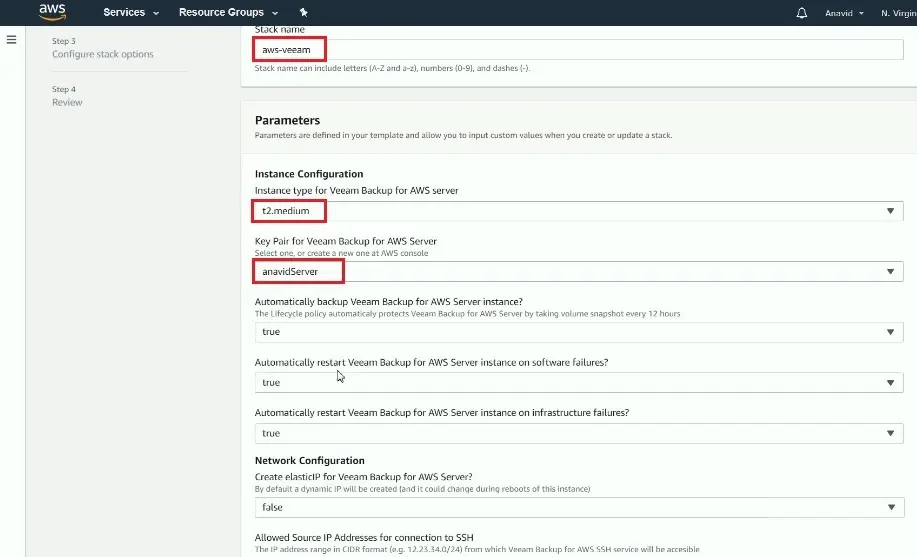
7- Stack name – aws-veeam
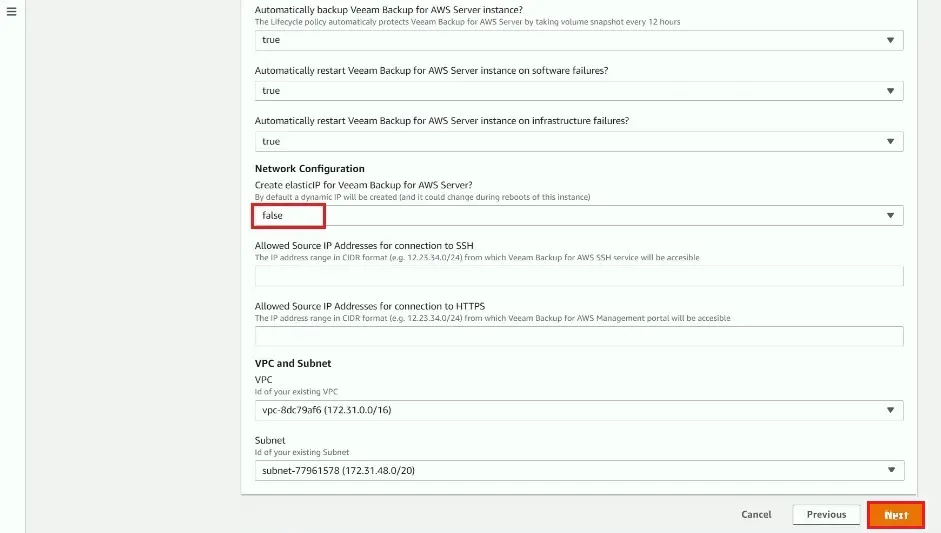
Instance configuration – t2-medium
Key pair – select your key pair and other options true
8- Default settings click next.
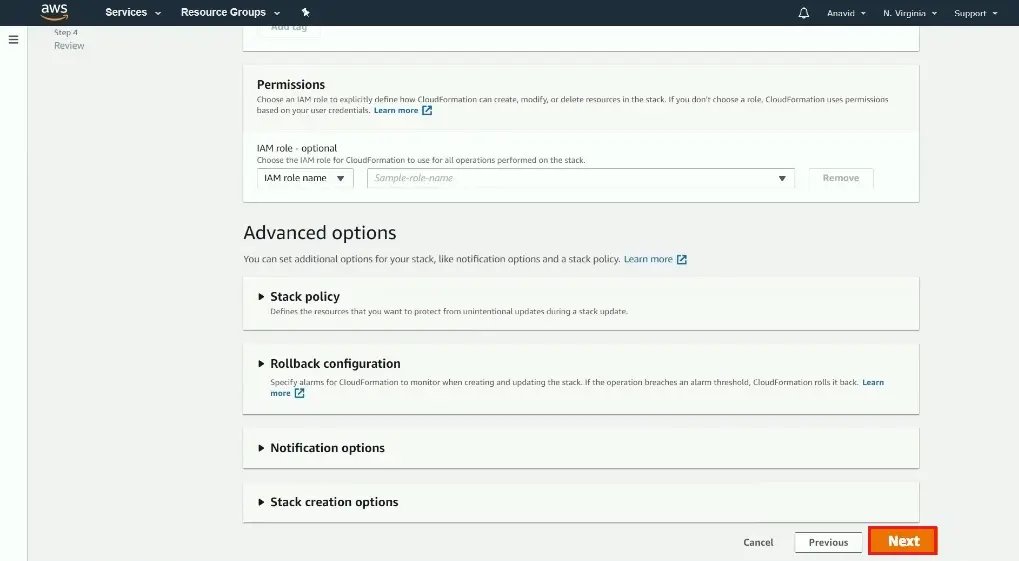
9- Click next.
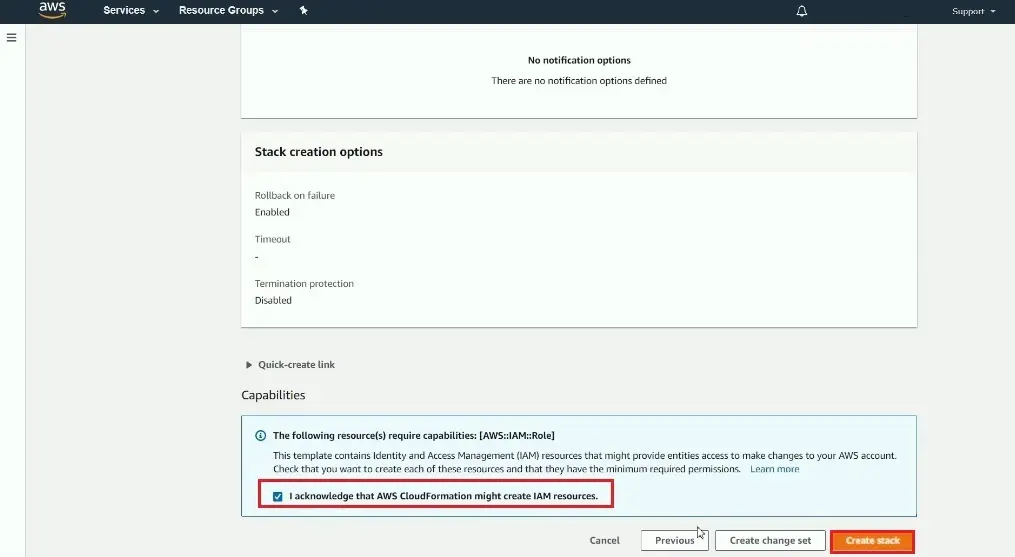
10- Select capability and click create.
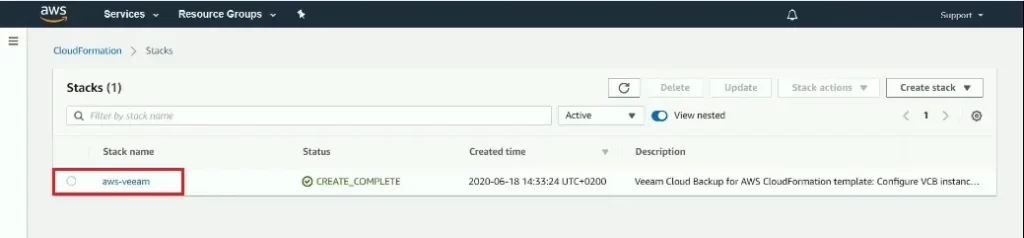
11- Veeam for AWS in progress.
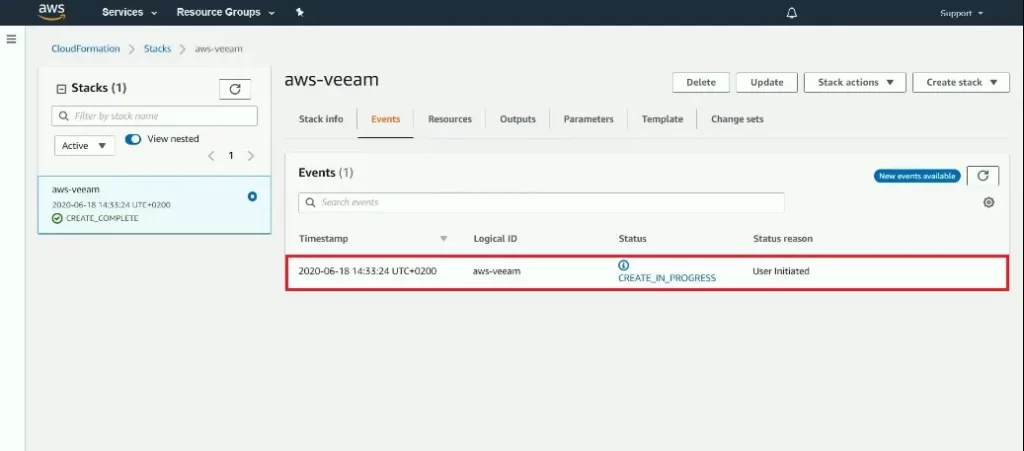
12- Click on stack name – aws-veeam.
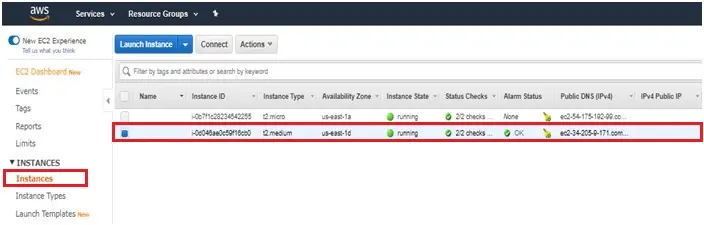
13- Navigate to EC2 Dashboard and check the new instance has been created and select it.
Veeam Backup for AWS
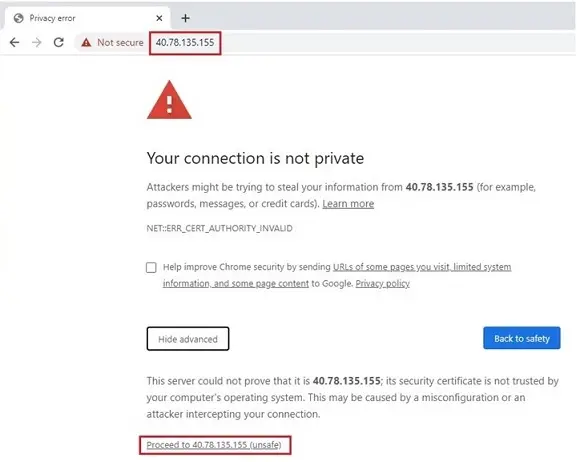
14- Copy its Public IP address. Open the web browser, paste the IP address, and then press enter to access the appliance. Choose the advanced button and then select proceed (Ignore the security warning by the web browser).

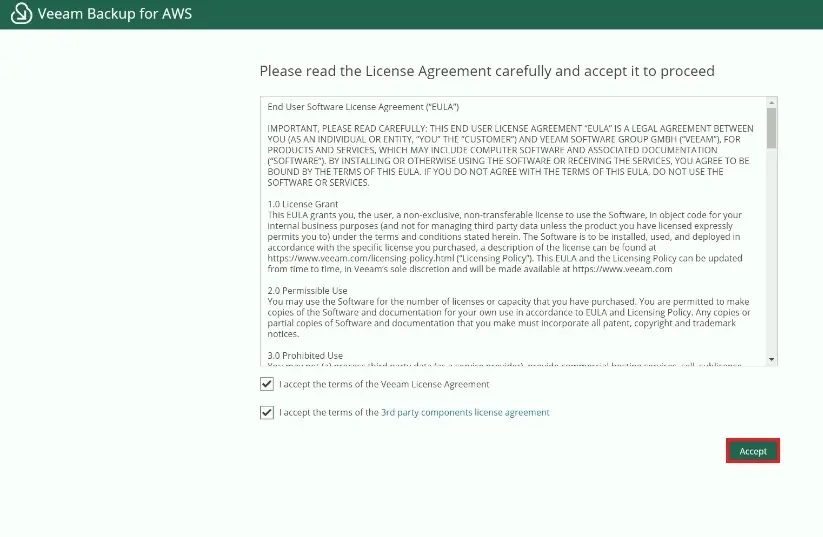
15- Accept the Veeam license.
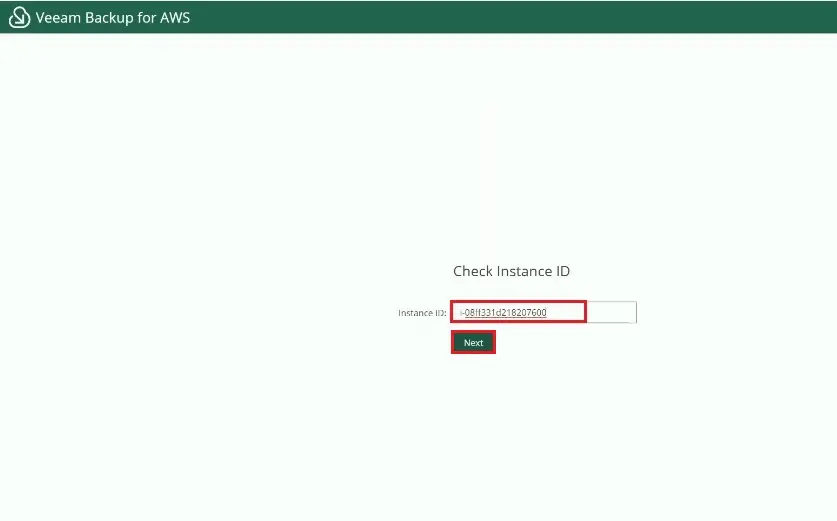
16- Paste the instance ID and click next.
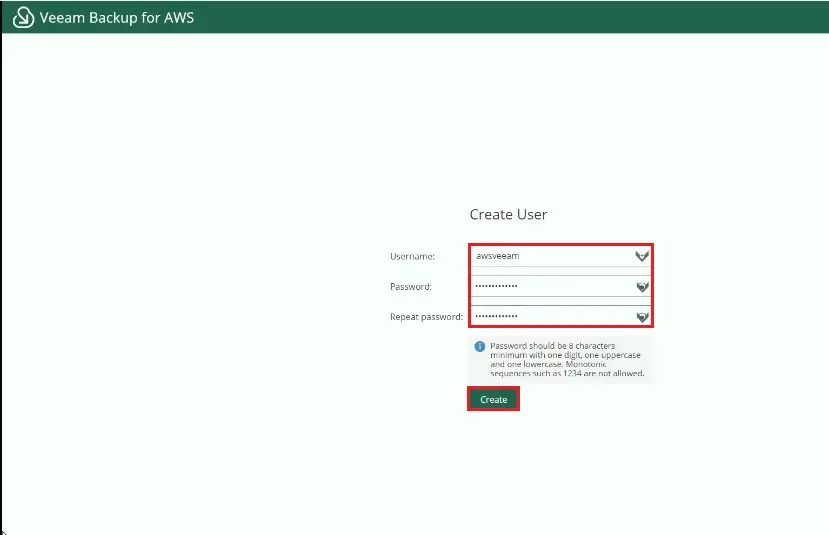
17- Type username and password and then click create.
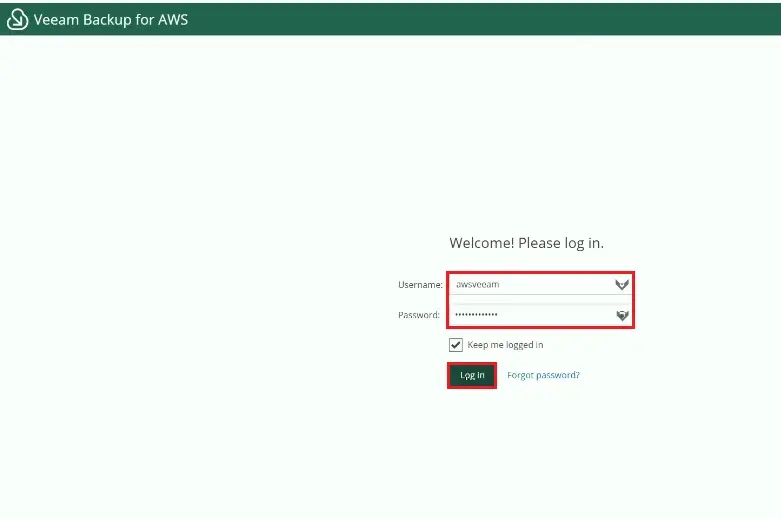
18- Enter username and password and then click login.
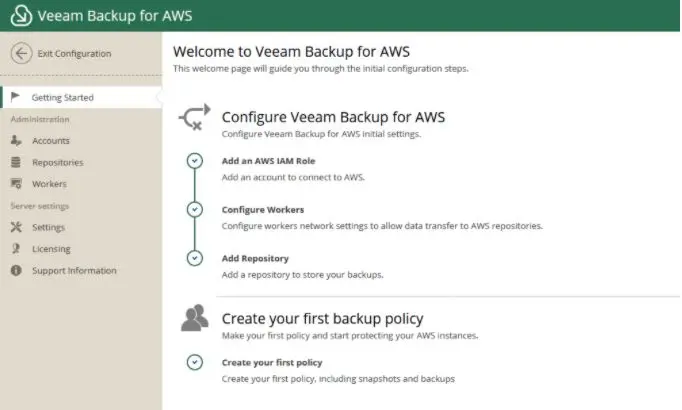
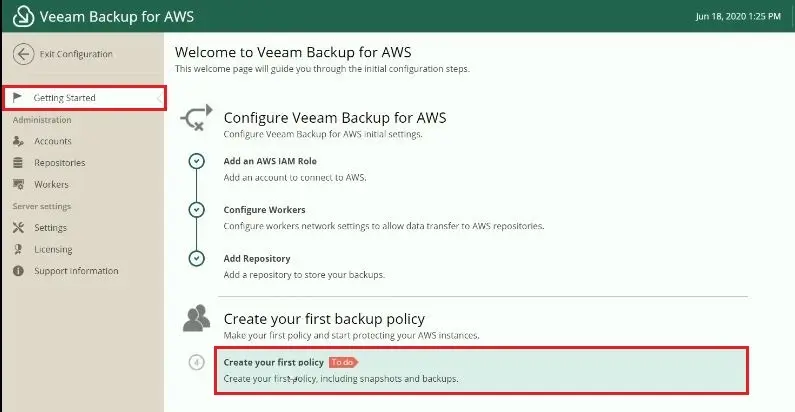
19- We first time access this appliance, now we are on the Getting the Started page. Here, are four initial steps that we will configure to make our Veeam backup service ready to roll. These steps are Add AWS Connection, Review Workers Configuration, Add Repository, and create your first policy.
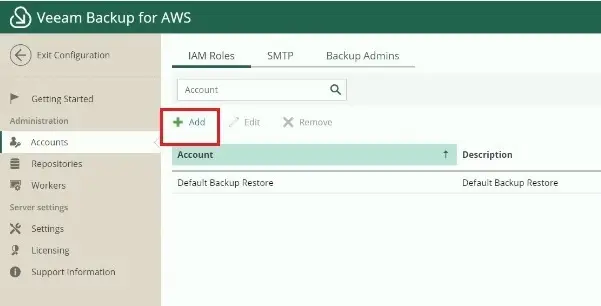
Add an account to connect to AWS.
1- Select Account tab and then click on Add an AWS IAM Role.
2- Choose the + Add to start the Add AWS Account.
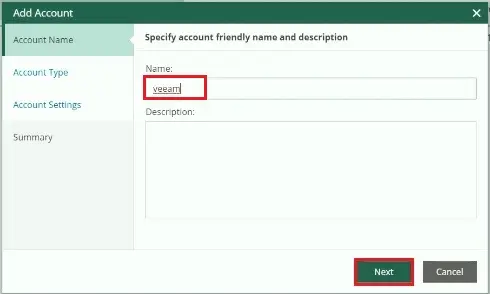
3- Type a name for this service account, description and then click next.
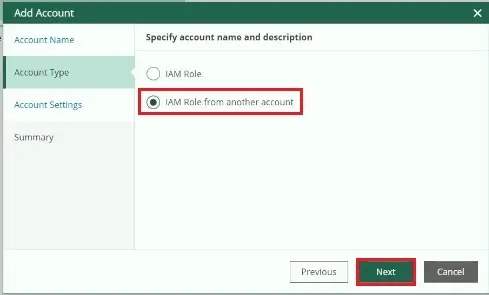
4- Select IAM role from another account and then click next.
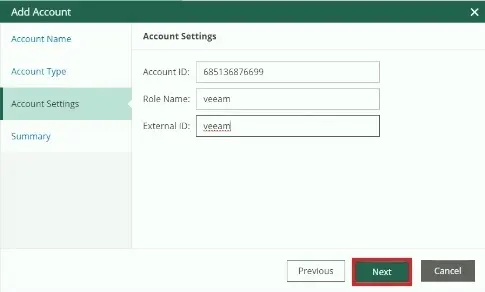
5- Type Account ID, Role name, external ID and then click next.
6- Review the account summary and then click Finish.

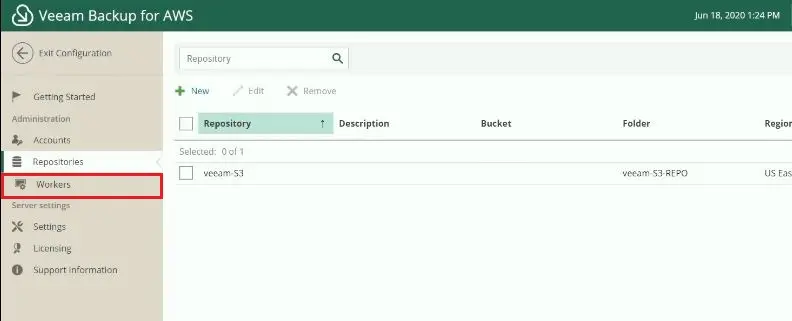
7- AWS account has been added, and click on the repository
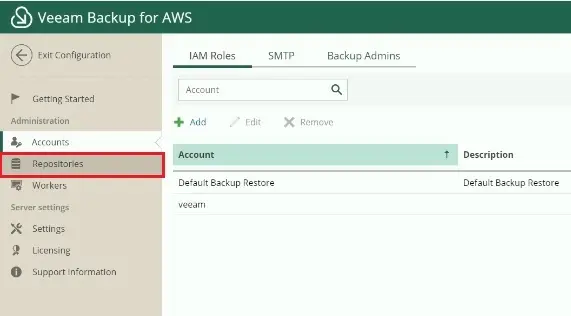
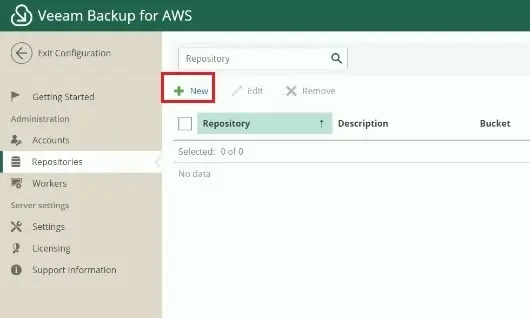
How to add Veeam Repository for AWS
1- Select the Repository under the Administration tab.
Choose the + Add button to start the Add Repository wizard.
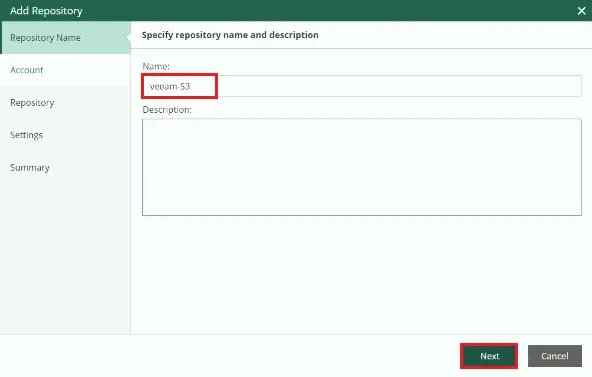
2- Type a repository name and description and then click next.
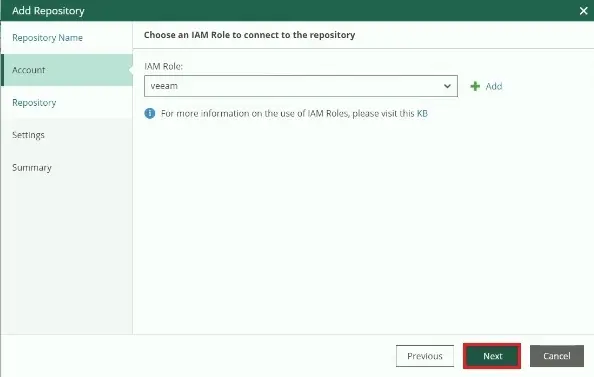
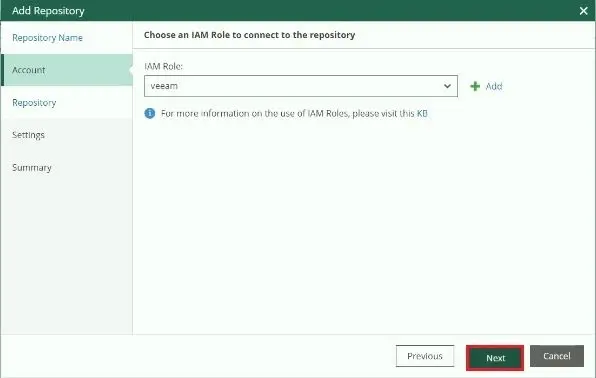
3- Choose the cloud account and then click next.
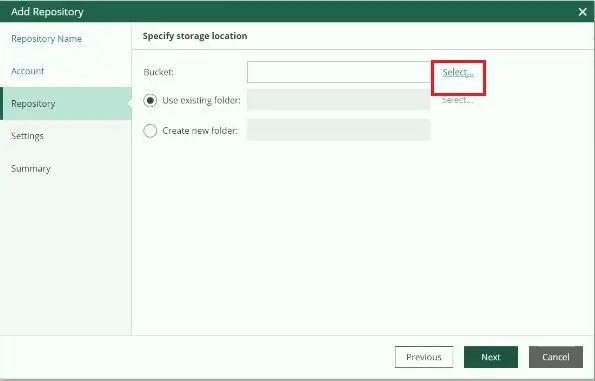
4- Select the select button.
5- Select a region and then click ok.
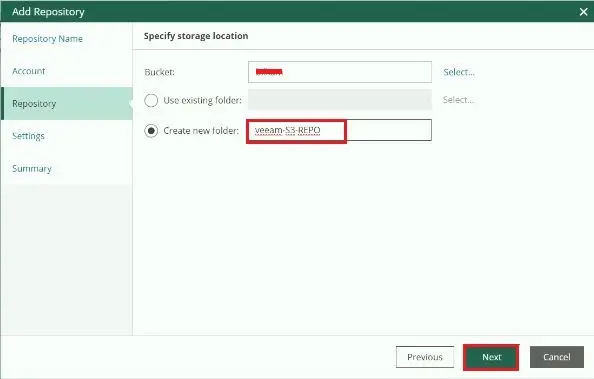
6- You can use the existing folder or create a new folder and then click next.
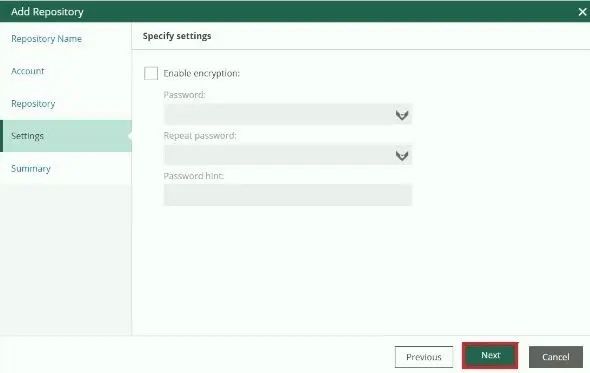
7- If you want to enable encryption you can or select next.
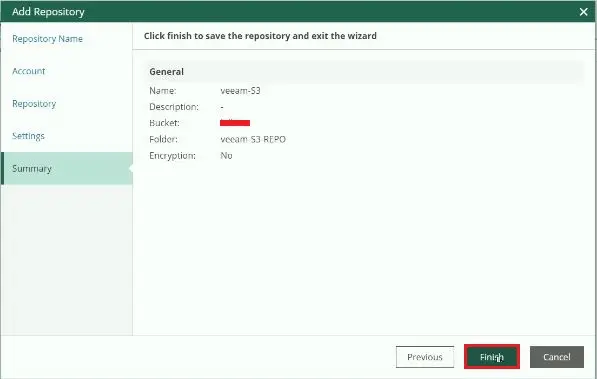
8- Review the add repository summary and then click finish
After these steps, the new Repository is created.
9- Repository created, Select Workers.
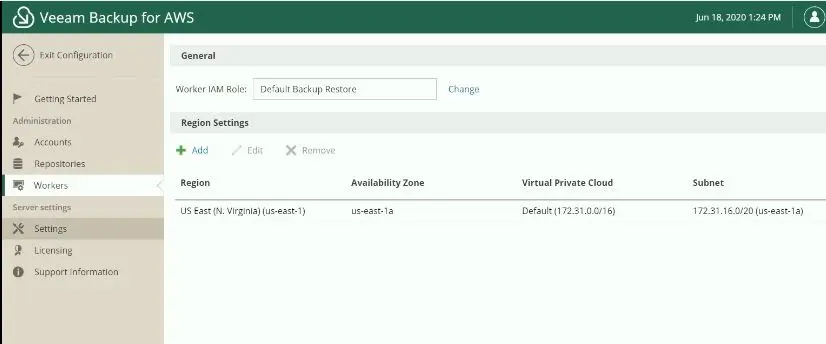
Add workers for Veeam Backup for AWS
1- Choose the + Add button, to add a new worker.

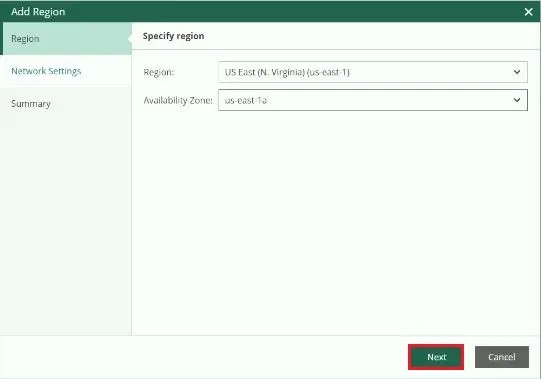
2- Select region and availability zone and then click next.
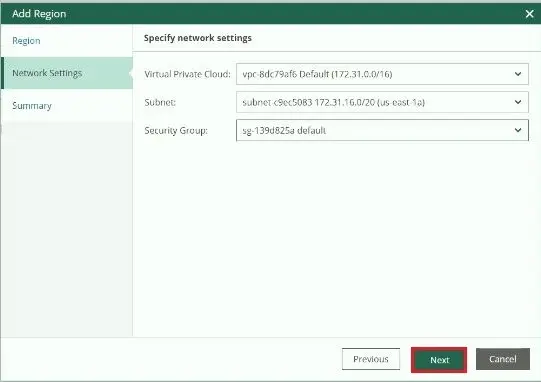
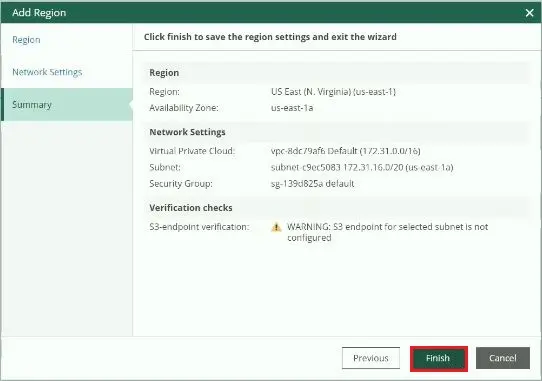
3- Specify network settings, Virtual private cloud, Subnet, and security group, and then click Next.
4- Review the workers summary and then click finish.
5- Workers configuration.
How to create your first policy
1- Choose the Getting Started option and then click on Create your first policy.
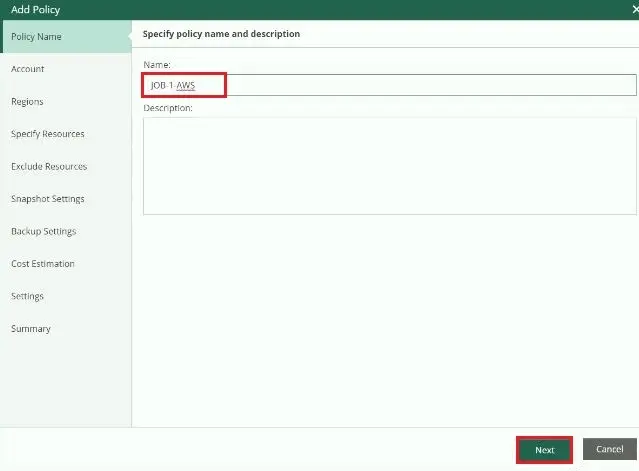
2- Enter a policy name and then click next.
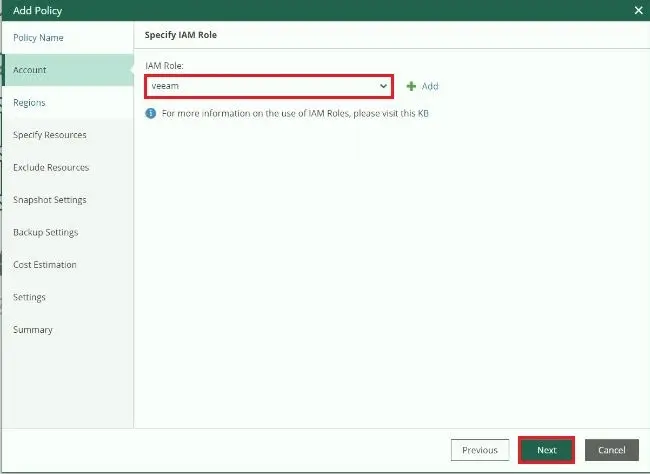
3- Select IAM Role and then click next.
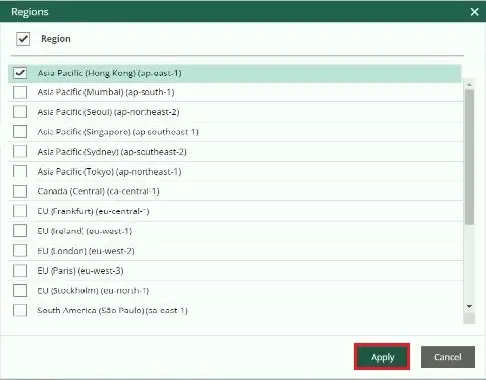
4- Region option, click + Add to select the regions we want to back up.
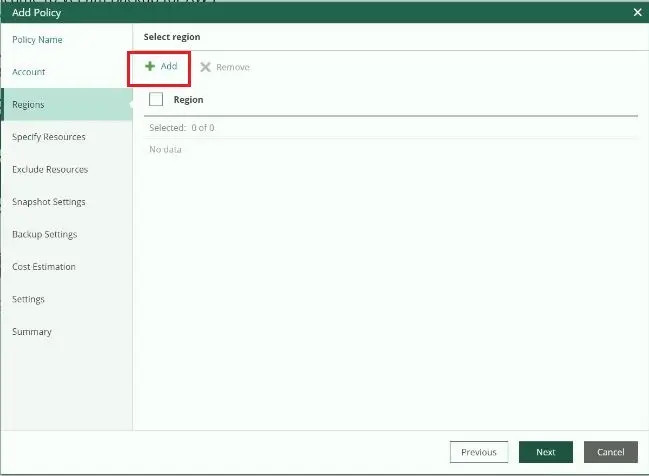
5- This policy will be able to back up resources from the selected region here.
Select a region and then click apply.
6- Click next.

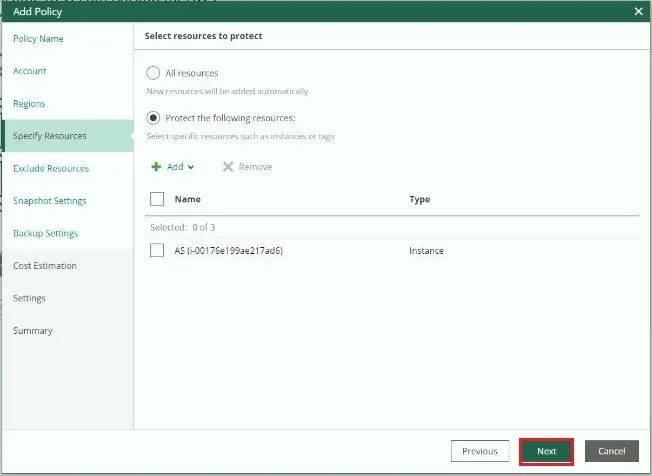
7- Select Protect the following resources
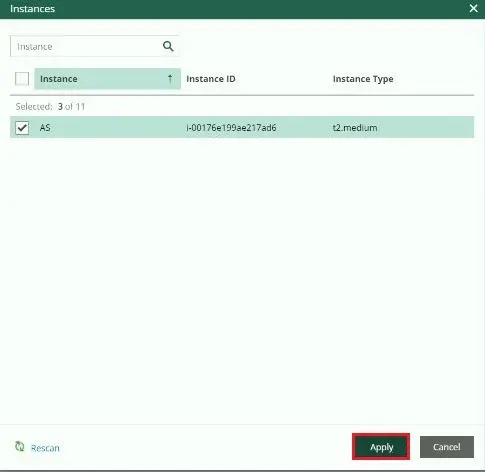
Select add and then the instance
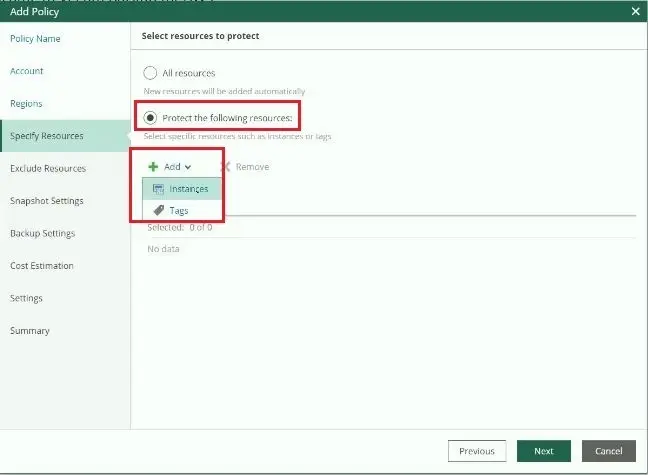
8- Select instances and then click apply.
9- Click next.
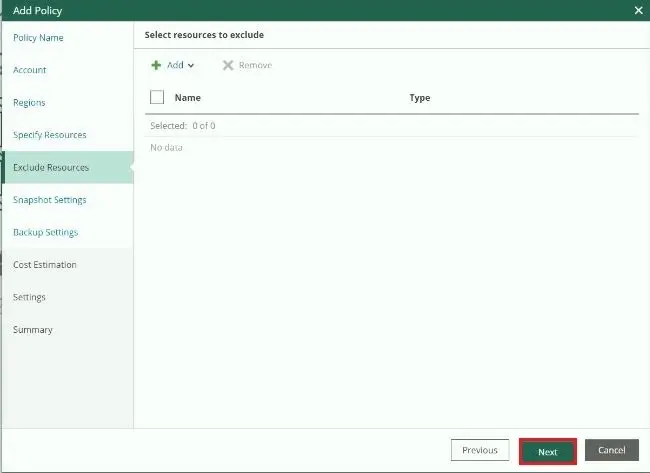
10- Click next.
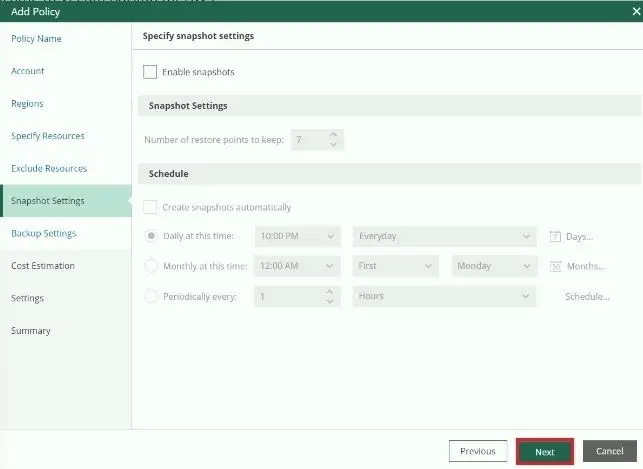
11- Snapshot Settings tab, we can enable snapshot settings, set the number of restore points, and then configure the snapshot schedule. Click next.
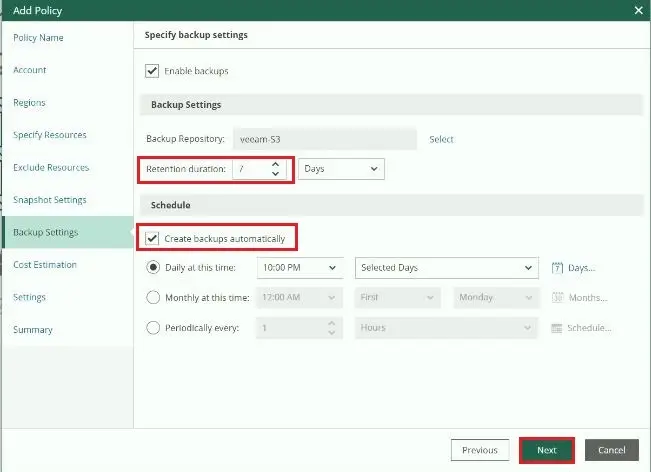
12- Select Enable Backup Settings,
Next to backup repository click on select.
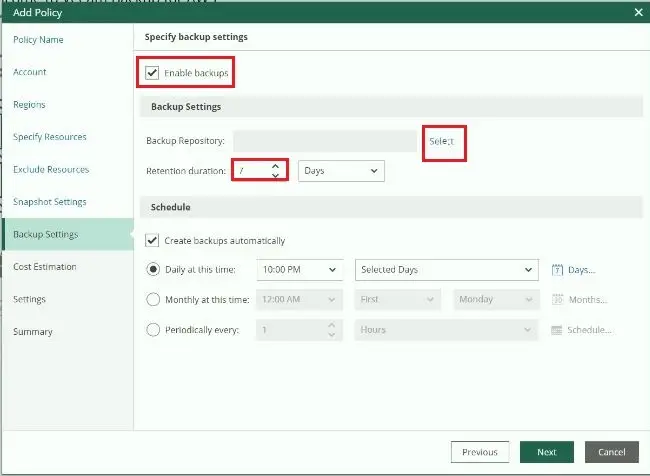
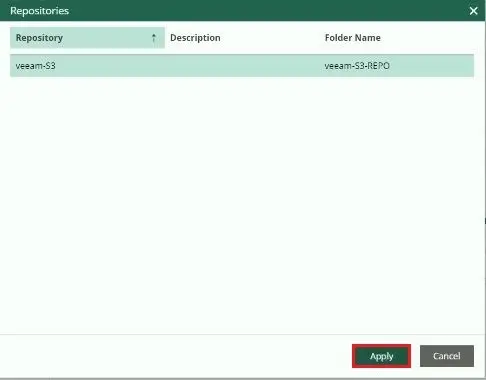
13- Select the repository and then click Apply.
14- Click next.
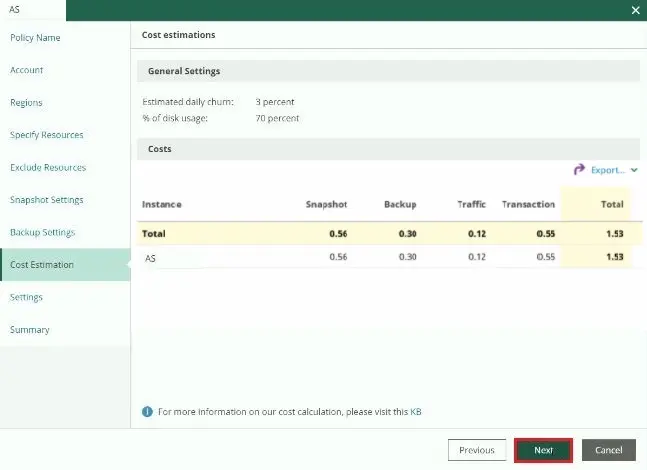
15- Cost Estimation option, Click next.
16- Email notification can be set here. Click next.
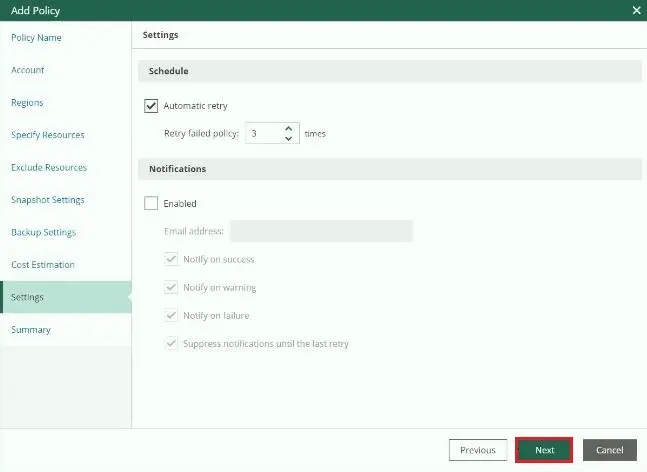
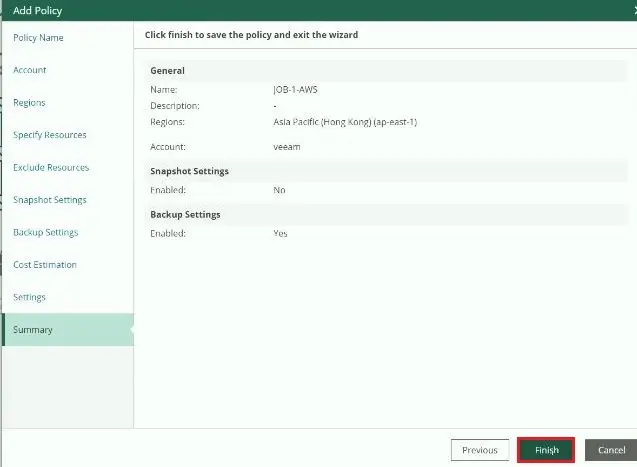
17- Review the Summary of the policy and then click Finish.
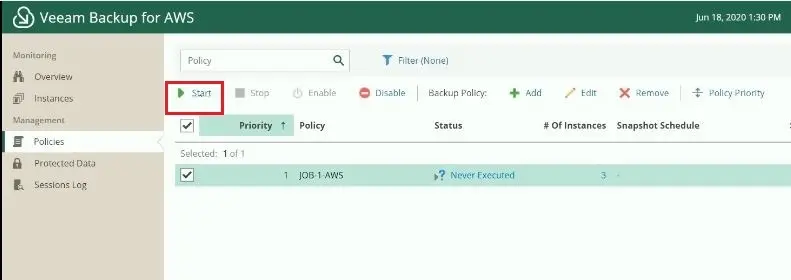
18- Click on the Start button.
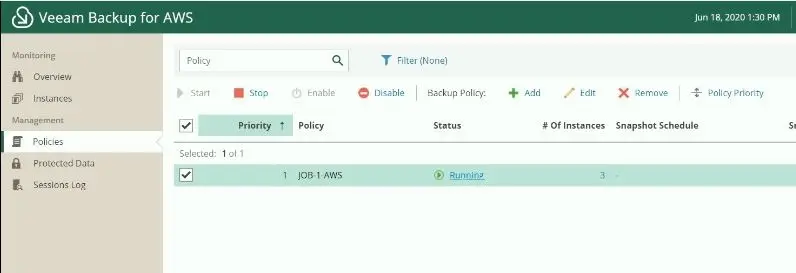
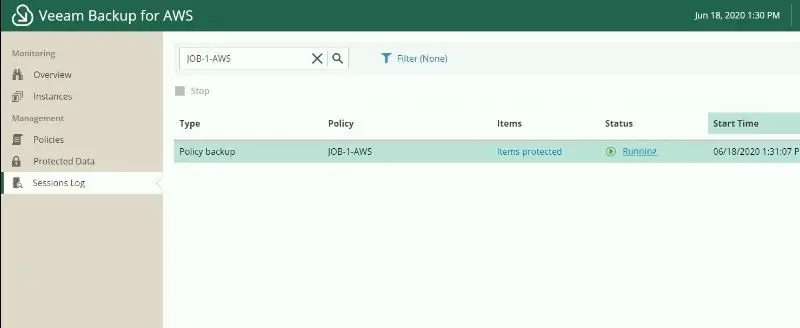
19- It’s in running status.
20- Sessions log.
21- Backup
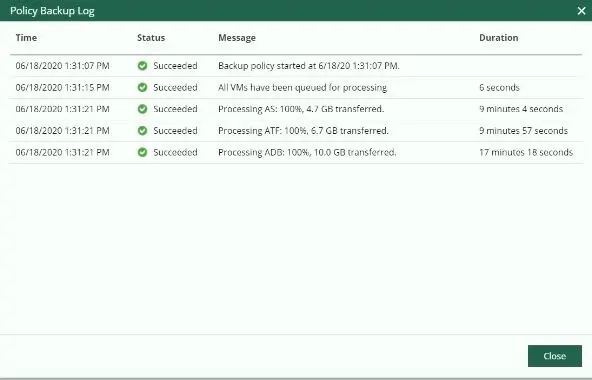
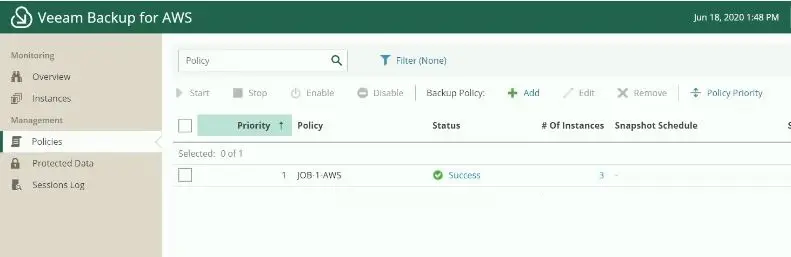
22- Now the policy is marked as Success.