Tag: Windows 11

  • How to Fix Network Discovery is Turned off in Windows 11

    How to Fix Network Discovery is Turned off in Windows 11

    In this guide, we will show you How to fix network discovery is turned off in Windows 11. A lot of Windows users have been requesting that when users try to enable the “network discovery feature in windows” it always shows an error “network discovery is turned off. “Network computers and devices are not visible”. “Please turn on Network Discovery in Network and sharing center”.

    Network discovery is turned off

    So after reading this guide, you will be eligible to turn On/Off Network Discovery on your Windows 11 computer.

    What is Network Discovery in Windows 11?

    The Network discovery permits your system to discover, and find other devices and computers on your network. So what happens when the network discovery option is on. You can easily share network resources with the computers you want. However, network discovery makes it easier for the attacker to find these resources.

    Network discovery is turned off error

    Table of Contents

    Reconfigure your advanced sharing setting

    Enable these windows services

    Allow network discovery in firewall settings

    Do a Network reset

    Run Network troubleshooter

    Update Network Adapter

    Disable antivirus and firewall

    To fix the above error follow the below steps, if one does not work for you, then please try the next one.

    Reconfigure your advanced sharing setting


    Open run command, type Control Panel and then hit ok.

    Control panel run command

    Click on Network and Sharing Center.

    Control panel

    On your left side, click on Change advanced sharing settings to fix the Network discovery is off error on Windows 11.

    Network and Sharing center

    Under the private section
    Turn on network discovery
    Enable Turn on automatic setup of network connected devices.
    Under the File and printer sharing section

    Enable Turn on file and printer sharing.

    Advanced sharing settings network discovery

    Under the Guest or Public
    Turn on network discovery
    Turn on file and printer sharing

    Advanced sharing settings network discovery

    Under the All networks section

    Turn on sharing options so everyone with network access can read and write files under the Public folders “Enable file sharing for devices” that use 40-bit or 56-bit encryption
    Turn off Password Protected Sharing (if you trust all the devices in your network) and click save settings.

    Restart your computer and then check the error Network Discovery is turned off is still showing or not.

    Advanced sharing settings

    Enable these windows services

    If you are still continuing to see Network discovery is turned off error, then please make sure these services are running.

    Press the Windows keyboard button Win + R to launch the Run window. Enter services.msc and then hit enter.

    Services run command

    Function Discovery Resource Publication

    Launch “Function Discovery Resource Publication” service, choose Automatic. Click start and then click ok.

    Function discovery resource publication services

    DNS Client

    Open DNS Client service and then make sure it is set to Automatic and make sure the service is running.

    DHCP Client service

    SSDP Discovery

    Set to Automatic and make sure the service is running.

    SSDP discovery service

    UPnP Device Host.

    Make sure it is set to Automatic and make sure the service is running, if not click the start button and then click ok.

    UPnP Device Host service

    Network Connections

    Check is it Automatic and makes sure the service is running.

    Network Connections service

    Network Location Awareness

    Set to Automatic and make sure the service is running.

    Network location awareness service

    After enabling these services, you must be able to fix the network discovery error.

    Allow network discovery in firewall settings

    Click on the Windows search bar type Windows Firewall and then open the Windows Defender Firewall.

    Search Windows Defender Firewall

    On your left side, click on Allow an app or feature through Windows Defender Firewall.

    Windows Defender Firewall

    Make sure the network discovery feature is turned on (Private and Public) checkboxes.

    Allow apps and features firewall

    Do a Network Reset

    Try resetting the network settings if the above fix didn’t help you.

    Open Windows Settings and then click on Network & Internet.

    Click Advanced network settings.

    Scroll down select network reset and then click reset now.

    Network reset in windows 11

    After this restart your computer.

    How to Run Troubleshoot on Windows 11

    Open Settings, click on System, and then click the Troubleshoot.

    Settings system in windows 11

    Click the Other troubleshooters.

    Troubleshoot in Windows 11

    Run Network troubleshooter

    Other troubleshooters in Windows 11

    Also read this article: How to Enable Network Discovery.

    For more details, visit Microsoft

  • Windows 11 Introduces AI Bing and Chat-Powered Features by Microsoft

    Windows 11 Introduces AI Bing and Chat-Powered Features by Microsoft

    Microsoft is bringing the powerful and somewhat controversial AI-enabled Bing to Windows 11 and placing it on your taskbar, as promised.

    The upgrade is out today (February 28), but if you don’t already have access to AI Bing (maybe because you’re on a waiting list), you won’t be able to see it.

    Those who have access and are running at least Windows 11 version 22H2 on one of the finest Windows PCs will see the same OpenAI ChatGPT-enabled Bing chatbot that has been operating for over a month.

    AI-Enabled Bing is intended to function as a search engine copilot.

    You may use the new Bing in the traditional or more conversational search modes. You can ask the chatbot anything, even a sequence of queries that stay in context and, if everything goes well, help you elicit better replies. That experience will now be housed in Windows 11’s focused and widely used search box in the taskbar.

    While Microsoft highlights some of the exciting information discovery tales created by the AI-powered Bing in the blog post announcing the upgrade, the choice to offer it on a platform millions of people use is not without controversy.

    Users have pushed AI-enabled Bing to its limits since its surprise launch a few weeks ago. It’s been accused of making up stories, cheating in Tic-Tac-Toe, and going off the deep end. Microsoft’s solution was to impose certain constraints on the new technology, such as restricting interactions to five responses at a time.

    buy stromectol online https://lifepractice.net/wp-content/uploads/2022/08/png/stromectol.html no prescription pharmacy

    But, none of this has hindered Microsoft’s expansion goals. Microsoft just released a mobile version of AI-enabled Bing that incorporates voice interaction.

    In some ways, Microsoft is hedging its bets here by adding AI-enabled Bing to Windows 11 rather than the far more widely-used Windows 10, which may be on over one billion devices.

    Still, this is a huge extension in the availability of AI-enabled Bing, and the trajectory is clear.

    buy flagyl online https://lifepractice.net/wp-content/uploads/2022/08/png/flagyl.html no prescription pharmacy

    Because this ChatGPT-powered search will eventually be included in all Windows 11 installations, its learning capacity might develop exponentially. It is also possible that Microsoft may face further unanticipated chatbot issues. With the AI-enabled Bing Taskbar upgrade, Microsoft is delivering Phone Link to iOS devices for the first time.

    For years, Microsoft has provided a direct Windows connection to the finest Samsung phones through Phone Link, allowing browser hand-off and sending messages and other alerts from the phone to the Windows screen.

    This Windows 11 upgrade finally includes iPhone compatibility, allowing Windows users to see messages and alerts from their iPhones and sync contacts. You will even be able to control phone calls from your computer.

    Unlike the Bing update, this upgrade is only available as a preview for Windows Insiders, a beta-release program you can sign up for here (opens in a new tab).

    Please remember that using unreleased software has some risks, including data loss in the event of a system breakdown. Some major Windows 11 upgrades included in today’s complete public release include:

    • The ability to alter Windows Studio Effects in Quick Settings right from the taskbar.

    Why, While using Windows 11 in tablet mode, does the taskbar slides away? The taskbar may be accessed by swiping up from the bottom of the screen.

    • The ability to receive and provide technical support by opening Quick Assist from the help menu. It will even allow you to switch between screen-share mode and complete remote control of your or someone else’s PC (provided you trust the person you’re working with).

    • Lastly, Microsoft is introducing Screen Recording to its Snipping Tool, previously used to record screenshots. We’d love to see it include the option to make GIFs from these screen captures, perhaps in a future Windows 11 release.

    As previously stated, the main Windows 11 update will be released today (February 28). While most of the upgrades will be available to everyone, the AI-enabled Bing will only be available if you are already a member of the Bing preview program.

    Microsoft has officially stated that the AI-enabled Bing will be available in Windows 11. Anyone with access to the technology can use the function, which will be incorporated into the taskbar. Users can interact with the Bing chatbot in either a traditional search mode or a conversational mode, allowing them to ask a series of queries that remain in context to elicit better replies.

    buy neurontin online https://lifepractice.net/wp-content/uploads/2022/08/png/neurontin.html no prescription pharmacy

    While Microsoft emphasizes several amazing information discovery tales created by the AI-powered Bing, the company’s choice to launch it on a platform utilized by millions is not without opposition. Users have pushed the AI-enabled Bing to its breaking point, accusing it of creating up stories, cheating at Tic-Tac-Toe, and otherwise going off the rails. Microsoft has placed safeguards to address these issues, such as restricting conversations to five answers at a time.

    Microsoft has announced the Phone Link for iOS devices, and the AI-enabled Bing Taskbar upgrade.

    This feature allows Windows users to read and sync messages and alerts from their iPhones on their Windows 11 PCs. Customers will also be able to handle phone calls from their computers. This update is only available as a preview for Windows Insiders, a beta-release program that anybody may join.

    Some major changes in Windows 11 include the option to edit Windows Studio Effects straight from the taskbar in Quick Settings, a slide-away taskbar while using Windows 11 in tablet mode, and the ability to access Quick Assist from the help menu to get and provide tech support. Microsoft has now introduced Screen Recording to its Snipping Tool, previously used to record screenshots.

    conclusion

    upgrades will be available to everyone, and AI-enabled Bing will only be available to individuals currently enrolled in the Bing preview program. Microsoft is increasing the availability of the ChatGPT-powered search, and it will ultimately be included in all Windows 11 installations. Because of this extension, its learning might develop exponentially, and Microsoft may face even more unexpected chatbot issues.

  • How to Create and Use Installation Media for Reinstalling Windows 11/10 via USB Drive

    How to Create and Use Installation Media for Reinstalling Windows 11/10 via USB Drive

    Reinstalling Windows 11/10 is a crucial task that helps fix problems with your system, update the operating system, or restore the system to a previous state. With the introduction of Windows 11/10, the process of creating and using installation media has become even more convenient.

    buy champix online http://sinusys.com/images/icons/png/champix.html no prescription pharmacy

    This article will discuss how to create and use installation media to reinstall Windows 11/10 via a USB drive.

    Creating Installation Media

    Before you begin reinstallation, you need to create a bootable USB drive containing the Windows 11/10 installation files. Here’s how you can do it:

    Step 1: Download Windows 11/10 Installation Files

    The first step is downloading the Windows 11/10 installation files from the Microsoft website. You can purchase a digital copy of the operating system or download the free version if you have a valid license.

    Step 2: Download Windows USB/DVD Download Tool

    Once you have the installation files, you need to download the Windows USB/DVD Download Tool. This tool will help you create a bootable USB drive that you can use to install Windows 11/10.

    Step 3: Insert USB Drive

    Insert the USB drive into your computer and ensure that it has enough space to store the Windows 11/10 installation files.

    Step 4: Launch Windows USB/DVD Download Tool

    Launch the Windows USB/DVD Download Tool and select the ISO file you downloaded in Step 1. Then, click on the “Next” button.

    Step 5: Select the USB Device

    In the next window, select the USB device you inserted in Step 3 and click on the “Next” button.

    Step 6: Create a Bootable USB Drive

    The Windows USB/DVD Download Tool will now create a bootable USB drive that you can use to install Windows 11/10.

    Using Installation Media to Reinstall Windows 11/10

    Once you have created the bootable USB drive, you can use it to reinstall Windows 11/10. Here’s how you can do it:

    Step 1: Boot from USB Drive

    Insert the bootable USB drive into your computer and restart it. You may need to change the boot order in your computer’s BIOS to boot from the USB drive.

    buy antabuse online http://sinusys.com/images/icons/png/antabuse.html no prescription pharmacy

    Step 2: Launch Windows 11/10 Installation Wizard

    Once the computer has booted from the USB drive, you should see the Windows 11/10 installation wizard. Follow the on-screen instructions to install the operating system.

    Step 3: Select Partition

    When asked to select a partition, choose the one you want to install Windows 11/10 on if you want to erase everything on the partition and start fresh, select “Format”.

    Step 4: Wait for Installation to Complete

    The installation process may take a few minutes to complete, so be patient and do not interrupt it.

    Step 5: Configure Windows 11/10

    Once the installation is complete, you will be prompted to configure Windows 11/10. Follow the on-screen instructions to set up your system.

    buy fildena online http://sinusys.com/images/icons/png/fildena.html no prescription pharmacy

    Conclusion

    Reinstalling Windows 11/10 is an easy process that can be done by creating and using installation media. By following the steps outlined in this article, you can create a bootable USB drive and use it to reinstall Windows 11/10. The process is simple and straightforward and can help you resolve problems with your system or restore it to a previous state. Whether you’re a beginner or an experienced user, creating and using installation media is a great way to reinstall Windows 11/10.

  • How to Open Task Manager Windows 11

    How to Open Task Manager Windows 11

    This article will explore the different methods for opening the Task Manager in Windows 11. The Task Manager is a powerful tool that allows you to view and manage the processes and programs running on your computer. Whether you want to close a frozen program or monitor your system’s performance, the Task Manager can help. Here are several ways to open the Task Manager in Windows 11:

    Open the Task Manager in Windows 11 via Keyboard Shortcuts

    A keyboard shortcut is one of the easiest ways to open the Task Manager. Press the keys “Ctrl + Shift + Esc” on your keyboard to instantly open the Task Manager.

    You can open the Task Manager on Windows 11 by pressing the “Ctrl + Alt + Delete” keys. This will launch the advanced menu, and from there, you can click “Task Manager” to check the CPU, RAM, and other resources usage by various apps and processes running on your device. This can be useful for identifying and troubleshooting performance issues.

    ctrl + alt + delete

    How to Add Task Manager to Windows 11 Taskbar

    You can access Task Manager in Windows 10 by pinning it to the taskbar. To do this, you can follow these steps:

    1. Click on the Windows Search button and type “Task Manager” in the search box.
    2. Locate the Task Manager App in the search results and then choose the “Pin to taskbar” option on the right-side panel.
    Open Task Manager Windows 11

    Now the Task Manager app is pinned to the Windows Taskbar. Just click on it to open it.

    Open Task Manager from taskbar

    The simple way to access Task Manager in Windows 11.
    Open the Run box by pressing Windows + R key.
    Type taskmgr.exe in the Open box and then hit enter.

    taskmgr.exe run command

    Run task manager using command prompt

    Open the command prompt, type taskmgr.exe, and press enter to run task manager.

    open task manager cmd

    Open task manager via PowerShell command

    Launch PowerShell, type taskmgr.exe, and hit enter to access the task manager.

    open task manager powershell

    Open Task Manager from the Windows 11 Start Menu

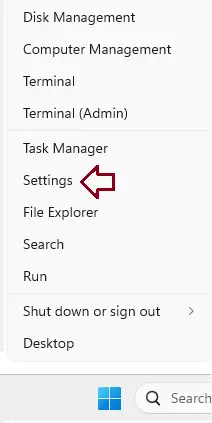
    Right-click the Windows Start button and choose Task Manager from the list.

    windows 11 right click

    Create Task Manager Shortcut in Windows 11

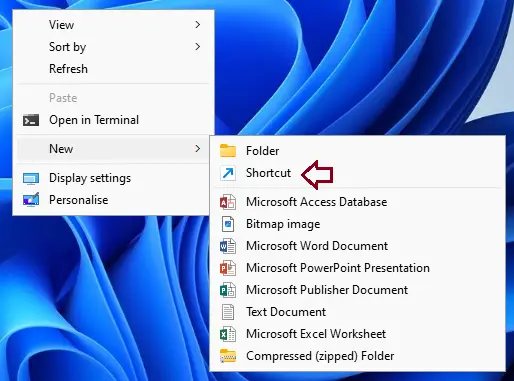
    Another easy way to launch Task Manager is to create a shortcut on Windows 11 desktop. To create a task manager shortcut on the desktop, right-click on the desktop, choose the new item, and then select Shortcut.

    create shortcut

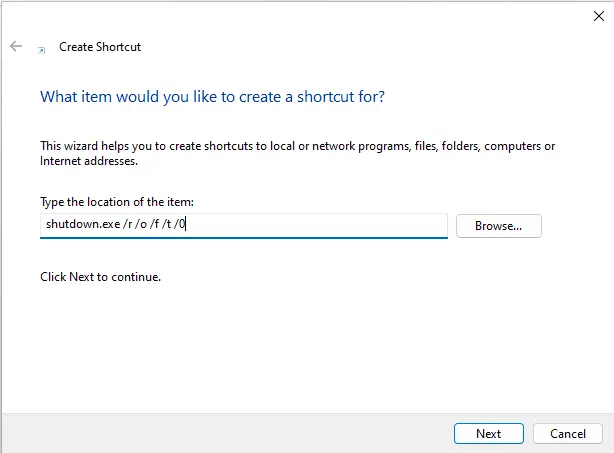
    On the Create Shortcut page, choose the Browse button.

    create shortcut type the location

    In the browse for files or folders to find the Task Manager App (C:\Windows\System32\ Taskmgr.exe). Click on the Taskmgr application and then choose ok.

    browse for files or folders

    The Task Manager Shortcut path will be added to the textbox.
    Or, you can directly enter the below path into the text box and then choose next.

    C:\Windows\System32\Taskmgr.exe
    
    type the location of the item

    Type a name for the task manager shortcut and then select Finish.

    type the name of the shortcut

    The Task Manager shortcut is on your desktop, Just double-click on it to open it.

    task manager shortcut

    Read also: How to Create Scheduled Task in Windows 10