In this article, please follow the steps on how to create a bootable Windows 11 USB drive for Windows 11. Creating a bootable USB drive is always great idea must you ever run into problems with your OS and need to start afresh. Bootable USB drives are also very helpful due to their extreme compatibility and portability.
Now: if you are looking at how to create a Windows 11 USB bootable drive, so you are in the right place.
Requirements:
Windows 11 ISO File Minimum 8GB USB Flash drive A Windows Computer
“If you are a tech newbie or a Mac user, please check out UUByte ISO Editor tool for creating a Windows 11 Bootable USB. It is much easiar to use than Rufus.”
Create a Windows 11 USB Bootable Drive
There are lots of bootable disk creation software available on the internet, in this guide, I am going to use a freeware tool called Rufus to create a bootable pin drive. First, visit the Rufus website and then download the latest version of Rufus from the download section.
No need to install Rufus on your computer. Just double click to launch Rufus.
Create a Bootable Windows 11 USB Drive
Plugin your USB device into your computer. Rufus will automatically detect it. Or else, you can select your pin drive under the device menu.
Select your boot selection method for your drive under the boot section. Then select the SELECT button to select the Windows 11 ISO file from your PC hard drive.
Select the Image option.
For additional configuration, if you would like to know about the PC BIOS Mode of your target machine. Then press Windows+R, type msinfo32, and then hit ok on the PC you wish to install Windows 11.
Check the BIOS Mode value, it should be either Legacy or UEFI.
Now go back to Rufus, choose MBR if you’re BIOS Mode is Legacy. If the BIOS Mode is UEFI then choose the GPT option.
Select Show advanced drive properties, leave them as it is. Under volume label, type in an appropriate name for your bootable USB or leave it default.
Select Show advanced format options; Select (Quick Format, Create extended label and icon files, Check the device for bad blocks) to ensure that there are no bad memory blocks.
From the advanced format options field, you can choose the test patterns for checking bad blocks on your USB. The default value is set to 1. Select the Start button to start and create a Windows 11 bootable USB drive.
Read the warning and then click OK to start the process.
Be relax and let the Rufus tool work to create your Windows 11 USB drive.
In this article, I will explain how to upgrade windows 11 in Windows insider program. You will be able to upgrade your Windows 10 to Windows 11 for free if you are already a Windows 10 user, and then you can test out an early version now. You can try with PC Health Check app to see if your computer will be able to run Microsoft’s new operating system Windows 11.
If you don’t want to wait to try out the new Microsoft Windows 11? Then join the Windows Insider Program and start using Windows 11 right away. First, you need to check your computers would meet the Windows 11 System Requirement.
There is good news everybody can get their hands on Windows 11 by registering for the Windows Insider Program, which will release Windows 11 preview builds for your OS well in advance it is available to the general public.
Is your system being Compatible with Windows 11 Insider Preview?
Microsoft is going to allow some exemptions to Insiders who are already enrolled with Dev Channel by permitting them to download the preview builds of Windows 11.
Enrolling in Windows Insider Program will allow you to completely free of cost if you were wondering. You can either visit the Windows Insider Program website and register. You can also do that from your PC in Windows Settings app as well. Before upgrading first you need to check your Windows version by typing winver in the run command.
How to check Windows updates
First, you can update your windows to the one you want to upgrade to Windows 11 using Windows Insider Program. Open Windows Settings and then click on the Update & Security.
Check your Windows is up to date.
In Windows Settings Enroll in Insider Preview Dev Channel
In Windows Settings Enroll in Insider Preview Dev Channel.
Windows Insider Program, select the Get started button.
Pick an account to get started, select Link an account.
Select Microsoft account and then click continue.
Type your Microsoft email account and then click Next.
Type your account password and then click sign-in.
Click next.
After login, you will be able to see what is available in Insider Channels for your PC. You can select any of your choices and then select Confirm button.
Read the Microsoft insider privacy and then select Confirm button.
Select Restart Now.
After restarting the system again open the Windows Insider Program option using the Settings app.
Windows 11 Insider Preview 10.0.22000.65 Upgrade
Now your system is in line to get Microsoft Windows 11 developer preview builds. Select Windows Update options and then select check for updates.
Windows 11 Insider Preview started downloading.
Windows 11 insider preview, 100% downloaded.
Successfully installed Windows 11 preview 10.0.22000.65, Select Restart Now.
In this article, we will learn how to open the Run command in Windows. The Run command window permits you to launch apps/programs, open files/folders, and access internet resources in Windows. Just enter a path or a quick command into the Windows Run box, and then hit the ok button use a Run command.
Open Run command with a keyboard shortcut
The fastest way to launch the Run command window is to use the Windows key + R. Just hold down the Windows key and then hold the R on your keyboard.
Launch Run Command Using Windows Search
If you are using Windows 11, in the search bar just type the run then select run App to open it.
Opening the Run command using the Start Menu
In Windows 11, select the Start Menu button and then All apps.
Scroll down, and then click on Windows Tools.
Open Run.
Using the Command Prompt to launch the Run window
To launch the Windows Run, you can also open the command prompt and then enter the following command. explorer.exe Shell:::{2559a1f3-21d7-11d4-bdaf-00c04f60b9f0}
Launch the Run command using PowerShell
Open the powershell command and then, type or copy/paste the below command. (New-Object -ComObject “Shell.Application”).FileRun()
Using the Windows menu to run the Run command
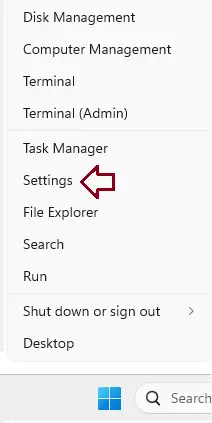
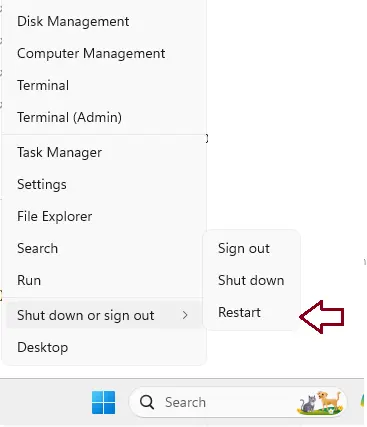
Right-click on the Windows start button and then click or tap on Run to open it.
Learn the steps to install Windows 11 in Hyper-V Virtual machine running on Windows 11 to experience the OS. Hyper-V is a virtualization platform that permits installing nearly all types of operating systems virtually. It is obtainable as a standalone system to run on bare metal machines or you can use it as an additional feature in Windows pro editions. Let’s have a look at how to Install Windows 11 on Hyper-V. There are different ways to install Windows 11 in a virtual machine like Oracle VirtualBox, VMware Player, and VMware Workstation. In a meantime, there is a simple way to install Windows 11 using Microsoft’s own virtual machine Hyper-V. So, in this blog, you will learn how to run Windows 11 in Hyper-V in Windows 11.
I’m sure many of you have already upgraded your Windows in Microsoft’s Windows Insider Program Microsoft has launched the testing circumstances of Windows 11. Some Windows users will upgrade their Windows when it’s the official launch and recommended.
To Enable Hyper-V on Windows 10, first, you need to enable the Hyper-V feature on your Windows 11 to start using this Microsoft hypervisor program. Type Turn Windows Features on or off, launch Run command (Windows+R). Type optionalfeatures in the open box and then click ok.
Scroll down, find Hyper-V in the features list, and select checkbox Hyper-V Management Tools, Hyper-V Platform. Click ok
Start enabling Hyper-V features in Windows.
Once installed, select Restart now.
Install Windows 11 Using Hyper-V in Windows 11
So, here you can find the guide to install Windows 11 on Hyper-V in Windows 11.
Create Windows 11 Virtual Machine
Click on the Windows search button, type Hyper-V Manager and then open it.
Under the Action menu, click on New and then Virtual Machine.
New virtual machine wizard, Click Next.
Type a virtual machine name and then click Next.
Choose Generation 2 and click next.
Assign the Memory/RAM you wish to provide to your Windows 11 VM, this must be at least 4 GB or higher. Click Next.
From the Connection Drop-down box, choose Default Switch to provide network connectivity to the virtual machine and then click Next.
Select the Hard disk size that you wish to assign Windows 11 and click next.
To choose a Windows ISO image file, select the checkbox Install an operating system using a bootable image file and then click Browse.
Review the virtual machine summary and click on the Finish button.
Edit Windows 11 Hyper-V Virtual Machine
Right-click the Hyper-V virtual machine and then click on Settings from the menu.
Click on the Security option from the left pane and then enable the following options. Enable Secure Boot, Enable Trusted Platform Module, click ok.
Right-click Hyper-V VM and then select start.
Once again right-click on Windows 11 virtual machine and then click Connect.
Clean installation of Windows 11
Press a key to boot
Windows 11 setup screen, click Next.
Click Install Now.
Click on I don’t have a product key.
Choose a Windows 11 operating system and then click Next.
Click next after accepting Microsoft Software License Terms.
Choose custom
Select the drive and then click Next.
The Windows 11 installation will start.
Windows 11 Basic Setups
Choose your country or region and then click Yes.
Select the keyboard layout, click next Set up for personal use, click next Add your Microsoft account, click next Choose privacy settings and then click Accept.
Done, Windows 11 is successfully installed on Hyper-V Manager
This is the way you can install Windows 11 in Hyper-V in Windows 11.
In this blog, we have a look at how to open Computer Management in Windows 11. The Computer The management tool is included in all versions of the Windows operating system, and it acts as a control panel for many advanced administration tools.
Using Windows Use search
In Windows 11, the Win search bar enters computer management and then launches it.
Using the Control Panel
Launch the control panel, select System and Security, and then select Windows Tools.
In the list of Windows tools, Double-click on Computer Management to open it.
Using the Start Menu to Run Computer Management
Click on Windows 11 start button and then click on All apps.
Scroll down, and then click on Windows tools
Launch Computer Management.
Using the Windows menu
Open this Windows 11 menu, with a right-click on the Start button and then select Computer Management from the menu.
Create computer management shortcut
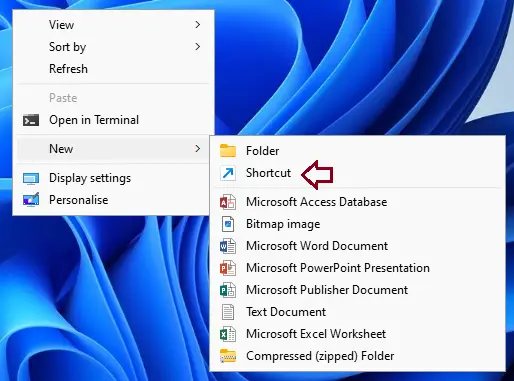
Right-click any empty place on your desktop, select new, and then shortcut.
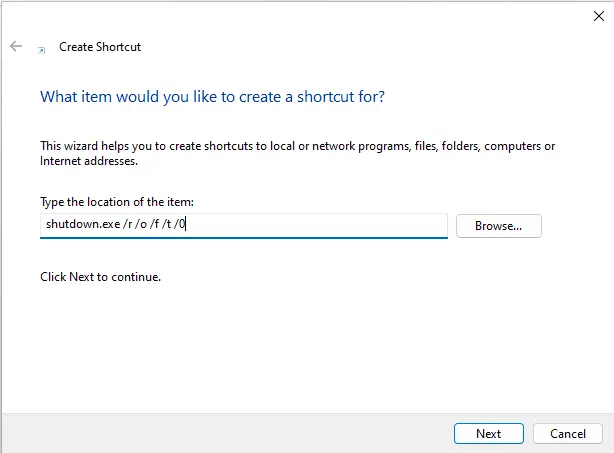
Type the command compmgmt.msc and then select next.
Type a name and then click finish.
Double click to launch computer management.
Open Computer Managemet via Run Command
Hold the Win + R keys on your keyboard to open Run, type the command compmgmt.msc, and then hit enter or ok.
Using Command Prompt or PowerShell
You can also launch Computer Management from the Command Prompt or PowerShell. Type the command mmc compmgmt.msc and then hit enter to launch.
Open Computer Management Using Task Manager
First hold the Ctrl + Shift + Esc keys to launch Task Manager, select more details. Select File menu, select Run new task and then type compmgmt.msc. Press enter on your keyboard.
In this guide, I will explain to you how to move taskbar in Windows 11 start button to the left side. If you are not feeling good with Windows 11’s centered Taskbar? Well, you can move to the left side of the Taskbar on Windows 11 and go back to the way things were.
Almost all Windows users have the habit of accessing the Windows start menu from the left corner of the screen. Hence, people coming from old Windows may have problems getting used to the centered icons.
Put Windows 11 Taskbar to Left
Right-click on the Windows Start button on the taskbar and then select Settings in the menu.
Or click on the start button, or select the Windows+I key keyboard shortcut to launch Settings on Windows 11.
Then select the Personalization setting from the available options.
In the Personalization settings window, scroll down and then select the Taskbar settings option.
Expand taskbar behaviors, under taskbar alignment select left.
You can also access taskbar settings by right-clicking on the Taskbar and then select the Taskbar settings option from the context menu.
Personalization settings, scroll down expand taskbar behaviors, and then under taskbar alignment select left.
Or click on the Windows search icon from the taskbar and then type taskbar settings, click to open it.
Personalization settings, scroll down, expand taskbar behaviors, and then under taskbar alignment, select left.
The changes will apply right away, and you will see your Start button once again on the left side of the screen after setting Taskbar alignment to the left.
In this article, we have a look at Different ways to start the Task Scheduler in Windows. The Task Scheduler is one useful tool from Windows which lets us schedule and run automated tasks. For instance, with the help of the Task Scheduler tool, you can make Windows OS run a program at a specific time.
Open the Task Scheduler by using search
Probably in Windows 11, the easiest way to launch Task Scheduler is to use search. Enter the word task scheduler in the search box and then hit enter to open it.
Open the Task Scheduler from the Start Menu
Click on Windows 11 Start Menu button and then click on All apps.
Scroll down to find the Windows Tools.
Scroll down and then you can find the Task Scheduler.
Open the Task Scheduler using Run window
Press the Windows + R keys on your keyboard to launch Run, type taskschd.msc, and then press enter on your keyboard.
Open the Task Scheduler via Control Panel
Launch control panel, by typing control in run command.
Navigate to System and Security under Windows Tools and then select the Schedule tasks link.
Open the Task Scheduler creating a shortcut
Right-click on your Windows desktop, select new, and then shortcut.
Type taskschd.msc under type the location of the item and then click Next.
Type a shortcut name or leave it as the default name and then click finish.
Double click to launch task scheduler.
Start the Task Scheduler in Windows by using the PowerShell or Command Prompt
Open command prompt or PowerShell apps, enter the command taskschd.msc and then hit Enter the Task Scheduler will open immediately.
Open the Task Scheduler via Task Manager
Hold the Ctrl + Shift + Esc keys on your keyboard to open the Task Manager or right-click on the Windows start bar and select task manager. Then select File menu, select Run new task,” and then type the command taskschd.msc. Click ok.
Open the Task Scheduler via Computer Management
Open the Computer Management console, on the left side, expands system tools, and then click on Task Scheduler.
Watch Video: Different Ways to Start the Task Scheduler in Windows
In this article, we will explain how to install Windows 11 in VMware Player Virtual Machine. Installing Windows 11 on a VMware player is not a tough task, what we need is the Workstation Player and Windows 11 ISO on our existing Windows 11 OS to experience this latest Microsoft operating system. If you are not sure how? Then, here is the article to help you.
Windows 11 is the new operating system that is currently available as an upgrade for the existing Windows 10 Insider program. Therefore, there is no official availability of Windows 11 ISO files, but, there is a way you can download it to install Windows 11 not only on Virtual machines but also on computers/laptops.
VMware player is a popular software to run virtual machines. It is a free application for personal usage just like VirtualBox. VMware Workstation player interface is easy to understand.
Installation Windows 11 on VMware player Workstation
The article is given below can be performed on any latest version VMplayer running on any operating system. While the VirtualBox users can follow my other blog. Install Windows 11 on VirtualBox Virtual Machine.
Download VMware VMplayer
First, we need to download virtualization software on your specific operating systems. Then you can download it from the VMware official website.
Download Windows 11 ISO File
The 2nd requirement to run Windows 11 on any virtual machine is its Windows 11 ISO file. The process is very simple to use to get the latest Windows Insider Preview copy of Windows 11.
Install VMware Workstation Player
VMware Workstation Player is limited capability free and non-commercial use. As a person, you can use it without paying anything. VMware is not open source though.
Start the installer by double-clicking it (VMware-player-1.6.1.2-17966106).
VMware Installation launcher, you might see User Account Control Warning. Select yes to continue.
The VMware Player installation wizard opens.
VMware Player 16 Installation Setup Wizard, click Next.
Accept the end-user license and then click Next.
Custom setup, Enhanced Keyboard driver, and Installation directory. Click next
Leave it as it is, also check the box Enhanced Keyboard Drivers option and then click Next.
Check the options (Check the product update at Startup and Join the VMware Customer Program) and then click next.
Select the checkbox where the shortcut to run the application will be created and click Next.
The installation wizard is ready to install, click on install to start the installation.
Click on Finish to complete the installation.
You should see a VMware Player desktop icon. Double click on that run the VMware Workstation Player. You will be asked for a license, choose the option Use VMware Workstation Player 16 for free for non-commercial use.
Click continue.
Click on Finish.
Here you can see VMware Workstation Player 16 set to be used for free for non-commercial purposes.
Create a Virtual Machine on VMware Player
To create a new virtual machine in VMplayer 16, select the link Create a new virtual machine.
Assign Windows 11 bootable ISO
Select the Installer disc image file (ISO) option and then select the Browse button.
It will open a Windows explorer, choose the folder where you have saved Windows 11 ISO file, open it.
Click the Next button.
Set Guest OS Type
Select Microsoft Windows as OS type, select drop-down version box, set it to Windows 10 x64 because yet we don’t have Windows 11 option here. Click next
Name the Virtual Machine
Type a virtual machine name, to recognize the virtual machine on VMplayer and then click next.
Add Virtual hard disk
The VMplayer will automatically set the virtual machine disk space to 60GB, still, you can increase it as per your need or what is your planning to do on Windows 11 VM. Click next.
Customize Hardware to increase VM Memory for Windows 11
For perfect usage of Windows 11 in VMware Player set virtual machine memory to 4 GB, select the Customize Hardware button.
Select the Memory option, drag the vertical slider to 4GB, and then close the window.
Select the Finish button.
Play Windows 11 Virtual machine
Choose the created virtual machine from your left side of the VMware player and then select the Play Virtual machine link.
Install Windows 11 on VMware Player
Press any key to continue….. Select the OS language to install (Time, currency, and Keyboard) type and then click Next.
Press the Install button.
Skip this step by selecting I don’t have a product key link.
Select the operating system and then click next.
Accept the Microsoft license and click next.
Custom: Install Windows only (advanced) option.
Drive 0 Unallocated space, click next.
Now, the Windows installation process started.
Now after restarting the PC, select your Region and then click on YES.
The Keyboard layout, select the US and select yes.
Skip the second keyboard layout. Type your virtual machine and then click Next.
Now select Set up for personal use.
And then log in to your Microsoft account and then select Next. Accept Windows 11 privacy settings.
Now you have successfully installed Windows 11 on a virtual machine using VMware Player.
In this article, I’m going to discuss how to split screen on windows 11. If you are facing an issue with Split Windows, This article is going to be very important for you.
In this guide, I will show you the way how to split screen in Windows 11. You can split your Windows 11 screen into multiple sections to improve your productivity. Split-screen permits you to view and access multiple windows at once. Windows 11 displays up to 4 or six windows simultaneously app at a time. The Snap feature by default is enabled in Windows 11.
Split Screen on Windows 11 with 2 Ways PC and Laptop
Enable split screen in Windows 11, press WINDOWS + I key from your keyboard to open the Settings, and then select System.
In System settings, scroll down and then select the Multitasking option.
Verify the Snap windows option is enabled and select the down arrow key.
Also, you can explore the various options listed under it and then check/uncheck as per requirement.
Using Windows 11 Snap Layouts
Splitting Screen on Windows 11 is very simple and quick with Snap Layouts integrated right into the maximize button for each window. No need to hold or drag a window to the side, or work with your keyboard shortcuts to trigger Snap windows. Use Snap Layouts in Windows 11, hover the cursor (mouse) over the maximize button near the screen top right corner of a window. A small box will pop up with 4 or 6 different options to split the screen.
Split Screen into 2 Sections
Open the app windows that you would like to split, hover the mouse (cursor) over the maximize button, and then select one of the parts of the first option.
The current app window will appear now snap into the selected half of the screen, and you can find other open apps as thumbnails on the other half screen. Choose the one that you need to add to the other half of the screen.
Now you can see two app windows on the screen. You can access and then work on them simultaneously. You can also have the option to resize the windows.
Split Screen into Three Sections
If you want to work on three apps simultaneously, there is also an option to split the screen into three. Hover the cursor to the maximize button and then select the three parts.
The current window will fit the part we choose earlier and then the other open windows will be displaying as thumbnails in your left half. Choose the 2nd and then 3rd window that you need to work on.
Now we have three open windows on the screen, split according to your decision. The concept of resizing remains the same, just hold and then drag the line that separates two/three windows.
Split Screen into Four Sections
The concept of splitting screen on Windows 11 into four is pretty much the same as what we discussed in the last section. Hover the cursor (mouse) over the maximize button of the current window, select the desired quarter in the last option, and then choose the other apps to be on the split-screen accordingly.
With the default settings in place, once 1 of the windows takes up half the Windows screen, the other open windows will be displayed in the other half. choose the one that you need to add to the other side of the screen.
Once you have two windows on the screen, drag the line that separates them in either direction to resize the windows. This process to adjust the windows remains the same in both methods.
In this guide, we will show you How to fix network discovery is turned off in Windows 11. A lot of Windows users have been requesting that when users try to enable the “network discovery feature in windows” it always shows an error “network discovery is turned off. “Network computers and devices are not visible”. “Please turn on Network Discovery in Network and sharing center”.
So after reading this guide, you will be eligible to turn On/Off Network Discovery on your Windows 11 computer.
What is Network Discovery in Windows 11?
The Network discovery permits your system to discover, and find other devices and computers on your network. So what happens when the network discovery option is on. You can easily share network resources with the computers you want. However, network discovery makes it easier for the attacker to find these resources.
To fix the above error follow the below steps, if one does not work for you, then please try the next one.
Reconfigure your advanced sharing setting
Open run command, type Control Panel and then hit ok.
Click on Network and Sharing Center.
On your left side, click on Change advanced sharing settings to fix the Network discovery is off error on Windows 11.
Under the private section Turn on network discovery Enable Turn on automatic setup of network connected devices. Under the File and printer sharing section
Enable Turn on file and printer sharing.
Under the Guest or Public Turn on network discovery Turn on file and printer sharing
Under the All networks section
Turn on sharing options so everyone with network access can read and write files under the Public folders “Enable file sharing for devices” that use 40-bit or 56-bit encryption Turn off Password Protected Sharing (if you trust all the devices in your network) and click save settings.
Restart your computer and then check the error Network Discovery is turned off is still showing or not.
Enable these windows services
If you are still continuing to see Network discovery is turned off error, then please make sure these services are running.
Press the Windows keyboard button Win + R to launch the Run window. Enter services.msc and then hit enter.
Function Discovery Resource Publication
Launch “Function Discovery Resource Publication” service, choose Automatic. Click start and then click ok.
DNS Client
Open DNS Client service and then make sure it is set to Automatic and make sure the service is running.
SSDP Discovery
Set to Automatic and make sure the service is running.
UPnP Device Host.
Make sure it is set to Automatic and make sure the service is running, if not click the start button and then click ok.
Network Connections
Check is it Automatic and makes sure the service is running.
Network Location Awareness
Set to Automatic and make sure the service is running.
After enabling these services, you must be able to fix the network discovery error.
Allow network discovery in firewall settings
Click on the Windows search bar type Windows Firewall and then open the Windows Defender Firewall.
On your left side, click on Allow an app or feature through Windows Defender Firewall.
Make sure the network discovery feature is turned on (Private and Public) checkboxes.
Do a Network Reset
Try resetting the network settings if the above fix didn’t help you.
Open Windows Settings and then click on Network & Internet.
Click Advanced network settings.
Scroll down select network reset and then click reset now.
After this restart your computer.
How to Run Troubleshoot on Windows 11
Open Settings, click on System, and then click the Troubleshoot.
Turn Windows features on or off is a powerful tool that comes with Windows operating systems. It allows users to enable or disable features and services that are integrated into the operating system. This feature is designed to help users customize their system according to their preferences and requirements. In this article, we will discuss what is it, how to access it, and how to use it effectively.
What is Turn Windows features on or off?
It is a built-in tool in Windows operating systems that allows users to enable or disable features and services that are integrated into the operating system. These features can be divided into two categories: Features and Optional Features. The Features category includes features that are essential to the functioning of the operating system, such as the .NET Framework, Internet Explorer, and Windows Media Player. The Optional Features category includes additional features that are not required for the operating system to function, such as handwriting recognition, Telnet Client, and Windows Subsystem for Linux.
How to access Turn Windows features on or off
To access this feature follow the steps below:
Press the Windows key + R on your keyboard to open the Run dialog box.
Type “appwiz.cpl” in the Run dialog box and press Enter. This will open the Programs and Features window.
In the Programs and Features window’s left panel, click “Turn Windows on or off.” This will open the Windows Features dialogue box.
In the Windows Features dialog box, you will see a list of all the features and services that are available on your computer. To enable or disable a feature, simply check or uncheck the box next to it.
Once you have made your changes, click OK. Windows will then apply the changes, which may take several minutes.
How to use Turn Windows features on or off effectively
This is a powerful tool, but it can also be overwhelming if you are not sure what you are doing. Here are some tips on how to use it effectively:
Only disable features that you are sure you do not need. Disabling essential features can cause your operating system to malfunction, so it is important to be cautious.
Consider the impact of disabling a feature. Some features may be necessary for other applications to run correctly, so make sure you understand the implications of disabling a feature before doing so.
Use the search function to find specific features. If you are looking for a specific feature, you can use the search function in the Windows Features dialog box to quickly find it.
Use the “Details” button to get more information. If you are not sure what a feature does, you can click the “Details” button in the Windows Features dialog box to get more information about it.
Be patient. Applying changes to Windows features can take some time, so be patient and allow Windows to finish before restarting your computer or opening any applications.
Conclusion
This is a powerful tool that allows users to customize their Windows operating system according to their preferences and requirements. However, it is important to use this tool with caution, as disabling essential features can cause your operating system to malfunction. By following the tips outlined in this article, you can use Turn Windows features on or off effectively and safely.