In this guide, I will run Windows PC Health Check to know if the computer can run Windows 11. Here you can check Windows 11 minimum system requirements and then how to check if you’re PC can update to Windows 11.
The Microsoft PC Health Check App had been intended to offer a simple way to check Windows 11 compatibility on Windows 10 PC, ready for the new operating system launch. However, Windows users originally found it deficient specificity the Windows app would say your PC won’t run Windows 11, but would not explain why.
Microsoft has a tool to help you figure out if your system will be able to run Microsoft Windows 11. Minimum System Requirements for Windows 11 Windows 11 Feature Specific Requirements To quickly check if your device is compatible, first, download the Windows PC Health Check from Microsoft.
Windows PC Health Check
Scroll down, find Check for compatibility and then click Download APP.
After downloading, double click to run the application from the download folder of your browser.
Select the radio button I accept the terms in the License Agreement option then select the Install button.
It will take a few seconds/minutes to complete the installation Once installation completed, select the checkbox Open Windows PC Health Check option and then select the Finish button.
Introducing Windows 11, select the Check Now option.
It will take few seconds to check the compatibility of your system. If your computer is compatible with Windows 11, you will receive this alert stating so.
It is very pretty simple to change computer name in Windows 11 (default computer name). You can change the PC name throughout the Windows 11 Settings tab. You can also use Command Prompt (CMD) or PowerShell or to change the name of your Windows 11 system. Here are the steps to change your computer name on Windows 11.
Change Computer Name via Windows Settings
To change the computer name, right-click on This PC and then select properties.
Select rename this PC.
Or you can open the Windows settings app and then select projecting this PC.
Select rename your PC.
Enter a new computer name under the current PC name and then click Next.
Select the Restart now button.
Change Computer Name using System Properties
We can also have the option to change our computer name from the properties.
To change the computer name, hold the WINDOWS+R key to launch the run command, type sysdm.cpl, and then click ok.
The System Properties will open by default, Select the Change button.
Under computer name/domain changes, type a new computer name and then select ok.
Click on ok.
Click close.
Make sure that you have saved files before restart. Select Restart Now.
Are you still running old Windows 10? It’s time to upgrade Windows 10 to Windows 11. Here are the guidelines that you will need to keep Windows files and apps without any issues.
Before you start the process, first, make sure that your Windows 10 installation has been activated. The best thing is to backup your files and folders. The Windows PC health check tool permits you to check your Windows 10 OS is capable to upgrade to Windows 11. First, you need to check your Windows version. Open settings and check your Windows is up to date.
It will tell you if you need to keep all the apps and files after the upgrade. By default, it will remain everything however, if you are looking to start fresh with no files or apps, then select the “Change what to keep” option. Select what you want to do and then click next.
This article shows, how to enable Hyper-V in Windows 11 desktop to run guest machines or virtual machines inside Windows 11.
Hyper-V is a built-in Windows feature that permits anyone to create a virtualized environment on the host machine (physical machine) to run virtual machines in Windows 11. Windows Hyper-V feature allows you to create virtual machines on your computer without any software or additional hardware support. You can create several virtual machines, each one with its own Operating System, in case you work on several operating systems. You can have virtual switches, hard drives, and other stuff on an individual virtual machine.
Enabling Hyper-V on Windows 11, follow the below steps
Here are several ways to enable the Hyper-V feature in Windows 11 to run virtual Operating Systems on your system.
There are multiple positions where Hyper-V could be your go-to option. Here are some of them. If your work demands you to operate several Operating Systems, Hyper-V would help you to create virtual machines and install different OS on each. If you have designed software and you want to test them all on the same system by installing a different OS.
You can run often the software which doesn’t run on the current Operating System, by installing the capable one. Now we recognize the concept of Hyper-V and its lots of benefits, let’s have a look at how to enable it in Windows 11.
First, you need to check if Hardware Virtualization is enabled in BIOS. In case if it’s disabled, the option to enable Hyper-V or its components will be hidden.
Hyper-V Platform greyed out.
Enable Hardware Virtualization in BIOS
Note: These steps are for an HP Elite 8300 desktop and the interface, terms, and keyboards inputs may different for other manufacturers, though the idea remains the same. We recommend you either read your system manual or visit the web to find out the process for your computer.
First, Shut down your computer and then power on. Now, press the F10 key to enter the BIOS Setup. In the BIOS Setup, navigate to the Security tab at the top and then select system security.
Find the Visualization Technology (VTx) option, and press the right arrow key to enable Hardware Visualization.
Now the Virtualization technology VTx is enabled, Press F10 to save the changes.
Under File, tab select save changes and exit.
Select Yes to confirm the changes.
After saving the changes, exit the BIOS settings. It will take a few minutes to complete, wait for the changes to come into effect. Once it’s done, Windows will boot automatically. You can enable Hyper-V either from the Control Panel, Windows PowerShell, and Command Prompt. In this blog, we have discussed each under a separate section for your understanding.
How to turn on Hyper-V in Windows 11
To Turn Windows features on or off, open the run box type appwiz.cpl and then click ok to open Windows Control panel features pane.
Select Turn Windows features on or off.
Or you can type optionalfeatures in the run box to launch turn Windows features on or off a window.
In the Windows Features screen, scroll down and then choose the checkbox next to Hyper-V (Hyper-V Management Tools and Hyper-V Platform). Click OK.
Windows features, searching for required files.
Select restart now.
After rebooting the computer, the Hyper-V feature should start enabling, and once done you can start creating virtual machines to run other operating systems on.
How to Enable Hyper-V using PowerShell in Windows 11
Here is another way to enable Hyper-V on Windows 11. If the above methods are not working for you, launch Windows PowerShell and then install it from there. Click the search button, type PowerShell as shown below in the image. Note: You need to run Windows PowerShell as administrator.
After launching Windows PowerShell, enter the command below to enable Hyper-V.
This command will download packages and enable Hyper-V. Type y and then hit enter to restart the computer.
Once completed, Hyper-V must be enabled and ready to use.
How to Enable Hyper-V using Command Prompt
Here are another ways to install Hyper-V is using Windows Command Prompt. If the above steps aren’t right for you, simply use the command prompt way below to install and enable Hyper-V. Run the Windows Command Prompt as administrator. Click on the search button and then type Command Prompt, open it as administrator.
Once Command Prompt opens, copy and paste the below command and then hit Enter.
Restart your system and Windows Hyper-V should be installed and enabled.
How to Create Virtual Machines in Windows 11 Hyper-V
Now that Hyper-V is enabled and installed, type Hyper-V Manager in the search bar after clicking on the search button as shown in the image below. Open it
Under the Action menu, select New and then Virtual Machine.
In this guide, I will show you how to restore from system restore point in Windows 11 from the boot. As a famous, restoring system using the system restore points are a good way to solve some Windows problems. So if you have some Windows problems like the driver issues, then you can restore the system. If your system still can boot when it impacts with some problems, you can perform a system restore in System Properties after booting your system. In spite of that, if your PC fails to boot when it meetings with some Issues, then how to restore the system? In such a condition, you need to perform a system restore Windows 11 from boot or from Windows Recovery Environment.
Open the System Protection tab and then click on System Restore as shown in the image below. Then you will be able to undo or revert system changes by reverting your PC to a previous restore point. This is the easiest way to restore your system.
Select the Windows search, type sysdm.cpl, and then click on it to open system properties.
Under the System properties tab, select system restore.
It depending on your computer speed, this will take some time to complete. Your computer will reboot to be successfully restored.
You will see System restore completed successfully after log in.
Step by step restore Windows 11 back to a restore point
If your PC runs into any issue, you can apply your restore points, whether restore point is created automatically or manually, to get your system back to how it was before.
Restore System Using Advanced Startup
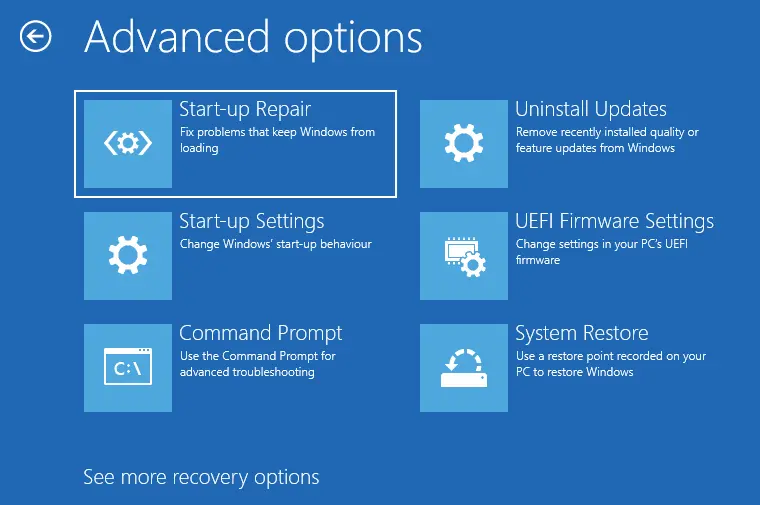
If you are unable to boot up your system, you may have to access the Advanced Startup settings and then restore your system through it. There are a lot of ways you can access the Advanced Startup screen.
Turn off your computer and then pressing F10 (Esc, F8, Dell and etc.) before you see the Windows logo. Select boot from CD/DVD or USB media. This will boot your system into recovery mode.
Select Repair your computer.
Select Troubleshoot.
Now click on System Restore.
Choose target operating system.
System Restore wizard, click next.
Choose a system restore point and then select next.
Confirm your restore point and then select Finish to have your system restored.
A system restores point is used to reverse the installed applications, system files, system settings, and Windows Registry to an earlier state.
System Restore point is missing
The problem system restore point is invisible may happen when you are trying to restore your system to an earlier date. This problem may be caused by mistaken deletion of restore points, Windows update, no free space for creating restore point Windows 11, the System Restore turned off, or disabled, defragmented page file, and so on.
Will System Restore delete my files?
The System Restore is capable to change your system files and revert your PC and system settings to an earlier date, but it won’t delete or remove your personal documents, files, and photos.
System Restore did not complete successfully
The issue system restore did not complete successfully May happen when restoring the system. And it may be caused by several reasons. For instance, the system restore failed to recover the directory from the restore point; the system restore could not approach a file; system restore failed to extract the file or some other reason.
System Restore stuck
When you are an attempt to restore your PC to a previous date, you may come across the issue system restore stuck including two kinds of two situations: system restore is initializing and Windows system restores stuck on restoring files.
How do I find an earlier restore point?
Go to the System Protection tab, select System Restore… to continue. Click Next. There you can find the system restore points.
Should I delete restore points?
Yes, you can delete restore points without any problems.
Here you can find a guide, how to rename a file or folder in Windows 11. If you are unable to find the Rename option in the New Windows 11 in File Explorer. A file/folder name is described as a title of the file/folder and the file extension.
How to rename Files & Folders in Windows 11
There are different ways to rename a file or folder in Windows 11.
After releasing the Windows 11 Insider Preview version, (Dev (OS Build 21996.1), you can’t find the context menu like in the below image.
It is available in Windows 11 Version 21H2 (OS Build 22000.51 and 22000.65).
Using Context Menu – Right-clicking
Select the file/folder you want to rename right-click on it and then select rename icon.
Type a new name of the file/folder and then press enter or click anywhere on the screen.
Rename Using Folder Properties
Right-click on the folder and then select show more options.
Select rename.
Rename Using Folder Properties
Right-click on the folder, choose to show more options, and then select properties.
The folder properties window will pop up. In the General tab, type a new folder name and then select ok.
Keyboard Shortcut – Alt+Enter
Select the folder you want to rename and then simply press Alt+Enter. The folder Properties pop-up will open. Enter a new name of the file and then click ok.
Keyboard Shortcut – F2
Select the folder and simply press F2 to rename the item.
Home Menu in File Explorer
To rename from the File Explorer, choose the item. Select the Rename tab and follow the steps.
By Two Single Clicks
Click on the file/folder two single times. The file/folder name will get highlighted. Type a new name and then hit the Enter key to save it.
Using Command Prompt
Command Prompt permits you to rename the folders using the ren command. Use the following command. ren E:documents.docx file.docx For instance, this will rename the document named documents located on E drive to file.
Using PowerShell Rename Folder
Open the folder location and launch a PowerShell window. Use the rename-item command The following command renames the folder software to a folder on Drive.
In this article, I am going to show you how to register Windows Insider Program for Windows 11 Dev channel. Even then if you don’t have access to your Windows PC at the moment but you want to enroll in the Windows Insider Program as soon as you can or facing any difficulty enrolling from the Windows Settings app, you can log on to the insider Windows website and then you can do that.
Type your Microsoft account credentials and then click sign in.
Now you will redirect to the Start flighting page, First, make sure to read all the information to prepare the system to begin installing the Windows 11 Insider Preview Builds. Select the Open Settings button if you would like to view the page on your Windows PC, or else switch to your Windows computer and then open the Settings app to continue ahead.
In this article, we will learn how to change mouse pointer color and size in Windows 11. Windows 11, like the earlier version, permits you to change the mouse pointer (cursor) color and size. Windows 11, lets you increase the mouse pointer size and change the color.
Let’s see there are different options are available and how we can apply them to Windows 11.
Steps to Change Mouse Cursor Color and Size
Hold the Windows+I key from your keyboard to launch settings. Or You can press the Windows Start Menu and then select the Windows settings app.
Now you are in the Mouse pointer and touch settings where we can change the size and color of your mouse pointer.
How to Change the Pointer Color
You will find different options under Mouse Pointer Style. Let’s see what these other options are.
The line color will be selected by default when we click on the Custom option. You can choose any other color from the list below. Or click on choose other colors from one that is not listed below.
Here you can select any color that you want for the pointer. Select a particular portion in the box and then use the below slider to adjust the color value. Select the Done button to apply the changes to the mouse pointer color.
How to Change the Mouse Cursor Size
To increase the cursor size, drag the slider next to the size on your right. By default, the pointer size is set to 1, which one is the minimum size? you can increase it up to 15.
The volume numbers mentioned here would not construct much sense until we drag the slider ourselves. Also, the cursor size will shift while dragging the slider, and you can stop dragging further when it reaches the desired size.
In this article, I will explain how to Media Creation Tool downloads windows 11. Let’s see how you can get the Windows 11 ISO file, and how to complete the task.
If you would like to have a backup of the Windows 11 installation folder or you wish to install the operating system on a virtual machine, you need to download the Windows 11 ISO file. The ISO is a file format that keeps the contents of a physical disk (CD/DVD, or Blu-ray).
Windows 11 media creation tool permits users to upgrade the current version of Windows to Windows 11. You can also create a bootable USB that permits you to Install Windows 11 on any other device they are using. The Windows media creation tool is the most popular way of upgrading older version Windows or installing a new version of Windows 11.
If you are planning to upgrade to Windows 11, the best way is to use Windows Update. Through, Microsoft supports other ways to proceed with the new installation via the Media Creation Tool.
If you would like to create a Windows 11 USB for another PC, then you can also untick the Use the recommended options for this PC. Choose language and edition, then click the next button.
Let’s see how to create a system restore point in Windows 11 and then bring back Windows 11 to an earlier state. A restore point creates imitate of the system files on the computer at the instant it’s created. This means you can return your system to its original condition should any errors occur when, for example, you run system utilities or installing drivers. It’s a great idea to create a restore point when your system is in a steady, working state. Create one before making meaningful computer changes or installing unknown or new unknown software; if anything goes Incorrect, you can revert your operating system to the restore point.
A System Restore permit you to undo system changes that may be causing problems. System Restore is a Windows feature designed to create a restore point (snapshot) of the systems current working condition as a restore point when devices changes are detected. If a crucial problem occurs after installing a Windows update, installing driver, application, or after modifying computer settings incorrectly using any other tool, you can use any of the available restore points to revert your system to an earlier point in time to resolve the issue without losing your data.
If you know the changes you need to make may lead to damage of data or your computer being unstable, then you need to create a restore point before doing changes. Windows 11 helps you restore your system back to a fine state.
Using System Properties
To create a restore point in Windows 11, press the Windows key + R on the keyboard to launch the Run app. Then type sysdm.cpl and hit Enter to launch.
Alternatively, click on the Windows search bar, type sysdm.cpl, and open it.
It will open the System Properties settings and then select System Protection tab. Here you might see your Local Disk (C:) (System) drive Protection Off, click the Configure button.
Turn on the system protection radio button and then click ok to save your changes. Performing this will enable System Protection on your local system disk drive.
After System protection is turned on, select the Create button to create a restore point.
Type the restore point name and then select Create.
Creating a restore point
Windows system restores point successfully completed for the computer that you can restore to in case the system becomes unstable.
How to Do Windows 11 System Restore
The system restore option is available in Windows 11, but by default it’s disabled.
Create system restore point with PowerShell
Admin rights users can create restore points with PowerShell as well. Select Windows search button, type PowerShell, and then select Run as administrator.
Change Restore Point Name with whatever you want to name the restore point.
Might be PowerShell displays a warning (see in the below pic) saying that you cannot create more than one system restore point in 24 hours. Providing steps below.
You can see the progress report of the restore point creation.
To Create Restore Point Using Command Prompt
Another way to create a restore point is with Command Prompt. Select search bar, type cmd, and then click on Run as administrator.
Change Restore Point Name in the below command with whatever you wish to name the restore point and then hit enter.
When you received the “Method execution successful” and “ReturnValue=0” messages this means your system restore point is successfully created.
How to fix can’t create a system restore point?
There is might be some reasons, you may unable to create a system restore point. But there are some easy fixes that you can solve the issue.
To Change system restore frequency in Registry Editor
As mentioned above, by default, Windows only allows you to create one system restore point if one has already been created in the last 24 hours. This could be difficult, principally if you are looking to edit the registry settings but want to make sure that there’s a restore point in case things goes wrong. To permit the creation of system restore points at any time, you will be eligible to change the frequency of system restore points.
Hold Win + R key to launch the RUN box, type regedit, and then press enter.
Right-click empty place, choose New and then select DWORD (32-bit) Value.
Copy SystemRestorePointCreationFrequency and paste it.
Leave it default and close the registry editor. Now you are able to create a snapshot (system restore point) manually without considering any frequency limitations.
To enable system restore via Group Policy Editor
Press Windows key + R to open the RUN, type gpedit.msc, and then press enter.
Group Policy Editor Window will pop up. From the left pane, expand Administrative Templates > System > System Restore. On the right, these two Settings should be set to Not configured.
If any of them is enabled, double-click on it to open and then set it to Not configured.
Now you must be able to create a system restore point.
How to turn on Volume Shadow Copy service
When you’re unable to create a system restore point, here is another fix that you may wish to implement is to turn the Volume Shadow Copy service. Open Windows search, type services, and then hit enter.
Scroll down and find the Volume Shadow Copy service. Click on Start the service if the service isn’t already running.
How to Schedule System Restore Point
Now, this step is to create a task in Windows Task Scheduler so that a restore point will create whenever Windows starts. To do this, press Win + R key to the open the Run box, type taskschd.msc, and then press enter.
In the right panel under the Action menu click on Create Task.
Select the General tab, type this task a name, and select radio buttons “Run whether a user is logged on or not”, and “Run with highest privileges”. Next to Configure for select Windows 10. No need to worry if Windows 11 is not among the options. As there is no steady build for Windows 11 yet.
Select the Triggers tab and then click on New at the bottom.
Next to Begin this task, select At startup and then click ok.
Select the Actions tab and then click on New at the bottom.
In the New Action window, Start a program (default) settings next to action is selected. Program/script field, enter wmic.exe. Next to Add arguments (optional), enter the below command: /Namespace:\root\default Path SystemRestore Call CreateRestorePoint “Startup Restore Point”, 100, 7 Then click ok.
Select Conditions tab.
If you’re working on a laptop, untick the option under Power name Start the task only if the computer is on AC power and then click ok.
Task Scheduler window will open, type your credentials to complete setting up the task. Click ok.
Whenever you start your computer, a system restore point will be created.
Note: You are almost done setting up the scheduled system restore point. You can find the task in the task scheduler window. To confirm if the task is running as setup, right-click on the system restore task and then select Run. This action must create a new restore point.
System Restore: Frequently Asked Questions FAQ’s
What happens when you create a restore point?
Windows takes a snapshot of your computer data as it is at a specific time. The descriptions of the operating system are thus saved so that you can return back to it in case things go incorrect.
Why did my system restore points disappear?
The most general reason is the system restore option was disabled manually. Each time the system restore option is disabled, the system restore points are deleted. Also, this condition may be caused by the installation of Windows susceptibilities or other important updates or the incidental deletion of the Disk Cleanup utility.
How long does Windows 11 keep restore points?
The retaining is 90 days, and the earlier restore points increased this date will be deleted automatically to make room for a new one.
Will System Restore bring back deleted files?
System Restore only works for system programs or files. If you delete any special data, such as videos, pictures, documents, etc., it won’t help.
Does Windows 11 create automatic restore points?
Yes, by default Windows 11 has its System Properties set to automatically create system restore points from time to time, for example when you make important changes or any update to your system.
How long does a system restore point take?
It depends on how much data needs to be saved, creating a system restore point can take wherever from a few minutes to a few hours. Though, if after five to six hours you find that a restore point is still being created, it is probably that Windows has run into some problems. In such a scenario, you might need to cancel the whole process and then start again.
Can I undo the changes System Restore makes?
Yes. Each time when you use System Restore, a restore point is created before processing, so you can undo the changes if they don’t fix the problem. If you use System Restore when using the System Recovery Options or the computer is in safe mode, you can’t undo the restore process. Despite that, you can run System Restore again and then choose a different restore point, if one exists.
What files are changed during a system restore?
System Restore affects programs, Windows system files, and registry settings. It can also make changes to batch files, scripts, and other types of practicable files created under any user account on your system. System Restore does not affect personal data, such as documents, email, or photos, so it can’t help you restore a deleted file. If you have a backup of your data, you can restore the files from a backup.
What if System Restore doesn’t fix the problem?
If System Restore doesn’t fix the issue, you can undo the restore process or try selecting a different restore point. If System Restore doesn’t show any restore points to select from, please ensure you have system protection turned on and that you have free space on your hard disk and if the System Restore does not fix your problem, you can also try an advanced recovery method.
Conclusion:
This blog showed you how to create Windows 11 System Restore point to restore Windows systems to an earlier state. If you find any problems above, please write a comment.
This post will show you different ways to open Task Manager in Windows 11. Let’s have a look at how to speedily open Windows 11 Task Manager from the Start menu, create a shortcut for it on your system desktop, and pin Task Manager to the Windows Taskbar.
Windows Task Manager is an exceedingly powerful and useful tool in Windows that permits you to monitor system resource usages of CPU, memory, disk, and bandwidth for running programs, Windows processes, and background processes. It is also often commonly used for ending programs that might be jammed or can’t be closed for other reasons.
If you forever opened Task manager from the Windows Taskbar and now don’t know how to open it in Windows 11, take it easy! In this guide, I will show you the various easiest ways to launch the Task Manager in Windows 11.
Right-click on the Windows Start menu and then select Task Manager from the options list.
Task Manager
Add Task Manger to Taskbar in Windows 11
You can also open Task Manager with a single click by pin it to the Windows 11 Taskbar.
Select the Windows Search button or press the Windows button + S key, type Task Manager in the search box.
Select the Task Manager App and then select the Pin to taskbar option on the right side panel.
Now you can the Task Manager is pinned to the Taskbar. Just single-click on it to open it.
Open Task Manger with a Shortcut key
This is the easiest way to launch Task Manager by pressing the (CTRL + SHIFT +ESC) shortcut key from your Keyboard.
Create Task Manger Shortcut in Windows 11
Another simple way to open Task Manager is to create a shortcut on the Windows desktop.
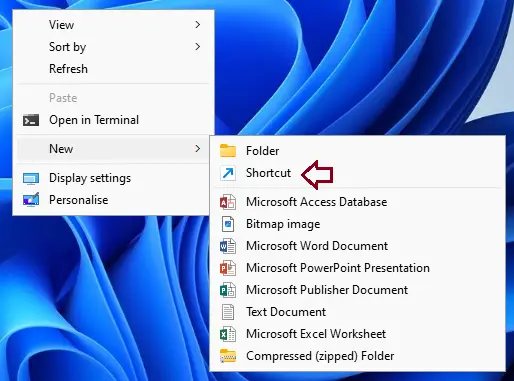
To create a shortcut for Task Manager on the desktop, right-click on your system desktop where you wish to create a shortcut, select a new item and then select Shortcut.
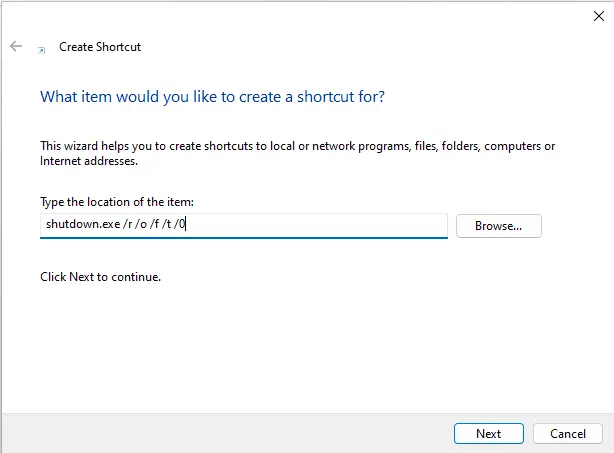
In the Create Shortcut window, select the Browse button.
Find the Task Manager App in the Browse for Files or Folders window: (C > Windows > System32 > Taskmgr.exe). Select the Taskmgr application and then click ok.
The Task Manager App path will be added to the textbox.
Or, you can directly type the below path into the text box.
C:\Windows\System32\Taskmgr.exe then select the next button.
Type Task Manager for your shortcut in the textbox, and then select Finish.
Now you can find the Task Manager shortcut on your desktop. Just double-click on to open.
The easily way to access Task manager in Windows 11
Open the Run dialogue box by pressing the Windows button + R key. Type taskmgr.exe in the Open box and then press enter.
Run task manager from command prompt
Open the command prompt, type taskmgr.exe, and then hit enter.
Run task manager using PowerShell command
Open the PowerShell, type taskmgr.exe and then press enter.
In this blog, we will have a look at how to log in Automatically in Windows 11. Do you find it unsuitable to type a password each time when you turn on your computer? If so, you can actually automate the entire login process on your Windows 11 PC. The Windows log-in screen is a security feature that assists protect your system from others. Someone will need to know your password before they are permitted to sign in. This automatic signing feature is built into the operating system, and all you wish to do is turn it on to get clear of login annoyance.
Before following the below steps, there are few things to note. You must have access to your Windows administrator account to makes changes and you must log in as the administrator and if you always decide to change the password for the account set to automatically log in, then you will need to re-do the steps.
Log In Automatically in Windows 11
How to Remove Your Windows Password
Right-click on This PC from your desktop and then select Manage.
Or open run command by pressing Win + R keys, type compmgmt.msc, and then select ok.
Expand local users and groups, select Users Right-click on a user the one you want to log in automatically and then select a set password.
Select proceed
Click ok without typing passwords
Click ok
Allow Automatic Login via User Accounts
Hold Windows key + R to launch run box, type control userpasswords2, or type Netplwiz to Sign In to a User Account Automatically and then select ok. Click Yes if you get a User Account Control warning message that appears.
User Account window will open, deselect the checkbox Users must enter a user name and password to use this computer and then select ok.
Click ok
Restart your computer, and you will find it no longer asks for a credential.
Using Windows Registry to Login to a User Account Automatically
Hold Windows Key + R, type Regedit, and then press Enter.
Once open the Registry Editor, go to the following path. HKEY_LOCAL_MACHINE\SOFTWARE\Microsoft\Windows NT\CurrentVersion\Winlogon
Find AutoAdminLogon from your right and double-click to open it Enter 1 in the Value data box and then select ok. Close the Registry Editor and then restart your computer Now that you have set up the account to log in without typing a password, reboot your computer and you will notice Windows will sign you in without typing a password.
To turn off automatic login, change the value of AutoAdminLogon to 0
Conclusion:
This article showed you how to set up Windows 11 to automatically sign in without typing a password every time.