Create Backup Copy Job In this blog, I will explain how to copy backups to a secondary location, you need to configure a backup copy job. The Veeam backup copy job will defines how, where and when to copy backups. 1 job can be used to process backups of one or more machines.
Create Backup Copy Job
1- Open Veeam Backup & Replication console, select the Home tab, select Backup copy and then select Virtual machine
2- New backup copy wizard, In the Name field, types a backup copy job name. Type a description for the copy job. The default description includes information about a user who creates the job, date & time when the job was created. Select Periodic copy (pruning) to copy the most recent restore points once within a backup copy. If you have selected a daily backup copy, specify the start time and then click on next
3- New backup copy job wizard, Objects option, select VM machines whose to restore points you want to copy to a target Backup Repository, and then click on the Add button.
4- Select a backup job for a backup copy job
5- Click next
6- New backup copy job, Target option, From the Backup repository list, selects a backup repository where you want to copy backups job. At the Restore points select keep option checkbox, specify the number of restore points that must be preserved on the target backup repository. Click on the Schedule button to define the schedule for creating GFS full backups. Select the checkbox reads the entire restore point from source ….
7- New backup copy job, data transfer option, select direct and then click OK.
8- Select the schedule option when the job is allowed to transfer data over the network and then click Next.
9- New backup copy job wizard, review the job summary, select enable the job when I click finish checkbox and then click finish
Instant VM recovery Veeam, it will help you to improve recovery time objectives (RTO), minimize disturbance and downtime of production work burden. It is like having a temporary reserve for a workload: users remain productive while you can troubleshoot an issue with the failed workload. When Instant VM Recovery is carried out, Veeam Backup & Replication uses the Veeam vPower technology to mount a retrieved VM image to an ESXi host directly from a compressing and deduplicated backup file. After that no need to extract the VM from the backup file and copy it to production storage, you can perform restore from any restore point in a matter of minutes.
Instant VM recovery Veeam
1- Run Veeam Backup and Replication console and select Backups and then select the backup job. Right-click on Virtual Machine then one you want to create instant VM then click on Instant VM recovery.
2- Instant VM recovery Wizard will open, so just select the Backup and click on the Next button.
3- We are creating this instant Virtual Machine for testing purposes. Choose option Restore to a new location or different and click on the Next button.
4- Now you can here define the name of instant Virtual Machine. So we need to select the ESXi Host where we need to restore and then just click on choose Host button.
5- Now select the ESXi host here and then click on the OK button.
6- After selecting the ESXi host and then click on the Next button.
7- Select a Datastore where you need to restore. If you have multiple Datastore or leave it as default and click on the Next button.
8- Select scan backup for viruses or else leave it default and click on the next button.
10- Now we need to select the following option very carefully so please don’t select connect VM to network for avoiding IP address conflict select only power on VM automatically option and click on restore and wait for it.
11- Instant VM recovery has been completed successfully so wait a few minutes to power on the Virtual Machine.
Testing Recovered VMs
Before migration recovered Virtual Machine to production, you can open VM consoles in Veeam Backup & Replication or in the VMware vSphere client. To open a Virtual Machine console in Veeam Backup and Replication: Select the Home tab, In the inventory pane, select the Instant Recovery option, In the working area, right-click a VM and select Open Virtual Machine console.
13- Type credentials and click OK
14- Now Instant Virtual Machine Opened
Migrating Recovered VMs
Migrate click Quick Migration (will be provide the link as soon as possible)
Stop publication Recovered Virtual Machine
If the test has failed, you can stop publishing the recovered VMs. This will remove the restored VMs from the host that you selected as the destination for recovery.
Note that all modifications made in the recovered VMs will be lost.
To stop publishing a recovered VM
1- Select the Home view, In the inventory option, select the Instant Recovery node, In the working area, right-click a VM and click Stop publishing.
Cloud Tier is a feature available in Veeam Backup & Replication that allows administrators to store long-term data retention on cost-effective storage cloud solutions. Veeam Cloud Tier capability takes advantage of Object Storage Repository configured as Capacity Tier Extent in the Scale-out Backup Repository providing a very scalable repository. Veeam Backup & Replication provides the capability to securely transfer on-premises backups to Azure Object Storage offering a scalable storage infrastructure.
4- Type repository Name, Description then click Next.
5- Account, Insert Service Point address, and select Region by selecting between the available Wasabi datacenters. s3.us-west-1.wasabisys.com For credentials click Add
6- Enter your Wasabi “Access key” and the “Secret Key” retrieved from the Wasabi Management Console then click OK.
7- Click Next.
8- Bucket, based on specified credentials, Veeam fetches the Bucket you have configured in Wasabi (wasabibuckets3). Select Browse to select an existing folder
9- To create a new folder, click on New Folder button type a folder name to store your backups and then click OK.
10- Enable Limit object storage consumption to & specify the limit to 1TB. When the limit is surpassed, no new tasks will be executed. Choose recent backup immutable and then click Next.
11- Click finish to create the Wasabi Backup Repository.
12- The new Wasabi Bacup Repository has been created successfully.
Create a new local Backup Repository
1- Select the Backup Repositories section and then select Add Backup Repository.
2- Select director attached storage as backup repository type.
3- Select Microsoft Windows.
4- Type repository Name, Description and then click Next.
5- Select the Populate button, select a drive you want to use as a backup repository, and then click Next.
6- Click Next.
7- Click Yes.
8- Click next.
9- Click Apply.
10- Click next
11- Click Finish to create the local Backup Repository.
12- The new local Backup Repository has been created successfully.
Create a new Scale-out Repository
1- Select Scale-out Repositories and then Select Add Scale-out Backup Repository.
2- Type a Name, Description for the new Scale-out Backup Repository and then click Next.
3- Click the Add button to add a local Extent used as Performance Tier to store metadata.
4- Select the the backup repository and then click OK to confirm.
5- Click Next.
6- Select Data Locality option and then click next.
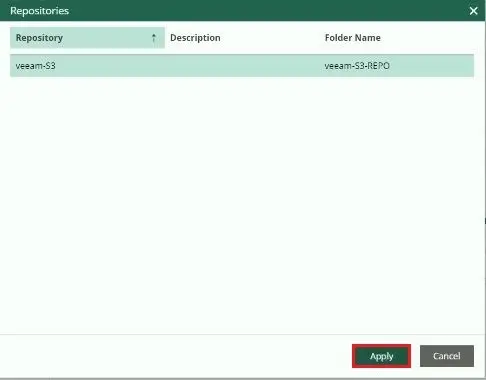
7- Select checkbox Extend scale-out repository capacity with object storage option by specifying the Wasabi repository previously created. Define also the time/age when old backups can be moved to the object storage (Wasabi object storage repository) for long-retention archival purposes. You can set the value click Apply.
8- Click finish to create the Scale-out Repository.
9- The Scale-out Repository has been created successfully.
Create a Backup Job
Create a new Backup Job to grab advantage of the Immutability feature.
1- Select home tab, select backup job and then virtual machine.
2- Type backup job name and then click next.
3- Virtual machine to backup click the add button
4- Select the object to backup and then click add.
5- Click next
6- In the configuration wizard select from the Backup repository drop-down menu the just created Scale-out Repository (local backup repository Wasabi) and then click next. Follow the below instructions and finalize the Backup Job configuration.
7- Click next
8- Click next
9- Click finish
10- During the first performance, a Full Backup is being performed.
Move backups to Wasabi Object Storage
If you are willing to test the archival process into the protected bucket, after the initial Full Backup you must perform some additional backups. At least 3 to 4 additional Incremental Backups and one another Active Full Backup.
In this picture you can find 2 full backups 3 incremental backup
1- To move backups immediately to the selected Wasabi Object Storage. Select your scale-out repository and then click edit scale-out repository.
2- Select Capacity Tier option, select Move backup files older than field set to 0, and click finish.
3- Keep the CTRL button and right-click on your Scale-out Backup Repository (Wasabi) and then select Run tiering job now.
4- The offload process is performing and backups are moved to Wasabi Object Storage. I am testing in my test lab so I am stopping it.
5- Login to Wasabi Console and access the Bucket used as Backup Repository. As expected, backup files have been stored in the configured Bucket.
In this guide series, the focus is to create a trial account that will be used in combination with Veeam Backup and Replication to store long term backup. In this case how to sigh up a Wasabi S3 free account for a trial. Later on also the ability to explain content directly from the cloud for granular restores. Wasabi S3 offers enterprise cloud blob storage at a reasonable price. They offer an interesting option for that entire customer who wants to benefit from cloud resources and in particular for object or blob storage. Wasabi offered for a fraction of the price when compared to other solutions in the market.
How to Create Wasabi S3 Account
To create a trial account is a straight forward process and requires no credit card. The trial gives access for 30 days for a maximum of 1 TB. 1- Browse the Wasabi website for sign up and then click Try or BUY Now.
2- Click Create Account
3- Enter details and then click start your free trial
4- You will receive an email from Wasabi for confirmation. Type your email address, password and then click signup
Create Account Wasabi S3 Bucket
5- Once the Wasabi account is created the next step is to create a bucket. Click create bucket
6- Enter a name for the bucket and the region and then click next
7- Click next.
8- Review the settings and then click create bucket
9- Select your bucket
10- Here you can create folder
11- Select settings
12- In the bucket settings we can edit settings for example enable Logging and Versioning or you can enable while creating the bucket.
13- The last step is to create the Access Key. Select create new access key
The status and creation of the keys can be controlled by the wasabi S3 console. The wizard will create an Access & Secret Key. This information is to provide when configuring client apps to access the pertinent bucket. In addition, it’s necessary to also provide the correct name of the region where the bucket is located. 14- Click create
15- Here you can get your access key and secret key
In this blog, I am going to restore files and folders from the tape backup. Please follow the below steps to restore files form tape.
1- Open the Veeam Backup & Replication console, select Home tab, and click on the Restore tab and select Tape
2- Select Restore files.
3- Restore from tape wizard, Objects to Restore option and then click Add.
4- Expand the server, browse to the file or folder or volume you need to restore. Select them and then click ok
5- Select Backup Set button
6- If you need to restore files from other restore points, so select them and click ok By default, Veeam Backup & Replication will restore the latest version of files and folders are available on the tape.
7- If you want to remove a file or folder from the list, select it and then click Remove. Click next
8- Restore from tape destination option, select an original location if you want to restore files and folder to its original server. This server option. If you want to restore files to another server. You can restore files to the Veeam backup server shared folder or to any other machine the one is added to Veeam Backup & Replication. Now select the browse button and select the folder where you need to restore files
9- Select the overwrite the existing files option and then click next
10- Review the restore from tape settings and then click Finish.
11- Files form tape successfully restored
12- Now you can see the files in restoration folder
In this blog, I will explain how to restore Virtual Machine in Veeam Backup & Replication.
1- Open Veeam Backup and Replication Console, click on Inventory options and click on VMware vSphere you can see the following virtual machine.
2- Here you need to select the vCenter server, after that select the virtual machine which you want to restore and click on restore option and then restore entire VM
3- Full Virtual Machine Restore wizard will open, so just select the Virtual Machine and click on next.
4- Here you can select restore location you can select any one option in these two so I am restoring the Virtual Machine to different locations so just select the location and click on the Next button.
5- Here it’s showing the Virtual Machine and original location here so we need to change the host location so just select the Host button and select the different Host where you need to restore the virtual machine.
6- Here you can select the available host where you need to restore and click on the OK button.
7- After selecting host so just click on next button.
8- Here you can select resources like Datastore or you can leave it default and click on the next button.
9- Now select the Database button if you want to change the datastore.
10- Select a Datastore and then click OK.
11- Select disk type
12- Select disk type and then click OK.
13- Now you can see the virtual machine hard disk and datastore size so verify the details and click on the Next button.
14- Select the name button.
15- Type a virtual machine name and click OK.
16- Click next.
17- Virtual Machine Network and click on next button.
18- Click next
19- Now you can type the reason why you are restoring the Virtual Machine and click on the Next button.
20- Choose the Power on target VM after the restoring option and then click on the Finish button.
21- Virtual Machine successfully restored so just click on close button.
22- Virtual Machine successfully restored
Related: How to use Extract Utility in Veeam Backup & Replication
Extract Utility Veeam Backup & Replication with an extract utility that can be used to restore virtual machines from Veeam backup files. The Veeam extract utility does not need any communication with Veeam. You can use it as an independent tool on Linux & Microsoft Windows virtual machines.
Extract Utility Veeam Backup
Veeam extract utility can be use in two interfaces (Graphic user interface (GUI) and command line) I am using an extract utility Graphic user interface (GUI) interface The Veeam extract utility is located in the installation folder of Veeam, by default C:\Program Files\Veeam\Backup and Replication\Backup The folder includes three files for the extract utility: Veeam.Backup.Extractor.exe working in GUI (can be use on Microsoft Windows machines only) extract.exe: Veeam utility working in the command prompt interface, a version for Microsoft Windows extract: Veeam utility working in the command prompt interface, a version for Linux
Extract Utility GUI
Restore VM data using Veeam extract utility GUI Run the Veeam.Backup.Extractor.exe setup file extract utility file from the installation folder of Veeam Backup & Replication. Veeam Backup Extraction Utility wizard next to Backup file option and then click on the browse button
Specify a Veeam backup .vbk path. If the backup file is encrypted, the utility will require you to provide a credential to unlock the backup file.
Under the Target folder field, specify a path to the destination folder where you want to restore virtual machine data.
From the Virtual Machines list, select a virtual machine whose data you need to restore.
Click on Extract button, Machine data will be restored to the specified folder.
The Veeam extract utility can be start on Microsoft Windows machines only. If you plan to start the Veeam extract utility on that machine where Veeam backup not installed. You need to copy the Veeam.Backup.Extractor.exe and extract.exe file from the Veeam installation folder and store these 2 files to the same folder on the destination machine. Restoring files please wait
In this article, I will create a file to tape the job using the Veeam new file to Tape Job wizard.
1- Select the Home tab, right-click the Jobs tab, and select Tape Job and then Select Files to Tape.
2- New file to tape job wizard, under the Name field, type a name for the file to tape job. Under the Description option, type a description of the file to tape the job and then click next.
3- File to tape, (Files and Folders) step of the wizard, click the Add button.
4- Select file or folder windows pop up, From the Server drop-down list; select a Windows Server the one you want to backup files or folders. Select files & folders that you need to backup and then click on ok.
5- If you want to back up files and folders from a Windows server or Linux server, first make sure you have added as a managed server to the Veeam backup infrastructure. If you want to back up files and folders from an SMB server or NFS share, and then make sure you have added as a file share to the inventory. Now in the Files and Folders windows, you use the Up and Down buttons on your right side menu to move sources up or down.
6- Select Include masks & Exclude masks fields to filter the file & folder contents and then click ok
7- Select Next.
Media pool for full backup
8- New file to tape job wizard, Full Backup options. Select a media pool that you want to use for full backups. If you need to create a new media pool click here. Backup schedule option select the Run the full backup automatically checkbox to specify the full backup schedule and click next
9- Incremental Backup option, Select a media pool that will use for incremental backups. Backup schedule, select the Run incremental backup automatically checkbox and specify the schedule for the incremental backup.
10- Select Microsoft volume shadow copy (VSS) to enable backup of files with the help of Microsoft shadow volume copies. Select Eject media upon job completion option if you want tape automatically eject from the drive. Select Advanced
11- At the advanced settings. Then select the Notifications tab, Configure e-mail notification and then click ok
12- Select the Run the job when I click Finish option if you need to start file to tape job right and then click the Finish button.
13- Now files and folder job has been created and running
Archive Veeam Backup to AWS S3, The Veeam Backup & Replication solution offers backup, restore, and replication functionality for physical servers, virtual machines, and workstations as well as cloud-based workloads.
A native S3 interface for Veeam Backup & Replication is part of the Veeam Availability. It will allow us to push backups to an S3 compatible service to maximize backup capacity.
The following below steps will represent the functionality of Veeam Backup and Restore which acts as an intermediate agent to manage primary data storage and secondary & archival storage:
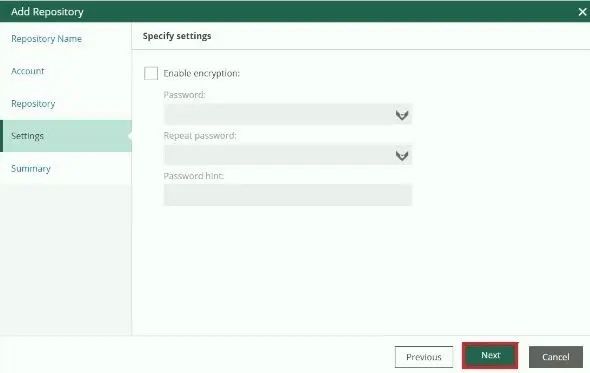
2- Backup Infrastructure tab, click on Backup Repositories, and then click Add Repository.
3- Select the Object storage as repository type.
4- Choose Amazon S3 as object storage type.
5- Type repository name, Description and then click next.
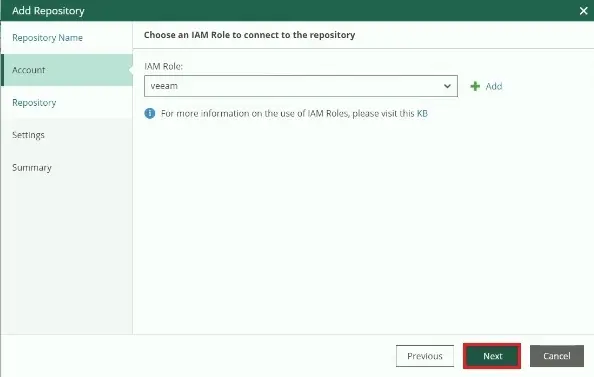
6- Select Add
7- To access Amazon S3 bucket type credentials and then click OK.
8- Select Data center region and then click Next.
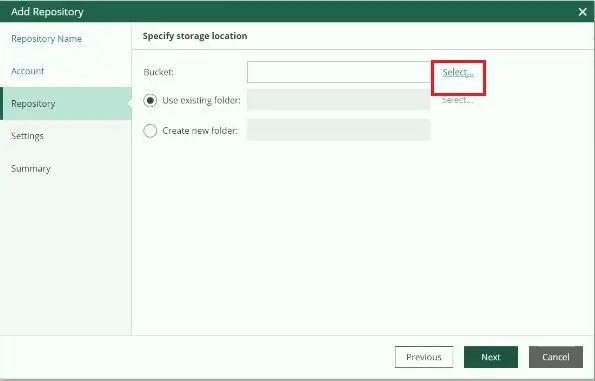
9- Select the Datacenter region to use and the Bucket. Click the Browse button to specify the correct folder to use to store the backups.
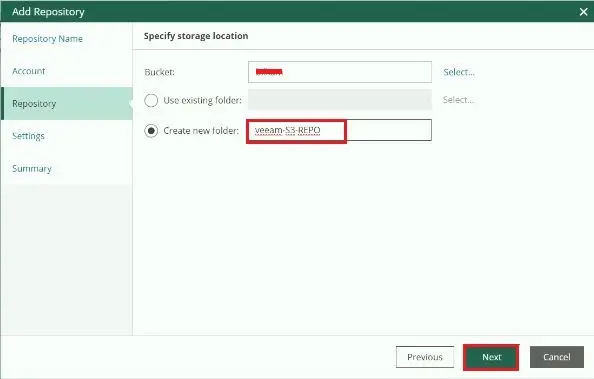
10- Click New Folder and specify the folder name. Click OK.
11- You can enable the Limit object storage consumption option to keep storage costs under control. Choose Make recent backups immutable for days to use native object storage capabilities and specify the retention in days. Click Next.
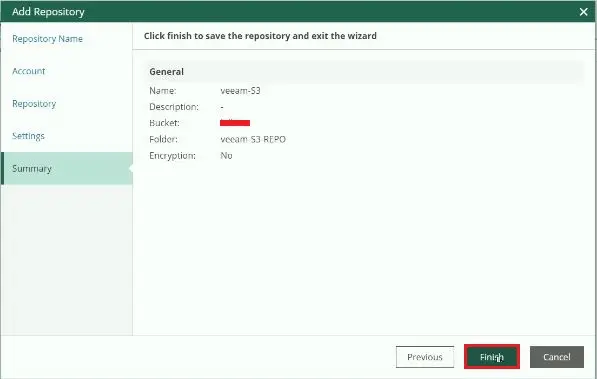
12- Click Finish to save the configuration.
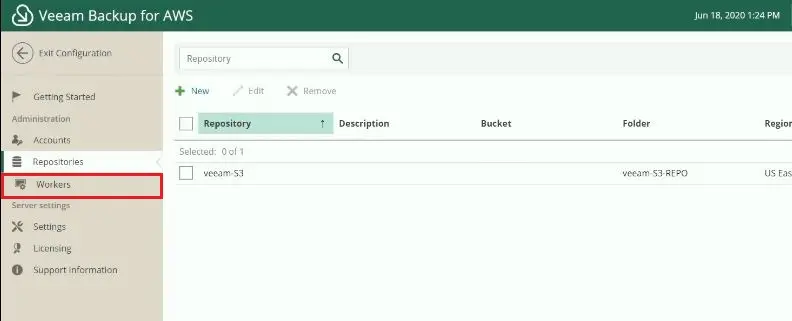
13- The new S3 Repository has been created successfully.
3- Configure a Scale-Out repository
Veeam Scale-out Backup Repository is a key technology for many/various additional competencies for managing backup data.
1- From the Backup Infrastructure tab, click on the Scale-out Repositories and then click Add Scale-out Repository to create a new one.
2- Enter a Name, a Description and then click next.
3- Click the Add button to specify the Performance Tier Extent.
“Configuring a Local Backup Repository” I have already configured a local backup repository name (Backup Repository Cloud).
4- Select the Repository to use then and then click OK.
5- After selecting the Performance Tier click next.
6- Choose Data locality option as Placement Policy then click next.
7- Enable the Extend Scale-out repository capacity with object storage option and select the S3 Repository previously created. This default value is set as 30 days. Click Apply.
8- Click Finish to create the Scale-out Repository.
9- Scale-out Repository created.
4- Create a Backup Job Veeam
Now we need to create a new Backup Job to take advantage of the Immutability feature.
1- Select Home, select backup job and then virtual machine.
2- Enter job name and click next.
3- Click add
4- Select virtual machine and then click OK.
5- Select from the Backup repository drop-down menu the just we have created Scale-out Repository and then click next.
6- Guest processing click next.
7- Backup schedule click next.
8- Summary click finish
9- Right click the created Backup Job and then select Start to start the backup immediately.
During the first execution, an Active Full Backup is being performed. If you are willing to test the archival process to the protected bucket, after the initial Full Backup you should perform some additional (incremental) backups. At least 3 additional Incremental Backups and one another Active Full Backup.
2 Full active backup and 3 Incremental backup
5- Move backups to the Cloud Tier Immutability
To move backups immediately to the selected Object Storage (Amazon S3).
1- Select the Backup Infrastructure option and expand the Scale-out Repositories. Select the Repository previously configured and then select Edit the Scale-out Repository.
2- Select Capacity Ties, set the Move backup files older than the field to 0, and then click Finish to save the configuration.
3- Hold CTRL & right-click on the Scale-out Backup Repository and then select Run tiering job now.
4- The offload process is started and backups are moved to the S3 Object Storage. I am going to stop this process because I have free trial AWS with one GB storage capacity. Just testing in my lab.
5- The backup will be also found in the AWS S3 bucket.
Adding an organization fails within the 401: Unauthorized and Connect to PowerShell Access Denied errors in Office 365 tenants with enabled Security Defaults
Require MFA (Multi-Factor Authentication) for all users, including administrators & Azure management. Require Azure MFA (Multi-Factor Authentication) registration Block legacy authentication
Conditional Access: Require MFA for all users Create a Conditional Access policy
The below steps will help you to create a Conditional Access policy to require All users to perform multi-factor authentication.
Adding an organization fails 401:
1- Signin Microsoft Azure as a security administrator, global administrator, or Conditional Access administrator. Select the Azure Active Directory
2- Select Security under manage tab.
3- Under protect tab select Conditional Access.
4- Click on + New policy.
5- Type your policy a name. We recommend that institutional create a meaningful standard for the names of their policies. Select Users and groups Under Assignments
6- Select Include tab, and then select All users.
7- Select Exclude tab and then select Users and groups.
8- Select your organization’s emergency access or break-glass accounts and then choose the select button.
9- Select Cloud apps or actions, select Include and select All cloud apps.
10- Select the Exclude tab, select excluded cloud apps, choose any applications that do not require multi-factor authentication, and click on the create button.
11- Choose the Conditions tab, select Client apps (Preview), and then select Configure to Yes. Under Select the client apps this policy will apply to leave all defaults selected and then select Done.
12- Under Access controls option select Grant, choose Grant access, select Require multi-factor authentication checkbox and select Select.
13- Confirm your settings and choose Enable policy to On. Select Save to create to enable your policy.
1- Connect Veeam Backup for Microsoft Office 365 console, select the Organizations view. On the Home tab, click Backup on the ribbon.
2- Backup Office 365 Email, Specify job name and description page, enter a name for your backup job, and then click Next.
3- Veeam new backup job wizard, select objects to back up window, select Back up entire organization if you have enough users license for the entire organization if not, you need to select Back up the following objects. You can add by users, groups, sites, and organizations. Click the Add button.
4- I am going to add a user for backup and then click add.
5- After adding a user for backup click the next button.
6- Select objects to exclude page, we can add by users, groups, sites & Organization. Click next after you add them.
7- New Veeam Backup job wizard, specify backup proxy and repository window, select backup proxy and Azure Blob backup repository and then click next.
8- Select scheduling options page, enter your schedule information, and then click Create.
9- Select the new created office 365 email backup job and then click Start.
10- Now you can see the office 365 email job in progress.
Add Office 365 Organization using modern authentication, after successfully configuring modern authentication now I am going to add organizations with veeam backup for office 365.
How to add to the Veeam Backup for Microsoft Office 365 scope, an Office 365 organization using modern authentication
Now I am ready to add our tenant to Veeam backup for Microsoft Office 365.
1- Open Veeam Backup for Office 365 console, select organization and then Add Org.
2- Select the Organizations deployment type, select the services you want to protect and then click next.
3- Select region of your tenant and which authentication you need to use. Of course we are going for the modern authentication now (allow for using legacy authentication protocols) and then click next.
4- Exchange Online Credentials setup we need to provide all our collected information. Meaning the application ID, the application secret, our username, the app password and then click next.
5- Click the close button after verifying connection and organization parameters. The tenant will be added to your Veeam console successfully.
6- Now you can see an Organization successfully added.