How to Create and Set Up Virtual Hard Disk in Windows
In this blog, I am will explore how to create and set up virtual hard disk in Windows. In Windows 10, a virtual hard disk (VHDX or VHD) is a file that we could use a .vhd or .vhdx extension and then use as a physical hard disk, but with the variance that this is a file stored on a real disk.
Using likewise format (.vhd or .vhdx) for a virtual drive, you can store files, including (documents, pictures, videos, boot files) and a complete OS installation.
How to create a VHDX/VHD in Windows
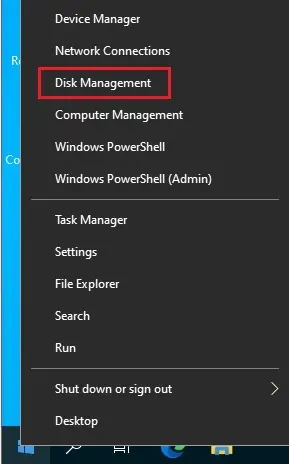
Right click on start button and then select Disk Management.
Create and Set Up Virtual Hard Disk
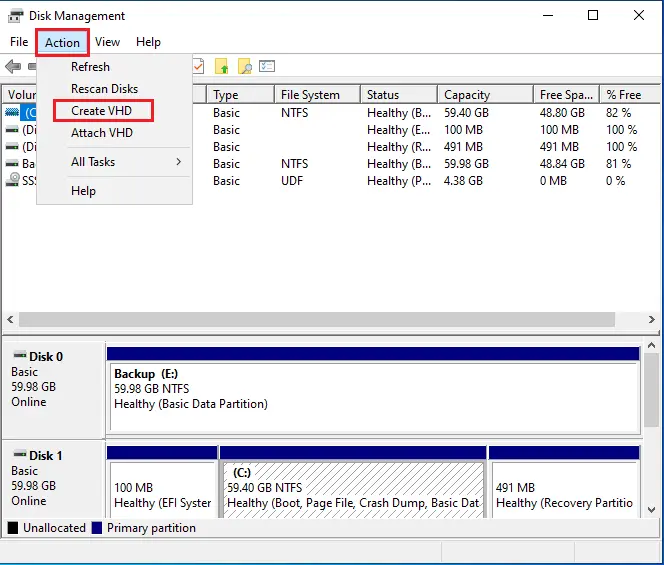
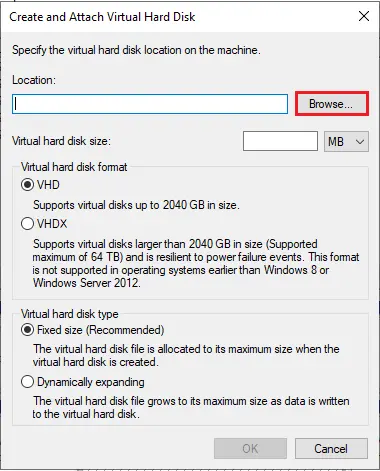
Click the Action button and then Create VHD.
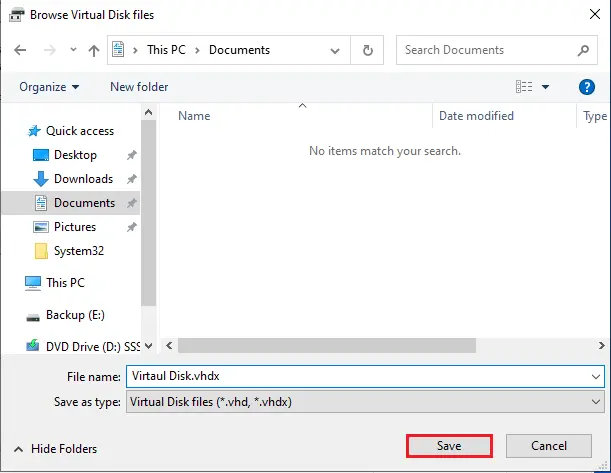
Click the Browse button
File name field type a name for the VHD drive.
Save as type from a drop-down menu, choose Virtual Disk files (.vhdx) or Virtual Disk files (.vhd).
Click Save.
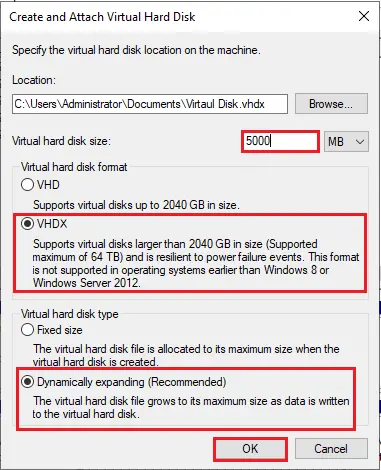
Virtual hard disk size chooses the size of the drive in (MB, GB, TB).
Virtual hard disk format choose the VHDX radio button.
Virtual hard disk type chooses the Dynamic expanding radio button, Click OK.
How to set up a VHDX, VHD
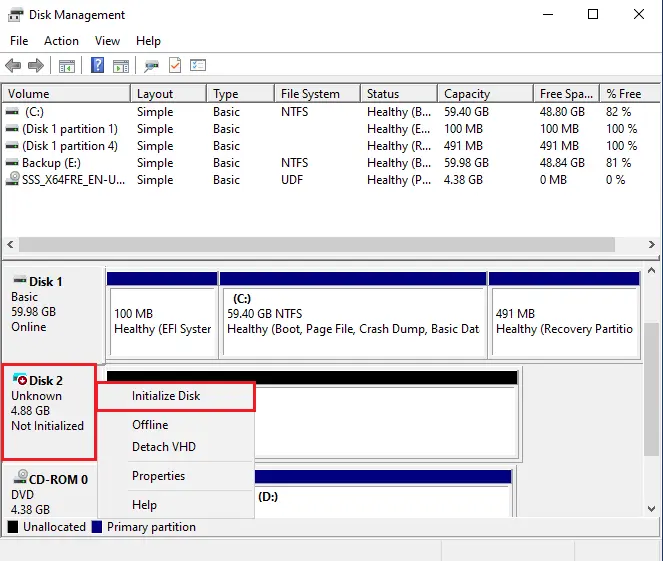
Using the above steps, we have created a VHD, but it is empty without having any data or file system. To make this useful, you need to initialize the disk, create a partition, and then format the drive.
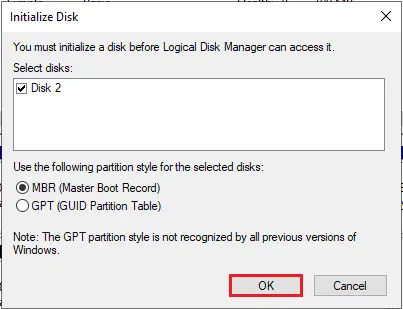
Right-click the newly created drive and then choose Initialize Disk.
Choose the disk from the list.
Choose the MBR (Master Boot Record) radio button and then click ok.
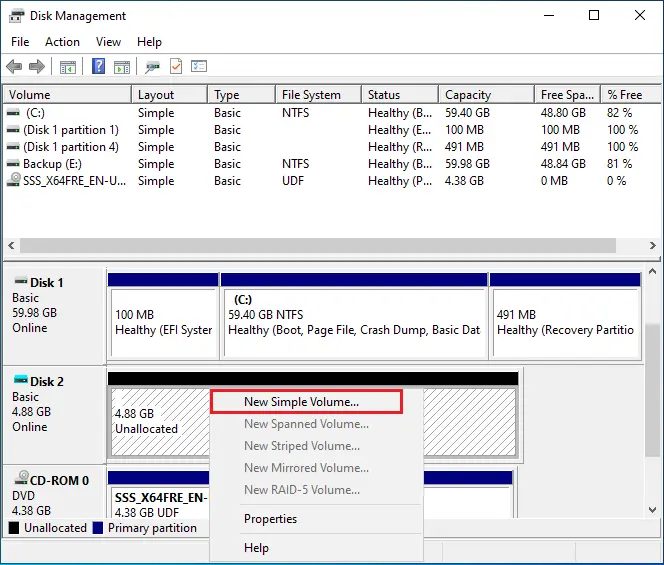
Right click on Unallocated space and then choose New Simple Volume.
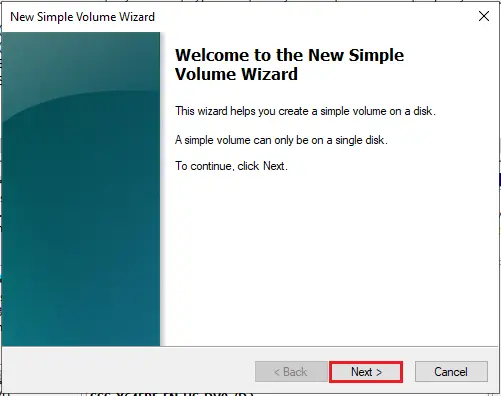
Choose Next.
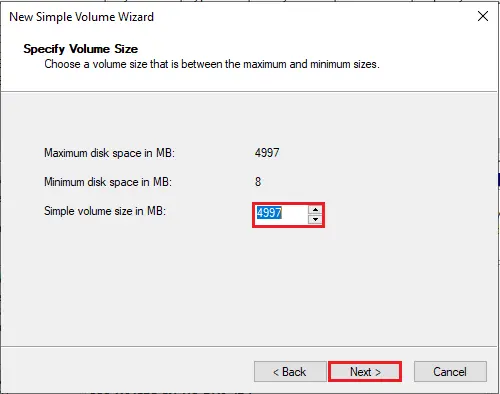
Specify the size of the partition and then click next.
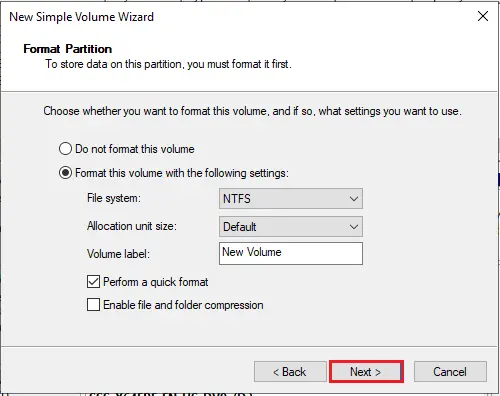
Choose the drive letter you want to assign to the drive and then click next.
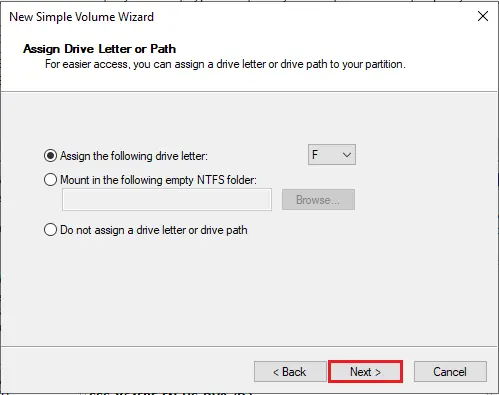
Format this volume options:
File System – NTFS.
Allocation unit size – Default.
Volume label – Leave it default or you can change it.
Perform a quick format and click next.
Click Finish.
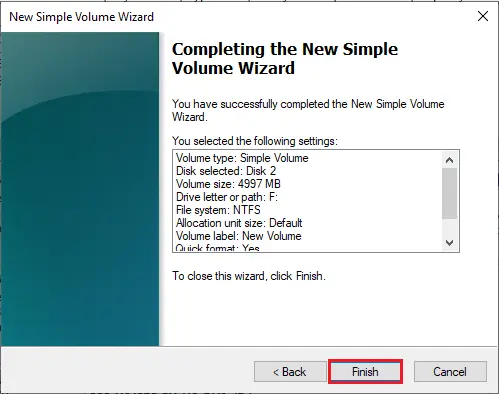
After completing the process, the VHDX/VHD will be initialized, partitioned, and formatted. The virtual hard disk will mount automatically and then you can now access, save files using File Explorer.
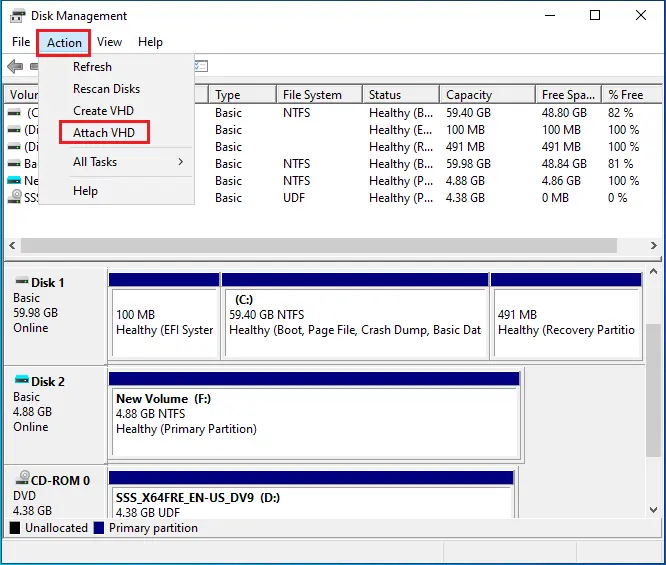
How to mount a VHDX/VHD
Although during the setup process, Windows will automatically mount a VHD or VHDX file to your device that would not always be the case.
Mounting VHD/VHDX
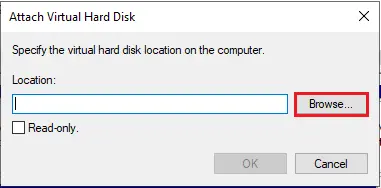
To attach or mount the virtual hard disk follow the below steps.
Select Action menu and then click the Attach VHD.
Choose Browse button.
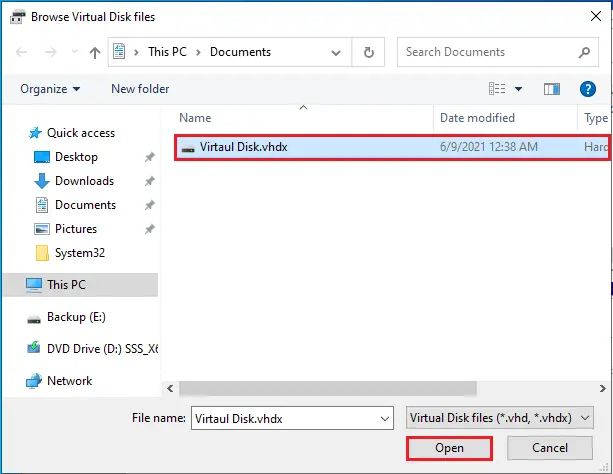
Choose your virtual disk and then click open.
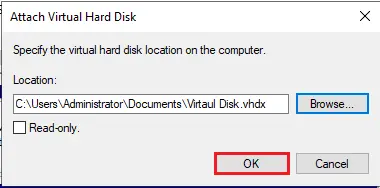
Click OK.
After completing these steps, you can access the VHD/VHDX like a drive.
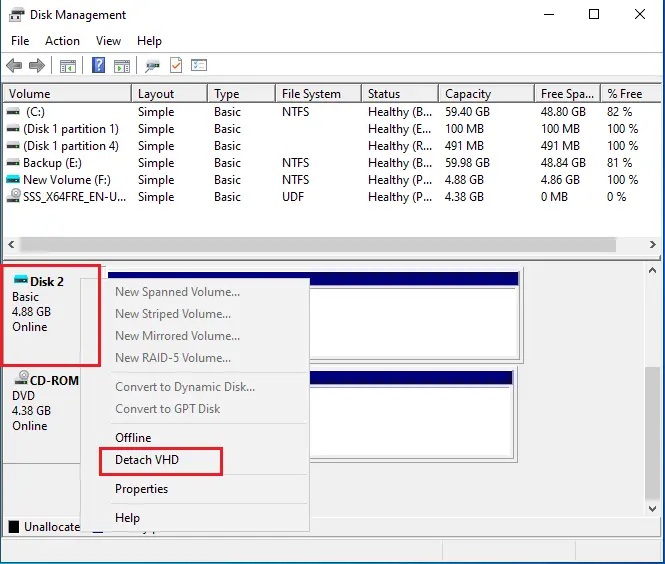
Dismounting VHD
Before mounting please save any files and applications located in the VHD or VHDX file before detaching or dismounting to prevent data loss.
Right-click the VHD drive and then choose Detach VHD.
Click OK.
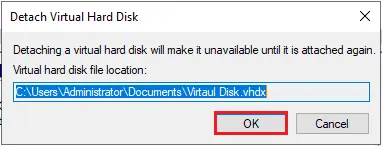
Once you complete the above steps, the VHD or VHDX file will no longer show up in File Explorer.
Also, read this article: How to Attach, Detach, and Permanently Attach a VHD File.
For more information, please visit Microsoft