Increase VM Hard Disk size, in this blog you can see how to increase virtual machine hard disk size from the vSphere Web Client interface.
Increase Virtual Machine Hard Disk Size
1- Login to your VMware vSphere Web Client, select the Virtual Machine you want to increase the disk size, Select Configure tab, under settings select VM Hardware and click the Edit button.
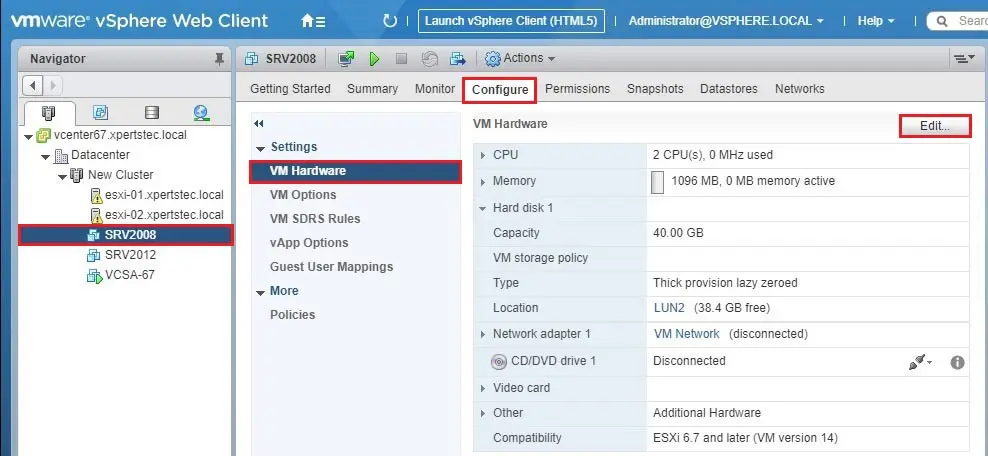
2- Here you can find the VM hard disk you want to increase the size.
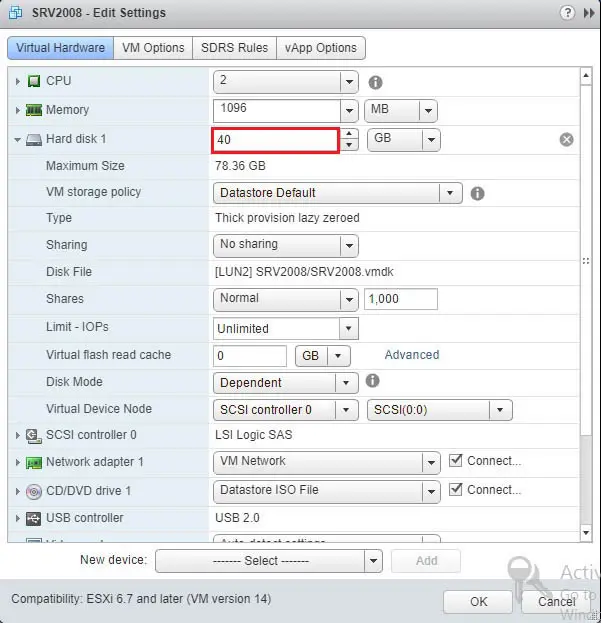
3- Then you can increase the new size required for this hard disk and then click the ok button.
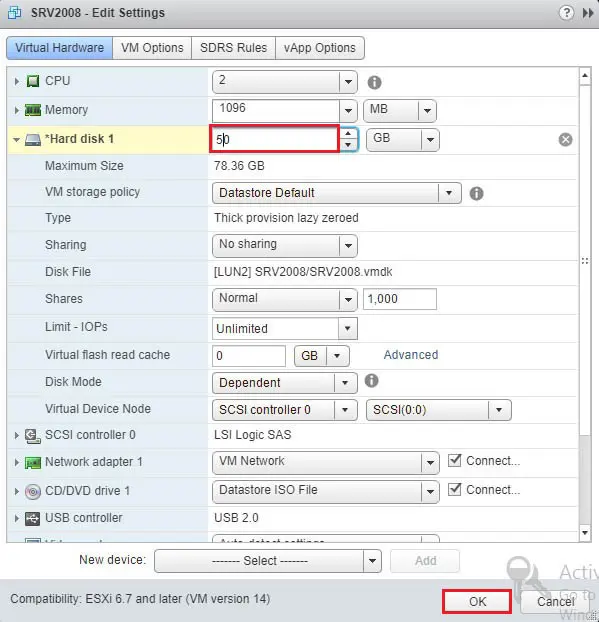
4- Under Recent Tasks, you can see reconfigure virtual machine status.

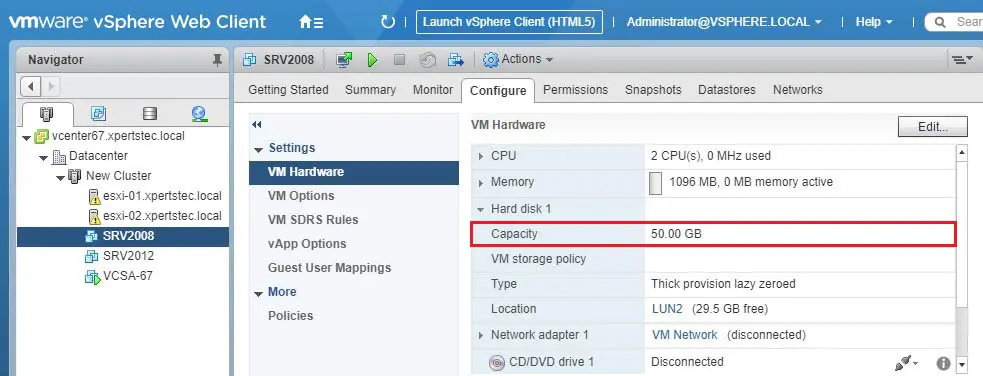
5- Now VM hard disk capacity increased from 40 GB to 50 GB.
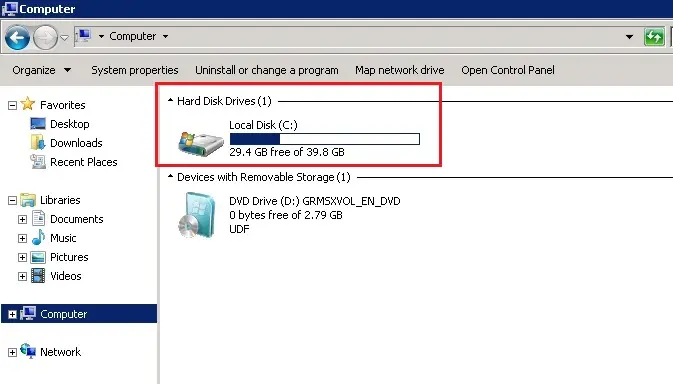
6- Login to your virtual machine Windows Server, open my computer, and then you can see hard disk size not yet increases.
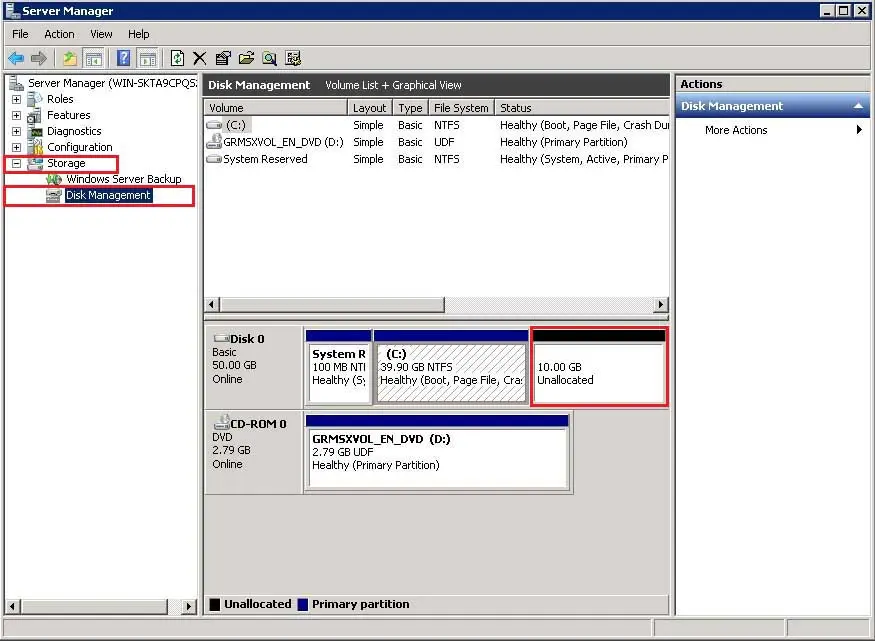
7- Open Server Manager, expand Storage, then click Disk Management and you can see 10 GB disk unallocated.
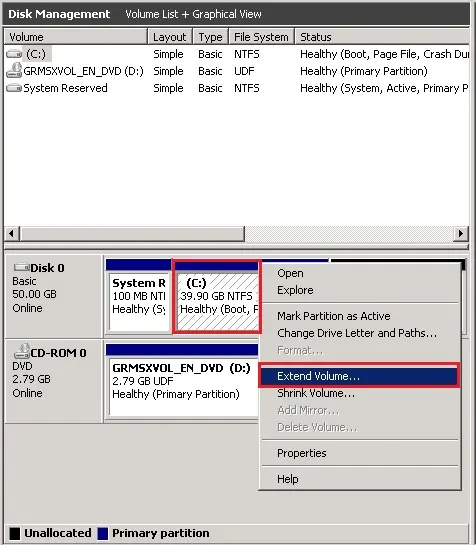
8- Right click on hard disk C and then click Extend Volume.
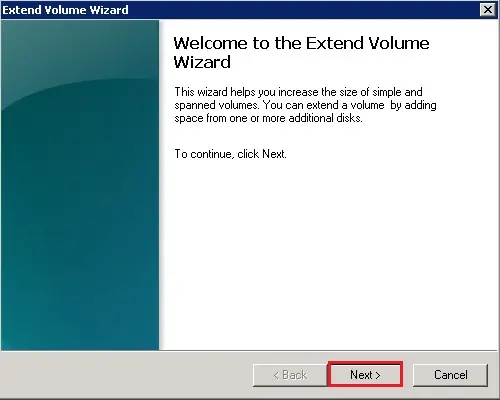
9- Now welcome to the Extend Volume wizard, click next.
10- Select the unallocated volume and then click next.
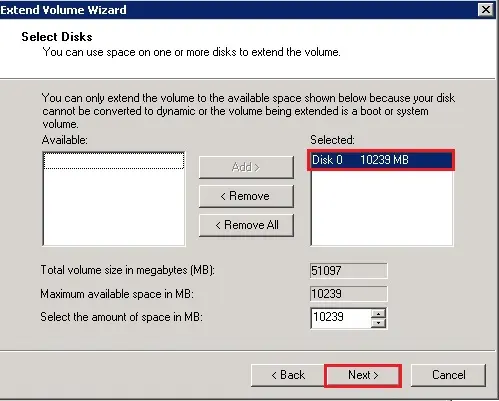
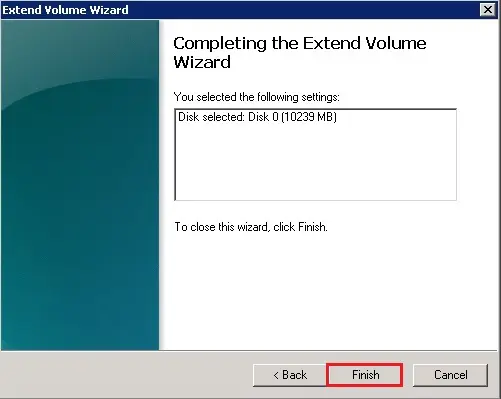
11- Click finish.
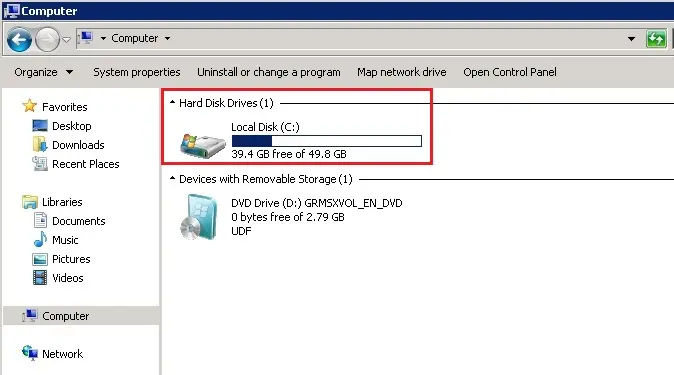
12- Now you can see in my computer Local Disk C has been increased.
For more details how to expand hard disk size please visit VMware Website


No Comments
Like!! Great article post. Really thank you! Really Cool.
Thank you
I’m gone to convey to my little brother, that he should also pay a visit to this webpage
on regular basis to get updated on the newest news.
Dear Lacy, thank you