


Restore vCenter Server 7, in this second blog, I will show you how to restore VMware vCenter Server 7 from Backup.
In the first Part how to schedule and backup vCenter
Restore vCenter Server 7.0
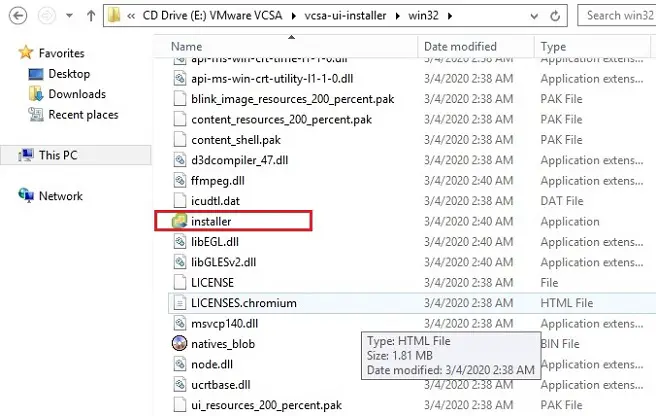
1- Mount VMware-VCSA-all-7.ISO, The Restore Wizard is located in the VCSA 7 ISO.
Open the VSCA ISO and double click on vcsa-ui-install, select Win32 directory and then double click on Installer.
exe to start the vCenter Server restore wizard.
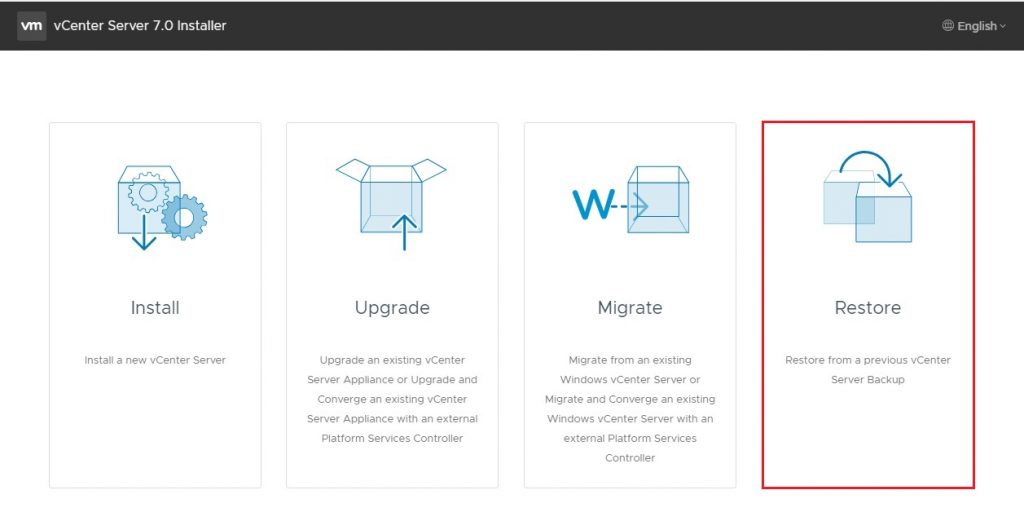
2- vCenter Server 7.0 Installer, click Restore
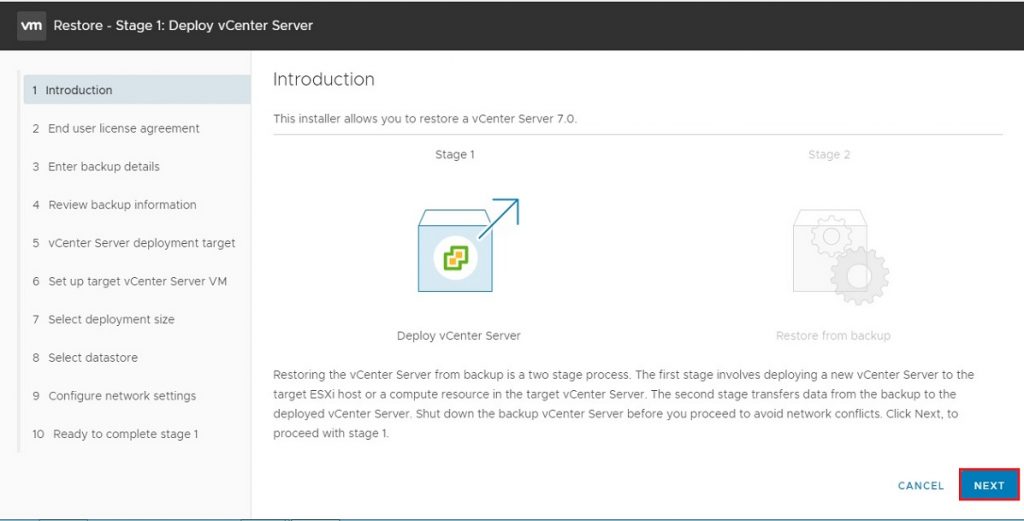
3- Restore – Stage 1: Deploy vCenter Server introduction, so click the next button
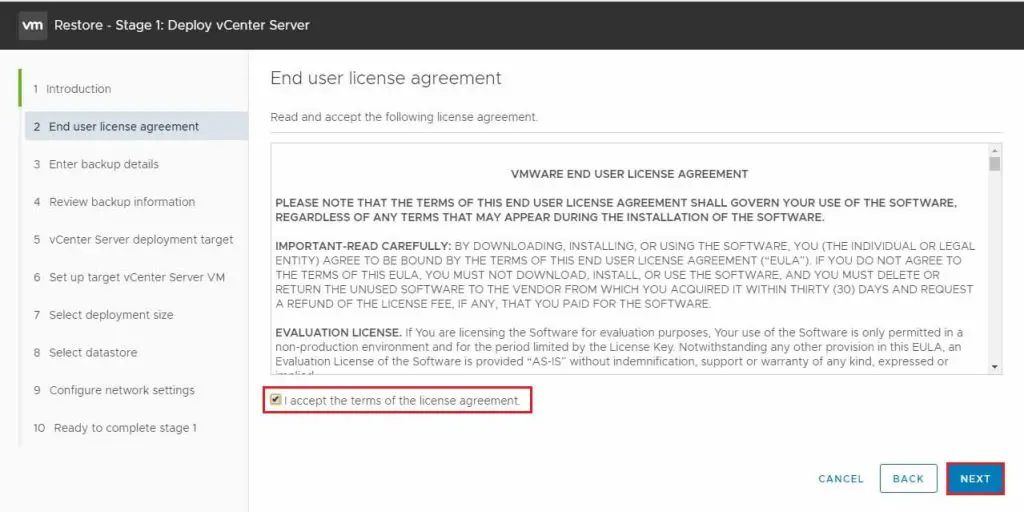
4- Deploy vCenter Server end user license agreement, select I accept the terms of the license Agreement and then click next
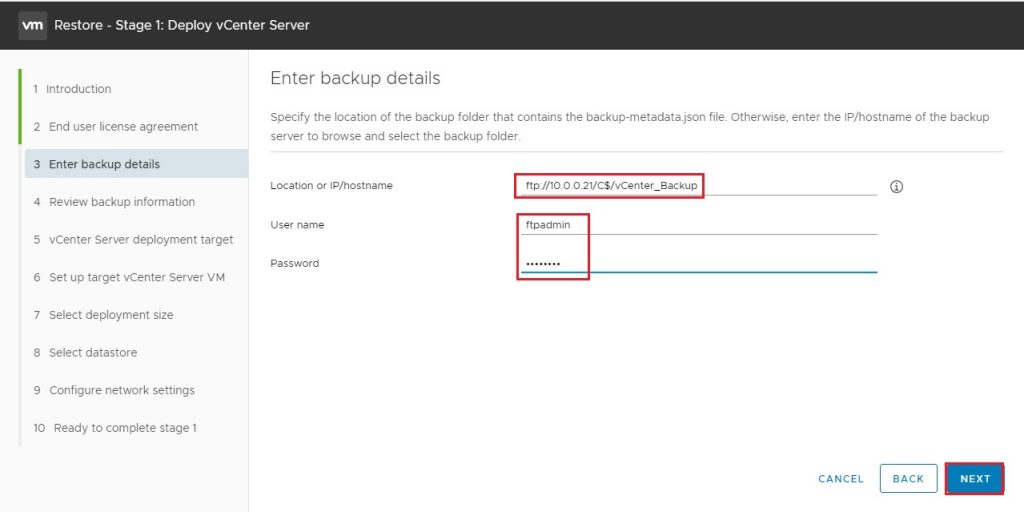
5- In this enter backup details option, Enter the FTP server shared folder path, type FTP username, password and then click next
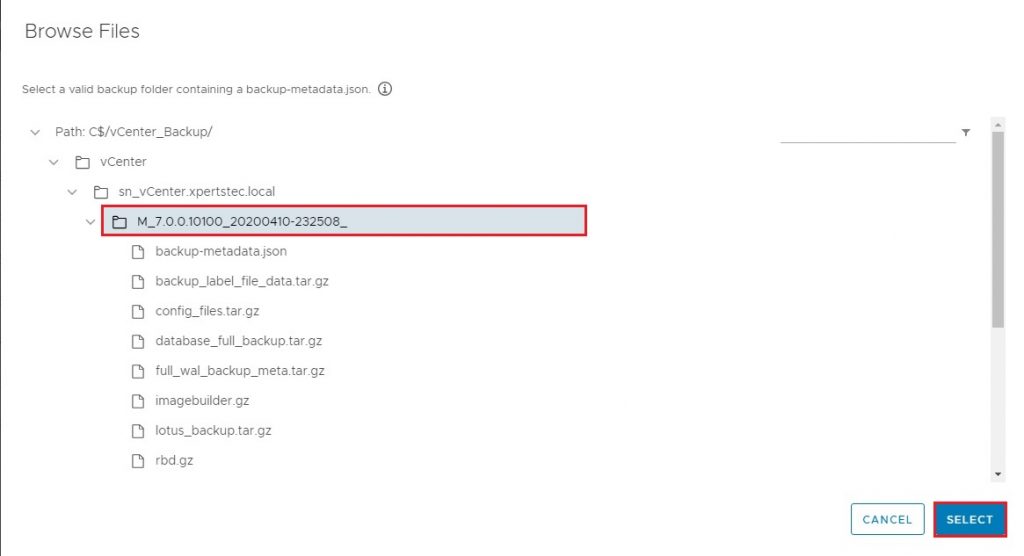
6- FTP backup server share folder opened, where we need to select the VCSA backup and then click the select button
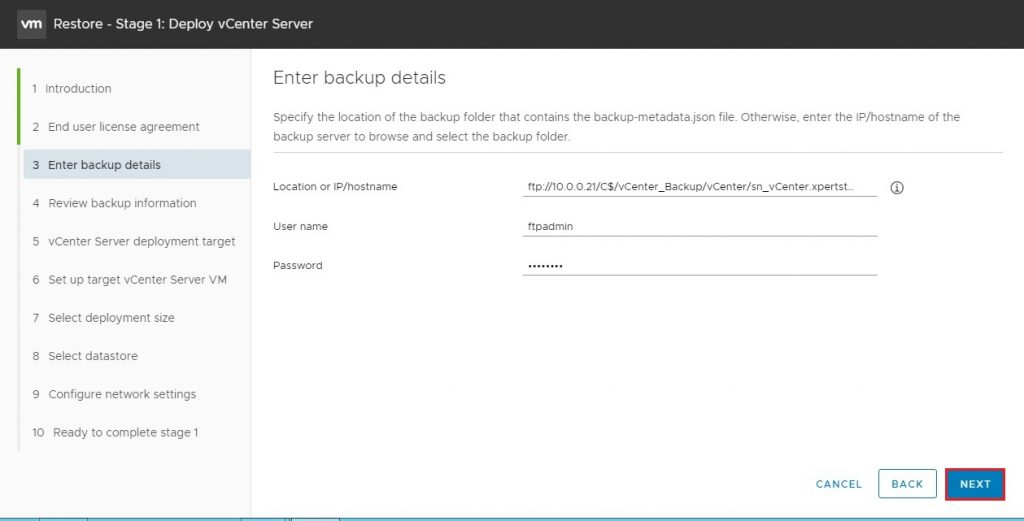
7- Restore – Stage 1: Deploy vCenter Server, Click Next
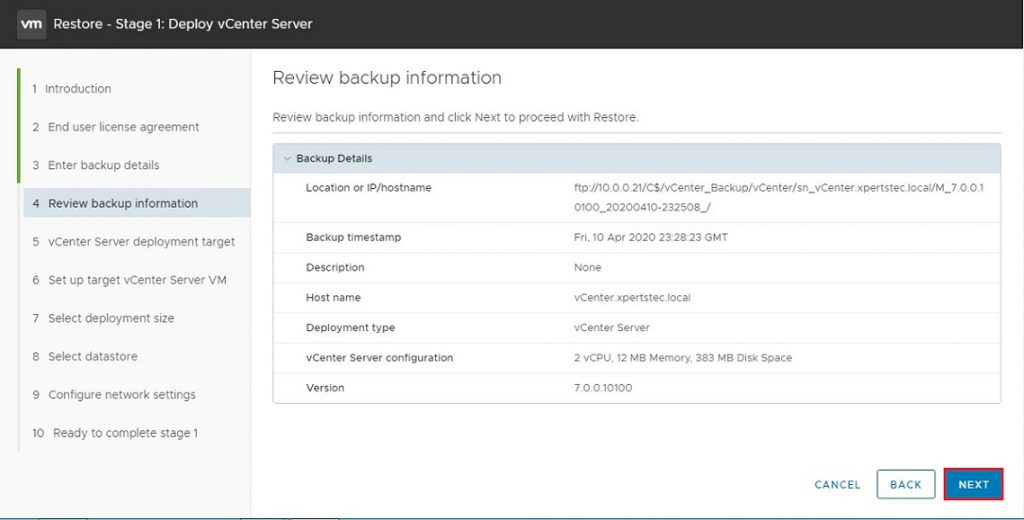
8- Review the backup information and click next to precede the restoration
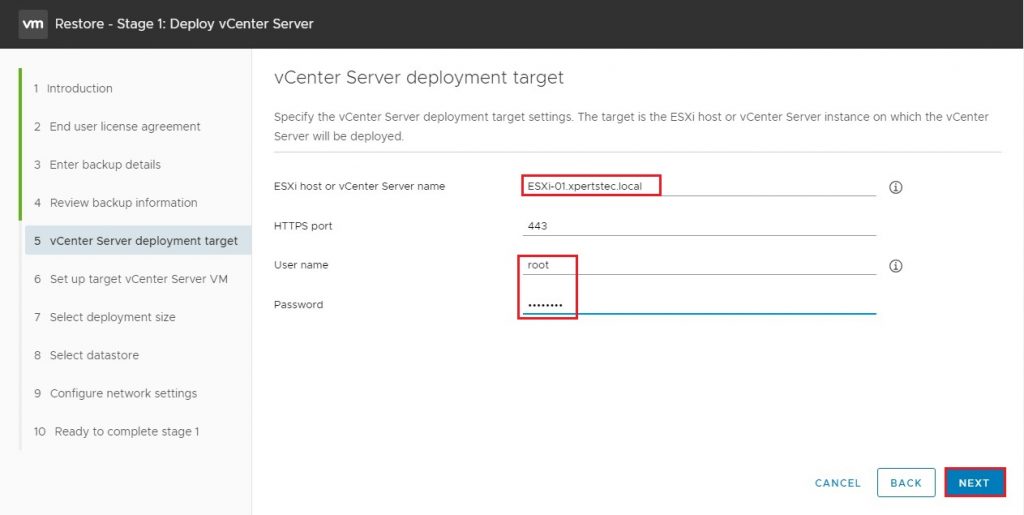
9- Enter the ESXi host or vCenter Server name where you want to restore the vCenter backup, type username, password and then click next
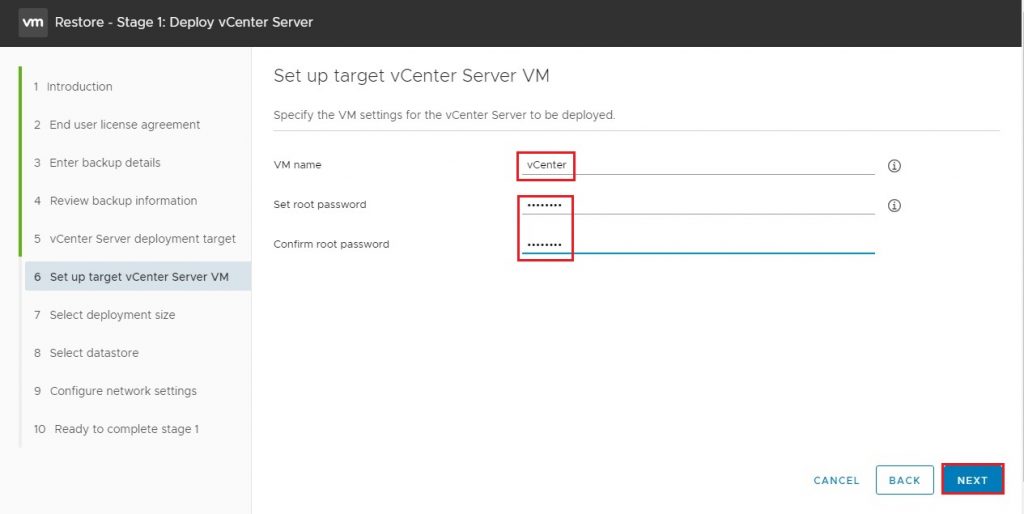
10- Set up target vCenter Server VM, Set a root password and then click next
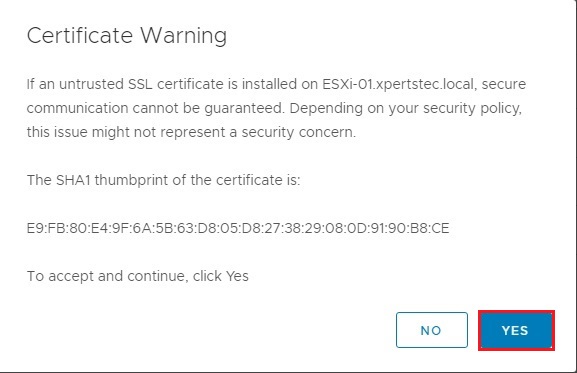
11- ESXi host SSL certificate warning, so click yes
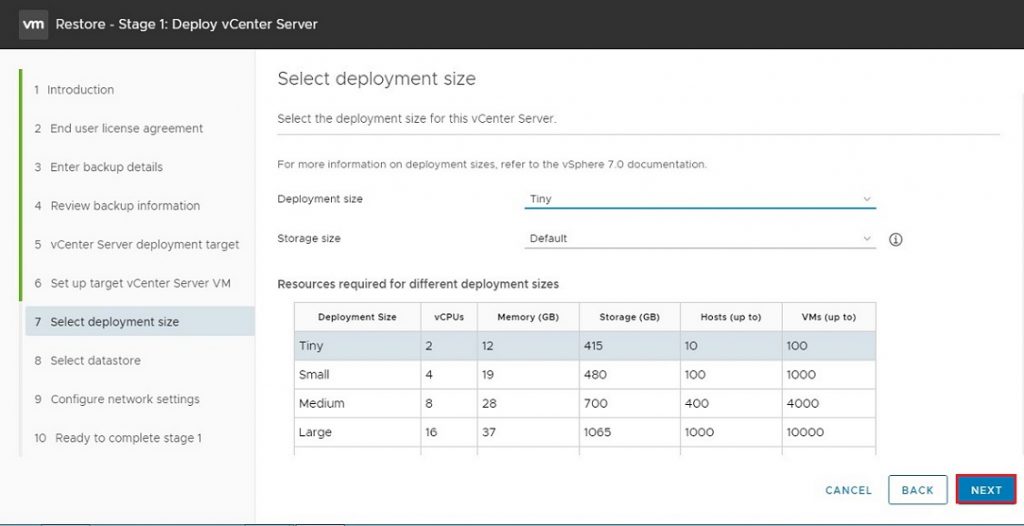
12- Select a deployment size for the VMware vCenter Server and then Click next
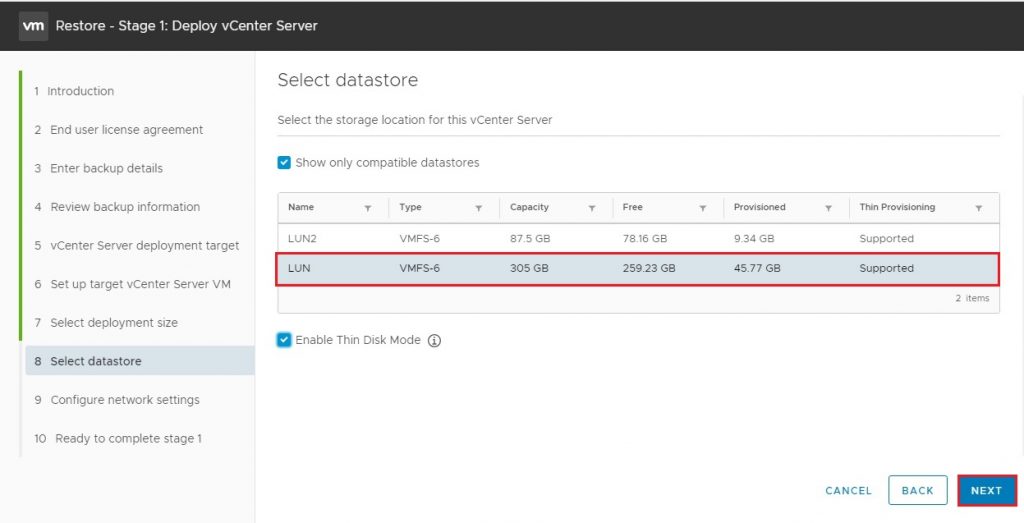
13- Select a datastore for this vCenter Server and then click next
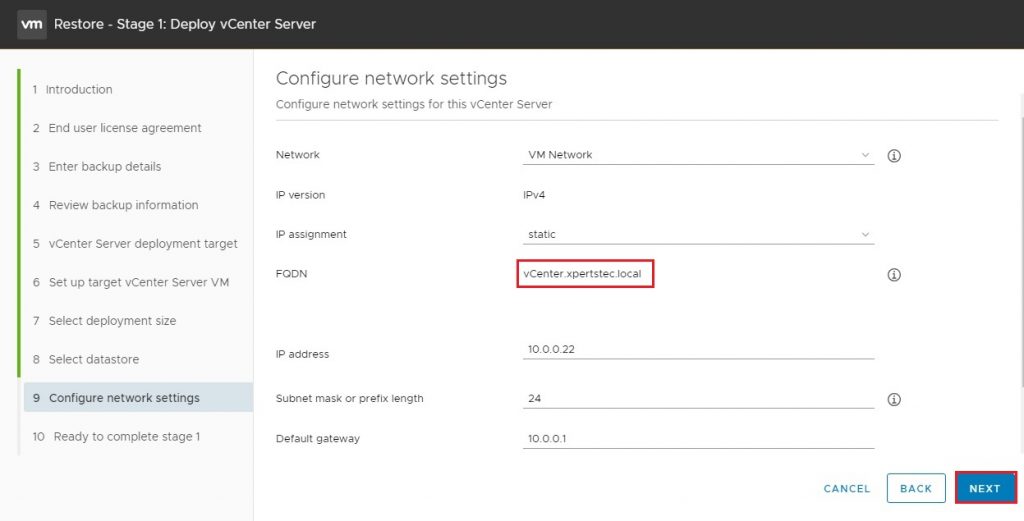
14- Configure network settings for the vCenter Server and then click next
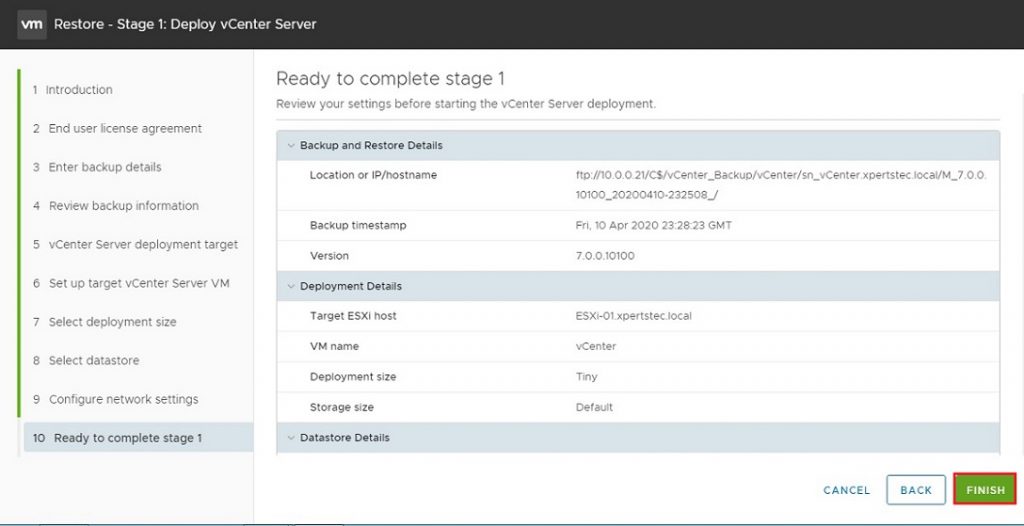
15- Review the settings and click the finish button to start vCenter Server deployment
16- vCenter Server Deploying in progress

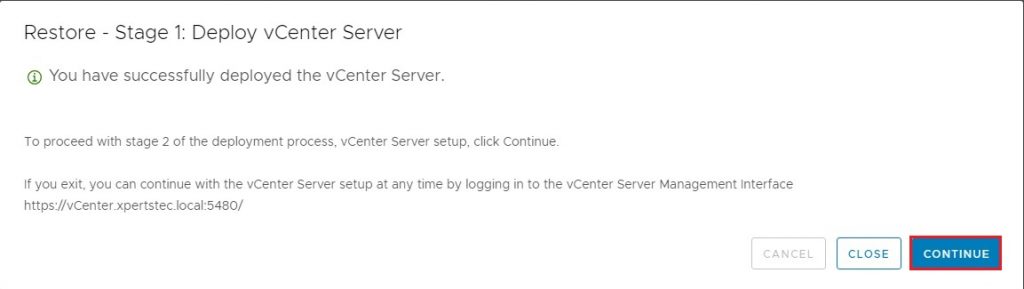
17- Successfully deployed the vCenter Server, click continue
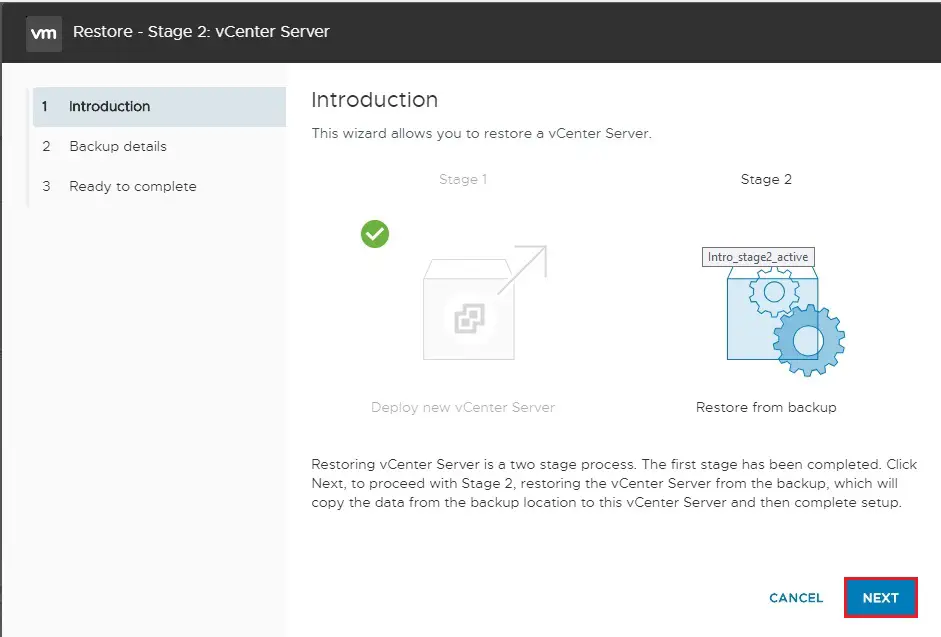
Stage 2: vCenter Server
18- Once restore Stage 1 is completed we will need to run Stage 2 of the restore. Restore from backup, so click next
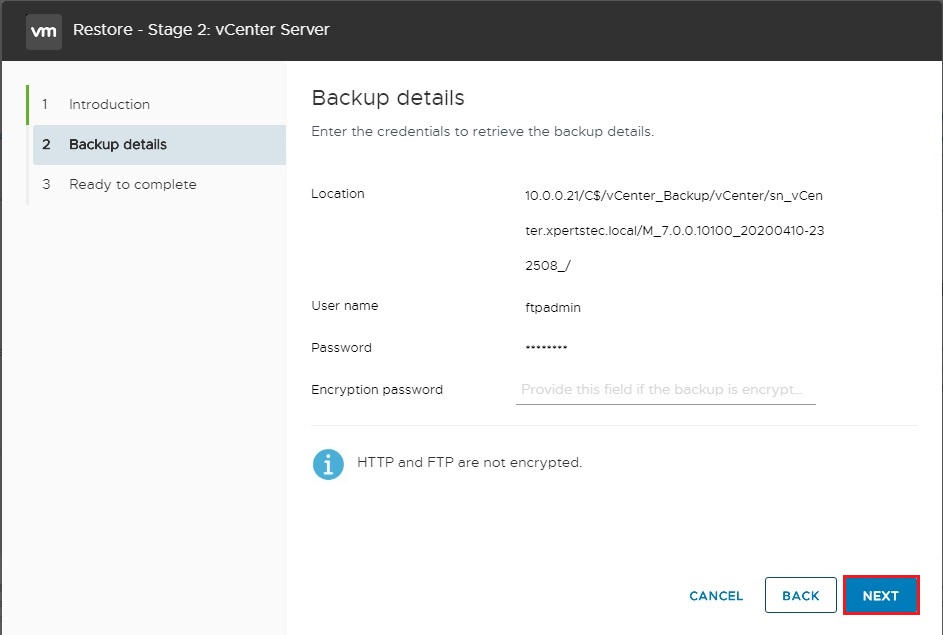
19- Enter the credentials to retrieve the backup details if any and then click next
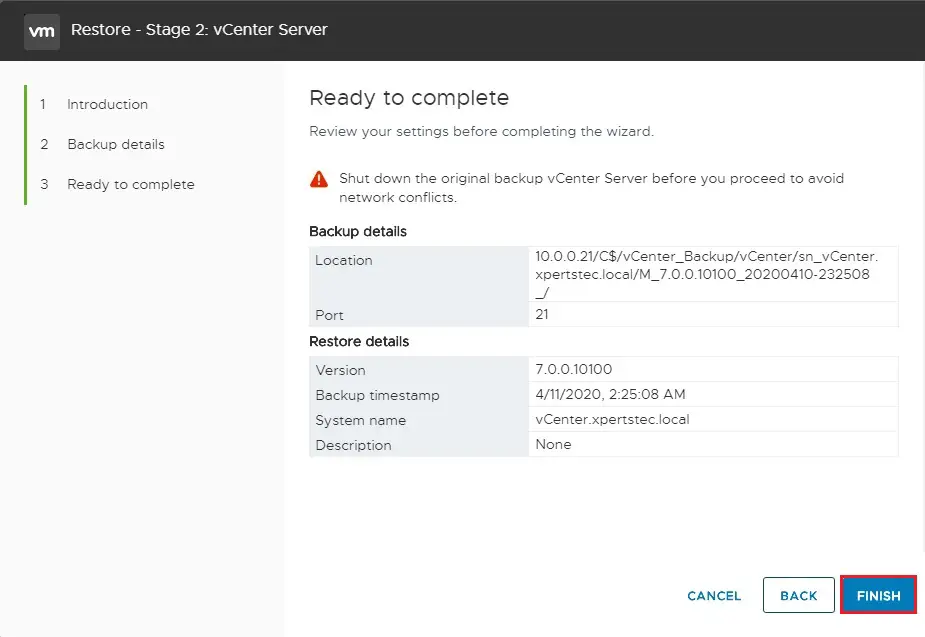
20- Review your settings before completing the restore wizard and click finish
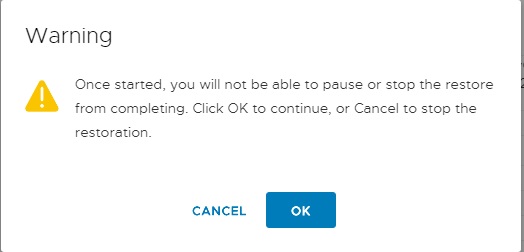
21- Click OK
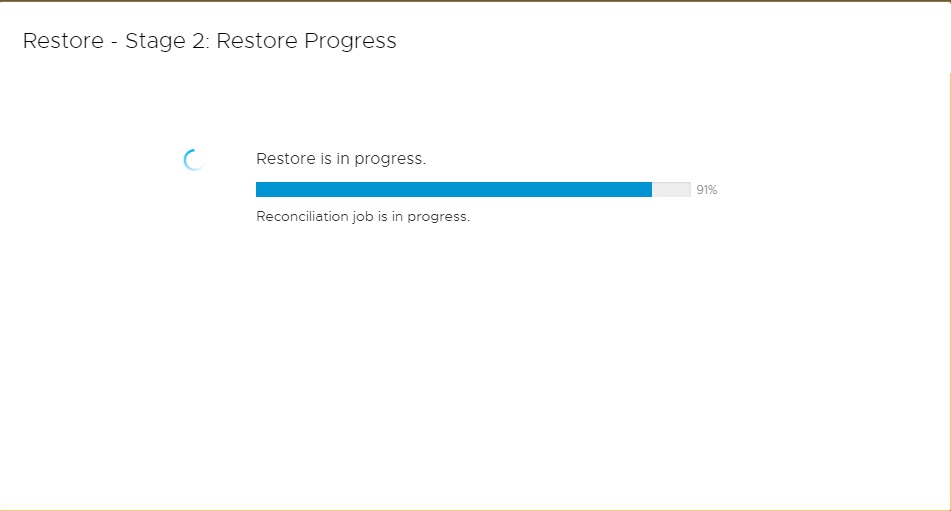
22- Restore – Stage 2: restore is in progress
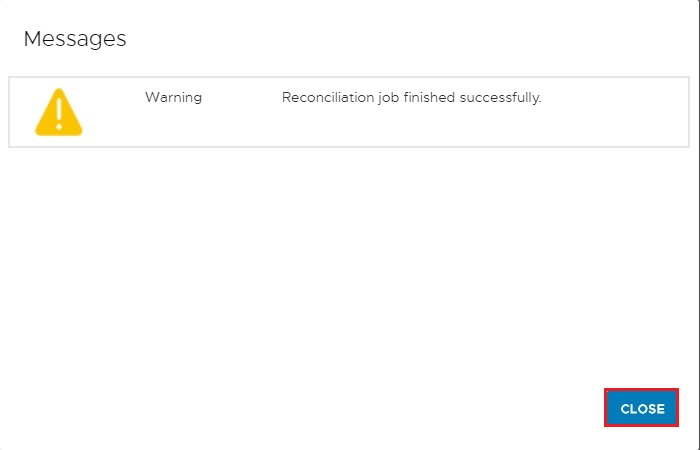
23- Reconciliation job finished successfully, so click OK
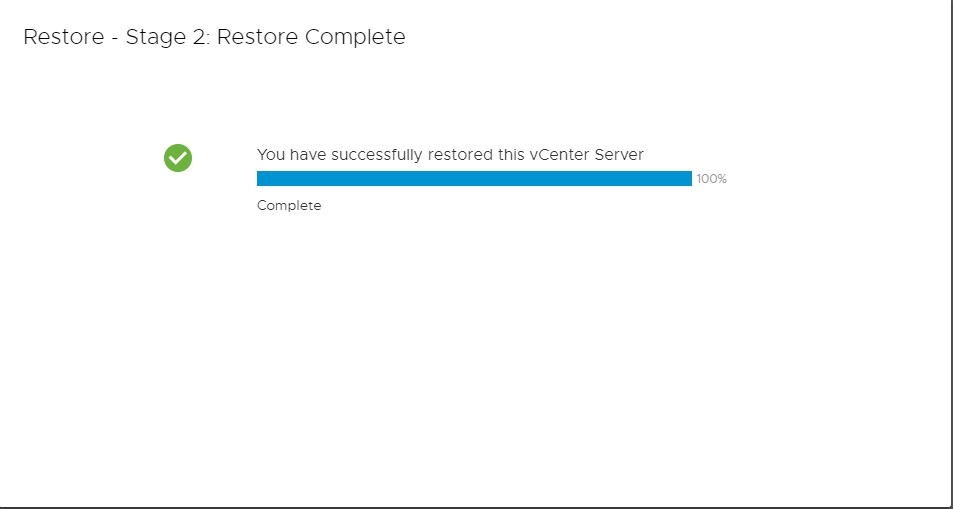
24- VMware vCenter Server successfully restored
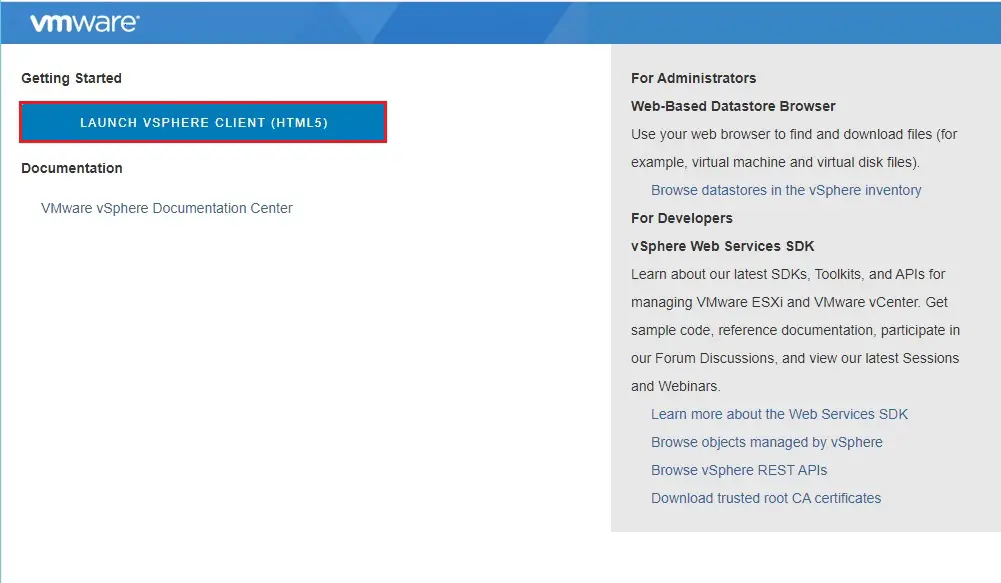
25- Open web browser, type your FQDN (vcenter.xpertstec.local:5480) and click launch vsphere client
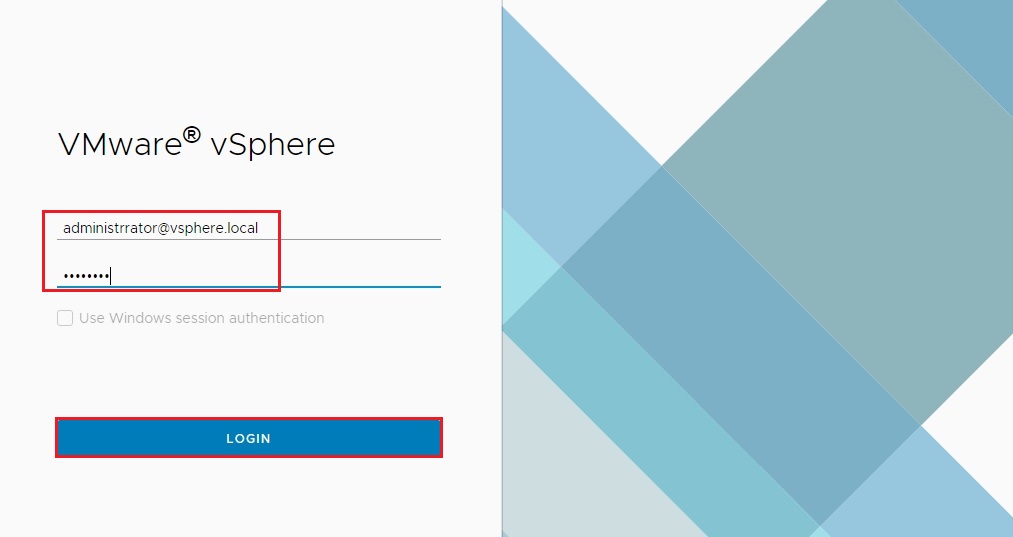
26- Type vCenter Server username, password and then click the login button
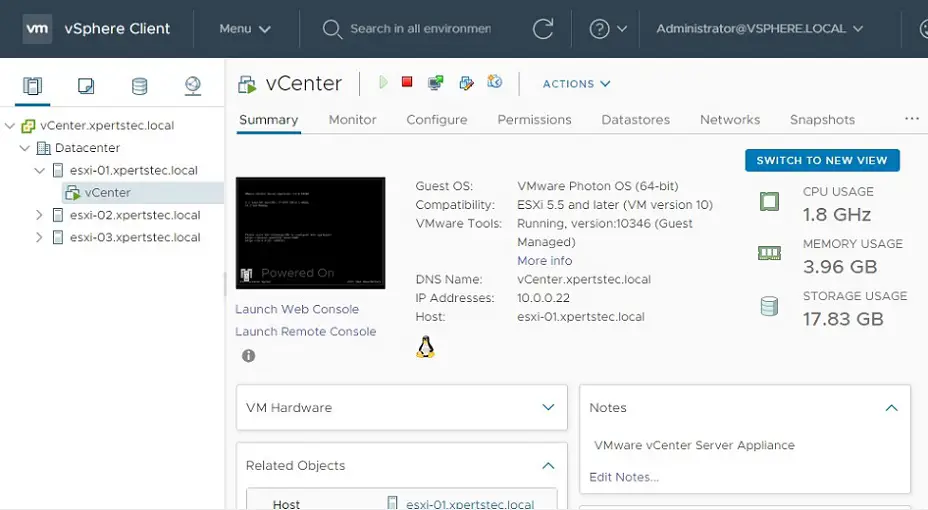
27- Now vCenter Server 7 successfully login
For more details click here
[recent_post_carousel design=”design-1″]