Migrate Windows vCenter Server to VCSA, in this guide, I will explain to you how to migrate Windows vCenter Server 6.7 to vCenter Server 7 (VCSA 7).
Prerequisites click here
Software Requirements click here
Hardware Requirements click here
System Requirements click here
Migrate Windows vCenter Server to VCSA
Before we start the process if our existing Windows vCenter Server is virtual it may be useful to rename the VMware vCenter virtual machine name in the vSphere inventory to include -old or identical. Though the hostname and IP are migrated the VMware vSphere inventory name of the Virtual Machine cannot be a duplicate. The old server will be powered down but not deleted so that we need to have a backup.
Download the VMware vCenter Server 7.0 ISO from VMware
Now mount the VMware vCenter Server 7.0 ISO on your computer. The VMware vCenter Server 7.0 installer is compatible with Mac, Linux, and Windows.
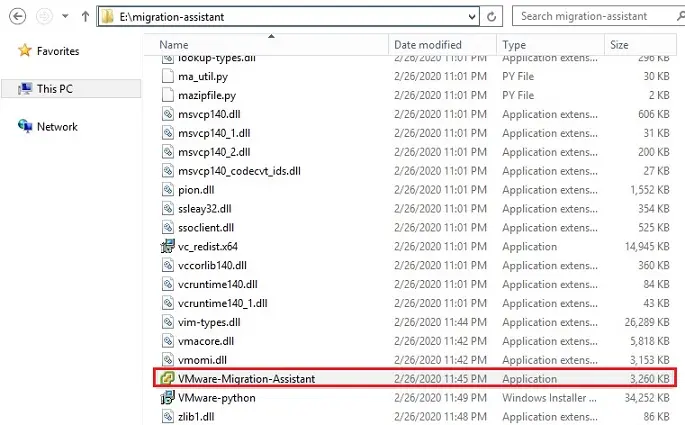
Please copy the migration-assistant folder to the Windows vCenter Server. If the Platform Services Controller (PSC) is running on a different Windows server then you must run the Migration Assistant on the Platform Services Controller (PSC) server first and then following the below instructions, then complete the similar process on the Windows vCenter Server.
1- Double click on VMware-Migration-Assistant to start.
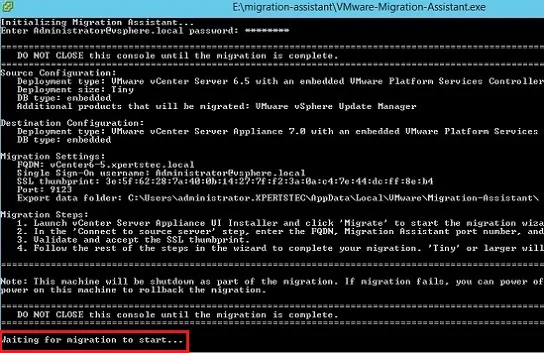
2- Type the SSO Administrator credentials to start running pre-checks.
If all the checks successfully completed the Migration Assistant will finish at waiting for migration to start.
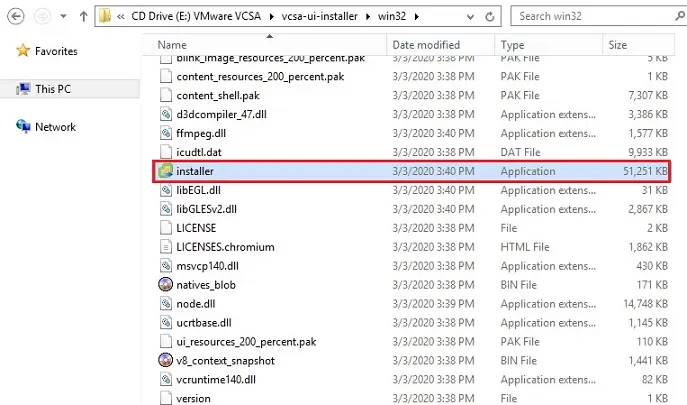
3- Use a different computer from your Windows vCenter & PSC servers open the vcsa-ui-installer folder that file is located on the VMware VCSA ISO. Double click on Installer to run the file.
Migration Process
4- The vCenter Server 7.0 Installer will open and click on Migrate.
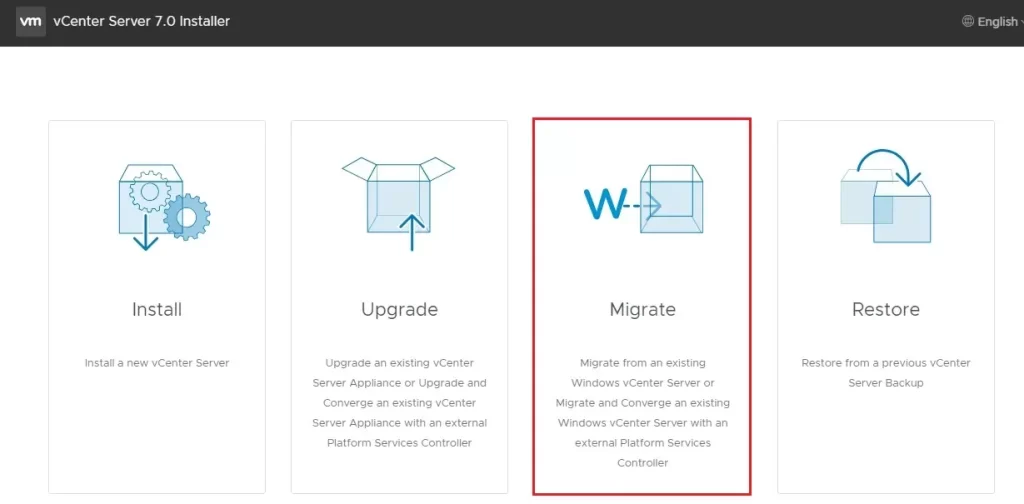
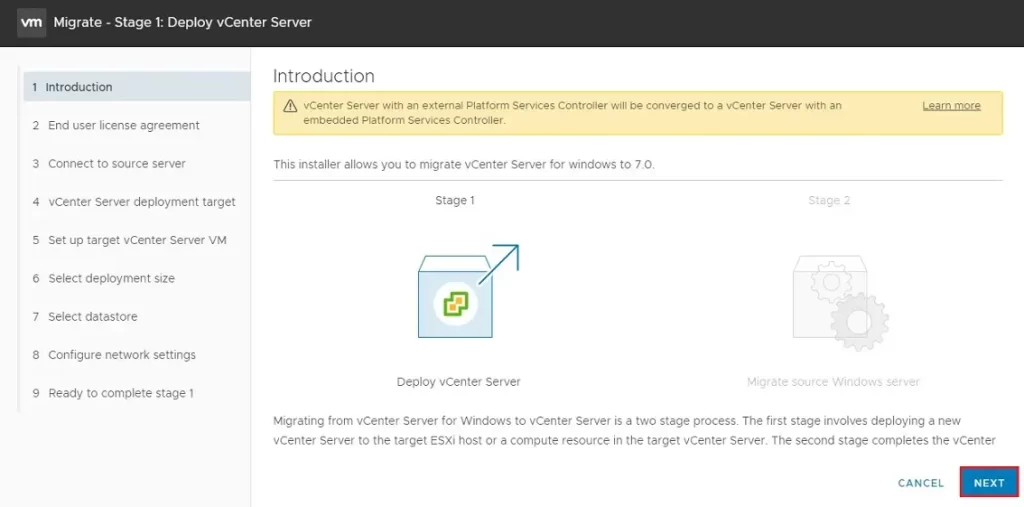
5- Migrate – stage 1: deploys vCenter Server, Stage 2: migrates data & network settings over to the new appliance and shuts down the Windows vCenter server. Start the migration click next.
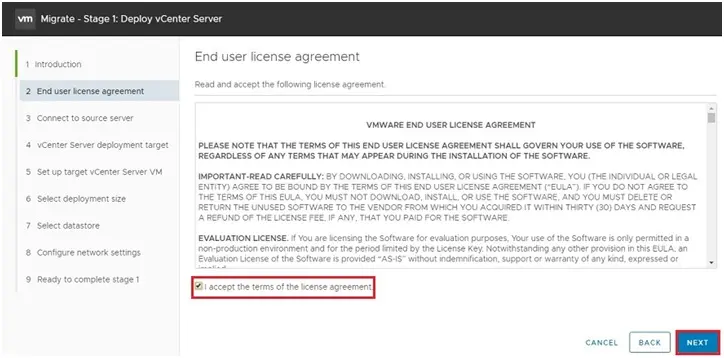
6- Migrate Windows vCenter Server, accept the VMware license terms and then click next.
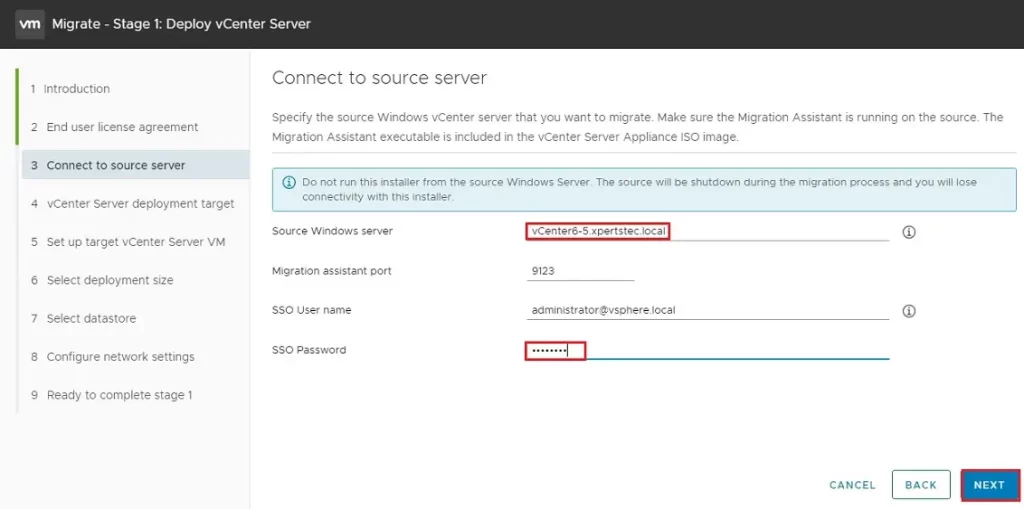
7- Type the details of the Windows vCenter Server to migrate and then click next.
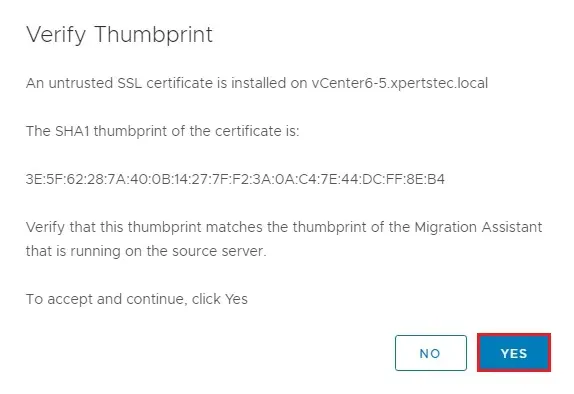
8- Windows vCenter Server SSL certificate click yes
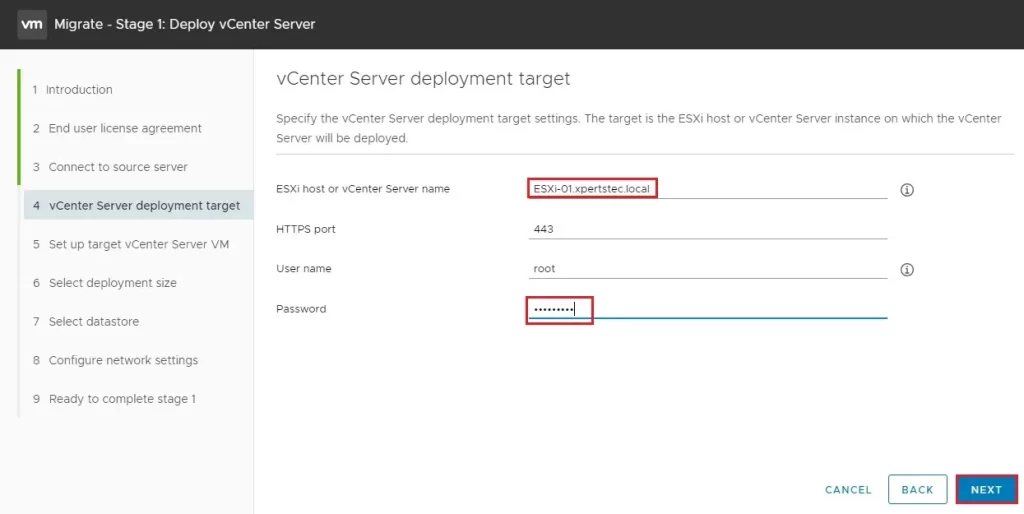
9- Type the IP address or FQDN of the ESXi host, or vCenter upon which you need to deploy the new vCenter Server 7. Type the root username, password and then click next.
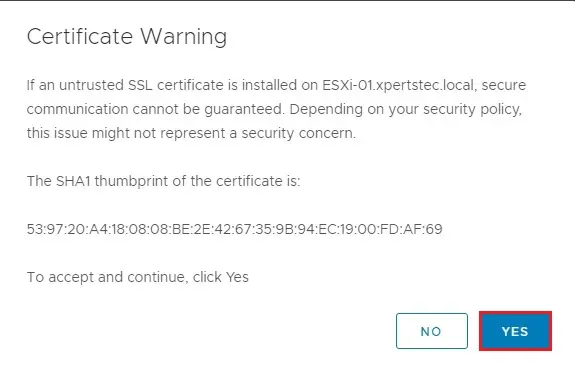
10- Untrusted SSL certificate ESXi message click Yes to continue.
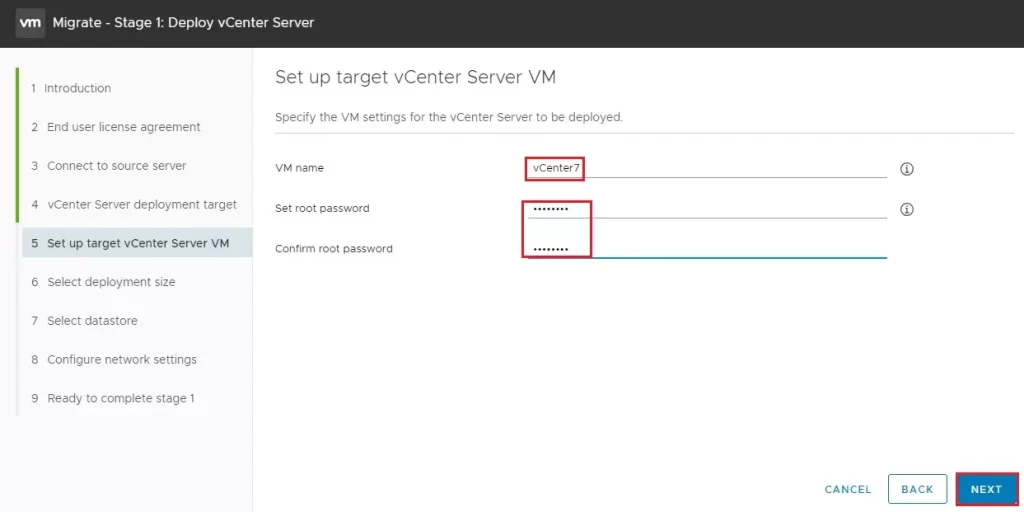
11- Type the vCenter Server VM name, the host name of the vCenter Server will automatically migrate. Click Next.
12- Migrate Windows vCenter Server, Select the deployment size for your environment and then click next.
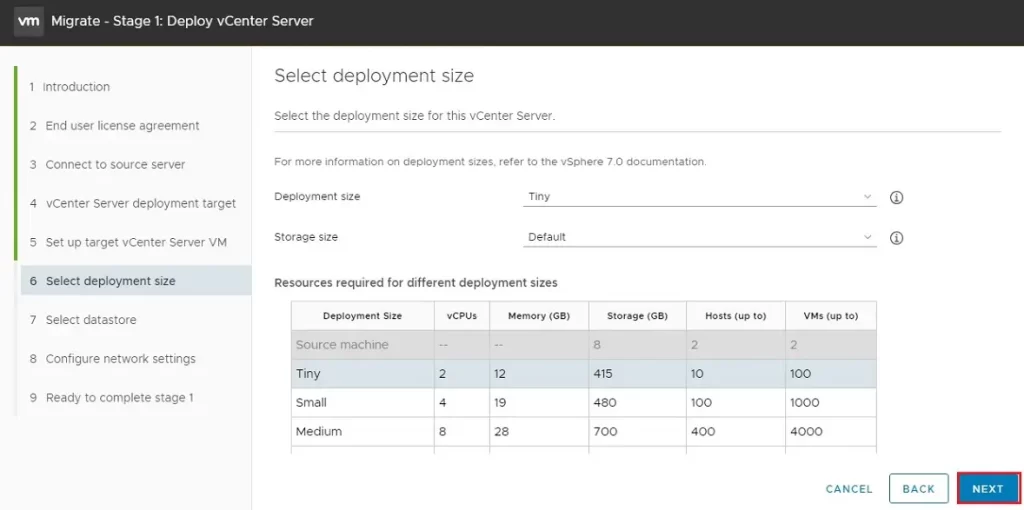
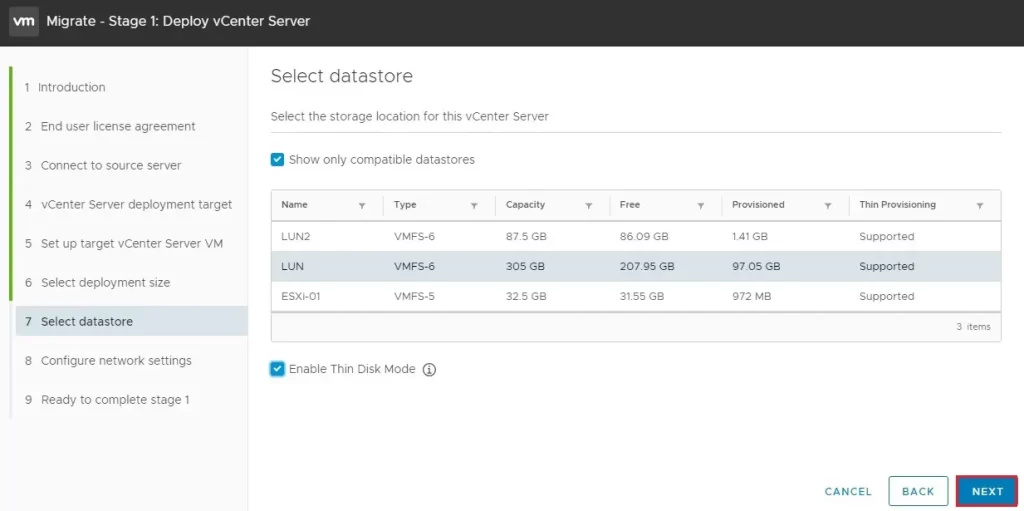
13- Select the datastore for the vCenter Server to deploy and then click next.
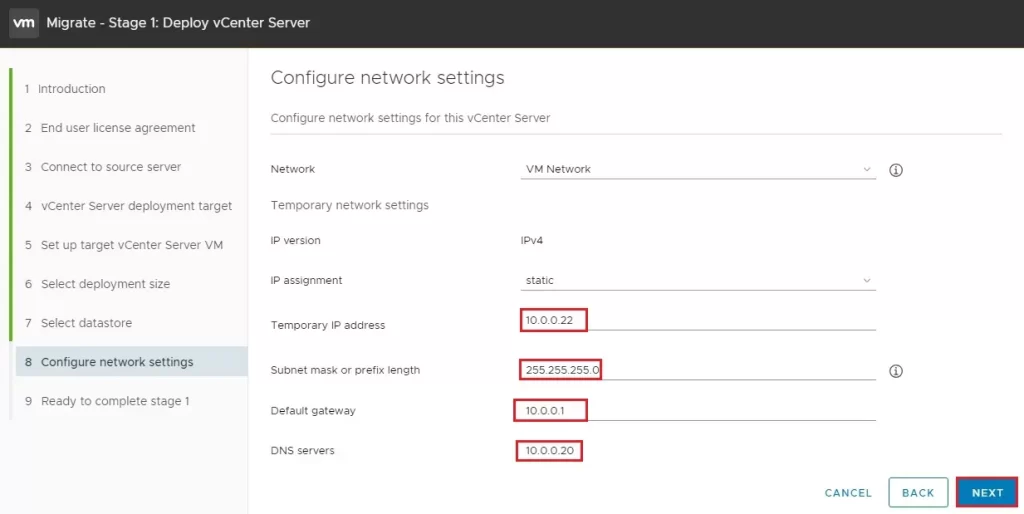
14- Configure the temporary network settings for the vCenter (VCSA). These settings only used throughout the migration of the data, once complete the temporary network settings are discarded and the VCSA assumes the identity, including IP settings, of the Windows vCenter Server. Click Next.
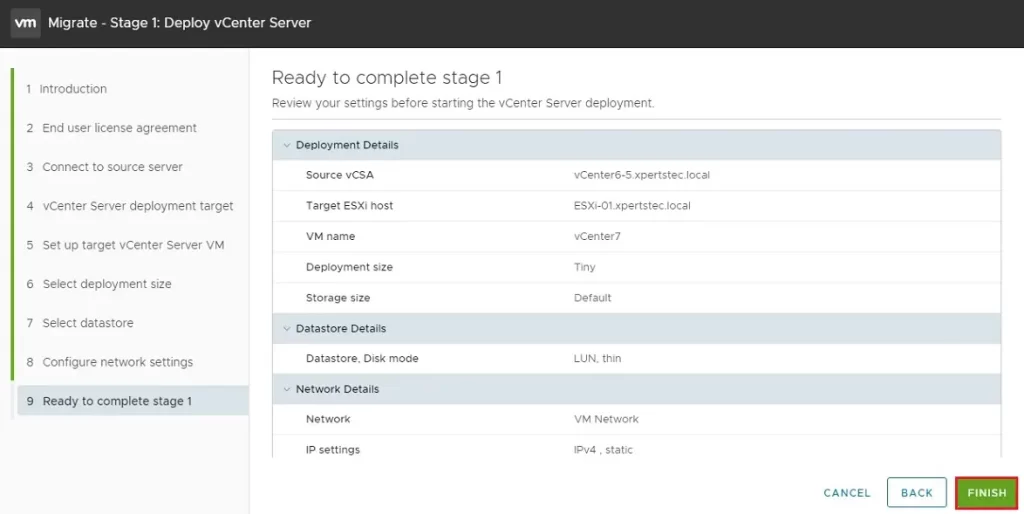
15- Review the settings of the Migrate vCenter Server page and then click Finish.
16- Migrate – Stage 1: Deploy vCenter Server, deploying the vCenter server

17- Now VCSA successfully deployed the vCenter server. Click the Continue button to start the 2nd stage of the migration.

How to Migrate Windows vCenter Server to VCSA Part-02


